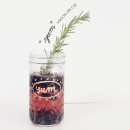
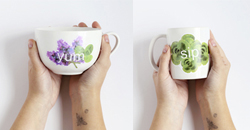
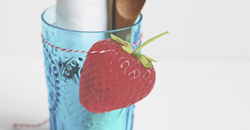
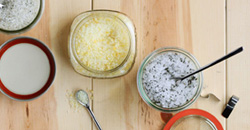
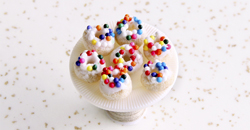
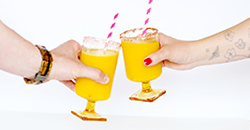
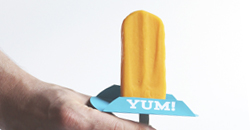
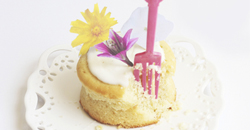
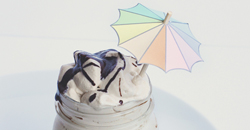
Posts Tagged ‘mason jar’


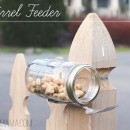
We feed the squirrels.

Squirrel Feeder // thepapermama.com

Do not feed the squirrels. Yeah, we feed those little rodents. I KNOW we probably shouldn’t… but it’s pretty cute to watch. They pretty much rule our neighborhood and I’m 90% sure they are living in the attic of our separate garage (darn them). We still feed them. They terrorize our bird feeder and squeak angrily at my Chihuahua (I believe they think he is a giant squirrel). We still feed them. Mostly because it’s fun for the kiddo. Each day we bring out the peanut jar and sprinkle them around the yard and hide them on the fence… then wait for them to show up and we watch them from the window. It’s our thing. NOW we have a cute little jar to hide nuts in. I like that it’s a glass jar (easier to spy on them while they eat).

Squirrel Feeder // thepapermama.com

I made it in about 20 minutes. I had a wide mouth jar (with a 3 inch opening), an old serving fork, and some wire. Sooooo, this squirrel feeder was FREE, minus the small price for peanuts. Yeah… it cost peanuts (I’ll be here all night).

Squirrel Feeder // thepapermama.com

I wrapped the wire around two spots on the jar and secured the fork. Simple simple. Secure the feeder to something that’s easy to reach… a fence? A tree? Hmmm? I wired ours onto a fence post (within view from our living room… so important).

Squirrel Feeder // thepapermama.com
Fill that jar with squirrel treats, and we’re done

Squirrel Feeder // thepapermama.com

Squirrel Feeder // thepapermama.com

I can’t wait to snap a photo of those naughty little squirrels getting into the jar. We also have a TON of blue jays… and they love those peanuts. The crows might even try and get in on this. All super entertaining for us… because that’s EXACTLY what I made this jar for: pure entertainment. Ha!

Annnnnd, in case you’re curious… our squirrels are a bit chunky (they eat from ALL the bird feeders in the neighborhood).

Squirrel // thepapermama.com

- Chelsey

Homemade Granola (no refined sugars)

Homemade Granola

I love quick and easy foods. I’d MUCH rather just head to the store and buy something… instead of making it. I’m just not into cooking. Since I’ve had my kiddo I’ve been looking at the ingredients on all those foods I thought were healthy for me, when they’re really not. I cannot pronounce half of the ingredients on most packaged foods out there. PLUS, the majority have corn syrup or sugar added. I prefer to save my sugar intake for when I’m eating pie, chocolate, or cookies.

This brings me to snack time for the kiddo. She’s started preschool this year and can’t bring peanut butter to class (she pretty much LIVES on pb at home). We tried store bought almond butter, she doesn’t like it (I’ll have to make my own, maybe add a touch of honey). I wanted to send her with some sort of snack that had protein and no refined sugars. I googled, I experimented, and finally came up with a granola recipe she loves and I’m comfortable and happy to give to my daughter.

Homemade Granola (with no refined sugars)

- 7 cups old fashioned oats

- 1 1/2 cups of slivered almonds (optional: food processor them for less crunch)

- 1/2 cup shelled sunflower seeds (optional: food processor them for less crunch)

- 1 1/2 cups unsweetened shredded coconut

- 3 Tablespoons of cinnamon

- 1/4 teaspoon of nutmeg

- 1/8 teaspoon ground ginger

- 3 tablespoons pure vanilla (check the ingredients, most vanilla has corn syrup added…)

- 1 1/2 cups of no sugar added applesauce

- 1/4 cup honey

Directions:

- Set your oven to 275 degrees Fahrenheit. Mix together all the dry ingredients in a large bowl. Mix together the wet ingredients in a separate bowl. Add the wet ingredients to the dry and blend. You wont the granola just barely moist. Add a bit of applesauce if it seems too dry (blend really well, get the wet ingredients mixed in well).

Place the granola in a 1/2 inch thick layer on 2 cookie pans (make sure the pans have sides, so the granola doesn’t slide off). Bake the granola in the oven for 40 – 50 minutes. Mixing up the granola blend every ten minutes. This will help the granola to cook evenly, and hopefully not burn. The outer pieces of granola will probably cook faster. This recipe made enough to fill two 24 ounce jars and one 12 ounce jar.

When you’re done, let the granola cool and then store in your favorite jar! OR, give these away as gifts for your buddies. You can also add raisins or other dried fruits to the mix, after it’s done cooking. My kid likes raisins and banana chips in the granola.

Homemade Granola

SO, my kiddo doesn’t like the big giant pieces of almonds and sunflower seeds (she’d eat around them). That’s why I like to process the nuts into small tiny pieces (just a bit smaller than the oats). She doesn’t even know she’s eating them…. bwa ha ha ha <——–evil laugh.

I’ve been eating this pretty much every morning with breakfast. I mix half plain yogurt and half applesauce…. and put a TON of granola in there. So yum.

Enjoy!

- Chelsey

Day 28: Faux Mercury Glass Vases

Day 28: The leaves have fallen, and it’s chilly outside! Time to get cozy inside with some more DIY projects. Today I’m sharing how you can create some very pretty faux mercury glassware! Yup, all those pretty/aged candles and vases you find in the shops for $30+ can now be made for a few bucks. Yeeeessss. The past year I’ve seen SO many different tutorials for homemade faux glassware, but I hadn’t seen any DIY’s that you can actually turn into a vase (the usual tutorial sprays paint INSIDE of the glassware). I wanted to actually use my vases to hold flowers, so I tried something… Instead of spraying the paint inside the glassware, I sprayed it on the OUTside. It turned out lovely! Here’s how I did it.

Supplies:

- Glassware. You know you have some lying around… an old glass vase, jar, or even an old glass container. If you can’t find anything, head to your local thrift store. You can find SO much discarded glassware for a few cents or dollars.

- Krylon Looking Glass Mirror-like Paint Spray

- Spray bottle

- White Vinegar and water mixture (1/2 water + half vinegar)

- Paper towels

- Drop cloth/paper

- Respirator mask (safety first!)

- Gloves (messy)

- Optional: goggles (this spray sort of bugged my contacts, so I threw on some goggles)

Directions:

1. Clean and completely dry your glassware.

2. Get your tools all ready: Put your vinegar + water mixture into the spray bottle, set the nozzle to the lightest mist setting possible. Lay down your drop cloth (outside or in a very well ventilated space), and set your glassware up. Get your gloves, mask, and beautiful goggles on. Have your paper towels nearby… ok, let’s do this!

3. Spray a layer of the mirrored paint on the outside of a glass. Follow this with a light spritz of the vinegar + water mixture. Let that sit for 2 – 4 minutes.

4. When your wait time is up, dab the vinegar + water mixture off of the glass. DON’T rub. That will smudge the paint. Just a light dab.

5. Repeat steps 3 and 4 until you’re happy with how the glass looks! I added about 4 layers of mirror glass to each piece (each layer was followed by a spritz of vinegar + water and then dabs).

6. Let the paint dry for 24 hours.

7. Add a beautiful bouquet of flowers to your vase! Or, turn those beauties into a candle holder. Give them as gifts! Enjoy.

- Chelsey

…………………………………………………………………………………………………………………………………………………

To keep up with my 50 DIY Days, click here:


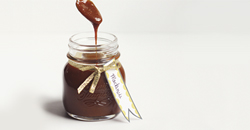
Day 22: Chocolate Covered Bacon Bites!

Day 22: This DIY is a favorite of mine because, well yeah… bacon covered in chocolate. I bet some of you are thinking, “What the? Nope.” Let me tell you, it’s fantastic. Things you need to enjoy this: you need to love bacon. You need to love chocolate. Done. That’s it. I love a good combo of salty and sweet, this is perfect!

I’m pretty sure you’d be the COOLest guest EVer if you brought over a gift of chocolate covered bacon bites!!! You will need to make this day of (or, day before) for the best flavor/quality. Plus, it needs to be refrigerated.

Supplies:

- Roughly 8 slices of bacon (find a good quality bacon… it will taste better)

- 1/2 bag of Wilton Candy Melts milk or dark chocolate (I prefer milk)

- A jar

Ok, how you do this:

- Preheat your oven to 400 degrees F.

- Cut up your bacon into 1/4 inch to 1/2 inch pieces, place on a baking sheet (that has sides, to keep the grease in), and bake for 10 to 20 minutes. The time all depends on your oven/type of bacon. It took about 17 minutes to cook my pieces. I like them to be a little more crunchy (less chewy when covered in chocolate).

- Make sure your bacon is patted dry and get all the grease off the bacon bites.

- Follow the directions on the back of your Wilton Chocolate Melts bag, melt the chocolate in the microwave, and start covering your bacon bits in chocolate! (tip: if your chocolate is microwaved too long, and get’s stiff…. add a tablespoon of lard. Mix it in. It helps. and is so good for you… ha!).

- Using a pair of tongs, place your chocolate covered bacon bites onto a piece of wax paper.

- Let the chocolate cool for about 1 hour. I recommend putting the chocolate bites in a container and into the fridge, for a couple of hours, before putting in the jar. This will make sure the chocolate is all cool and won’t smudge inside your pretty jar.

- When your chocolate covered bacon bites are cool and all ready: put them in a jar, add a ribbon, maybe a gift tag, and give to your favorite bacon loving friend!

Happy Saturday!

- Chelsey

…………………………………………………………………………………………………………………………………………………

To keep up with my 50 DIY Days, click here:

May Giveaway!

Giveaway!

Advertisers

archives

Search