12 No Carve Pumpkin Ideas

12 No Carve Pumpkin Ideas

I love NOT carving pumpkins (I know, so weird). The cool thing about no-carve pumpkins is it’s less messy (sometimes), the sad part is you don’t get all the pumpkin seeds to roast for yummy snacks (like these parmesan pumpkin seeds). Below I gathered 12 of my favorite No Carve Pumpkin Ideas from around the web, enjoy!

Donut Pumpkins, from Studio DIY.

Donut-Pumpkins-DIY

Color Dipped Pumpkins, from Brit + Co.

Color Dipped Pumpkins

Boo String Pumpkin, on Lovely Indeed.

Boo String Pumpkin

Puffy Paint Pumpkin, on A Beautiful Mess.

Puffy Paint Pumpkin

Mummy Pumpkin, from Better Homes and Gardens.

Mummy Pumpkin

Painted Squirrel Pumpkin (with free printable), on Midwest Living.

Squirrel Pumpkin

Chevron, Plaid, and Argyle Pumpkin, from Home Stories A to Z.

http://www.homestoriesatoz.com/fall-2/how-to-paint-pumpkins.html

Yarn Pumpkin Face, on the Better Homes and Gardens blog.

Yarn Pumpkin Face

Sugar Rush Pumpkin, from Real Simple.

Sugar Rush Pumpkin

Color Drip Pumpkin, on A Girl Named PJ.

http://www.agirlnamedpj.com/diy-drip-paint-pumpkins-no-carve-pumpkins/

Spiderweb Pumpkin, from Women’s Day.

Spider Web Pumpkin

Confetti Dipped Pumpkins, from Studio DIY.

Confetti Dipped Pumpkins

 If you need more inspiration for fall, you should check out my 12 Fall Tabletop ideas over on the Better Homes and Gardens Blog.

12 Tabletop Fall Ideas

– Chelsey

P.S. I’m a paid contributor on the Better Homes and Gardens Blog

Tags:

Categories: favorite blogs


Maple Tree Seed Fall Wreath DIY

Maple Tree Seed Fall Wreath DIY // thepapermama.com

It’s a new season, so that means it’s time for a new wreath (I love wreaths… and Fall). I’d like to introduce all of you to the newest member of our wreath family: the Maple Tree Seed Fall Wreath DIY. Made from maple tree seeds, pinecones, and acorns. All of these items were found on a walk with my kiddo. Whenever we walk she picks up these goodies and they ALWAYS end up in my purse… Not anymore! We made something out of our finds and I shared this project on the Better Homes and Gardens blog. I do believe this is my favorite wreath creation so far.

Maple Tree Seed Fall Wreath DIY // thepapermama.com

Side random note: My friend let me switch things up a bit and photograph this wreath on her cute orange door (and with her silly dog). I’d LOVE to have an orange door, but our trim is red and I don’t feel like painting trim right now. Anywho…

If YOU would like to check out how I made this wreath, head on over to the Better Homes and Gardens blog. The cost to make this is under $8. Yay!

Maple Tree Seed Fall Wreath DIY // thepapermama.com

Who else is as excited as I am for Fall?

– Chelsey

P.S. I’m a paid contributor on the Better Homes and Gardens Style Spotter Blog

Save

Save


Halloween Candy Corn Jello with Spooky Spoon Toppers!

Halloween Candy Corn Jello with Spooky Spoon Toppers! Halloween Candy Corn Jello with Spooky Spoon Toppers! Halloween Candy Corn Jello with Spooky Spoon Toppers!

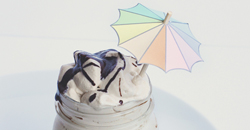
Here’s the thing, I don’t like the taste of candy corn. Then why did I make candy corn jello? Well, it doesn’t actually taste like candy corn (yay) because it’s made with lemon and orange jello, then topped with whipped cream. Yup. It’s a fun treat for this Halloween! I think it’s perfect for a spooky party, but it’s also the perfect everyday treat for the kiddo (or yourself). It takes very little effort to create and just a couple of supplies to make this inexpensive party treat. Plus, I made a cute spoon topper (think cupcake topper, except more spoony) to decorate these treats. How cute would these be all set up on a tray?

Halloween Candy Corn Jello with Spooky Spoon Toppers!

Supplies:

  • 1 small box of lemon jello
  • 1 small box of orange jello
  • 1 can of whip cream
  • 8 juice glasses
  • 8 clear plastic spoons
  • washi tape
  • Printable Spooky Spoon Toppers (bats or candy corn or ghosts)
  • Paper

Directions:

STEP 1: Grab the clean glassware and put a single plastic spoon into each juice glass.

Halloween Candy Corn Jello with Spooky Spoon Toppers!

STEP 2: Following the directions on the back of the Jello, prep the lemon box. Pour the prepared jello mixture into a liquid measuring cup (so it’s easier to pour into the juice glasses). Carefully pour the lemon mixture about 1 1/2 inches into the bottom of each juice glass. Place the juice glasses into the refrigerator and let chill for 4 hours. Tip #1: It’s important to let the jello chill for the full 4 hours, or longer. If you move onto step 3 too fast, the flavors could blend.

Halloween Candy Corn Jello with Spooky Spoon Toppers!

STEP 3: Following the directions on the back of the Jello box, prepare the orange flavor. Pour the prepared jello mixture into a liquid measuring cup. Let the Jello cool on the counter. I let mine cool for about 20 minutes. Carefully pour the orange mixture about 1 1/2 inches over the chilled lemon Jello. Place the juice glasses back into the refrigerator and let chill for 4 hours.

Halloween Candy Corn Jello with Spooky Spoon Toppers!

STEP 4: Print out your the spoon toppers you’d like to use (bats or candy corn). Cut the shapes out and use some washi tape to attach the spoon toppers onto the plastic spoons. Place the Jello back into the refrigerator and store until you’re ready to serve. Right before serving, take the Jello out of the refrigerator and top with whip cream! Now you have an adorable Halloween treat!

Halloween Candy Corn Jello with Spooky Spoon Toppers! Halloween Candy Corn Jello with Spooky Spoon Toppers!

Now you’re done!

Candy Corn Jello

Candy Corn Jello

Are you excited for Halloween? Cause I AM so excited. Christmas is usually my fave time of the year, but having a kiddo makes Halloween even more exciting.

– Chelsey

P.S. I’m a paid contributor for the HP Create blog

Save

Save


Free Halloween Prints: Beware of Vampire (he bites).

Free Halloween Prints

Dudes, Halloween is seriously right around the corner. I just bought the kiddo’s Halloween costume (not making one this year…. since she wants to be Elsa and I have exactly zero idea how to sew a dress + I don’t want to completely lose my mind trying to figure it out… ha). We’ve also SLOWLY started decorating for Fall. Our front step has a sweet collection of colorful pumpkins and now I have my Free Halloween Prints hanging in the front entrance.

They are free for you to download and print for your own Halloween decor. I made them to fit in an 8 x 10 frame or smaller. These prints will remind your guests to beware of your pet vampire/werewolf/swamp monster. Never pet a monster you don’t know, they may bite! You can download each of the printables by right clicking the links below + saving the image to your desktop.

Werewolf Beware Print // Swamp Monster Beware Print // Vampire Beware Print

Free Halloween Prints

Ok, I need to know… what are you or your kids dressing up as for Halloween? I’m lazy with my costume when it comes to Halloween. I just seem to wear the same silly glasses each year, plus ever since I had a kid I tend to focus all my creative costume time on her outfit. Random note: it sounds like there will be about 6 Elsa’s in my kiddo’s class this year. Goodness.

Need some silly Halloween costume inspiration? You can check out these past costumes I made for my kiddo: Red Fox and a Unicorn Wearing a Dress + Glasses.

– Chelsey

P.S. Just a reminder that you are very welcome to use these printable for personal use. The printables cannot be adjusted or used for commercial use. The frame is from Target. The fonts I used for this project are free to download and you can find them here: Nexa Rust and Mathlete


Banana Note For The Lunch box

Banana Note

If you’re a Pinterest person, chances are you’ve seen the banana note image. It has made it’s way across the interwebs, and it’s a pretty darn cute idea. Bananas bruise easily, that’s why this banana note idea was sort of a “duh” moment for me. Not that it’s a necessary step in our lunch packing routine… I just think it’s a fun surprise for my daughter. I did this the other week and she asked her preschool teacher to read the note. When I picked her up from school I got the biggest hug and kiss for her lunch box surprise. Creating that “I love you” note on her banana snack was 1-minute well spent.

How-to:

Banana Note

1. You need a needle or toothpick, a yellow banana, and a sweet (or weird/silly) note to write.

Banana Note

2. While you’re packing the kiddo’s lunch (and they aren’t looking), use the needle to scratch out a note. I went with the classic: “I love you!!!”, but you can write out whatever you want. “I’m bananas for you!”, “You’re sweet.”, “I’m a banana.”, or maybe you need to give the kid a reminder: “Clean your room.”

Side note…. Typing out “I’m a banana” reminded me of this totally ridiculous indie cartoon. So ridiculous, so silly.

Do you create any special surprises for your kiddo’s lunch?

– Chelsey


I’m Back + 8 Travel DIY Ideas

What have I been up to? I took the most fabulous time off. It’s been quite a while since I’ve had few days off work, and I needed it (so bad). I feel refreshed and ready to get back to work. Last week I went to New York for the Better Homes and Gardens Stylemakers event, flew home Friday night, and drove to Bend, Oregon, the next morning with my family. I was crazy busy, but I had a fantastic time. I’ll share some NYC highlights tomorrow (OMG, the food)… Today I just wanted to share some of my favorite Travel DIY Ideas from around the internets. Enjoy!

Clear Travel Makeup Bag, from Beautiful Kayekie.

http://beautifulkayekie.com/2013/11/17/diy-clear-travel-makeup-accessory-bags/

Travel Bingo, from Say Yes.

http://sayyes.com/2013/06/diy-family-car-games-travel-bingo-printable.html

Leather Travel Tag DIY, from Fairgoods.

http://blog.fairgoods.com/maker-stories/2014/05/20/fathers-day-diy-embossed-leather-tag-and-tie-clip/

DIY Travel Map, from Lovely Indeed.

http://lovelyindeed.com/diy-travel-map/

Jewelry Roll DIY (made from a placemat), from The Paper Mama on HP Create.

http://bit.ly/1nhrCdP

Grumpy Cat Eye Mask, from Lovely Art.

http://lovelyartclaudia.blogspot.com/2013/12/grumpy-cat-sleep-mask-grumpy-cat-eye.html

Car Seat Organizer, from Cheryl Style.

http://www.cherylstyle.com/creative-crafts/family-and-kids/diy-kids-travel-organizer/

I hope you all had a great week… And: yay for Fall!!!

– Chelsey

Categories: favorite blogs


End of Summer Brunch Party Ideas

K. I landed in New York at 5AM. Yup. It was rough. I was lucky enough to get an early check in at my hotel and sleep for 4 hours. Then I wandered down to the Showplace and to Eataly. Sort of like a Zombie. So now I’m sitting here in my hotel… exhausted, but on Oregon time. All I can think about is the morning. What do you do on a wednesday morning when you don’t have to get your kid ready for preschool? You go to brunch. That’s what inspired todays post. All of these lovely bloggers will be attending the Better Homes and Gardens blog event on Thursday. I’m hoping all of these posts will help you create the cutest last minute “End of Summer Brunch Party” for you and your friends.

Dirty Bloody Mary, from Aida Mollenkamp.

http://www.aidamollenkamp.com/2014/04/last-fridays-dirty-bloody-mary-recipe/

Breakfast Sandwiches on Cheddar Chive Biscuits, from Lulu The Baker.

http://luluthebaker.com/2014/04/breakfast-sandwiches-on-cheddar-chive-biscuits.html

Spiral Apple Bread with Caramel Apple Glaze, from Inspired By Charm.

http://www.inspiredbycharm.com/2013/08/spiral-apple-bread-with-caramel-apple-glaze.html

Faux Etched Glass Table, from Sand & Sisal.

http://sandandsisal.com/2013/06/faux-etched-glass.html

5 Tips For Setting A Table, from Waiting On Martha.

http://waitingonmartha.com/summer-table-settings/

Paint Stir Stick Table Runner, from Sarah Hearts.

http://sarahhearts.com/2014-06-04/stir-stick-table-runner/

Doily Print Napkins, from Alexandra Hedin.

http://alexandrahedin.blogspot.com/2014/04/faking-fabulous-doily-print-napkins.html

Have a wonderful Wednesday!

– Chelsey

Categories: favorite blogs