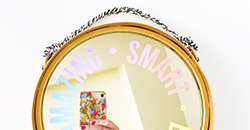
14 Amazing Office Makeovers

14 Amazing Office Makeovers

Trend: 14 Amazing Office Makeovers

School is right around the corner and it might be time to makeover your old office. If you don’t have an office in the home, maybe you need to make space for one? Over on the Better Homes and Gardens blog you’ll find 14 inspiring office spaces from around the blog world. Some of the spaces are complete room makeovers, and the others are all cool tiny office spaces (that would be my category). Have you seen a closet turned into a mini office?

To check out the full list of office makeovers, head on over to the original blog post on the Better Homes and Gardens site. Have a wonderful Thursday!

– Chelsey

P.S. I am a paid contributor for the Better Homes and Gardens blog. The images in the first photo are from: Home StoryCentsational Girl, and The Crafted Life

Categories: BHG, favorite blogs


Bicycle Basket Makeover

Bicycle Basket Makeover

My daughter has a little scooter that she loves to ride. Every time we head out to the park the kiddo has to bring a stuffed animal, a water bottle, and maybe a snack (that’s a lot to carry for a quick trip to the park). Instead of carrying all these items in my purse or hands this basket will do the trick. With my Bicycle Basket Makeover I have created the perfect little container to attach to her scooter and I made it for under $5. We took it out for a spin the other day, and she loved it (and so did I).

Bicycle Basket Makeover supplies:

  • yarn (for pompoms)
  • sewing needle and thread
  • small basket (I found mine at a thrift shop for $1)
  • gesso
  • white acrylic paint (I used Martha Stewart)
  • wide paint brush and thin paint brush
  • wire and/or zip ties (to attach the basket to your bike or scooter)
  • optional: ⅛ inch wide ribbon, Free “PLAY” printable, and hot glue

Continue reading


How To Make Mini Pom-Poms

Bike Basket Makeover

I don’t know why it took me so long to actually make a pom-pom, but now I’m a pom-pom pro. It turns out it’s pretty easy to do and requires very little supplies. I recently needed some poms for a project I made, and had to teach myself how to make these tiny fluff balls. I took some photos along the way and I thought I should share how to make mini pom-poms with you.

Supplies needed to make a mini pom:

  • Yarn
  • Twine
  • Fork
  • Scissors

1) Wrap your yarn around the tines of the fork a few times. The more times you wrap the yarn around the fork, the thicker and fluffier the pom will be.

2) Cut out a small piece of twine. Slip the piece of twine through the center tine, wrap the twine around the yarn, tighten the twine and tie a knot around the yarn.

3) Grab the scissors and cut right and left sides of the yarn.

4) Pull the pom off the fork. Fluff up the pom with your hands.

5) Use your scissors to shape the pom-pom, and you’re done!

Repeat all the steps above to make more.

If you make some poms, I want to see your project!

– Chelsey

Categories: diy, Tips and Tricks


Yoga Mat Strap DIY

Yoga Mat Strap DIY

Well, I’m currently 17 weeks pregnant. Yoga has been the perfect low impact workout for me while I grow this little baby girl. I love going to yoga, but I really don’t like carrying my yoga mat around. I either carry it in my hands, or in a little bag… that it eventually falls out of and unravels onto the floor.

To fix my yoga mat problem, I created this Yoga Mat Strap DIY and shared it on the HP Create blog. This mat strap has been great and keeps my yoga mat in place, plus it’s much easier to carry. The main crafting skill you’ll need for this project is braiding. It’s pretty darn easy.

Yoga Mat Strap DIY

Supplies needed to create this Yoga Mat Strap DIY:

  • HP Iron-On Transfer Paper
  • Latigo lace leather strip – 5 yards at ⅛” thick (I found colorful leather at a local fabric store)
  • White felt- one 4.5 inch x 2.5 inch section
  • Fabric glue (I used Unique Stitch)
  • Steel galvanized wire – 2 inches (I used 20 gauge)
  • Needle nose pliers and wire cutters
  • Binder clip
  • Iron

To check out the full tutorial, head on over to the HP Create blog.

– Chelsey

P.S. I am a paid contributor for the HP Create blog. To check out other foodie projects I’ve made for them, head on over to their blog: Homemade Vanilla Extract Labels, Happy Cookie Gifts, and Candy Corn Jello (with printables) for your Halloween party!


National Ice Cream Sandwich Day

National Ice Cream Sandwich Day

Here’s the thing: National Ice Cream Sandwich Day is today and it’s TOTALLY my kind of day. I love them. To celebrate I’ve shared 8 of my favorite ice cream sandwiches from around the blog world. Enjoy!

  1. I made these yummy mini ice cream sandwiches the other day (so good), from The Paper Mama.
  2. Turn some store bought ice cream sandwiches into “doughnut” ice cream sandwiches. So freakin’ cute, on Studio DIY.
  3. This giant cookie ice cream sandwich cake looks so good, from A Subtle Revelry.
  4. Use actual doughnuts and ice cream to make these Doughnut Ice Cream Sandwiches, on Paper & Stitch.
  5. Waffle Ice Cream Sandwiches look amazing, on Handmade Charlotte.
  6. I LOVE Samoas and I can only imagine how delicious these ice cream sandwiches are, on Country Cleaver.
  7. Can’t do dairy? These ice cream sandwiches are made with delicious banana ice cream, from Super Healthy Kids.
  8. These skinny macaroon ice cream sandwiches are pretty and look so good, on Sugar and Cloth.

– Chelsey

Categories: favorite blogs


Mini Ice Cream Sandwich

Mini Ice Cream Sandwich

Mini Ice Cream Sandwich

Did you know that this upcoming Sunday is National Ice Cream Sandwich day? I know, there’s a day for everything, but this day is fantastic. I love a good ice cream sandwich. It’s a hot hot summer and these are the perfect little bite size treats for a party, or just for fun.

Supplies needed for this yummy treat:

  • Mini chocolate chip cookies (I used Mini Nabisco Chips Ahoy Cookies)
  • Ice cream (I used some yummy vanilla chocolate chip gelato and mint chocolate chip gelato).
  • Melon baller (or small spoon)
  • A sweet tooth!

Mini Ice Cream Sandwich

First: Gather those supplies! You’ll need super cold ice cream (don’t pull out the ice cream until you’re ready for it).

Mini Ice Cream Sandwich

Second: When you’re ready to assemble the ice cream sandwiches, pull the ice cream out of the fridge. Grab the melon baller and scoop a tiny bit of ice cream (or gelato).

Mini Ice Cream Sandwich

Third: Push the little ice cream ball onto the cookie.

4Mini Ice Cream Sandwich

Fourth: Squish the second cookie onto the top!

Mini Ice Cream Sandwich

You’re done: Just repeat those steps until you have all the sandwiches you need. Tip: I suggest making a few minutes ahead of time, and then place them back into the freezer. Ice cream melts fast, so placing it back in the fridge before serving will help it set. 

Mini Ice Cream Sandwich

I hope you enjoy this treat and Happy Friday (and happy almost National Ice Cream Sandwich Day)!

– Chelsey

If you loved this treat, check out these other yummy goodies: Banana Ice CreamDelicious Apple Pie, Plastic Egg Popsicles

Tags:

Categories: food, Sweets


Sea Glass Candy Recipe and Gift (with free printable gift tags)

Sea Glass Candy Recipe and Gift (with free printable gift tags) - the paper mama blog

See all that glass in the photo above? Yeah, it’s not glass… it’s candy! You can hold and eat it and it will not cut you. One of the coolest things to do at the beach is search for shells, rocks, and sea glass! As a kid sea glass was always fun to find because it was so pretty and I was amazed that this smooth glass rock was once a sharp piece of broken glass. The ocean is amazing.

So, I was inspired by the beach and created this tasty Sea Glass Candy recipe (and free sea glass candy printable gift tags) for HP Create. How fun would these be for a beach themed wedding favor? Or, makes some bright and colorful glass for a kids summer party!

Sea Glass Candy Recipe and Gift (with free printable gift tags) - the paper mama blog

Sea Glass Candy Recipe Ingredients:

  • 1 3/4 cup granulated sugar
  • 1/2 cup powdered sugar
  • 1/2 cup corn syrup
  • 1/2 cup water
  • 1 tsp. candy flavoring (flavor of choice)
  • Blue and green food coloring

Supplies needed to make this treat:

  • Paper
  • Large Rectangle Baking Dish
  • Candy Thermometer
  • Scissors
  • Baker’s Twine
  • Mason Jars

STEP 1: In a medium size saucepan, mix together granulated sugar, water, and corn syrup at medium-high heat. Attach a candy thermometer to the pan.

Sea Glass Candy Recipe and Gift (with free printable gift tags) - the paper mama blog

STEP 2: While the mixture is coming to a boil, grease the baking dish and combine one drop of blue and one drop of green food coloring in a bowl. If you want a darker color, feel free to add a few more drops in of each.

Sea Glass Candy Recipe and Gift (with free printable gift tags) - the paper mama blog

STEP 3: Once the mixture has reached 300 degrees, remove it quickly from the stove, pour in the food coloring and flavoring. Mix together and pour the mixture into the baking dish.

You want it to spread out as much as possible in the baking dish so that it turns out to be a nice thin layer of candy.

Sea Glass Candy Recipe and Gift (with free printable gift tags) - the paper mama blog

STEP 4: Allow the candy mixture to completely cool. Use a knife to crack the candy into pieces.

Sea Glass Candy Recipe and Gift (with free printable gift tags) - the paper mama blog

STEP 5: It will turn out pretty and shiny like this, but we want to add a cloudy effect to it just like sea glass.

Sea Glass Candy Recipe and Gift (with free printable gift tags) - the paper mama blog

STEP 6: Combine powdered sugar and candy pieces in a plastic bag until they are fully coated.

Sea Glass Candy Recipe and Gift (with free printable gift tags) - the paper mama blog

STEP 7: Remove candy from bag and dust off excess powdered sugar.

Sea Glass Candy Recipe and Gift (with free printable gift tags) - the paper mama blog

STEP 8: Print and cut Sea Glass Candy labels.

Sea Glass Candy Recipe and Gift (with free printable gift tags) - the paper mama blog

STEP 9: Fill jars with candy and attach tags with baker’s twine.

Sea Glass Candy Recipe and Gift (with free printable gift tags) - the paper mama blog

Sea Glass Candy Recipe and Gift (with free printable gift tags) - the paper mama blog

Hand out jars of tasty sea glass candy at your next summer party!

Sea Glass Candy Recipe and Gift (with free printable gift tags) - the paper mama blog

I want to see what you’re crafting! You can share a link to what you’ve made in the comments below, or tag me on Instagram with a photo (my user name is @thepapermama).

– Chelsey

P.S. I was a paid contributor for the HP Create blog and was paid to create this blog post.

Tags: , ,

Categories: diy, food, Gifts, HP, Sweets