Cute custom ornaments!

There was an artist I met at the event I went to last weekend in Washington. She just had a tiny little booth… covered in ornaments…. and paint markers. Turns out she would create a custom ornament for you… for pretty cheap. The small ornaments were $10 each. I had a little ornament created of Mr. Angus in his Christmas sweater (see above). AND…. since I know Mike’s parents don’t read my blog (not really computer people)… we also got them an ornament of their pup: Llewe! I love them. Ruari loves them too!!!

Here’s her eBay shop if you want to see her work. If you’d like to order something you can email her here: sullivan_artist {at} hotmail {dot} com

AND… it’s almost Christmas! Yay! That means: don’t forget to enter your holiday photo into my freakin awesome Holiday Photo Challenge! What? Yes!

signature

Categories: Uncategorized


{CLOSED} GIVEAWAY: Toddler Bundle from Prince Lionheart!

The giveaway winner is: Savanna from These Little Moments! Congrats!

I’ve been lucky enough to work with Prince Lionheart for this past year hosting a couple of other reviews…. and giveaways (Wheely bug, Drawer Organizer, and sippy cups).

So, as a thank you from Prince Lionheart and I for the past year of giveaways…. we are giving one of you a chance to win a Toddler Bundle! Perfect little bundle for your crazy toddler!

What you win:
How do you win? Please follow these steps… AND make sure I have a way to contact you through e-mail. If I don’t… I’ll have to delete the entry… 🙁

Mandatory entry:
1) Reader must sign-up for monthly newsletter by completing form here: Prince Lionheart.
We do not spam, nor disclose any information to other businesses. We also conform to a 1 email per month rule so as not to inundate our consumers. On certain occasions, though rare, we may send out 2 emails per month if there is a baby model search, a huge event or promotion.{1 entry}

{For extra entries (Please use a separate comment for each entry):
1) Become a follower of this blog via google friend connect, feedburner or bloglovin’ (see sidebar) {1 entry}
2) “Like” me on FB: The Paper Mama{1 entry}
3) Follow me on twitter: @thepapermama {1 entry}

3) Like Prince Lionheart on Facebook {1 entry}
4) Tweet or Facebook about this giveaway. You are welcome to copy and paste this tweet:
” Win a Toddler Bundle from Prince Lionheart http://bit.ly/w360lr @thepapermama “{1 entry}

This contest is only open to US residents 18 and up.  The winner will choose the color of the BoosterPod and 2 Stage Seat Saver.

Note: Giveaway ends on Saturday, December 10th, 2011 11:59 PM Pacific Time. Winner will be chosen at random from Random.org.

signature

Categories: Uncategorized


GIVEAWAY: Toddler Bundle from Prince Lionheart!

I’ve been lucky enough to work with Prince Lionheart for this past year hosting a couple of other reviews…. and giveaways (Wheely bug, Drawer Organizer, and sippy cups).

So, as a thank you from Prince Lionheart and I for the past year of giveaways…. we are giving one of you a chance to win a Toddler Bundle! Perfect little bundle for your crazy toddler!

What you win:
How do you win? Please follow these steps… AND make sure I have a way to contact you through e-mail. If I don’t… I’ll have to delete the entry… 🙁

Mandatory entry:
1) Reader must sign-up for monthly newsletter by completing form here: Prince Lionheart.
We do not spam, nor disclose any information to other businesses. We also conform to a 1 email per month rule so as not to inundate our consumers. On certain occasions, though rare, we may send out 2 emails per month if there is a baby model search, a huge event or promotion.{1 entry}

{For extra entries (Please use a separate comment for each entry):
1) Become a follower of this blog via google friend connect, feedburner or bloglovin’ (see sidebar) {1 entry}
2) “Like” me on FB: The Paper Mama{1 entry}
3) Follow me on twitter: @thepapermama {1 entry}

3) Like Prince Lionheart on Facebook {1 entry}
4) Tweet or Facebook about this giveaway. You are welcome to copy and paste this tweet:
” Win a Toddler Bundle from Prince Lionheart http://bit.ly/w360lr @thepapermama “{1 entry}

This contest is only open to US residents 18 and up.  The winner will choose the color of the BoosterPod and 2 Stage Seat Saver.

Note: Giveaway ends on Saturday, December 10th, 2011 11:59 PM Pacific Time. Winner will be chosen at random from Random.org.

signature

Categories: Uncategorized


50 DIY Days with The Curly Cues: Pies in a Jar

Day 33: Hello! Chelsea from The Curly Cues here! I am so excited to be guest posting on Chelsey’s blog (I have a special place in my heart for people with that name.) (I apologize in advance for my excessive use of parentheses.)
TINY PIE IN A JAR: What the What?
I found this incredible article on baking tiny personal sized pies in mason jars here and knew I had to try it. I made these as holiday gifts for my coworkers (I hope you guys aren’t reading this… if so, SURPRISE! Get back to work.)

 {Mmmmm, tiny pie.}

Here is what I did:

First: You need dough for the pie crust. Here is an awesome recipe, or you can just be lazy save time like me and (gasp!) buy pie dough at the store!
Second: Set aside dough for pie toppers. Roll out a small amount of dough (at least a bit larger than the mouth of the jar) and use the jar lids to trace a circle. Set aside for use later. (I know you can hardly wait right?)

Third: Line the inside of each jar evenly with the remaining pie dough. No rolling required, just break it into small bits and press around the inside! Easy peasy. 
**Special tip: on my first attempt I made the crust a but thick, which my husband described as “too crusty”… as in the crust-to-filling ratio was off. A thin layer is all you need.**
Fourth: The fun part! Fill your dough-lined jars with 1/2 cup of the pie filling of your choice. I chose apple and cherry, but I think any filling would work. Here are the recipes I used/planned to use (Thanks Martha!):
  • 12 Granny Smith apples, peeled, cored, and sliced
  • 3/4 cup sugar
  • Zest and juice of 1 lemon
  • 1 1/2 teaspoons cinnamon
  • 1/2 teaspoon nutmeg
  • Pinch ground cloves
  • 2 tablespoons all-purpose flour 
    **Note: I didn’t have any nutmeg or cloves. You know what I did have?Pumpkin Pie Spice. Yum. It has nutmeg and cloves in it, score!**

    In a large bowl, combine apples, sugar, lemon zest and juice,spices, and flour. Toss well.

    {If you are like me, apples are most efficiently peeled while watching the Parenthood you DVRed Tuesday night.}
    • 2 pounds Bing cherries, pitted and halved
    • 1/2 cup granulated sugar
    • 2 tablespoons cornstarch
    • 2 tablespoons fresh lemon juice
    In a largebowl, combine cherries, granulated sugar, cornstarch, and lemon juice;toss until cherries are coated.
    **Oh wait, you noticed that can of “Cherry Pie Filling” in the picture above? Yeah, I couldn’t find any cherries. Apparently they are “out of season” in Washington. Whatever… cans are cheaper, easier, fine.**
    Fifth: Time to get creative with your pie topper. Basically you just need a vent for the steam, so anything from simple slits to pretty cut-outs will do. Or try out a tiny lattice top like I did for your cherry pie.
     {This part was so fun. I got pie punches from Williams-Sonoma. I’m fancy.}
    Once you have completed your topper, place it in your jar making sure the edges run up the sides a bit and seal it with the rest of the dough using a fork (or your finger!). Then brush the top with butter and sprinkle with sugar, yum!
    Sixth: Freeze or Bake. You can pop the lids on the jars and toss (gently people, they are glass) in the freezer until you are ready.
    But, lets be serious for a second, you are not going to want to put these in the freezer, you are going to want to eat them. Pre-heat your oven to 375 (if you are worried about the glass in the oven you can always put them in as it preheats to let them heat up slowly. I had no problem, these are very durable jars.) If baking from frozen it takes 50-60 min, baking them fresh (which I am sure you are doing) takes about 45 min.
    Now just dress them up however you like (maybe using these free printable gift tags) and they are ready for the gifting. I recommend NOT gifting them and just eating them straight out of the jar.
    {Lily agrees. So much for for the Christmas spirit.}

    This one just went straight into my belly.

    Happy holidays everyone!

    ………………………………………………..

    Thank you SO much to Chelsea from The Curly Cues! What a LOVELY guest post. I LOVE PIE! Thank you for joining my 50 DIY Days of Christmas!

    Pin It

    Categories: 50 DIY Days, diy, food


    Wordless{ish} Wednesday: Washington time.

    {Last weekend I wandered up to Washington to visit my family… and, since my family lives right by Mandy and Fiona…. I did a little playdate with them. It was LOVELY. We went to a little play area for the kiddos… and, let them wander near eachother…. Ruari isn’t too good at mingling with other kids just yet. I think she believes they are just out to kill her or something….. you see that photo above? Yeah… that’s when Harper was checking out Ruari’s cool sweater and Ruari thought Harper was trying to murder her. Ruari: “OMG…. she’s touching me? OMG!” Poor Harper was so confused by Ruari freakin’ the flip out. 🙂 FYI: I love those two mama’s! They are so sweet and make me smile! Please visit their blogs and say, “hellooooo” if you’ve never been!}
    {And, for some reason I didn’t have any clear photos of Fiona’s sweet girls. That’s ok. If you want to see some photos… check out her beautiful shots on her blog!}

    {Have you entered your Holiday photo into my Holiday Photo Challenge yet? You could win prizes! :D}

    {If you have a Wordless{ish} Wednesday, please feel free to link it up below. BY the way: Shawntae from A Little King and I share our Wednesday Linky’s. :D. And, feel free to link up to these blogs too… 5 Minutes For Mom, Parenting by Dummies, Project Alicia,And Then She Snapped, Jenni from the Blog, and Live and Love Outloud.}

    signature

    Categories: Uncategorized


    50 DIY Days with Yellow Finch Designs: Decorating on a Budget

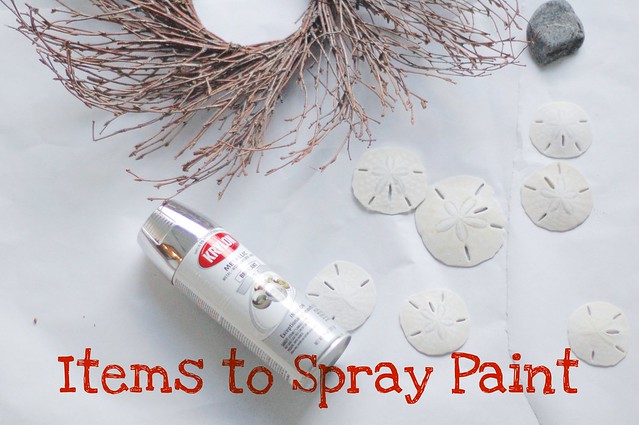
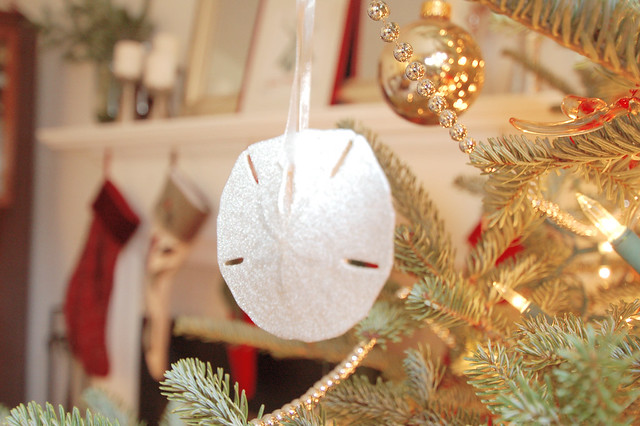
    Day 32: Hello Paper Mama readers! I’m Liz from Yellow Finch Designs Blog and I’m SO excited to share some decorating tips with you today. There are so many amazing crafters out there so I thought I could talk a bit about decorating on a budget.Every year I like to switch things up and decorate a little differently from the previous year. The easiest way to stick to your budget is to turn to nature, make a quick stop at the craft store and gather some thrifted items. Here in Ohio we have an abundance of evergreens so I decided to use this as my main piece for decorating. I also gathered pine cones and dug out an old box of sand dollars. To jazz up some of these pieces I decided a little spray paint would do the trick. I like to stick with just a couple colors so I choose red and silver. 

    decorate5You’ll notice on my blog that I have a passion for words so I wanted to add some holiday cheer with simple words. I thought JOY and PEACE would do the trick. 
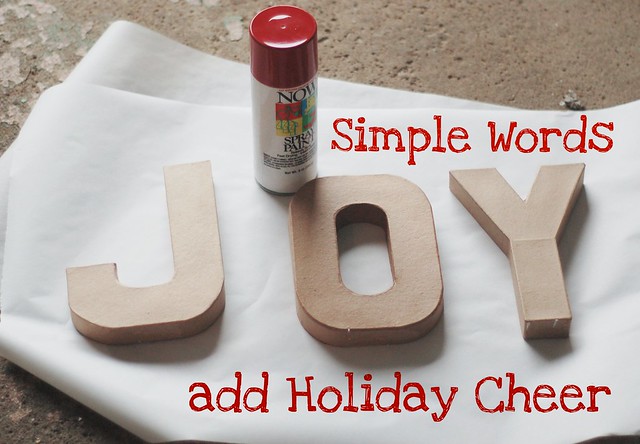
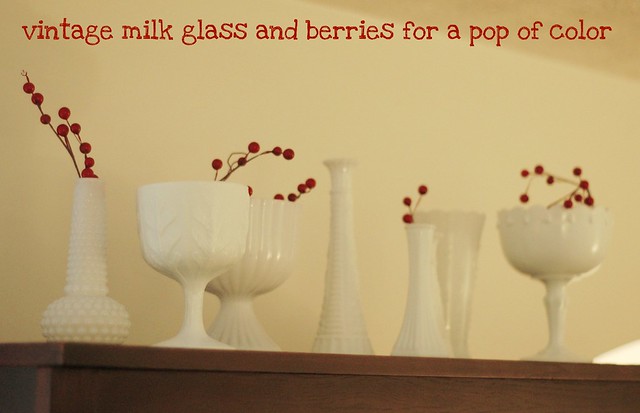
    JOYOnce the items are dry it’s time to get to work. I gathered old clear vases, vintage milk glass and clear bottles and arranged them throughout the house. I always like to focus on my living room because we have a large mantel that is the focal point of the room. Once my containers were set up I added my evergreens and pine cones. To get some color involved I used an inexpensive garland of berries that I cut and placed here and there. I wrapped the remaining garland around the iron banister on the stairs. 
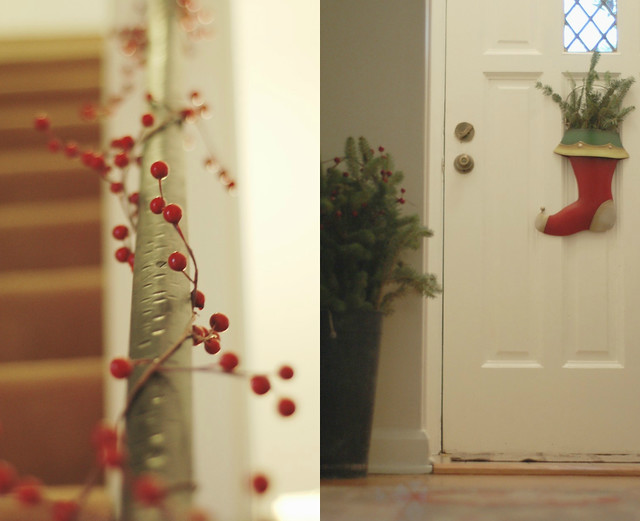
    Picnik collagedecorate9decorate4decorate3decorate2More tips for Holiday decorating:1. Choose two or three colors for your holiday palette. If you incorporate too many colors it may seem busy. This year I choose very neutral colors, but it would be fun to add some bold turquoise or lime green with silver, white or gold.2. When arranging items group them into odd numbers. For example, three candle holders or five small vintage vases.3. Use this time to rearrange for a fresh feel in your home. In order to set up our tree I have to move some furniture. I always love the new look and tend to appreciate my home even more during the holidays.4. Get creative. Use branches, leaves, pine cones, shells, ribbon, paper, garland, candles, material and anything else you can think of. And remember, you can change the look of anything with a little spray paint.5. Express yourself and have fun! I love decorating for the holidays because it’s fun and it’s a great way to involve my family. I like to add a little something to each room and I let the kids use their imagination when it comes to their rooms and their tree. 

    decorate

    I love this holiday print I picked from a local artistThe Canton Box Company.
    decorateHave fun friends and get decorating!I would love to hear or see how your home turns out this holiday season.Thanks Chelsey for having me on The Paper Mama.

    ………………………………………………..
    Thank you SO much to Elizabeth from Yellow Finch Designs! What a LOVELY guest post. I love your DIY decor! 😀 Thank you for joining my 50 DIY Days of Christmas!

    Categories: 50 DIY Days


    50 DIY Days with Living on Love: Printable Paper Chain Advent Calendar

    Day 31: Hi, friends! I’m Lacy from Living on Love where I blog about all kinds of things –  pregnancy & parenting, cooking tasty food, DIY projects, sharing inspiration, saving moo-lah, trying to make a tiny difference in this world, taking a stab at green living, and more! Aside from my jobs as teacher, momma, and wife, I have a little design business on Etsy. Visit my Adair Designs shop to see my other creations. Today, I am giving you a FREE Advent Paper Chain to download and create with your family. Advent is a special time of year and so I created this cute calendar that also serves as a fun decoration.
    Step One: Print your paper chain. You need a color printer and any type of white paper. You could use a thicker cardstock if you want, but I just used regular old computer paper. 
    Step Two: Cut out the paper chain strips! Use cutesy scissors or a paper cutter to get a good, even line. 
    Step Three: Write your daily Advent activities on the back. Think of all the simple things you could do… Some of ours include driving around to look at lights, making oreo shakes with Christmas oreos, reading the Chrsitmas story, filling the stockings, writing a letter to Santa, etc…
    Step Four: Assemble! You can use a stapler, but I highly recommend using tape or glue. Make sure your dates are in order, 1-25!
    Step Five: Hang! This would be cute on a small tree, hanging from a window, lining a mantle, etc. We decided to hang ours in our daughter’s nursery. She loves looking at it from her crib. 
    Thanks, Chelsey, for letting me share on your blog today! And thank YOU for reading! Stop by my blog and say hello! I’d love to see pictures of your finished paper chains, too!
    Cheers!
    Lacy
    Click here to get your FREE paperchain printable! Yay!
    ………………………………………………..
    Thank you SO much to Lacy from Living on Love! What a LOVELY guest post. I love advent calendars and this one is so simple! 😀 Thank you for joining my 50 DIY Days of Christmas!

    Categories: 50 DIY Days