Sale! Ad space sale!

I thought October 24th would be the perfect day to share a new ad space sale! Yeah! Holiday sale: get 40% off all ad space! What? Yeeeah. How? Head to my sponsor page, pick out the ad you’d like, and fill out your info/use this code: 40October

Enjoy!

– Chelsey


Categories: Uncategorized


Day 1: Magical Unicorn/Narwhal Necklace!

Hello all,

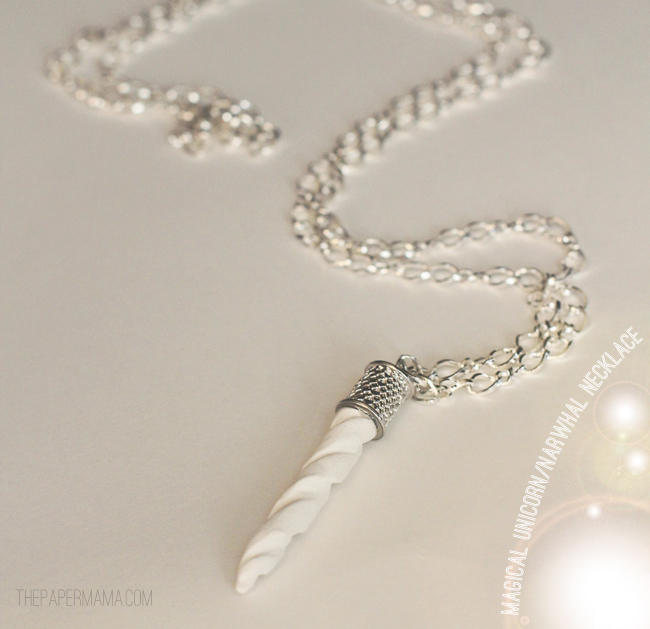
Welcome to Day 1 of the 50 DIY Days of Christmas. Whew! I’m excited. I’m going to kick this series off with a little DIY gift: the Magical Unicorn/Narwhal necklace! When asked, I tell people that my necklace is a Narwhal horn, but maybe you like Unicorns better? Well, then… it’s a unicorn horn. Hee!

Let’s get started with this easy gift…

Supplies needed:

  • – Polymer Clay: I used Kato Clay (known to be stronger than most oven-baked clays), but you can also use other brands you may find at your local craft store. I found my Kato Clay at an art supply shop (or, it can be purchased here).
  • – Toothpick
  • – Super strong epoxy that can glue both metal and clay (I used the Loctite brand).
  • – Bead cone/cap to cover the end of your horn.
  • Eyepin
  • – Necklace

Directions:
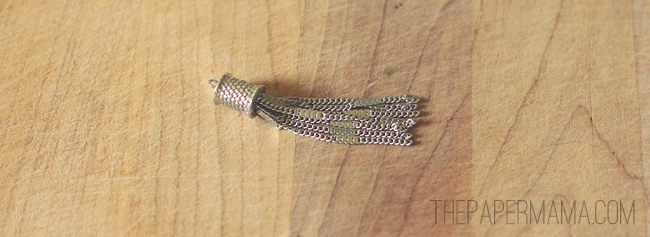
1. First, I wanted to note that I couldn’t find a bead cone/cap that I LOVED… so, I found an earring that had a cone that would be perfect. I just took out the extra chain that was attached (see the before below).

 2. Next up: the horn. Grab a small chunk of your polymer clay (I used about a 1/2 inch size ball) and roll out the clay to look like a stick. Test out the size with the bead cone (make sure it will fit).

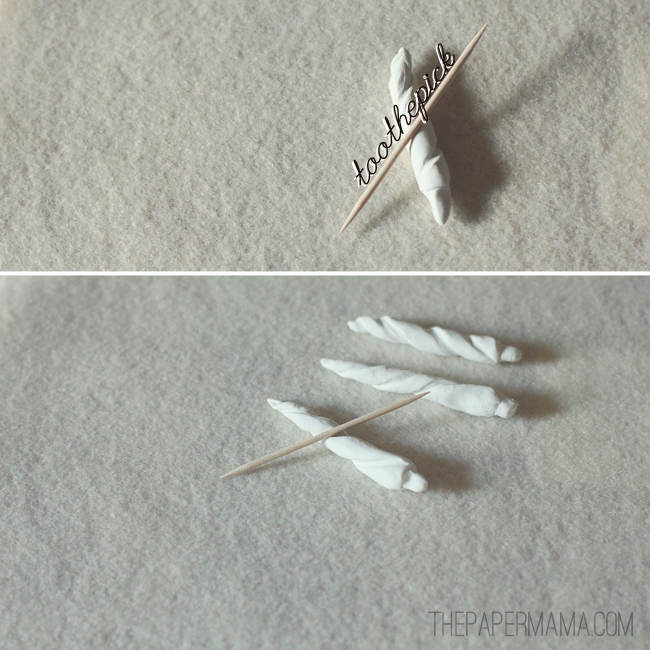
3. Once your happy with the size, time to add some ridges to the horn. Set your toothpick on the horn (at an angle) and roll the toothpick along the horn to create some ridges (see photo below). Smooth out any rough spots with your finger. At the base of your horn, make a little nub that fits inside the bead cone. The glue will need something to hold onto (see photo below).

4. Time to bake. Follow the baking directions of your clay.

5. When the horn is done baking, let’s glue it to the bead cone. First, make sure you have an eye pin set up in the bead cone (so you can hook it onto the necklace). Follow your epoxy directions, and glue the horn nub into the cone.

6. Let the glue cure (usually about 24 hours) and… You’re Done!

7. Attach to a necklace chain and give this gift to your favorite magical creature aficionado.

– Chelsey

Today is the 1st day of my 50 DIY Days, but if you’d like to keep up with all the posts… they will be here: 


Wordless{ish} Wednesday: Local love = Screen Door!

A couple of weekends ago, husband and I had a date night. We seriously never know where to go when we’re out these days (just a couple of old farts). We found ourselves driving towards the fried chicken… yes…. the restaurant I have wanted to try FOREVVVEEEEEER. This place is known for it’s fried chicken. Why haven’t I ever found my way over there? There’s no excuse. Really. The Screen Door. It did not disappoint. Not kidding: the best fried chicken I’ve had to date (and, I’ve had a lot). I was so happy. My little heaven. I wish I would have brought a better camera… that chicken needs to be photographed.

If you’re going to wander over there… Don’t go in groups larger than 2. If you do, you will be waiting for A LONG time. There’s always a wait. OR, just get some food to go. I love that chicken. I wish it was right here in front of me… right meow.

Do you have a favorite fried chicken spot? I need to know… I must try all the fried chicken of the woooorld!

Happy Wednesday!

– Chelsey

P.S. stay tuned for my first DIY for the 50 DIY Days of Christmas! It’s posting in a couple of hours! Weee!

 …………………………………………………………………………………………………………………………………………………………..

{If you have a Wordless{ish} Wednesday, please feel free to link it up below. And, feel free to link up to these blogs too… Parenting by DummiesProject AliciaJenni from the BlogBree: his honey and her mommy, and Live and Love Outloud.


50 DIY Days…. coming your way.

Alright, friends! It’s just about time…. This wednesday my 50 DIY Days of Christmas (for 2012) is starting! Whew! I (and, a few other lovely bloggers) have been working our buns off to get ready for this series! The goal: to have a new holiday inspired DIY Monday through Saturday. Each week (up until a couple days before Christmas).

Yeah… I’m going to make you start thinking of Christmas… in October. Ha! SO… get ready! I haven’t completely finished all the DIY’s… so, if there’s any DIY you’d reallllllyyyyy looooooove to see: let me know if the comments below!

Happy Monday!

– Chelsey

P.S. Thanks to Jess for making this 50 DIY Days logo for me! <3 And, here’s a link to last year’s 50 DIY Days.


The Paper Mama “Hands” Photo Challenge

All my photo challenges should be based around your children (pets are always welcome). 

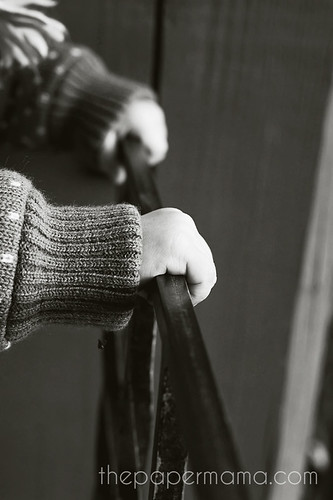
The challenge:  “Hands”

…………………………………………………………………………………………………………………………………………………
  • First time joining the Paper Mama photo challenge? Start here for rules and upcoming challenges.
  • My photo challenges do require you to have either your children or one of your furry children (pets) in the photo (unless it’s a self portrait week). It could be just one finger… or a toe… but, they must be there.

2010 winners . 2011 winners . 2012 winners .

Fall

…………………………………………………………………………………………………………………………………………………

Photo challenge buttons here:

Continue reading


Currently

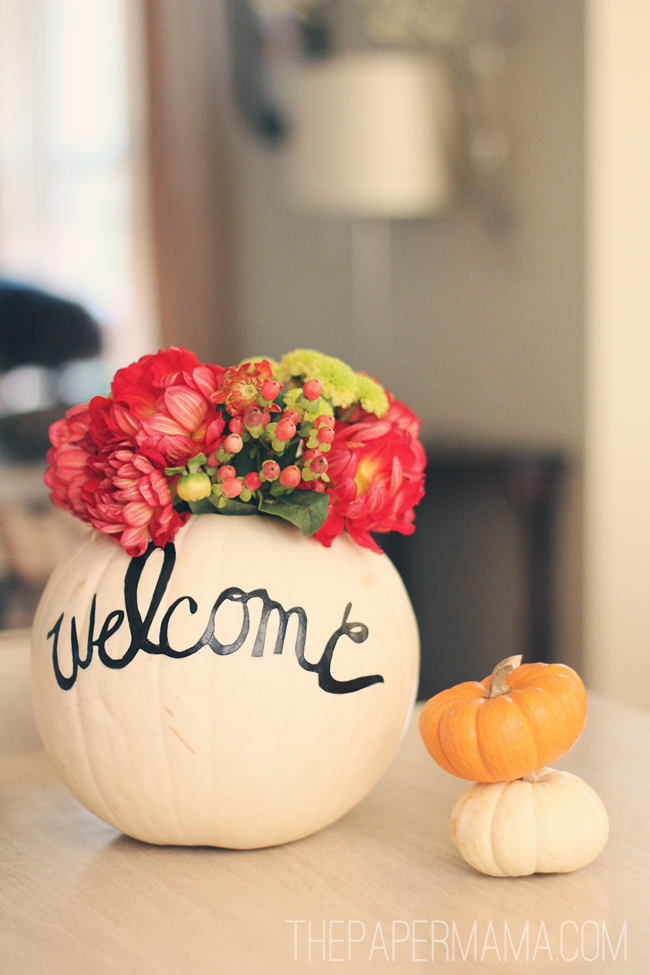
I have another new post over at Better Homes and Gardens! This week I’m sharing a free “Welcome” printable, to make your very own Welcome pumpkin. You can find it here. I love this pumpkin!

Obsessing over: Halloween candy. Ha! I don’t eat many sweets… but, when I bring those little bite-sized candies into my home: I can’t stop myself. Especially the Reese’s cups.

Working on: This year’s 50 DIY Days of Christmas! I did this last year, too. It’s been a ton of work and I am excited to share!

Thinking about: How grumpy my kid was tonight. It was a crazy meltdown. Whoa.

Anticipating: The weekend! We’re getting close to finishing our little fence. Weeee!

Listening to: Parks and Rec. Ha! Love this show.

Drinking: Wine. It’s like mama’s medicine for crazy toddler meltdowns.

Wishing: I had a reese’s peanut butter cup in my hand.


Just a couple links to share with you this week…. 

Headed to a baby shower? Cute DIY to show you how to turn onesies into cupcakes.

This little girl’s birthday party is so cute! I’m loving the braided hair gift favors!

PLUS, there’s one ticket left for my meet up! If you’ve been considering coming, there you go…

Happy Friday everyone!


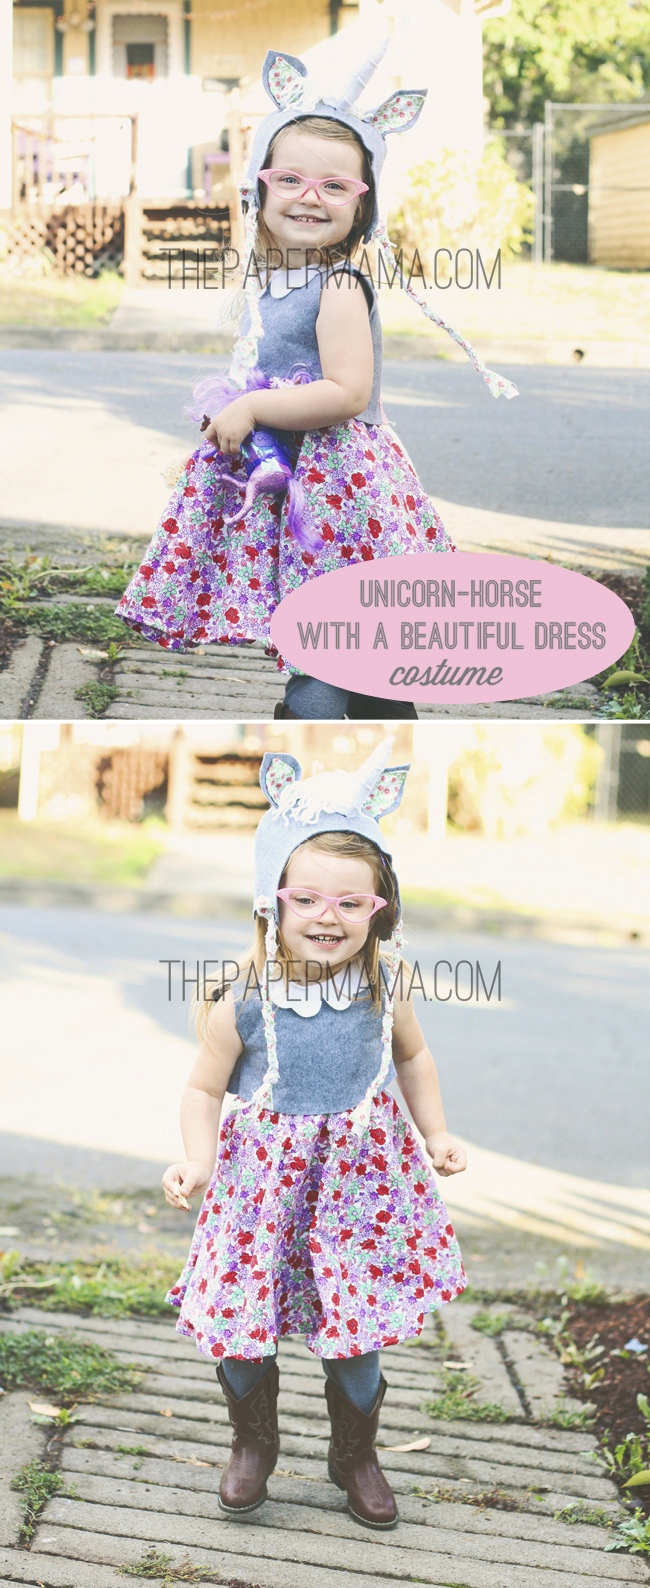
Halloween Costume: Unicorn Horse with a Beautiful Dress (and glasses)

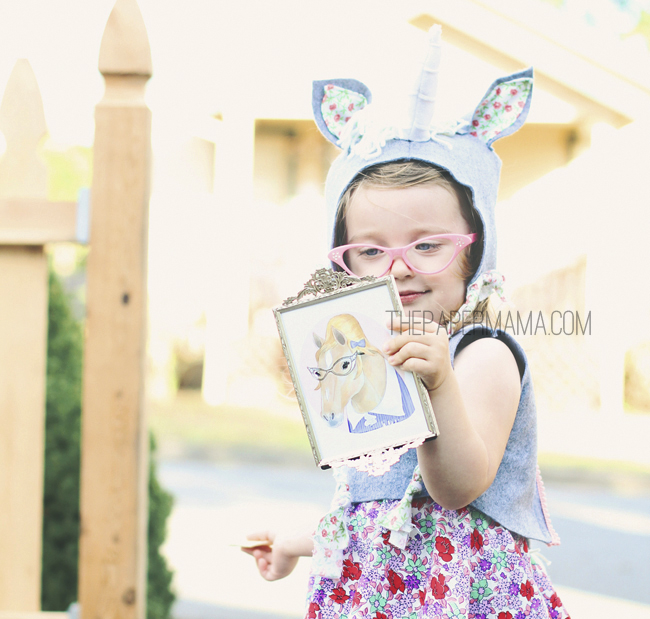
What? Yeah… that’s the costume my kiddo actually asked for. I’m 90% sure she was asking to be this (see below) illustration by, The Nearsighted Owl. SO, that’s what I made for her. She loves how it turned out. I wish I had gone with brown felt… instead of the grey. When I added the horn it looked like a rhinoceros. Whoops! But, I think the yarn hair helped. I think.
So, ok. I do not know how to sew. I’m learning, with the help of my mom and many tutorials (like this one, from Dana Made It). I would love to share how I made this circle skirt for R’s costume. It’s actually SOOoooooo much easier than you’d think. So much. Here’s how I did it:

What you need:

– About 1 yard of fabric

– About 1 yard of elastic

Directions:

Pattern and cutting:

– First, you’ll need to measure around your waist (or, wherever you’d like the top of the skirt to sit). The measurement should be snug, but not so tight you can’t breath. Take your measurement, and add 1 inch for the seam allowance.

– You need to figure your the waist radius, so you can draw your circle pattern. Thanks to the help, from Dana Made it, I have an easy equation for this: Radius = Waist length (plus 2 inches) divided by, 6.28.

– Time to draw your pattern. You’re going to draw a 1/4 of a doughnut (you’ll need a large piece of paper, or many small pieces taped together). In one corner, measure out your radius number you came up with. Keep moving the ruler and making little marks to create a small 1/4 circle of your radius measurement (see image). Then, connect the dotted measurements.

– How long do you want your skirt to be? I wanted R’s skirt just below her knees. Figure out your length, and add an extra inch or two (for seam allowance).

– With your ruler, measure another series of marks (based on your skirt length) starting from the first 1/4 waist circle measurement you made. Connect the dots.

– Cut out your pattern, you should now have a 1/4 of a doughnut.

– Time for the fabric! Fold you fabric into 4th’s. Lay your doughnut pattern onto your fabric (edge to edge). Mark it out, and cut!

– When it’s all cut out, you should have a doughnut! Weeee!

Sewing time:

– Finish of the top of your skirt (unless you don’t care about raw edges). I don’t have a serger, so I folded the edge over about 1/4 inch and stitched it.

– Time for the elastic. Take your waist sized elastic piece and sew it together. I did a double stitch to hold it together.

– Here’s the confusing part (for this newbie sewer): Time to start pinning and sewing the elastic. SO, find the middle of the back of your skirt. Pin the elastic to the skirt.

– Flip the skirt over and pin the middle of the front.

– Pin the right hip of the skirt, then the left hip of the skirt. You should now have the waist pinned into quarters.

– Noooow here’s the scary part (ok, maybe not scary… more difficult), it’s time to sew. Here’s what’s most important: you need to stretch the elastic while you sew. I’ve shared a photo of the elastic relaxed, and a photo of the elastic stretched taut. AND, since your stretching the elastic taut in the front, you’ll need to be pulling the fabric in the back. Depending on your taste, you can sew the elastic showing, or fold the fabric over it once and sew.

– Time to sew the bottom of the skirt. Fold over the edge a 1/4 – 1/2 inch and sew.

– That’s it! YOU now have an adorable skirt. Ruari loves it, because she can twirl around and dance in it.

Here’s a little tip I’ve learned… ummm, measure twice and cut once (as my mom always tells me). Ha! Yeeeah. I measured once and cut twice. Oopsie. I may have mixed up my measurement and made the waist too big. Luckily, that was fixed with a quick stitch up the back. The worst part: my mom could say, “See, I told you.” Damn. Ha!

I made the hat , horn, and the top too. I need to perfect the hat pattern before I share (it was too small, had to adjust), and for the top: I just measured a shirt, that fit her, on a paper to create a pattern. Added a cute little collar, and velcro to close it in the back.

Happy Halloween to you! What are you or your kiddo’s dressing up as for Halloween?
– Chelsey

P.S. Here’s where I found the child-sized cat eye glasses.

Categories: diy