Free Printable: Frozen Treat Drip Catcher

Frozen Treat Drip Catcher free printable // thepapermama.com

It’s that time of year. It’s time for my kiddo to ask me for some sort of frozen treat over and over and over and…. yeah. The whole treat thing would be fine, but frozen pops tend to drip everywhere and make a crazy mess. While I don’t like the mess from these frozen treats, I do need to celebrate bright side of life with the occasional yummy goody. I know there’s no way I can keep the kid completely clean while eating these treats, but I can try since life can be more fun with a bit of mess! My Frozen Treat Drip Catchers will catch a few of those drips before they hit the ground. They don’t have to be used only for frozen treats, any other food item on a stick would work with these. They’d be cute for party decoration! Right?

Supplies:

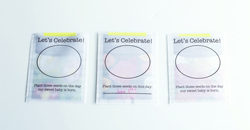
  • “YUM!” Frozen Treat Drip Catcher printable (top and bottom)
  • scissors
  • paper
  • printer
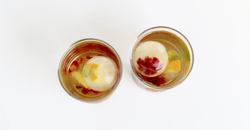
  • Fruttare Frozen Fruit Bars

Directions:

Step 1: 

Print out the Frozen Treat Drip Catcher printable. I’ve included a second printable so you can print these double sided, or you can just skip that step.

Step 2: 

Cut out the drip catcher shapes. In the center of each drip catcher you will see a light line. That’s the fruit bar stick line. Use your scissors to slit that line.

Frozen Treat Drip Catcher free printable // thepapermama.com

Step 3: 

There is a line under each “YUM!” word. Fold those lines up so when you’re eating the frozen bars you can see the word, “YUM!”

Step 4:

Push the frozen bar stick through the slit, then hand the treat over to some lucky person. Maybe that lucky person is you? Hee.

Frozen Treat Drip Catcher free printable // thepapermama.com

Also, how great do the bright orange Mango Fruttare bars look with my little drip catchers?  Mmmmm… those bars were so delicious and fruity. This box of bars didn’t last very long in the house… they’re gone. Smiles on our faces, Mango Fruttare bars in our bellies, and no drips on our shirts. Yay!

– Chelsey

I was selected for this opportunity as a member of Clever Girls Collective and the content and opinions expressed here are all my own.


Hello Blog Makeover!

The Paper Mama Blog

Have you noticed? Yup, The Paper Mama blog got a lovely makeover, thanks to the talent of Ryan and Nick from Roundhouse Designs. I’m so excited. It’s all up and running, but I have a lot to do on my end to get this new blog boat running smoothly.

1

Some new things for you to check out: I have these fantastic rotating category things in my side bar. I’ll change out some favorite posts from the past to feature there. If you click on the food, diy, or style links in the menu above there are a bunch of thumbnails you can explore. Looking for a home DIY? Or maybe some gifty food? Well, that’s the space for you. I still have a TON of organizing to do to make this blog run smoothly… my categories are sort of a crazy mess… but when I’m done it will be so nice!

I really hope you enjoy, and if you’re looking for a website makeover I completely recommend Roundhouse Designs!

– Chelsey


Alphabet Cookies Gift

Alphabet Cookies Gift // thepapermama.com

A couple weeks ago I made some really cute alphabet cookies for the HP Create blog. I don’t own any alphabet cookie cutters, I just printed out a really lovely alphabet and used a knife to cut these out. The cookies turned out great. These could be perfect for a gift for a baby shower, or a birthday! Just for fun I cut out letter’s to spell my kiddo’s name. Her birthday isn’t until December, but that doesn’t matter when you’re four and love all the cookies. She LOVED these.

Alphabet Cookies Gift // thepapermama.com

I have a free printable alphabet for you to use for your own alphabet cookies, just head on over to the HP Create blog. There’s a tutorial for follow if you need some help to create these yummy treats. Gluten-free side note: I made these cookies from the Pamela’s gluten-free sugar cookie mix… and they were delicious! Tasted just as good as any regular sugar cookie.

– Chelsey

I’m a paid contributor for the HP Create site.


Tiny Umbrella Drink Stirrers with Free Printable!

Drink Umbrella Stirrer with free printable // thepapermama.com

I love a cute drink stirrer and that’s why I made these Tiny Umbrella Drink Stirrers! They are perfect for your upcoming summer barbecues, or for any celebration. They could also be lovely for a bridal or baby shower. If you don’t want to make them into drink stirrers, the umbrellas would make cute cupcake toppers (just make the bamboo skewers shorter).

Drink Umbrella Stirrer with free printable // thepapermama.com

Want to make some for yourself? Well, below you’ll find my free printable and directions.

Supplies:

  • Umbrella Drink Stirrer printable
  • white card stock paper
  • bamboo skewers
  • hot glue
  • scissors
  • wire cutters
  • small hole punch
  • a yummy cool drink (like an iced Starbucks® Discoveries Iced Café Favorites™)

Directions:

Drink Umbrella Stirrer with free printable // thepapermama.com

Step 1:

Print out the Umbrella Drink Stirrer onto your white cardstock paper.

Drink Umbrella Stirrer with free printable // thepapermama.com

Step 2:

Use the scissors to cut out the umbrella shape outline.

Note: make sure you don’t cut off the glue tab, you need it.

Drink Umbrella Stirrer with free printable // thepapermama.com

Step 3:

Use a small hole punch to cut a hole in the center of each umbrella.

Drink Umbrella Stirrer with free printable // thepapermama.com

Step 4:

This next step could be optional: fold the umbrella on the dark lines (see image above). The umbrella is still super cute if you skip this, but I love how it looks when they’re folded.

Step 5:

Put a little dot of hot glue on the “glue tabs” and attach the glue tab to the bottom side of the umbrellas.

Drink Umbrella Stirrer with free printable // thepapermama.com

Step 6:

Push the flat side of the bamboo skewer through the hole-punched hole (make it stick out the top of the umbrella about a 1/4 of an inch). Flip the umbrella over so you can see the underside of the umbrella (the white side). Put a bit of hot glue on the skewer and the underside of the umbrella. Let the glue cool and pick away any hot glue strings.

Drink Umbrella Stirrer with free printable // thepapermama.com

Step 7:

Use the wire cutters to trim the umbrella drink stirrers to your desired length. Decorate your favorite drinks with this cute little umbrella! I just poured a Starbucks® Discoveries Iced Café Favorites™ – Caramel Macchiato over some ice for my cool drink. Yum.

Drink Umbrella Stirrer with free printable // thepapermama.com

Drink Umbrella Stirrer with free printable // thepapermama.com

Come back in a few days and I will have a yummy Starbucks Discoveries Milkshake Recipe for you. Something yummy for the warm weather and your little umbrellas.

Drink Umbrella Stirrer GIF // thepapermama.com

– Chelsey

Disclosure: This post is sponsored by Starbucks Coffee Company. All opinions are my own.


$5 Macrame Plant Hanger!

$5 Macrame Plant Hanger

Hellloooo! Today on the Better Homes and Gardens blog I’m sharing how to make your own Macrame Plant Holder. This little thing will cost less than $5 to make. Cute for your home or as a gift. Wedding coming up? These would make cute favors. How cute would it be to hang a few macrame plant hangers in your window with some herbs? Yeah. Let’s make 500. If you want to make your own, you can check out the full tutorial right heeeyerre.

$5 Macrame Plant Hanger

– Chelsey

I am a paid contributor for the Better Homes and Gardens blog.

Tags: , ,

Categories: BHG, diy, For The Outdoors


Are you in Portland? Join us for the Cricut Explore DIY Workshop!

Cricut Explore + Craft Workshop

Hello Portland friends! Do you love paper AND the Cricut? I do. I am SO excited about this little Cricut Explore DIY Workshop we have coming up on May 31st in Portland! My friends Lia from the Lia Griffith blog, Leigh Anne Wilkes from Your Home Based Mom, Kim Demmon from Today’s Creative Blog, and I will be sharing some fun crafting time with a few lucky people.  

The event is free to attend and one person will win a Cricut! Yup! Seriously, check out the Eventbrite page and I hope you can make it. Space is filling up fast (cause awesome + free)… so if you can go… sign up now.

– Chelsey

Tags:

Categories: announcement


Good Idea: Salt Dispenser Jar

Salt Dispenser Jar // thepapermama.com

The husband and I have a few kitchen organizing plans for the VERY near future and it’s going to make a few of our everyday cupboard items a little more visible, so I want to make them pretty. That’s why I made my glass salt dispenser jar. I saw an idea similar to this FORever ago on Pinterest. I finally tried it out and I love it. I think I will have to make another for our sugar and maybe polenta (using the salt dispenser spouts). The sugar dispenser would be awesome… I always make a mess with that.

Supplies: 

  • Salt container (with the metal spout)
  • Glass mason jar
  • Mason jar ring
  • Scissors
  • Pen

Directions:

Salt Dispenser Jar // thepapermama.com

– Empty the salt container contents into your jar. Cut out the cardboard around the metal spout from the box. Place the jar ring on the spout cardboard and trace with your pen.

Salt Dispenser Jar // thepapermama.com

– Cut out the line you traced. Push the cardboard and spout into the jar ring.

Salt Dispenser Jar // thepapermama.com

Salt Dispenser Jar // thepapermama.com

Put the lid on the jar and you’re done! Now you have a cute little salt dispenser. Much cuter than the box. If you want, you can always paint the word “salt” onto the jar.

– Chelsey