Our Growing Baby Chicks

Growing Baby Chicks // thepapermama.com

It’s been over a month since our chick eggs have hatched. Our little chicks have grown from sweet little puffs to super awkward preteens. After these little birds hatched out of their eggs, I decided I wanted to take weekly photos of them. I’ve done this for the first 4 weeks and it’s amazing to see how much chicks grow in just the first month. Just check out the photos below. Just in case I have a chicken nerd reading, here are the breeds I think I have here (all mixes): The two yellow babes are Serama/Bantam Frizzle Cochin mix, a couple are Ameraucana/Leghorn Mix, and the last two are Maran mixes. I’m unsure which eggs the four big ones are (since it was hard to tell as they were hatching). I guess we will find out as they lay eggs.

Growing Baby Chicks // thepapermama.com

Growing Baby Chicks // thepapermama.com

Growing Baby Chicks // thepapermama.com

Growing Baby Chicks // thepapermama.com

Growing Baby Chicks // thepapermama.com

Growing Baby Chicks // thepapermama.com

Isn’t that neat? Is my nerd showing? We still aren’t 100% sure which ones are roosters, but I have a strong feeling that the dark black chicken and brown chicken are boys. Which means they will have to go. I don’t think we will really know for sure until they start crowing or their comb (the red on their heads) grows like crazy. Ha! It’s really been a fun adventure for me and the kiddo.

I think I will continue with taking the chick photos, but maybe every 2 weeks instead.

– Chelsey


Fun Gardening Experiment: How To Propagate Succulents from Leaves

How To Propagate Succulents from Leaves // thepapermama.com

A couple of months ago I was working on this project for La Crema. It’s a very sweet mini succulent wreath. While I was putting this little guy together, quite a few succulent leaves fell off their host. I had once read if you pop the end of the succulent leaf into a bit of dirt, then it would sprout roots! I was very interested to try this, but I hadn’t tried it until recently.

How To Propagate Succulents from Leaves // thepapermama.com

How To Propagate Succulents // thepapermama.com

So I tried it… and guess what? It worked. It’s hard to tell in the photo above, but all those plants have roots (and a couple went crazy and took over). This is so perfect since I need a ton of succulents for an upcoming project. I gathered these succulents from all over (even from my neighbors yard, with permission).

Want to try it for your self? Well, here are some tips for you to make this at home:

-To start, pull (or carefully cut) off a few leaves from some favorite succulent plants. If the leaves are super small, just cut a little section (a stem with multiple leaves) off. Set those leaves and cuts aside to dry for a couple of days. If you put it in the dirt too soon, it can absorb too much water and die.

– There are a couple of ways to get your little leaves to start growing. One way is to place them on top of the dirt and gently water them with a spray bottle every few days. Another way is to actually push the end of the succulent leaf into the dirt and water every few days (don’t over water). I had started with just popping the ends into the dirt, then a couple types of succulents died fairly quickly. When I tried them again on top of the dirt, the roots started. You can also try using Rooting Hormones to encourage root growth.

– Succulents are a bit sensitive to extreme weather change. SO, if you plan on keeping these future plants indoors, keep your propagating plants inside. If this will be an outdoor arrangement, propagate the little leaves outside. Just watch for rainy days (we had a rain storm come by a month ago and flood out my poor plants).

– It took some time, but after a couple of months we had some good roots and only a small bit of the cuts died. I’m transferring then to individual planters and setting them aside to grow a big more until in ready to start my big project. Yay!

Maybe I can also make a couple more of these mini succulent wreaths (if you need the wreath DIY, it’s right here)? They are lovely.

Mini Succulent Wreath // thepapermama.com

Have you ever tried propagating succulents?

– Chelsey

Save

Save

Save


Banana Ice Cream Recipe: 3 Ways

Banana Ice Cream 3 Ways // thepapermama.com

I have heard about people making banana ice cream, but I’ve never actually tried it until now. I mean… I will admit that I do not like the taste of bananas… at all, but I have a kid that eats them everyday. So I decided to give this ice cream experiment a try. It turned out awesome. Even though I don’t like the taste of bananas, this was good! I ate some and my daughter devoured it like it was real ice cream. My husband loved it too.

If you have some overripe bananas, this ice cream trick is for you. Below I’ve shared the 3 different recipes I tried. It’s so simple. The best thing about this recipe is my daughter thinks she is actually eating ice cream! Ha! This mom wins!

Banana Ice Cream 3 Ways // thepapermama.com

Cocoa Cinnamon Banana “Ice Cream” 

Ingredients:

2 bananas, cut into coins and freeze (separated and not touching) on a plate in the freezer for 2 hours

1 teaspoon of unsweetened cocoa

1/2 teaspoon of vanilla extract

1/2 teaspoons of cinnamon

optional: a pinch of sea salt

Peanut Butter Banana “Ice Cream” 

Ingredients:

2 bananas, cut into coins and freeze (separated and not touching) on a plate in the freezer for 2 hours

3 tablespoons of peanut butter

optional: a pinch of sea salt

Strawberry Banana “Ice Cream” 

Ingredients:

2 bananas, cut into coins and freeze (separated and not touching) on a plate in the freezer for 2 hours

8 – 10 frozen strawberries

optional: 1 tablespoon of honey (use this if your strawberries are tart)

Directions for all the recipes:

– Place all the ingredients in a food processor. Blend until all the bananas and ingredients are blended and smooth like soft serve.

Note: you really do need a food processor for this recipe. You can use a blender, but it just won’t come out with that smooth ice cream texture.

– Place each Banana ice cream into a separate container and freezer for about 2 hours.

Banana Ice Cream 3 Ways // thepapermama.com

Seriously give this a try. My kiddo lived the strawberry best, while my husband preferred the peanut butter. I’m always a cocoa girl… So that was my favorite (especially with the little hint of cinnamon). If you try this, let me know. So good.

– Chelsey

P.S. I’ve seen these recipes all over the web, but I loved the combos I found on The Kitchn


What’s up with me these days?

Serama and Frizzle Cochin Chicken // thepapermama.com

What’s up with me these days? Just moving along with life and working….

– My kiddo has finished preschool for now and we are just about to start our summer.

– The baby chicks we raised from eggs are turning 5 weeks old today and tomorrow. 90% sure we have at least 3 roosters out of the bunch, which means they have to go… no roosters in the city. I’ve been taking weekly photos of those babies since they hatched. It’s crazy to see how fast they’ve grown. I will be sharing those photos soon. They are so neat.

– I ALWAYS have fun projects going on over at the HP Blog.

– Thinking about what to make or get form the husband for Father’s day… maybe a repeat of last year’s gift? See below:

Beer Cake

– I completely forgot about this recipe… until my Friend Mal reminded me about how tasty it was. Chocolate Caramel Crack-ers. They are addictive.

– I’m also working on a project with Home Depot (so exciting), so I hope to be sharing that soon. It involves a super neat door and a lot of paint and wood.

– I’m giving away another Polaroid camera over herrreee.

– I just finished watching the last episode of Game of Thrones for this week… OMG. That show is crazy and I can’t stop watching it. So great. Do you watch?

That’s about it over here! Are you ready for summer?

– Chelsey

Tags: ,

Categories: about me, paper mama farm


Craft Time with Friends, a Yummy Coffee Milkshake Recipe, and a GIVEAWAY!

Craft Time with Friends, a Yummy Coffee Milkshake Recipe // thepapermama.com

Craft Time with Friends, a Yummy Coffee Milkshake Recipe // thepapermama.com

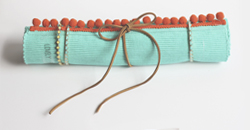
I love a good craft party. I recently invited my friends over to paint some wood beads and make necklaces. It turned out to be such a lovely day! Crafting with friends is one of my favorite ways to spend a Sunday afternoon. For this party I bought a bunch of wood beads from Collage (a local Portland craft stop), lots of colorful acrylic paint, and bakers twine for the necklace part. I provided a ton of paintbrushes and they went to town.

Craft Time with Friends, a Yummy Coffee Milkshake Recipe // thepapermama.com

Craft Time with Friends, a Yummy Coffee Milkshake Recipe // thepapermama.com

Craft Time with Friends, a Yummy Coffee Milkshake Recipe // thepapermama.com

Craft Time with Friends, a Yummy Coffee Milkshake Recipe // thepapermama.com

Craft Time with Friends, a Yummy Coffee Milkshake Recipe // thepapermama.com

Craft Time with Friends, a Yummy Coffee Milkshake Recipe // thepapermama.com

It was fun! We ate some lunch and had some yummy milkshakes for dessert (just in case you’re curious, I shared the milkshake recipe below). As a thank you to my friends for coming to play, I gave them each a little goody bag. They had three Starbucks Discoveries Iced Café Favorites™ coupons, pretty nail stickers (those things are so awesome), poppy seeds, a pin from my shop, and some caramel from Rose City Sweets.

Craft Time with Friends, a Yummy Coffee Milkshake Recipe // thepapermama.com

If you want to make your own coffee milkshake for the warm weather check out the recipes below. In addition to the milkshake, we also made our own whip cream. It’s not really needed, but I recommend trying it out (yum).

Craft Time with Friends, a Yummy Coffee Milkshake Recipe // thepapermama.com

Coffee Milkshake Recipe made with Starbucks® Discoveries Iced Café Favorites™

Ingredients:

Directions for Milkshake:

– Blend ingredients in a blender or stand mixer just until it’s all blended. Don’t blend for too long or the ice cream will melt.

– Optional: it does help to put the milkshake in the freezer for about five minutes before serving.

Craft Time with Friends, a Yummy Coffee Milkshake Recipe // thepapermama.com

Coffee Whip Cream made with Starbucks® Discoveries Iced Café Favorites™

Ingredients:

  • 1/2 cup whipping cream
  • 1/4 cup Starbucks® Discoveries Iced Café Favorites™ – Caramel Macchiato
  • 1 1/2 tsp milk powder (this helps stabilize the whip cream)
  • 1 tiny pinch of salt
  • Optional: chocolate syrup

Directions for whip cream:

– Put all the ingredients in a stand mixer.

– Blend on medium to high speed. Blend until the whip cream has stiff peaks. Your whip cream is done here, or you can keep it in the freezer for a few minutes while you make the milkshake (see next step).

– Optional: place the whip cream in a plastic bag and seal. Put the bag in the freezer for about 10 minutes. When you’re ready for the whip cream, cut the tip off one of the plastic bag corners. Squeeze the coffee whip onto the milkshake and maybe top that off with chocolate syrup!

GIVEAWAY:

Want to win some goodies? Ok! One lucky winner will win 3 complimentary Starbucks Discoveries Iced Café Favorites™ coupons AND (cause you guys went crazy for this prize last time) a Polaroid z2300. Yup. To enter, check out the Rafflecopter entry options below:

a Rafflecopter giveaway
Craft Time with Friends, a Yummy Coffee Milkshake Recipe // thepapermama.com

Do you do any crafting parties with your buddies?

– Chelsey

Disclosure: This post is sponsored by Starbucks Coffee Company. All opinions are my own. 

Giveaway Rules: No purchase necessary to participate or win. Void where prohibited by law. Open to legal US residents eighteen (18) years of age or order, except employees and the families of Bellalimento.com (“Sponsor”) or any company or agency responsible for the sweepstakes or any prize provided (“Sweepstakes Participants”). Enter by posting comment on the Site and filling out the Rafflecopter entry form May 30th, 2014 – June 13th, 2014. A winner will be selected at random from all eligible entries. The prize is 3 Starbucks Discoveries coupons and one Polaroid z2300. One entry per person, per email address. All determinations by Sponsor are final. Winners will be notified by email and must respond within 48 hours or another winner may be chosen. Odds of winning depend on number of eligible entries received. No cash substitutions for prizes and prizes are non-refundable and non-transferable except at sole discretion of Sponsor who reserves the right to substitute a prize of equal or greater value. Entrant’s name and entry may be used for promotional purposes without additional compensation unless prohibited by law. Winners release Sweepstakes Participants from all claims and damages associated with the Sweepstakes and use of the prize. Subject to all federal, state and local laws. Winner is responsible for any taxes on prize.


10 Outdoor Organization DIY’s on the Better Homes and Gardens Blog!

10 Outdoor Organization DIY

If you wander over to the Better Homes and Gardens blog today… you’ll find a few of my favorite Outdoor Organization DIY’s. I always say this, but my home is lacking any sort of storage space (inside and out). I’m hoping these DIY’s will help my hubs and I make our outdoor living space more comfortable and inviting. Head on over here and check out these awesome creations.

– Chelsey

P.S. The DIY’s from the first image are from: DIY Del RayA Cultivated NestAshbee Design, and Sand and Sisal. I’m a paid contributor on the Better Homes and Gardens Blog. 

Tags:

Categories: favorite blogs


Free Printable: Succulent Gift Tags!

Succulent Gift Tag Printable // thepapermama.com

Recently I made a really neat Mini Succulent Wreath for La Crema (full DIY here). It works perfectly as a little wine bottle decoration. It’s like a 2-in-1 gift: a bottle of tasty wine to drink and a mini succulent wreath to hang on the wall. I have to say, this wreath is up there as one of my favorite projects. I didn’t actually give if to anyone… since I love it so much. It’s now hanging on the wall by my front door.

Succulent Gift Tag Printable // thepapermama.com

To compliment this wreath DIY, I made these Succulent gift tags. It’s perfect for this wine bottle + mini wreath gift, or you can use the tags for whatever gift you’d like. Tie it onto a little planter and give to a friend. Perfect.

Supplies:

Directions:

Succulent Gift Tag Printable // thepapermama.com

– Print out the lovely gift tag printable I provided.

– Cut out the tags and punch a hole on the dot on the tag.

– String the ribbon through the hole and tie this cute tag on a cute gift! If you’d like to make the mini gift tags

If you have a moment, wander over to the wreath DIY. It looks like it’s hard to make, but really it’s pretty darn easy. I think I spent about an hour assembling it.

Succulent Gift Tag Printable // thepapermama.com

Enjoy!

– Chelsey