50 DIY Days with Acute Designs: Paper Snowflake Garland

Day 41: I got this simple and cute idea from Pinterest.  Where else?  Garlands are an easy and fun way to spruce up your space for any holiday.For this garland, I went with snowflakes.  They are super easy {I am pretty sure we all made them in kindergarten} and are a fun “in front of the tv” project.Supplies Needed:-paper for snowflakes-scissors-tape-string, twine, or yarn1. Cute several snowflakes – I used silver and blue paper and make about 15…mine were done in various sizes.


Take a square piece of paper and fold in half to make a triangle.  Fold the triangle in half again and then bring each side to the center.  Cut off the bottom edge so you have a small folded triangle.  Make several cuts in the triangle and open – each one will be different!
2. Cut a piece of string, twine, or yarn that is about 10 feet long and pull the string through each snowflake.  If you are particular {like I am } you can line the snowflakes up first in the order you wish for them to appear on the string.


3. You might need to use a few small piece of tape to secure certain snowflakes so that they don’t slide around.4. At the end of the string, tie a knot to hold the last piece in place and hang.  I don’t have a mantle {which would be perfect for this craft} so I hung my garland about the windows in the dining room. 


It is so cute and festive and can stay up through the winter season – I love it!  
Have fun decorating for the holidays ~ xo, Gina {AcuteDesigns}
………………………………………………..
Thank you SO much to Gina from Acute Designs! What a LOVELY guest post. Thank you for joining my 50 DIY Days of Christmas!

Categories: 50 DIY Days


50 DIY Days with Oh Dear Drea: Christmas Tree Felt Garland

Day 40: Day The easiest Christmas felt garland to ever exist. step one. draw a christmas tree stencil (as big or as small as you’d like). pin on felt. 

P1250369

step two. cut. cut as many or as little as you’d like.

P1250370

step three. with embroidery needle and floss (or thin yarn, or even sewing thread) sew through the tops of all the trees. 

P1250365

step four. cut strings, long enough to tie.

P1250368

step five. tie to yarn and hang.


uh yeah, that’s it! easy right? Totally a simple, dainty, and pretty way to decorate.

P1250388

Of course, you can trim up the ties a bit too… or add other items. I added hearts, cause, you know… they are cute and of course: easy. Happy decorating! 

………………………………………………..
Thank you SO much to Drea from Oh Dear Drea! What a LOVELY guest post. I LOVE that garland! Thank you for joining my 50 DIY Days of Christmas!

Categories: 50 DIY Days


50 DIY Days from Roofresh: Pinwheel Christmas Tree Topper

Day 38: I’m Kelsey and my little blog is Roofresh. I love crafting, especially with paper! I decided to do a DIY pinwheel tree topper because I like how versatile it is. You can make your tree whatever color-scheme you want and make a ton of little baby-sized pinwheels to set on the tree branches (which is great for little kids that have a hard time hanging ornaments). My favorite is using book pages for pinwheels, but I’ve done an assortment today that have a bit of a retro feel, because, why not?!
Start by picking some scrapbook paper that is double sided. I use 12×12 paper to make a nice big pinwheel that makes a statement, but obviously, choose whatever size you want. The 12×12 is nice because you don’t have to trim it down and mess with making a perfect square
Use a ruler and X-acto knife to cut diagonally down each corner towards the center. I cut six inches down for the 12×12, but you might need to practice the right cuts on a piece of paper that you don’t care very much about. I like using a grafted pad underneath so that I can line my ruler up with it and make sure that I have a straight line. 
Using a paper-hole punch or a book drill like the one shown, punch holes in the top corner of all four opposing corners and one in the middle.
Pull together all four corners towards the center to create the shape of the pinwheel.
Use a grommet to secure the center.
Use some craft wire to thread a button of your choice and twist the wire to keep the button in place. String the rest of the wire through the center of the grommet and thread only one piece of the wire through a pea-sized bead on the other side of the pinwheel. Tie both ends of the wire together on the back side of the bead. This is to make sure that the wire does not slide back through the grommet what the pinwheel is waiting to be hung. Make sure that you have enough slack on the wire to tie around the top branch of the tree. 
There you have it! A fun crafty tree-topper that you can make to your liking!

………………………………………………..

Thank you SO much to Kelsey from Roofresh! What a LOVELY guest post. Thank you for joining my 50 DIY Days of Christmas!

Categories: 50 DIY Days


50 DIY Days with A Good Life: Rice Filled Heating Pad gift!

Day 35: hey friends!  i’m amy from a good life.  i’m super excited chelsey asked me to be a part of her 50 days of DIY christmas because it actually gave me the motivation to start & finish one of my christmas projects early!  that in itself?  christmas miracle.anywho, i’m not really what you would call an advanced sewer/crafter/DIY-er so i picked something a novice like myself could handle.  i had a blast doing it & you will too! 

if you read my blog, then you may or may not know that i have a fabric buying obsession.  which is weird because i’ve sewn about two things in my entire life.  but buying fabric?  i’m totally addicted.  so that’s why step number one was my favorite. 

how could you not be addicted to buying fabric?  so many cute things, so little time.  you’ll need about 1/4 yard of each fabric.after washing & drying & ironing your fabric, proceed to step two.

of course this pattern isn’t set in stone, but i cut my pieces out 6″x18″.  seemed reasonable. 

self explanatory, yes?  just remember to leave a little hole open so you can fill it up with rice & lavender.    in fact, that’s the next step.  fill it up with rice & lavender.  i used about three cups of rice & two tablespoons of lavender… if i remember correctly.  oops.  just remember to only fill it about half full so there’s enough room to sew up the mid & quarter sections.  and you can put in as much lavender as your little heart desires.  you are the boss of you. 

after you’re all filled up with rice & smell-good lavender, go back & sew up the hole.  i am no expert so i just tucked in the edges & sewed over the top of it.  if you are a master sewer, you can do something like a ghost stitch {is that what it’s called?} to hide the hole.  i’m not that advanced.next you have to divide up the rice into half on one side, half on the other & sew down the middle of the pad, carefully moving the rice out of the way so you don’t break any needles.  i may have broken two.repeat this process to make quarters. 

when finished {pad on far right is completely finished}, you can just throw it in the microwave for 3 minutes or so & take it out for a cozy snuggly pad that will keep you warm & happy for a long time.  or? throw it in the freezer to use as an ice pack.  whatever suits your fancy.these are so fun to make & make such fun little stocking stuffers that i went out & bought a second round of fabric to gift them to even more friends!  you should too.happy holidays! 

{ps:  this project was inspired by this post.  thank you pinterest for helping me find it!}

………………………………………………..
Thank you SO much to Amy from A Good Life! What a LOVELY guest post. Thank you for joining my 50 DIY Days of Christmas!

Categories: 50 DIY Days, diy


50 DIY Days with Twenty Five Designs: Striped Vase Tutorial

Day 35: Spray Painted Striped Vase

Hey there! My name is Torie and you can usually find me hanging out at Twenty Five Design Blog talking about my crazy 2 year old, and sporting a baby bump all while trying to keep fashionable. That’s a hard thing to do when you are pregnant!
I originally saw these vases on Pinterest and thought they would be a pretty center piece for the holidays. They actually were really easy to do and look so pretty in the evening.
What you will need:
– A glass vase. (you can do as many as you’d like. These were left over from our wedding and just sitting in the garage.)
– Twine, string or yarn. The thickness depends on what type of look you are going for.
– Scotch tape.
– White spray paint.
– Scissors
Optional:
-Coffee beans for filler
-Tea lights (or any kind of candle will do)
The first thing you will do is make sure your glass is clean. After that you want to flip your vase over and tape down one end of your twine. The picture shows the tape in the middle, but I found that putting it closer to the edge works better (where the arrow is pointing).
Now you want to wrap your vase very tightly with the twine/string. Trust me, keep it tight other wise it will fall off. You don’t have to make it perfect either. Play around with it until you get your desired look and then tape the other end to the bottom.
Next, take you vase outside and place it on an old newspaper.
This next step will depend on what type of look you are going for with your paint. You can spray it very sheer or apply it heavy. I would suggest heavier but not to where you can’t see through the glass at all–just enough to wear you will see a bit of the candle light peaking through.
Let that dry completely. Then you will take the tape off of the bottom and remove your twine.
You can either put a candle inside or follow the next couple of steps for something different.
It was hard to find at the store, but I got a pack of whole (not ground) coffee beans and filled my vases about 1/4 of the way each.
Then I placed a tea light inside.
Make sure you use a long match or lighter to light your candles. They are hard to get to other wise.
And now you have a beautiful new center piece for very little cost. You can add garland, stones or any other embellishment to go around the outside of your vases. I will be spray painting some more coffee beans and scattering them around the plate that the vases are on.
………………………………………………..
Thank you SO much to Torie from Twenty Five Designs! Those are perfect for a sweet Christmas table centerpiece! 😀 Thank you for joining my 50 DIY Days of Christmas!

Categories: 50 DIY Days


Cute custom ornaments!

There was an artist I met at the event I went to last weekend in Washington. She just had a tiny little booth… covered in ornaments…. and paint markers. Turns out she would create a custom ornament for you… for pretty cheap. The small ornaments were $10 each. I had a little ornament created of Mr. Angus in his Christmas sweater (see above). AND…. since I know Mike’s parents don’t read my blog (not really computer people)… we also got them an ornament of their pup: Llewe! I love them. Ruari loves them too!!!

Here’s her eBay shop if you want to see her work. If you’d like to order something you can email her here: sullivan_artist {at} hotmail {dot} com

AND… it’s almost Christmas! Yay! That means: don’t forget to enter your holiday photo into my freakin awesome Holiday Photo Challenge! What? Yes!

signature

Categories: Uncategorized


50 DIY Days with Yellow Finch Designs: Decorating on a Budget

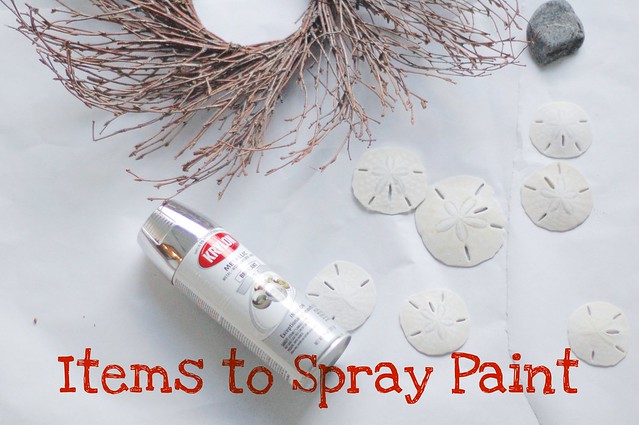
Day 32: Hello Paper Mama readers! I’m Liz from Yellow Finch Designs Blog and I’m SO excited to share some decorating tips with you today. There are so many amazing crafters out there so I thought I could talk a bit about decorating on a budget.Every year I like to switch things up and decorate a little differently from the previous year. The easiest way to stick to your budget is to turn to nature, make a quick stop at the craft store and gather some thrifted items. Here in Ohio we have an abundance of evergreens so I decided to use this as my main piece for decorating. I also gathered pine cones and dug out an old box of sand dollars. To jazz up some of these pieces I decided a little spray paint would do the trick. I like to stick with just a couple colors so I choose red and silver. 

decorate5You’ll notice on my blog that I have a passion for words so I wanted to add some holiday cheer with simple words. I thought JOY and PEACE would do the trick. 
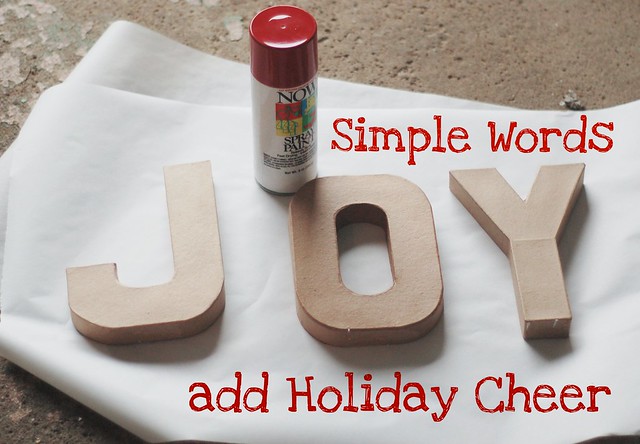
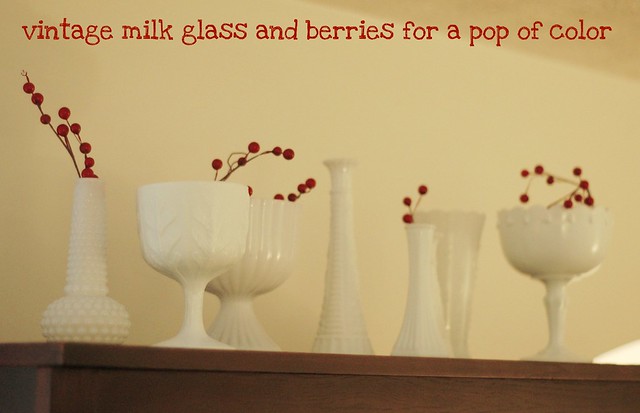
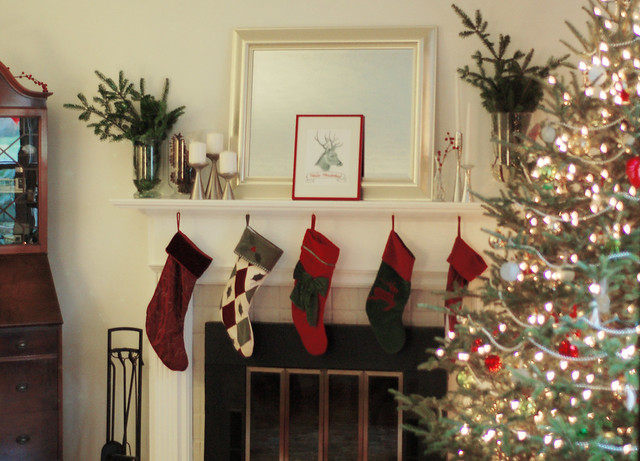
JOYOnce the items are dry it’s time to get to work. I gathered old clear vases, vintage milk glass and clear bottles and arranged them throughout the house. I always like to focus on my living room because we have a large mantel that is the focal point of the room. Once my containers were set up I added my evergreens and pine cones. To get some color involved I used an inexpensive garland of berries that I cut and placed here and there. I wrapped the remaining garland around the iron banister on the stairs. 
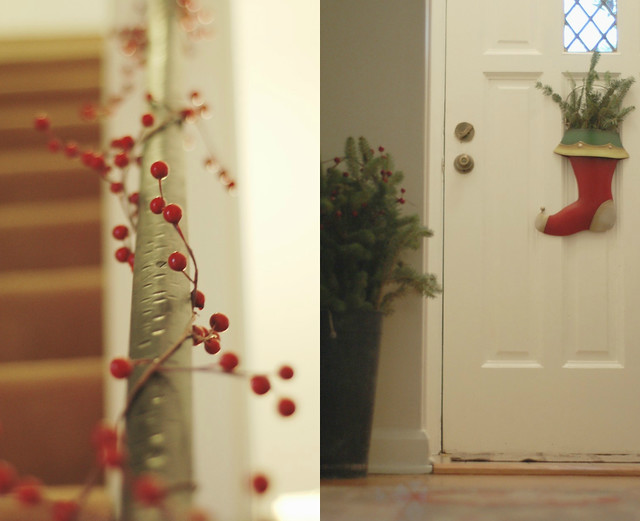
Picnik collagedecorate9decorate4decorate3decorate2More tips for Holiday decorating:1. Choose two or three colors for your holiday palette. If you incorporate too many colors it may seem busy. This year I choose very neutral colors, but it would be fun to add some bold turquoise or lime green with silver, white or gold.2. When arranging items group them into odd numbers. For example, three candle holders or five small vintage vases.3. Use this time to rearrange for a fresh feel in your home. In order to set up our tree I have to move some furniture. I always love the new look and tend to appreciate my home even more during the holidays.4. Get creative. Use branches, leaves, pine cones, shells, ribbon, paper, garland, candles, material and anything else you can think of. And remember, you can change the look of anything with a little spray paint.5. Express yourself and have fun! I love decorating for the holidays because it’s fun and it’s a great way to involve my family. I like to add a little something to each room and I let the kids use their imagination when it comes to their rooms and their tree. 

decorate

I love this holiday print I picked from a local artistThe Canton Box Company.
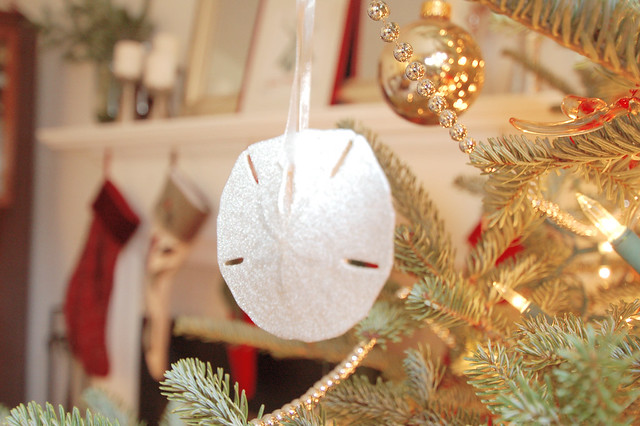
decorateHave fun friends and get decorating!I would love to hear or see how your home turns out this holiday season.Thanks Chelsey for having me on The Paper Mama.

………………………………………………..
Thank you SO much to Elizabeth from Yellow Finch Designs! What a LOVELY guest post. I love your DIY decor! 😀 Thank you for joining my 50 DIY Days of Christmas!

Categories: 50 DIY Days