Day 28: Mod Wood DIY Advent Calendar!

DIY Advent Calendar // thepapermama.com

Day 7 of my 50 DIY Days of Christmas: Mod Wood DIY Advent Calendar, from the super lovely Regina of Acute Designs! Today’s guest DIY-er brought you this fantastic Modern Advent Calendar. I LOVE it. It’s only December 3rd, so you still have time to create this lovely calendar to count down the remaining days till Christmas! Plus, you can use it year after year, enjoy!:

When I was a child, we had a felt Christmas tree advent calendar that my grandma had made for us. Every day in December, I would race down to the tree (had to beat my brother and sister) and hang a new ornament on the felt tree.  By December 25th the tree was full.  I have such fond memories of this simple advent calendar and decide to make something similar this year.

A felt tree is a great idea, but I wanted to make something that was more my style.  Plus, I will never be able to sew like my grandma, so I chose a super simple wood diy.

Supplies ~

-One 36″ x 24″ piece of wood.  I chose the most inexpensive option Lowe’s.  It was about $8. You can easily choose something larger or smaller to fit your space.

-Paint.  Use any color you love! I used the emerald Pantone color from Lowe’s for the tree and gold for the trunk.

-Small nails (to hang the ornaments) and thumb tacks or glue to secure the paper bags.

-25 small ornaments.  I chose to create ornaments in Photoshop (free printable below!) but tiny ornaments from the craft store or Target would also work.

-A few small paper bags to hold the ornaments.  I got mine at the craft store. You could easily use small envelopes or any other light weight bag that can easily be tacked or glued to the wood.

-brushes and painter’s tape

Steps ~

This diy is super simple.  Almost too easy.  First, create a triangle tree and a rectangle trunk with painter’s tape.  Paint the tree and the trunk and let dry.

DIY Advent Calendar // thepapermama.com

Once the paint has dried, remove the tape and hammer 25 small nails to the tree.

If you wish to create your own ornaments, you can use these that I created.  Just right click on the photo, open it in a new tab, and print.  I printed my ornaments on card stock and used spray glue to glue the sheets down to thick cardboard.  Finally, I cut the ornaments out and punched a hole in the top of each one for hanging. (NOTE: you can also use these sweet little ornaments as gift tags!)

DIY Advent Calendar // thepapermama.com

DIY Advent Calendar // thepapermama.com

Finally, tack a few small paper bags or envelopes on the board below the tree.  Fill each bag with ornaments and hang one each day in December.  By the 25th your tree will be full.

DIY Advent Calendar // thepapermama.com

DIY Advent Calendar // thepapermama.com
Happy Holidays everyone!
 
DIY Advent Calendar // thepapermama.com

– Regina, Acute Designs

To keep up with the series, click here or on the image below!

50 Diy Days of Christmas // thepapermama.com

P.S. If you’d like to reminisce in the past 50 DIY Days of Christmas… here you are: 2011 & 2012Don’t forget to check out Acute Designs and thank her for this lovely Advent Calendar idea!

Save


Day 25: Modern Tree Advent Calendar (plus Silhouette sale)!

Modern Christmas Tree Cone Advent Calendar // thepapermama.com

Day 25 of my 50 DIY Days of Christmas: Modern Tree Advent Calendar! You know what time it is? It’s advent calendar time! This year I made a calendar that’s very easy to create. Well, maybe it’s not really a calendar… It’s more of a forest of paper.

A couple weeks ago Silhouette contacted me and asked if I’d like to try out their super awesome cutting machine. Immediately I said “yes!” out loud, then realized I should probably respond through email and not just yell at my computer. If you haven’t already guessed, I like love paper. I’ve been dreaming of my own Silhouette forever. I like cutting paper by hand, but sometimes there are either too many things to cut, or something is too small. Okay. Time to make your own advent calendar!

Modern Christmas Tree Cone Advent Calendar // thepapermama.com

Supplies:

– Christmas Tree Cone Printables: right click + save (One, Two, Three, Four, Five, Six, Seven, Eight, Nine, Ten, Eleven, and Twelve)

Printable Advent Numbers (right click + save)

– Scissors (or use your Silhouette machine)

– Hot glue

– Scrapbook adhesive

Directions:

– Print out your cones. You’ll need 25, so choose which cones are your fave. I chose a nice mix of patterns/colors. Maybe you want all one color? Hmmm, totally up to you!

– Cut out your cones. You can use a Silhouette machine to cut out the cones, or just use scissors.

Modern Christmas Tree Cone Advent Calendar // thepapermama.com

– Print and cut out your advent calendar numbers. If you have a Silhouette machine, cut out 1 – 25 numbers (font is LeckerliOne). I cut out my numbers about 1 inch high.

– Roll your cone cutouts into cone shapes (the curved portion is the base). Use your hot glue to adhere the edge.

– Use the scrapbook adhesive to attach your numbers.

Modern Christmas Tree Cone Advent Calendar // thepapermama.com

– Arrange your lovely Chirstmas tree cones wherever you’d like them to sit (mine will be hanging out on my fireplace) and carefully add your advent surprises under each cone.

– Enjoy and start your countdown on December 1st!

Modern Christmas Tree Cone Advent Calendar // thepapermama.com

Okay, here’s an awesome sale Silhouette wanted to share with my readers! They are going CRAZY with discounts for the holiday season. These sales start TODAY and go through December 8th. You’re not going to find better prices for these goodies. Enter the code: PAPERMAMA at checkout. Here’s what’s happening below:

(1)          A Silhouette CAMEO®, Silhouette Studio® Designer Edition Software, a dust cover (the color is decided by Silhouette), a $25 download card, a hook, a scraper, a spatula, and a pick-me-up® tool for $229.99. Retail price for all of this would total $406.93 (over 40% savings!)

(2)          A Silhouette Portrait®, Silhouette Studio® Designer Edition Software, a dust cover (the color is decided by Silhouette), a $25 download card, a hook, a scraper, a spatula, and a pick-me-up® tool for $129.99. Retail price for all of this would total $286.93 (over 40% savings!)

(3)          A Silhouette CAMEO®, a Silhouette Portrait®, and two $25 download cards for $299.99. That’s right: If you buy a Silhouette CAMEO® at full price, you get two $25 download cards and a Silhouette Portrait® ABSOLUTELY FREE! Retail price for all of this would be $406.93(over 40% savings!)

(4)          40% off consumable products at silhouetteamerica.com. This excludes machines, subscriptions, download and gift cards. Cannot be combined with any other offers. Rain checks not available.

(5)          FREE SHIPPING on orders over $25.

Again, to get the discounts you have to enter this code at checkout: PAPERMAMA

Have a wonderful and beautiful Thanksgiving!

– Chelsey

To keep up with the series, click here or on the image below!

50 Diy Days of Christmas // thepapermama.com

P.S. If you’d like to reminisce in the past 50 DIY Days of Christmas… here you are: 2011 & 2012. I was not paid for this post, but Silhouette did send me a Silhouette Cameo in exchange for a blog post. 


Day 22: Personalized Casserole Dish

Personalized Casserole Dish // HP Create

Day 12 of my 50 DIY Days of Christmas: Personalized Casserole dish, made by Skip to my Lou, for HP Create. I just love this DIY! How neat would it be to bring a Personalized Casserole Dish (filled with a yummy treat) to a holiday party and leave it with the hostess as a gift?

For the full DIY, check out HP Create for the directions.

Thanks so much to Cindy for sharing this DIY!

To keep up with the series, click here or on the image below!

50 Diy Days of Christmas // thepapermama.com

P.S. I do have a couple of spots open for the DIY Days, so if you think you have the perfect project to share send me an email. First, check out theDIY/Submission section in my FAQ’s for a bit of post submission info.  If you’d like to reminisce in the past 50 DIY Days of Christmas… here you are: 2011 & 2012.


Day 21: Thankful Banner Printable

Thankful Banner Printable // thepapermama.com

Day 21 of my 50 DIY Days of Christmas: The Thankful Banner Printable I made for HP Create. Thanksgiving is JUST around the corner. This little banner is a quick and easy to spruce up your door/fireplace/whatever.

If you want these sweet banner for your holiday, head on over to HP Create to get the free printable!

Thankful Banner GIF // thepapermama.com

– Chelsey

To keep up with the series, click here or on the image below!

50 Diy Days of Christmas // thepapermama.com

P.S. I do have a couple of spots open for the DIY Days, so if you think you have the perfect project to share send me an email. First, check out the DIY/Submission section in my FAQ’s for a bit of post submission info.  If you’d like to reminisce in the past 50 DIY Days of Christmas… here you are: 2011 & 2012. Reminder: all printables are for personal use only. Thanks!

I’m a paid contributor at HP Create.

Tags: , , ,

Categories: 50 DIY Days, gif, HP


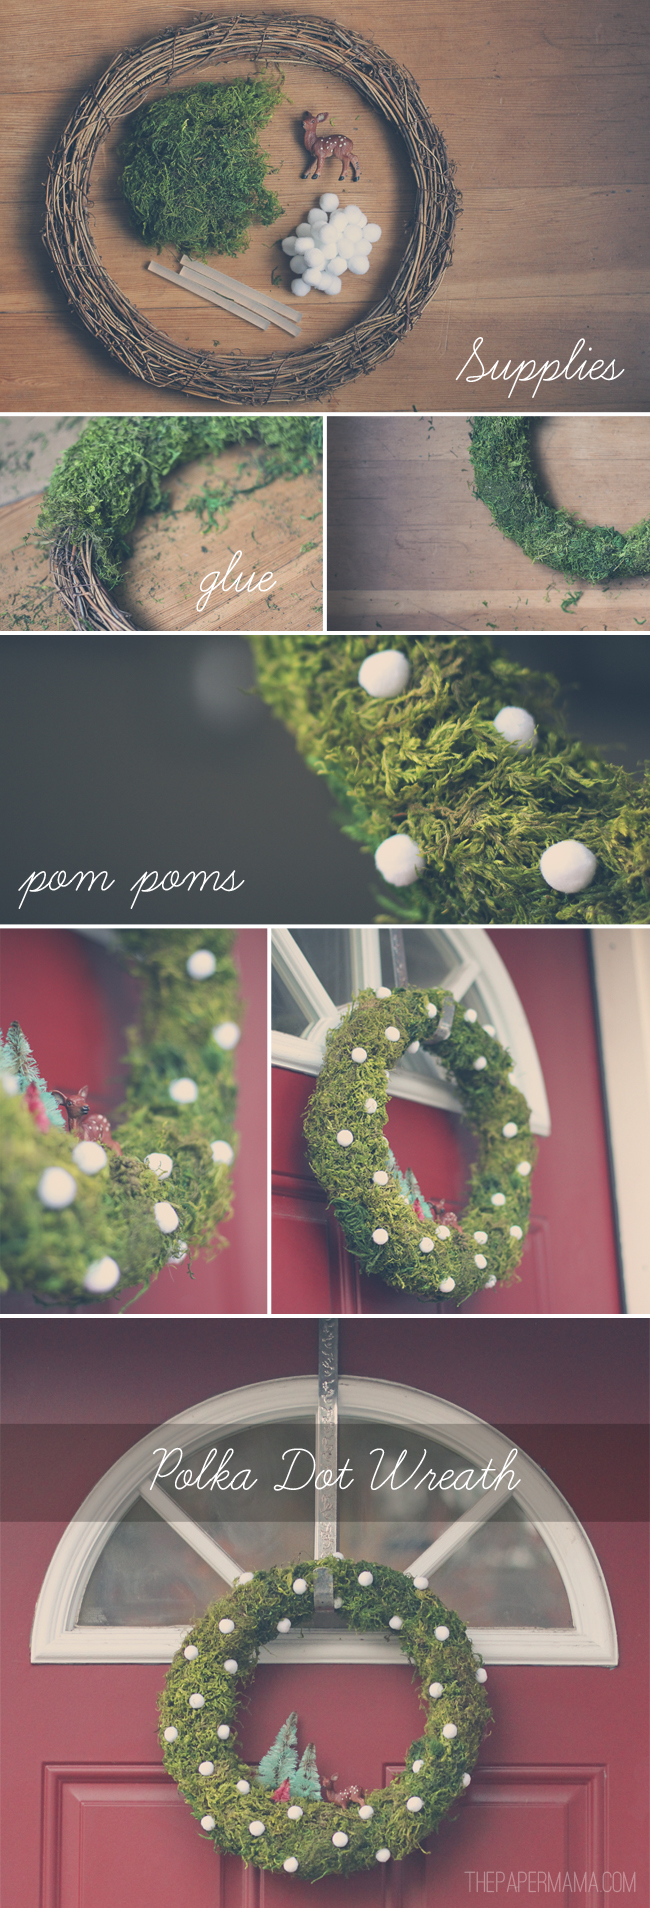
Day 19: Polka Dot Wreath

Day 19 of my 50 DIY Days of Christmas: Polka Dot Wreath! I made this sweet wreath for my 50 DIY Days last year, but I had to share it again. I love it so much. The moss process can be a bit messy/a pain, but it’s pretty easy to create. You could easily hang this up now without getting too many “that lady is decorating for Christmas too early” looks. Hee.

To see the full tutorial, check out my original post.

– Chelsey

To keep up with the series, click here or on the image below!

50 Diy Days of Christmas // thepapermama.com

P.S. I do have a couple of spots open for the DIY Days, so if you think you have the perfect project to share send me an email. First, check out the DIY/Submission section in my FAQ’s for a bit of post submission info.  If you’d like to reminisce in the past 50 DIY Days of Christmas… here you are: 2011 & 2012.

This post is brought to you by,

Make Your Day // makeyourdaydiy.com

Categories: 50 DIY Days


Love for Make Your Day

Make Your Day // makeyourdaydiy.com

TWO whole weeks. Yes, two whole weeks since Chelsea and I launched our ebook. I still can’t get over the fact that it’s out there, free in the wild of the internets. I need to say thank you to anyone and everyone that helped us spread the word! Thank you to each person that purchased a copy, you’re awesome. This has been a wild and exciting ride.

Make Your Day // makeyourdaydiy.com

There’s been so much book love from friends! Here are just a few I’ve saved to share. Give them each a visit if you have a moment (all lovely people):

– Whitney, at The Curtis Casa, tried out our printable pattern to create one of our Face Planters!

– Kelly suggests you cancel your Black Friday plans and make your gifts instead of buying (I like her thinking), Studio DIY.

– So many kind words from our friend, Moorea.

– A lovely shout out from Poppytalk!

– Elizabeth shared the news of our ebook launch, and made her own version of our painted planters! Cute. Delightfully Tacky.

Curbly loved our ebook!

– SUPER awesome that West Elm shared a photo from our book on Instagram!

There’s so many more and if I missed you, I’m sorry. You still have some more time to get 20% off your purchase, PLUS this comes with a bunch of neat freebies for the holiday (gift tags, calendar, placemats, awesomeness). Get it while you can using the code: MYDAYISMADETODAY at checkout.

Get your copy here.

P.S. Gotta send some shout outs to Ryan Foy (the husband-man to Chelsea) for the layout of this book. Let’s just say that if it was just Chelsea and I trying to do this layout… our brains would have imploded. Boom. PLUSALSO, the photographer for the images above are from Margaret Jacobsen


Day 13: Tree Plus Heart Garland

Tree Plus Heart Garland // thepapermama.com

Day 13 of my 50 DIY Days of Christmas: Tree Plus Heart Garland. I know we still have a bit of time before Thanksgiving, but I’m ready for Christmas decorations! This last weekend I made a Tree Plus Heart Garland. It may or may not be going up in my house this weekend. Yay!

Supplies:

– 5 sheets of green felt

– 2 sheets of red/pink felt

– bakers twine

– hot glue

– scissors

Directions:

– Trace out a tree and heart shape on paper. Cut out those shapes. These will be your patterns. Note: I made my trees about 3 inches high.

Tree Plus Heart Garland // thepapermama.com

– Cut out 16 trees and 17 hearts.

Tree Plus Heart Garland // thepapermama.com

– Hot glue the back of the trees + hearts onto the bakers twine.

Tree Plus Heart Garland // thepapermama.com

Hang and enjoy!

– Chelsey

To keep up with the series, click here or on the image below!

50 Diy Days of Christmas // thepapermama.com

P.S. I do have a couple of spots open for the DIY Days, so if you think you have the perfect project to share send me an email. First, check out the DIY/Submission section in my FAQ’s for a bit of post submission info.  If you’d like to reminisce in the past 50 DIY Days of Christmas… here you are: 2011 & 2012.