The 2011 Holiday Photo Challenge

HELLO! I’m so excited for this years holiday photo challenge! It was so much fun last year! What is the Holiday Photo Challenge? Well, it’s just that: A holiday photo challenge! Every year Mike and I take a Christmas photo to send out to our friends and family. Here’s our 2011 photo:

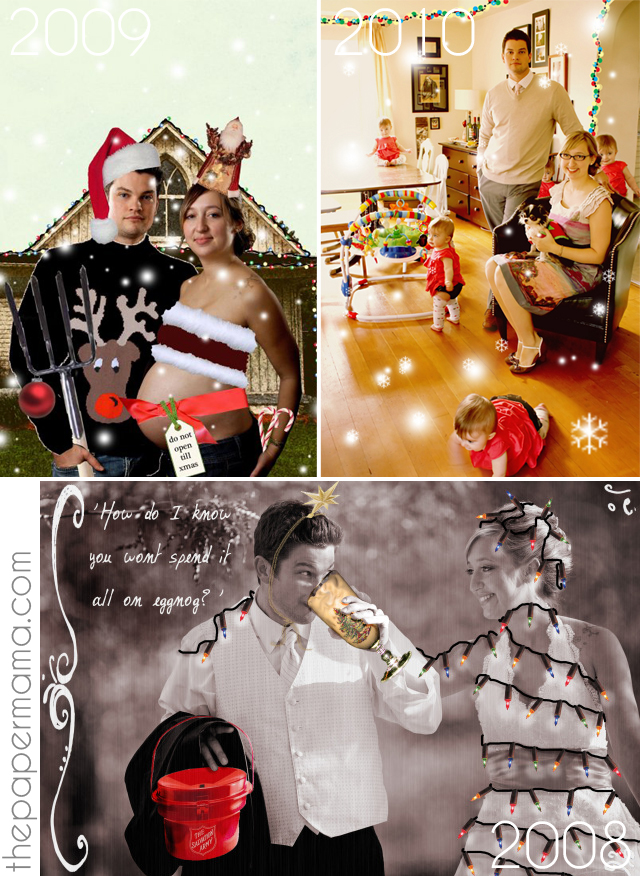
I’ve been making my own Christmas cards to send out for the past 7 years or so (I’ll have to wait to share the older ones… they’re in my Christmas storage). Here are the last three holiday photos….

What do I want from you? Well, I want to see YOUR Christmas (or whatever holiday you celebrate in December) photo for this year! You can edit as much as you like… or, not at all! Add wording… or not! It’s up to you! Personal/custom cards are SO much more fun than store bought. 😀 If you need some inspiration… here’s a link a post I did a couple weeks ago: Christmas Card Photo Inspiration!
Rules:
  • The photo can be edited to your hearts desire… but, there MUST be a photo.
  • You need to be the owner of this photo! AND, if you do any Photoshop work: it needs to be done by you.
  • A blog post (with a photo of your holiday card) will need to be linked to the linky on this post to be entered into the challenge. Please link directly to your Chrustmas Photo blog post URL. Please do not link to your facebook page. I usually can’t view those.
  • One entry per person. (if you mess up and link more than once: don’t worry. It’s ok. 🙂
  • PG rated photos only please. 
  • I do have the right to delete or disqualify any entrant if I feel it doesn’t follow the rules.
  • You can link up your photo through December 19th, 2011 11:59 AM Pacific Time. 
  • Top 30 photos will be chosen by me, and then voted on by all of you. Then, myself and a couple of judges will pick the 1st, 2nd, and 3rd place winners from the top 10 from the voting.
  • All blog post entries should link back to this Holiday Photo post. You can grab a button below. Thanks!  
Guess what: there are prizes for the winners! Yay! I’d like to thank the sponsors for donating! Thank you so much (First place winner picks a prize first, followed by second, followed by third place)!
– $50 shop credit to Gussy Sews shop.
– A Shine necklace from The Shine Project!
– $25 shop credit to Barely Measured.
– Beautiful Harper Wavy Shell Earrings from PoshLocket.
– $25 Shop credit to Pink Lemonade.
– $20 shop credit to The Paper Mama Shop.

The Paper Mama


signaturealt design banner

Categories: Uncategorized


The 2011 Holiday Photo Challenge

HELLO! I’m so excited for this years holiday photo challenge! It was so much fun last year! What is the Holiday Photo Challenge? Well, it’s just that: A holiday photo challenge! Every year Mike and I take a Christmas photo to send out to our friends and family. Here’s our 2011 photo:

I’ve been making my own Christmas cards to send out for the past 7 years or so (I’ll have to wait to share the older ones… they’re in my Christmas storage). Here are the last three holiday photos….

What do I want from you? Well, I want to see YOUR Christmas (or whatever holiday you celebrate in December) photo for this year! You can edit as much as you like… or, not at all! Add wording… or not! It’s up to you! Personal/custom cards are SO much more fun than store bought. 😀 If you need some inspiration… here’s a link a post I did a couple weeks ago: Christmas Card Photo Inspiration!
Rules:
  • The photo can be edited to your hearts desire… but, there MUST be a photo.
  • You need to be the owner of this photo! AND, if you do any Photoshop work: it needs to be done by you.
  • A blog post (with a photo of your holiday card) will need to be linked to the linky on this post to be entered into the challenge. Please link directly to your Chrustmas Photo blog post URL. Please do not link to your facebook page. I usually can’t view those.
  • One entry per person. (if you mess up and link more than once: don’t worry. It’s ok. 🙂
  • PG rated photos only please. 
  • I do have the right to delete or disqualify any entrant if I feel it doesn’t follow the rules.
  • You can link up your photo through December 13th, 2011 11:59 PM Pacific Time. 
  • Top 30 photos will be chosen by me, and then voted on by all of you. Then, myself and a couple of judges will pick the 1st, 2nd, and 3rd place winners from the top 10 from the voting.
  • All blog post entries should link back to this Holiday Photo post. You can grab a button below. Thanks!  
Guess what: there are prizes for the winners! Yay! I’d like to thank the sponsors for donating! Thank you so much (First place winner picks a prize first, followed by second, followed by third place)!
– $50 shop credit to Gussy Sews shop.
– A Shine necklace from The Shine Project!
– $25 shop credit to Barely Measured.
– Beautiful Harper Wavy Shell Earrings from PoshLocket.
– $25 Shop credit to Pink Lemonade.
– $20 shop credit to The Paper Mama Shop.

The Paper Mama


signaturealt design banner

Categories: Uncategorized


50 DIY Days with Hi, Baby: DIY Crayons

Day 21: DIY Crayons

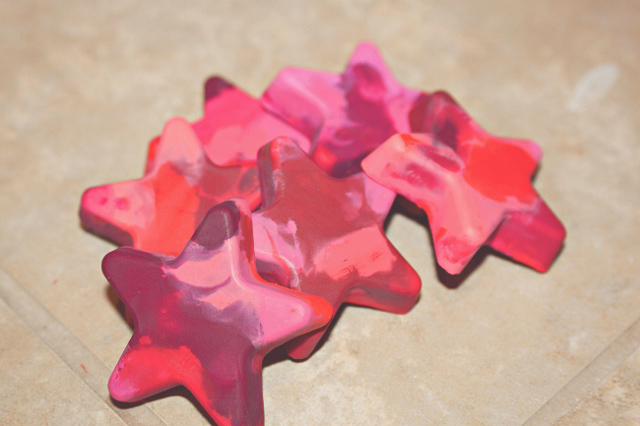
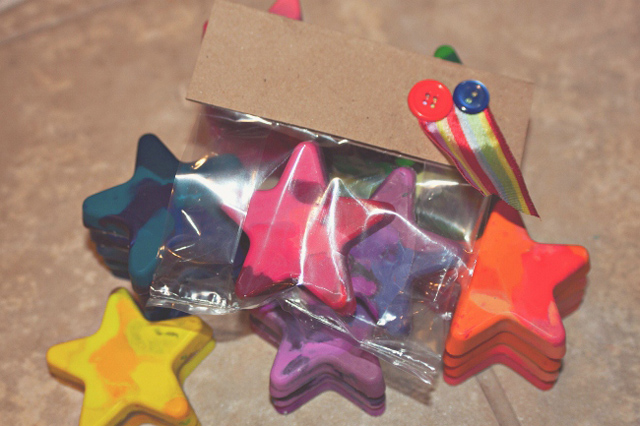
I know, you’re thinking… I could just give them a box of crayons and they would be as happy? No way! I promise the recipient of these bad boys will be gaga over coloring. The options are almost endless with all of the fun silicone molds out there – kids in our family are getting stars and hearts this year, but while I was scouring amazon I saw dinosaurs, bears, rings, and more! This is the perfect craft to get your kids involved in too, giving a gift gets that much more fun when it comes from your own hands.

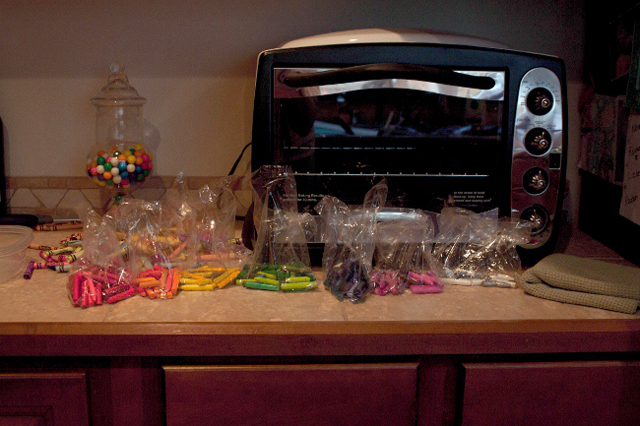
1. Start collecting those crayons! You don’t want to skimp in this part, anything other that crayola just won’t work. I like to stock up when target has back to school and you can get all sizes of crayola at insane prices, like the smaller boxes for .10 – and what’s even better? Right after everyone is back in school and target clearances all of that stuff to cheap. So, there you have it…no excuses, this is a cheap craft I promise!
2. Peel, peel, peel – this is where I enlist child slave labor and bribe my kids and their babysitter with candy, I haven’t heard any complaints yet! You want to make sure you have a nice clean, paper free crayon before you begin. If your having a lot of trouble cut a slit long wise then pop them into the freezer for a bit and the paper should come right off.
3. Break those crayons – they don’t have to be in itty bitty pieces, but you be the judge, you want them to be able to fit your mold nicely. I have found using a butter knife and a cutting board you don’t care too much about can be a great tool.
4. Sort those bad boys – now, this is all really up to you. You can go all out roy g biv in every mold or you can do like I like to do and separate the reds, yellows, oranges, ect into one group and the blues, greens, purples, and etc into another. Or if you really want to get crazy separate them out even more but I have found my way turns out pretty rad looking.
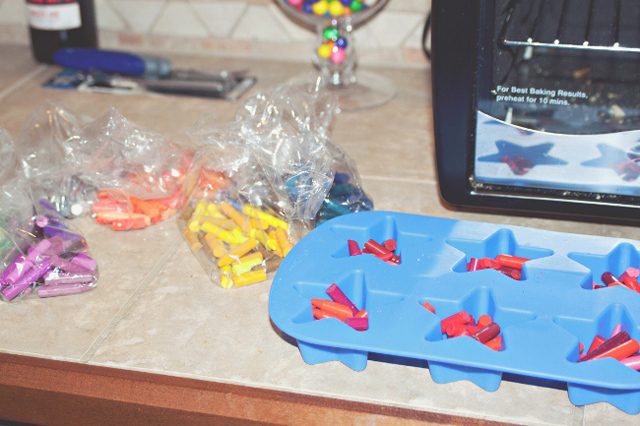
5. The mold – now the first time I did this project I used the very cheap-o heart ice trays from ikea. In the end these worked fine but I was on my toes the whole time watching the oven while they threatened to totally melt on me and when it came time to pull them out they didn’t let the new crayons go without a fight. So, moving on – I shopped from amazon.com this time around and wilton silicone star mold.
6. Now is where you preheat the oven to 350° and start placing your broken crayons into the mold (you didn’t here it from me, but it may or may not make it even easier to pop these bad boys out later if you spray a very light layer of cooking spray first) and place your silicone mold onto a cookie sheet to provide a nice flat stable surface.
7. Once the crayons are in the oven start checking on them every five minutes, you want them to be melted but don’t let them get too hot.
8. You’re almost done! Let your new awesome-sauce crayons cool completely then we can get started on the packaging.
9. it is so simple a monkey could do it – I went to Michael’s and picked up some $1.99 cellophane bags, cut them down to about 4 inches tall. Using some left over kraft paper I cut, folded and glued a piece over the top, added some ribbon and buttons and voila!
These particular crayons are going to the preschoolers showing up for rowan’s bday on Saturday but you can bet the little cousins are getting a bag full for Christmas – they make a perfect gift for all ages!
………………………………………………..
Thank you SO much to Melissa from Hi, Baby! What a LOVELY guest post. I am totally making crayons for Ruari. 😀 Thank you for joining my 50 DIY Days of Christmas!

Pin It

Categories: 50 DIY Days, diy


Messy Volume Pony hair tutorial!

Thanks to Walgreens for underwriting this post. I was paid as a member of the Clever Girls Collective, but the content is all mine. Visit http://moms.dailybuzz.com/channel/style.
…………………………………………………………………………………………………………………
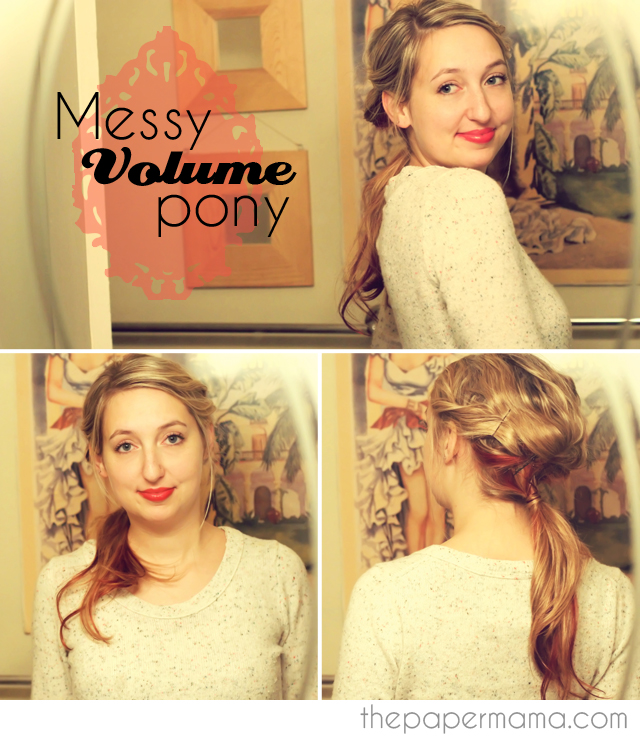
Today I wanted to share my Messy Volume Pony hair tutorial! and lovely way to wear your hair to all those holiday parties you will be attending in the next few weeks! It’s a style that can be accomplished using every day hair items you probably already have OR can buy for cheap.

Because of my straight hair I started this hair style with the Sock Bun Curl that I put up the night before… so, in the morning I had wavy hair. Yay volume! Perfect for my Messy Volume Pony.

Now, remember that this hair style should be messy! Don’t worry about the chunks of hair being uneven when you grab them. IT will still be lovely!
Supplies:
– Hair pins
– Hair tie (I prefer the clear hair ties)
– Hair spray
Directions:
– Start with wavy/curly hair… I suggest the Sock Bun Curl or the No Heat Curl if you have straight hair.
– Grab the back half of your hair… split it in half. Take one of those halves of hair…. push it up to give volume to the back of your head… pin that section of hair just above the nape of your neck. Repeat this step with the other half of hair. You should now have a lovely bit of volume on the back of your head (pictured above).
– Now it’s time to pin back the front portion of your hair. The way you do this will all depend on if you have bangs or not. On one side of your head grab a chunk of hair… push it up to give it some volume… and pin that section of hair just above the nape of your neck. Repeat this on the other side of your head. BUT, if you have bangs (like I do) you may need to either braid your bangs (video tutorial here) or twist them like I do (pictured above). Pin that section of hair just above the nape of your neck.
– You’re almost done! Grab a hair tie and gather up all the loose hair and make a pony tail at the nape of your neck. Optional: grab a tiny bit of ponytail hair and wrap it around the hair tie to cover it.
– So, you can stop with the last step. BUT, I wanted to take it a little bit further. I wanted the hair on the sides of my head to be pinned a little better. To do this you can just pinch a bit of hair on each side of your head and pin it. Wherever you think it looks best!
– You’re done! A touch of hairspray will secure it. 😀

I am SO in love with this new hairstyle. Because I’m a mama… I often take my shower in the evenings when my hubby can watch Ruari. This makes it perfect for me to throw my hair up in the sock bun the night before and then creating this sweet Messy Volume Pony the next day with my curly hairs! OR, if you do shower in the morning… you could still do the Sock Bun in the morning and have curly hair in time for the evening. Then you can wear your Messy Volume Pony that night!

Just ad some inexpensive makeup and a sweet little outfit…. ta dah! You’re ready for your party. Enjoy!

Pin It

Tags: ,

Categories: blogger business, hair


Steppin out… well, not really.

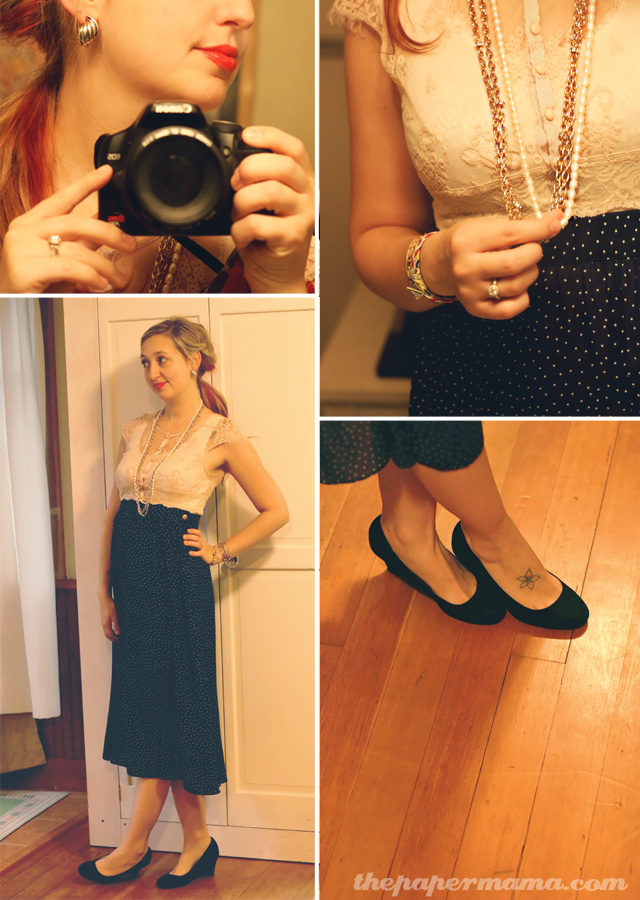
My outfit: earrings//from PoshLocket, necklace//from PoshLocket, top//thrift, skirt//thrift, shoes//my sister gave them to me.
Well…. these photos were taken on Thursday… I didn’t even actually step out. I really just felt like wearing pretty clothes… other than my very loved jammies. 😉 So, I dressed up and wandered around the home… danced with Ruari in my thrifted flowing skirt! That was my Thursday! Saturday and Sunday… not so awesome: I have the worst cold EVER! I am disgusting and am tired of blowing my nose. Meh. I hope you all are nice and healthy and had a fabulous weekend!

Linking up with Mandy from Harper’s Happenings, The Pleated Poppy, and Beautiful Blendings.

signaturealt design banner

Categories: Uncategorized


Banner bo nanner fanner.

I wanted to share another grouping of banners I’ve finished! I’m almost to my goal to make it to Alt Design Summit! Thanks to you guys! If you’d like some SUPER discounted ad space or a banner and button for $20 ($16 savings)…. Just click on the donate button below for more info on donating! Be sure to include your email so I can get back to you. 🙂 Thanks!

Categories: Uncategorized


The Paper Mama Photo Challenge: Home


This weeks challenge: Family
The challenge: The challenge will be based around your children. Take or find a photo of your baby (or kid… or puppy… or kitty).
It’s Thanksgiving week here in the states! Family time!


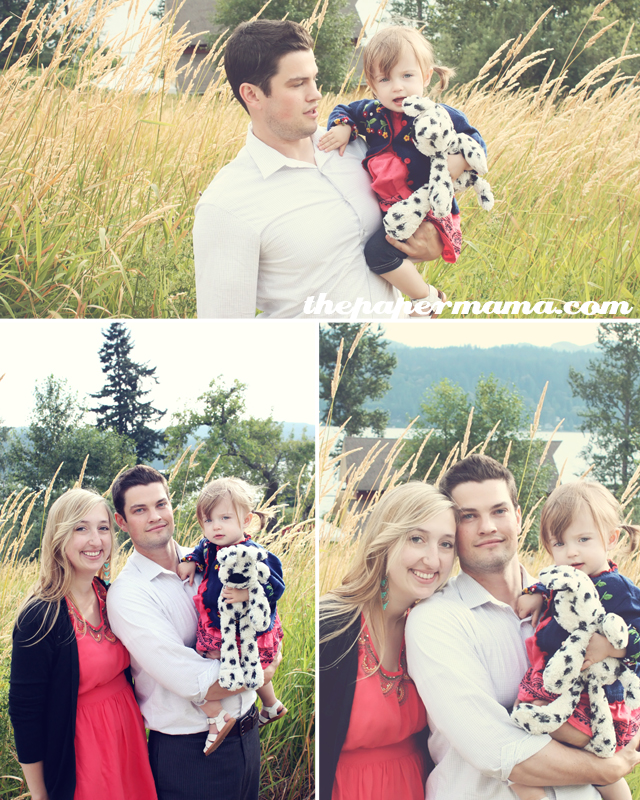
My example of “Family”:

These photos are from this summer…. I’ll be getting more family photos this Thanksgiving! <3

…………………………………………………………………………………………………………………………………………………
  • First time joining the Paper Mama photo challenge? Start here for rules and upcoming challenges. 🙂
  • My photo challenges do require you to have either your children or one of your furry children (pets) in the photo (unless it’s a self portrait week). It could be just one finger… or a toe… but, they must be there.
Smiles
…………………………………………………………………………………………………………………………………………………

The Paper Mama


signature

Categories: Uncategorized