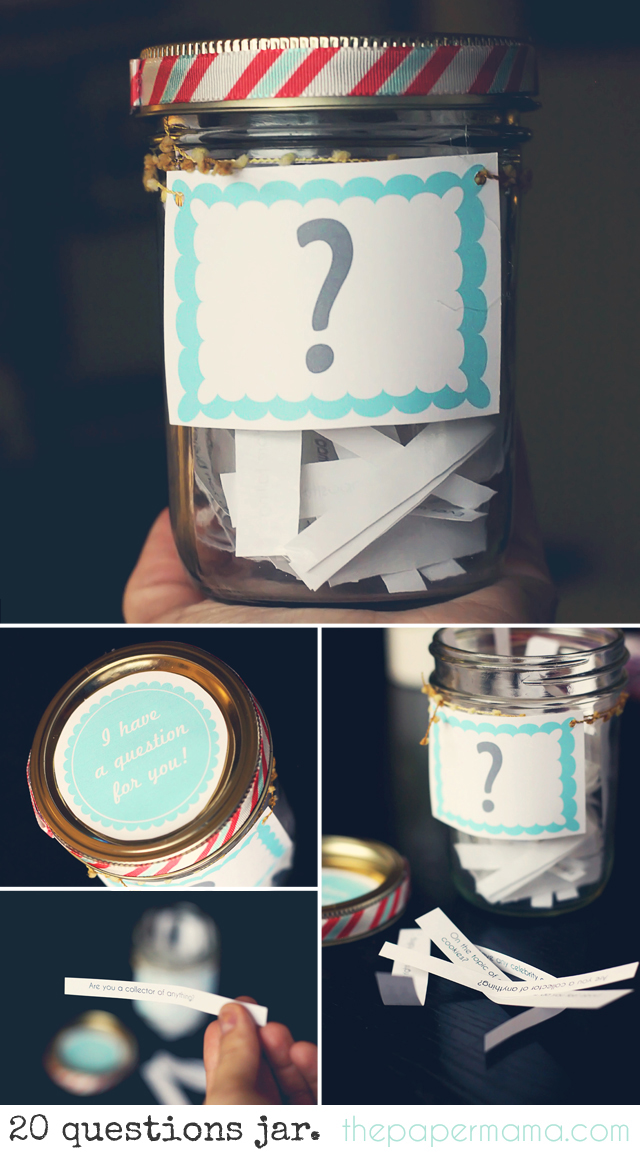
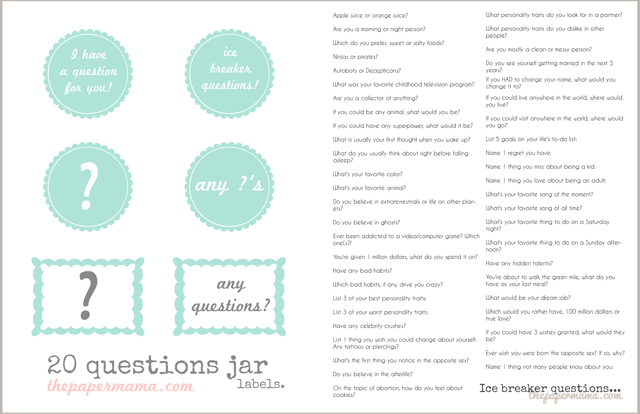
Day 4: The holidays usually mean many parties to attend. Maybe you’re throwing a party at your home…? or, maybe you’re headed to a couple holiday parties this season? Well, here you go: the 20 Questions Jar (or, an ice breaker jar)! Instead of spending $25 to buy one of those ice breaker kits…. make your own! It’s the perfect little hostess gift… 🙂 I even gathered up some questions that you can print out and use in your own jar (I’ve had these questions saved on my computer for so long…. I have no idea where I gathered them from… but, they are now here for you!).
Supplies needed:
– Jar
– Lid for jar
– My 20 questions printout (see below)
– Scissors
– Ribbon
– Glue (I used hot glue)
– My embellish printout (see below)
Directions:
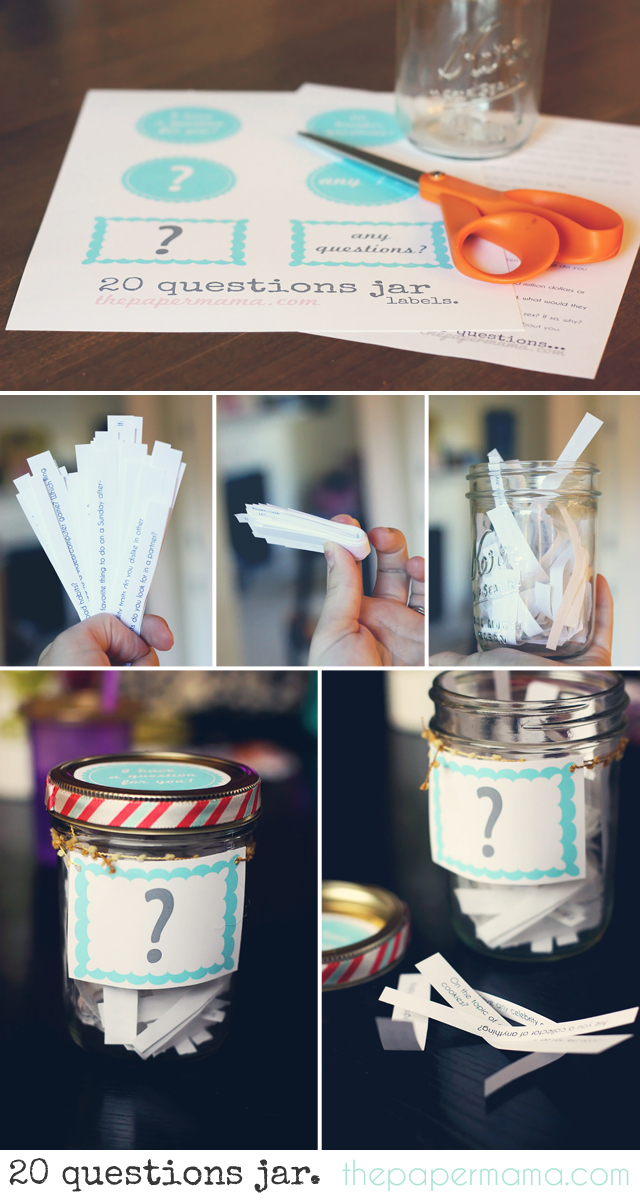
1. Print out your jar embellish page. Print out your questions page. Pick out which jar cover and rectangle label you’d like to use for your jar: cut it out. Cut your questions into strips. Glue the circle cutout onto the lid.
2. Grab your strips of questions and bend them in half. Toss them in the jar and sort of “fluff” them so they take up more space in the jar (looks better this way).
3. Take the rectangle label and either glue it onto the front of the jar, or cut out a hole on each side to string ribbon through and tie it around the jar (I tied mine around the jar).
4. Take your ribbon and glue it around the lid.
5. That’s it! Total cost of this project: $2 for me. 🙂
 |
| {Download here and here} |


Leave a Reply