Scavenger Hunt Sunday

1. Holiday Colors

2. Winter/Holiday Icon
3. A Tree

MM3

4. Quiet
 
 It’s ALWAYS so much quieter when Ruari has that thing in her mouth. ๐Ÿ˜€
5. Your Favorite Color

My favorite colors are actually blue and red together.

Scavenger Hunt Sunday

Steppin’ Out Saturday:

Ruari:
Sweater dress: Old Navy
Leggings: Target
Chelsey:
Earrings: Gift from Etsy
Dress: Anthroplogie
Belt: Urban Outfitters
Tights: Forever 21
Shoes: Kenzie

If you have a moment, could you help us with a vote?
Vote For Us @ TopBaby Blogs! The Best Baby Blog Directory

Would ya could ya? Vote for me?
Vote For Us @ topbabyblogs.com!

Categories: Uncategorized


Photo challenges for Saturday…. I can’t help myself…

I should really be getting some work done… but, I NEED to enter some challenges! ๐Ÿ˜€

Sky watch Friday:

This is NOT what our skyline looks like today… add more clouds… rain… erase that mountain… more gray… Yeah, that’s what it looks like. ๐Ÿ˜€

PhotoStory Friday       and then, she {snapped}   Give me your best shot at Better in Bulk   Household6Diva FotoFridayLive Every Moment

You Capture: Sweet

Photobucket

Ok, that was it. ๐Ÿ˜€ A vote for me?
Vote For Us @ TopBaby Blogs! The Best Baby Blog Directory

Would ya could ya? Vote for me?
Vote For Us @ topbabyblogs.com!

Categories: Uncategorized


Paper Mama Photo Challenge: Holiday Colors

This weeks guest judge: ME!
This weeks challenge: Holiday colors.
The challenge: The challenge will be based around your children. Take or find a photo of your baby (or kid… or puppy… or kitty) wearing red and green… blue and white… or, whatever colors make you think of the upcoming holidays. Feel free to play around with photo editing programs! Have fun!

My examples of “Holiday Colors”:

The white snow… the little pop of red on her hat… totally feels like the holidays.

……………………..

Here are a couple links to some free photo editing software if you don’t already have something:
Picnik
Picasa
Gimp
Pixlr

……………………..
There always has to be rules… I know, boring right? But, it’s to help me and you. ๐Ÿ™‚ Click on the link for more details… Each entry does need to link back to my blog… All photo entries need to be in by 11:59 PM Pacific Time on December 16th…
……………………..

Guess what…. after 4 challenges there will be a week long vote off of the winners from the 4 previous challenges… 4 more challenges to go…

Winners so far:
Holiday Colors: … no one yet …
Winter: … no one yet …
Your Holiday: … no one yet …
Bokeh: … no one yet …

The Paper Mama

And, if you all get a moment…. I’d LOVE a vote! ๐Ÿ˜€
Vote For Us @ TopBaby Blogs! The Best Baby Blog Directory

Would ya could ya? Vote for me?
Vote For Us @ topbabyblogs.com!

Categories: Uncategorized


VOTE OFF: Time to vote for your favorite!

It’s that time again! It’s time to vote for your favorite photo of the last month!

1) Cozy: Hi, Baby

2) Eyes: Bunch of Barrons

3) Black and White: Window to my Soul

{Window to my soul}


 4) Blessings: These Days

Please Vote! Voting will end on December 16th, 2010 at 11:59 pm. Get your friends and family to vote! ๐Ÿ™‚ Make a post on your blog linking back to the vote post.


Would ya could ya? Vote for me?
Vote For Us @ topbabyblogs.com!

Categories: Uncategorized


And, the winner of the "Blessings" photo challenge is…

This weeks guest judge: ME!
This weeks challenge: Blessings.
The challenge: The challenge will be based around your children. Take or find a photo of your baby (or kid… or puppy… or kitty) from your holiday meal or from Thanksgiving day. Or, if you don’t celebrate Thanksgiving, a photo of you and your loved ones together. A photo of your blessings.

My winners for this week:

  • 1st: Why I chose this photo: “This blessing is so sweet. Such a beautiful photo!”

{These Days}

Congrats! Please feel free to grab a “fact: I’m awesome … #1 winner” button below. Because: you ARE awesome! And, thank you SO much for participating!

The Paper Mama

  • 2nd: Why I chose this photo: “This moment is so sweet! I love the little kiss!”
{Being What I Want to Be}

  • 3rd: Why I chose this photo: “Something about this photo is SO magical!”
{Tezzie}
  • 4th: Why I chose this photo: “I love all the sparkle. The sweet little girl. Love it all.”
{Window to My Soul}

  • 5th: Why I chose this photo: “I love the focus on the Thanksgiving dinner with the little baby in the background.”
{Capture the Moment}

Congrats to the top 5 winners! Great job, and please feel free to grab the top 5 button below! You’re all awesome!

The Paper Mama


My favorites (in no particular order):

{Live Every Mom}

{My Life, My World}

{Hi, Baby}

{L to the third}
{Buckeroomama}

{Bunch of Barrons}


If you’re one of my favorites you are more than welcome to grab a “Paper mama hearts me” button below!

The Paper Mama

Guess what…. after 4 challenges there will be a week long vote off of the winners from the 4 previous challenges… 0 more challenges to go…

Winners so far:
Cozy: … Hi, Baby.
Eyes: … Bunch of Barrons
Black and White: … Window to my Soul
Blessings: … These Days …

Would ya could ya? Vote for me?
Vote For Us @ topbabyblogs.com!

Categories: Uncategorized


TUTORIAL: Tiny ribbon banner

Eight more days till Ruari’s first birthday party! I mentioned a while back that I was keeping to a small budget for birthday decoration. Well, I did it. I spent $67 on all party decor, invites (including postage), candy, favors, and dessert. I was $2 over… But, I think I’ll let that slide. ๐Ÿ˜€

So, I had all this ribbon left over from the wreath I made a month ago. I decided to make a tiny banner to string in between the candy decoration I’ve assembled. Cute?


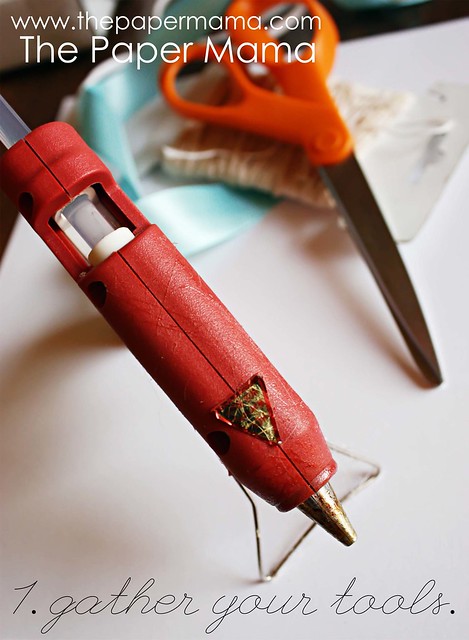
Here’s how I did it:

1st: Gather your supplies. You’ll need scissors, string of some kind (we use this in our kitchen), ribbon, and hot glue.


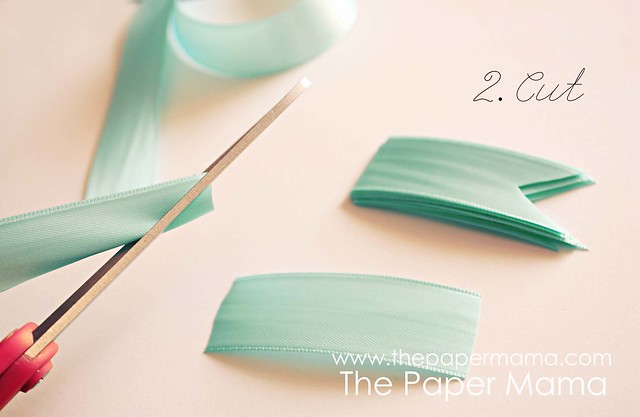
2nd: Cut out 2 inch long strips of your ribbon (you can adjust this depending on the width of the ribbon). Once all your 2 inch strips are cut out, cut a triangle out of one side of each strip. You can do this by slightly folding the ribbon in half and cutting at an angle from the folded side to the open side.


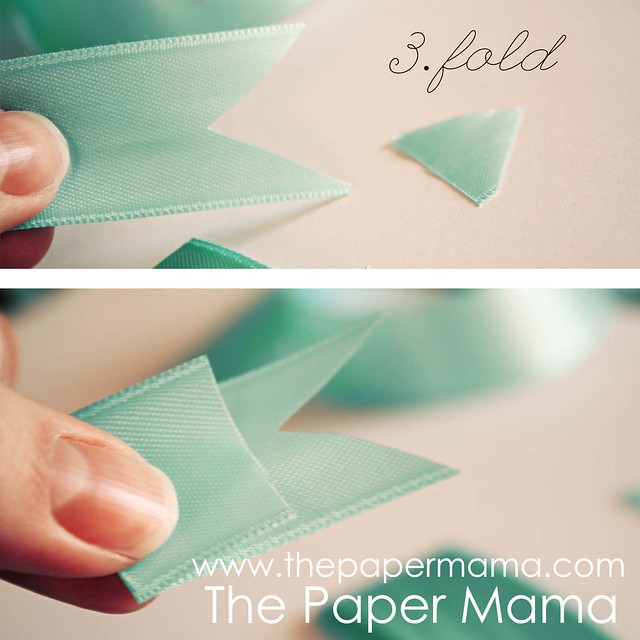
3rd: Next, fold down the non-triangle side of your ribbon. How much you fold down will depend on how long you want each strip. I folded about a half inch down.

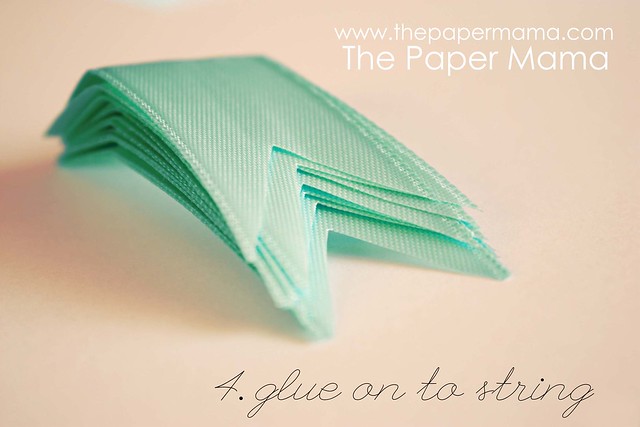
4th: Once all the strips have their folds, start gluing onto your string! It’s TOTALLY up to you on how long you’d like your string and the spacing in between each strip.

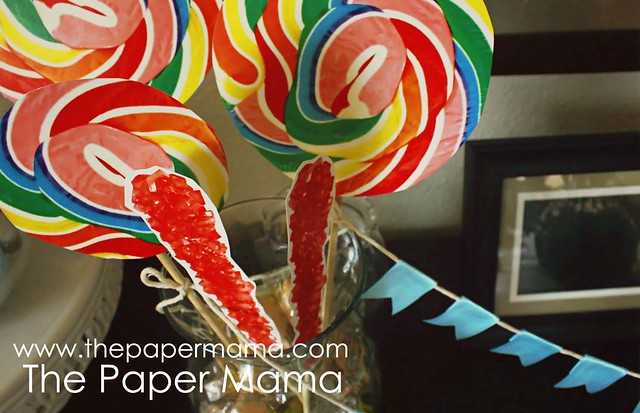
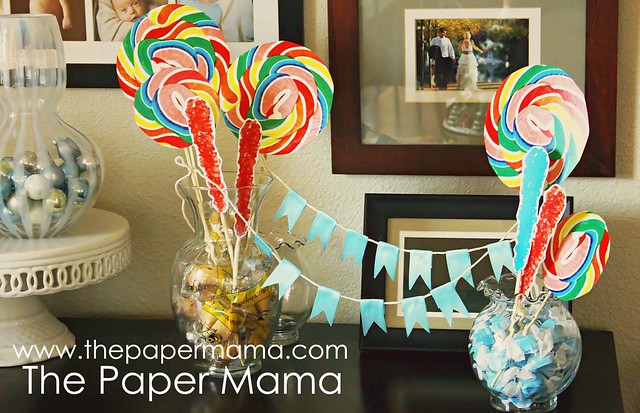
When you’re all finished you can tie these little banners up in between some “lollipops” like I did below, or it would be REALLY cute as a little cake decoration!!! If you use this tutorial, let me know! I’d love to see what you make!

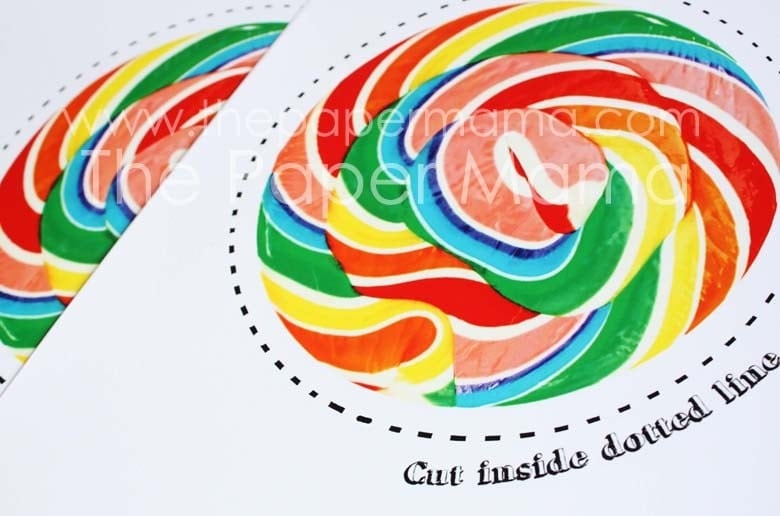
By the way… do you like my paper lollipops? I couldn’t get myself to buy more than one $4/lollipop. SO, I’ve created a picture that YOU can buy from my shop! It’s SO much cheaper than buying many many lollipops! For $5 you get my lollipop JPEG to print out as many prints as you’d like… then glue on some wooden skewers: and ta dah!!!

Here are what the print outs look like. I went to Office Depot to print mine for 60 cents a copy.

If this tutorial totally rocked your socks off…
Can you give my blog a vote?
Vote For Us @ TopBaby Blogs! The Best Baby Blog Directory

Would ya could ya? Vote for me?
Vote For Us @ topbabyblogs.com!

Categories: diy, paper mama shop