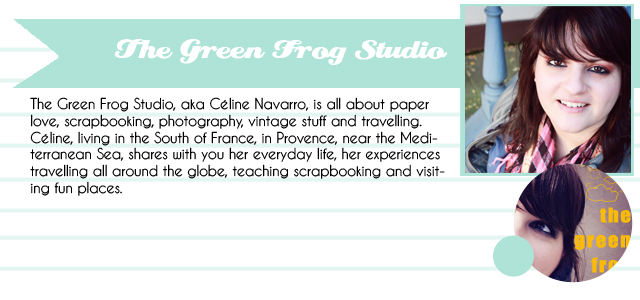
Hi hi!

{Shop//Blog//Facebook//Twitter}
my little mustache

{Shop//Shop 2//Blog//Facebook//Twitter}
Cositas Bellas

{Blog//Facebook//Twitter}
manic mrs stone

{Blog//Twitter//Facebook}

{Blog//Shop//Facebook//Twitter}

{Blog//Shop//Twitter}

{Shop//Blog//Facebook//Twitter}

{Shop//2nd Shop//Blog//Twitter}

{Shop//Blog//Photography Blog//Facebook//Twitter}
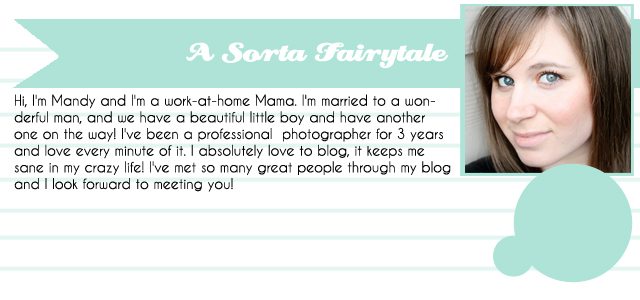
A Sorta Fairytale

{Shop//Blog}

Cositas Bellas

{Shop}

Photobucket

{Shop//Blog//Twitter}

Rice Babies Sponsor Button

{Shop//Blog//Facebook//Twitter}

fleur anning button

{Blog//Facebook//Twitter}

{Shop//Blog//Twitter}

Photobucket

{Shop//Blog//Facebook//Twitter}

tiny tree hugger

{Shop//Blog//Facebook//Twitter}

Wow… October is full of AMAZING sponsors! I hope you all take a moment to visit all of these fine people! They are awesome!!!

signature

Categories: Uncategorized


Hello there!

{Shop//Blog//Facebook//Twitter}
moorea seal

Please say hello to my lovely extra large sponsor for October! Moorea Seal. This lovely lady is so amazingly talented! I have been dreaming of owning one of her pieces for sooooo long! I guarantee you’ll love her stuff! Give her a visit…. AND, be sure to take advantage of her discount code for 10% off: PAPERMAMA . <3

signature
alt design banner

Categories: Uncategorized


50 DIY Days with the Incomplete Works of Anselm: Homemade Vanilla Extract

Day 10: Hi beautiful people! My name’s Naomi, and I blog over at the Incomplete Works of Anselm. I’m really excited to share an easy but impressive gift you can make in big batches for the bakers in your family: Homemade Vanilla Extract!

DIY Homemade Vanilla Extract // thepapermama.com

Here’s what you’ll need:

DIY Homemade Vanilla Extract // thepapermama.com

DIY Homemade Vanilla Extract // thepapermama.com

DIY Homemade Vanilla Extract // thepapermama.com

1. 4 oz. food-safe boston round amber or cobalt storage glasses. You can find these at health food stores or online (online is the best option, if you are making lots of these to hand out).
2. Vanilla beans (two per bottle). These can also be found at either a health food store or online. There are lots of different varieties of beans, but Bourbon vanilla beans from Madagascar are the most popular.
3. Rum or vodka. If you’re planning on making a large batch of bottles, vodka is less expensive. But rum will add a nicer flavor.
This is pretty much the easiest homemade gift you could choose to make, but because vanilla is an absolute staple for anyone who bakes (and a relatively expensive one, if you like quality vanilla), it will be very appreciated – especially for its rich flavor. And ADDED BONUS: Your family and friends can continue to refill these bottles for years to come before the beans even need to be replaced!
Let’s get to it. You ready?
  • Take two beans, and slit them down the center, gently pulling open to expose the lovely flavorful seeds.
  • Fold the beans in half and stick them in the bottles.
  • Fill the bottles with the vodka or rum.
That’s it. Seriously. Let the bottles chill out in a cupboard for a couple months, maybe just shaking them up every week or so – whenever you think of it. Don’t have a full two months before you plan on giving out your bottles? Don’t worry. Chances are, your family and friends are so fried from all that holiday baking that they’re taking a cookie break for a month or so anyway!

DIY Homemade Vanilla Extract // thepapermama.com

I wish you a merry Christmas, friends! Thanks a million for inviting me to participate, Chelsey!
………………………………………………..
Thank you SO much to Naomi from the Incomplete Works of Anselm! What a LOVELY guest post. Thank you for joining my 50 DIY Days of Christmas!

Pin It

Some links to LOOOoooove.

Ok, this list is hilarious! You probably need to be a parent to truly get it. Emily shared this with me.

I LOVE pumpkin seeds. This simple recipe looks delicious.

Her blog banner makes me smile. 🙂

Goal: try out this silhouette tutorial and work it!

This is a lovely blog I stumbled upon…. her photos are just so lovely and inspiring. New read for sure!

This jewelry is lovely. I have been eying her pieces for some time.

I wish I could afford this original piece.

Have any of you tried Scentsy? I haven’t. But, I may try. Apple is my FAVORITE smell.

I’ve met this sweet blogger during the PNW gathering in September. Love her style.

Jess from IROCKSOWHAT and I are raising money to go to Alt Design Summit!

One of my new sponsors. She’s super sweet!

Hee! And, to get the giggles watch the History of Rap!

signature

Categories: Uncategorized


50 DIY Days with Acute Designs: Cake in a Jar

Day 9: The cupcake trend has been around for a while and I have to admit – I am a over it.  Don’t get me wrong, I would never pass up a cupcake {I am not one to pass up any cake!} but I am moving on to a new trend – Cakes in a Jar.
Mason jars are everywhere, so why not fill them with cake?   All you need to do is buy 8 once mason jars {a store such as Target sells them}, bake your favorite cake and layer thin slices of it inside a jar with your favorite frosting.  These little jars would make a fun and delicious holiday gift or party favor. 
I made these jars for a friend of mine and used two of my favorite recipes: Pumpkin Spice Cake and Low-Fat Chocolate Cake {see recipes below}.
I topped the Pumpkin Spice Cake with mascarpone cheese frosting {a million times better than cream cheese frosting – trust me!} and caramel sauce.  YUM.
For the Chocolate Cake I layered a few with strawberry jam {just a store bought jar of strawberry jam} and  the rest were layered with peanut butter glaze.
I baked my cakes, allowed them to cool for an hour and then assembled the jars.  First I put down a thin layer of cake, then frosting, more cake, more frosting, and topped with either store bought caramel sauce for the pumpkin cake or powdered sugar for the chocolate cakes.
My packaging was super simple – tags with the each jars’ contents listed and a ribbon.
The beauty of these cake jars is that they are a total blank canvas – make a basic cake {even a simple box cake will do} and mix up each jar with various toppings {frosting, fruit, nuts, crushed bits of your favorite candy bar, Oreos, and so much more}. 
A few combos I plan to try this holiday season:
*chocolate and peppermint {with crushed bits of candy cane in a simple white frosting}
*gingerbread {ginger cake with a caramel glaze}
*tiramisu {layers of lady fingers, dark chocolate, and mascarpone cheese – topped with freshly ground espresso}

The possibilities are endless!
Have a fun and tasty holiday season :).  xo, Gina {Acute Designs}
Pumpkin Spice Cake
-1 cup all purpose flour
-2/3 cup whole wheat flour
-1/2 tablespoon baking powder
-1 teaspoon baking soda
-1/2 teaspoon salt
-1 teaspoon cinnamon
-1/2 teaspoon nutmeg
-1/2 teaspoon allspice
-1 cup sugar
-2 eggs
-1/4 cup canola oil
-1 cup low fat buttermilk
-1 cup pure canned pumpkin
-1 teaspoon vanilla extract
1.  Pre-heat oven to 350 degrees.
2. In a large bowl, whisk together all dry ingredients {flour through allspice} and set aside.
3. In a separate bowl, use an electric mixer and combine the sugar, eggs, oil, vanilla extract, and canned pumpkin.  Mix until well-combined {about a minute}
4. Add a third of the flour mixture to the wet ingredients, mix, and add in 1/3 of the buttermilk.  Continue until all dry ingredients and buttermilk are incorporated.  Do not over-mix, just mix until the dry ingrendients are incorporated.
5. Coat a cake pan {use any size you have – square or round – I used a 12 inch round pan} with non-stick cooking spray, fill with the batter, and bake for about 50 minutes or until a toothpick inserted in the center of the cake comes out clean.

Mascarpone Cheese Frosting
-One 8 ounce container of mascarpone cheese {at room temperature}
-1/2 teaspoon vanilla extract
-1/4 cup powdered sugar
1. Use an electric mixer or wooden spoon to mix together all three ingredients.
Low-Fat Chocolate Cake
-1 cup all purpose flour
-1/4 cup whole wheat flour
-1 teaspoon baking soda
-1/3 cup unsweetened cocoa powder
-1/4 teaspoon salt
-1 cup sugar
-1 cup low-fat buttermilk
-2 teaspoons vanilla extract
-2 tablespoons canola or vegetable oil
1. Pre-Heat oven to 350 degrees.
2. In a large bowl, whisk together the flours, baking soda, cocoa powder, salt, and sugar. 
3. Combine the buttermilk, vanilla extract, and oil in a small bowl.  Slowly pour the wet ingredients into the dry ingredients while stirring with a wooden spoon.  Stir until just combined – be careful to not over-mix!
4. Coat a 9 inch cake pan {round or square} with cooking spray and pour in the batter.  Bake for about 35 minutes or until a toothpick inserted in the center comes out clean.
Peanut Butter Glaze
-1 cup of unsweetened creamy peanut butter
-1/2 teaspoon vanilla extract
-1/4 cup powdered sugar
1. Microwave the peanut butter for about a minute – just until it is melted and easy to stir.
2. Use an electric mixer or wooden spoon to combine the melted peanut butter with the vanilla extract and powdered sugar
………………………………………………..
Thank you SO much to Gina from Acute Designs! What a LOVELY guest post. Thank you for joining my 50 DIY Days of Christmas!

Pin It

Categories: 50 DIY Days