New BHG post up!

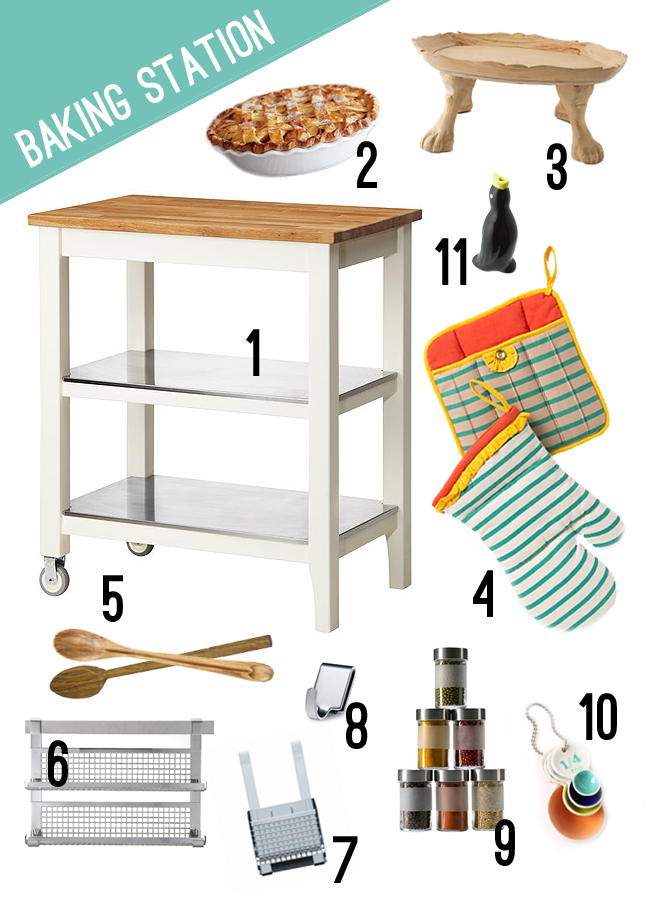
I have another Better Homes and Gardens post up! Are you ready for Baking Season?

 Happy Thursday!

– Chelsey

1. Stenstorp Kitchen Cart via Ikea 2. Ruffled Pie Plate via Sur La Table 3. Tray with Four Legs via Anthropologie 4. Bahia Holders via Antrhopologie 5. Berard Olivewood Spoons via Sur La Table 6. Rosle Double Shelf Spice Rack via Sur La Table 7. Rosle Utensil Holder via Brookstone 8. Rosle Rail Hook via Sur La Table 9. Droppar Spice Jars via Ikea 10. Color Tab Measuring Spoons via Anthropologie 11. Pie Bird Vent via Williams-Sonoma

Tags:

Categories: BHG


Day 7: Give back

DAY 7: Yeah, I know this is pretty much a no-brainer, but I think it helps to be reminded: Give Back to your community. This is a “DIY” that will probably take more time than making a nawhal necklace…. but, it’s worth it. I like to donate coats, clothes, or toys during the holiday season…. you can also donate your time. Here are some ideas for giving this holiday season:

– Donate to a food bank: We have the Oregon Food Bank here.

– Help feed seniors: We have the Loaves and Fishes. A program to help keep seniors independent. You can volunteer your time or donate money.

– Work with the Salvation Army: I’m not sure if other cities have this, but Portland has an “Adopt a Family” program. It’s pretty much as it sounds… you adopt a family for the holiday season. You pay for the family’s holiday dinner, plus a couple gifts for each family member. Large groups usually go in together for this.

– Give to charities that help children: the Ronald McDonald house and Children’s Relief nursery are the two I know of, in my state.

– Volunteer at a soup kitchen: we have Portland Rescue Mission. They are also always in need of blankets.

– Help clean up your neighborhood: this is a favorite of mine, Friends of Trees. They events to clean up public natural areas and green spaces between freeways and neighborhoods.

– Donate a toy: Toys for Tots is a popular charity to go through.

– Donate coats: There’s always a drive to collect new and gently used coats. The big one in my area is the Sleep Country Foster Kid’s Coat Drive.

I hope I was able to inspire some ideas! Happy Wednesday!

– Chelsey

If you’d like to keep up with all the 50 DIY day posts… they’ll be here:


Happy Halloweeeeeeen

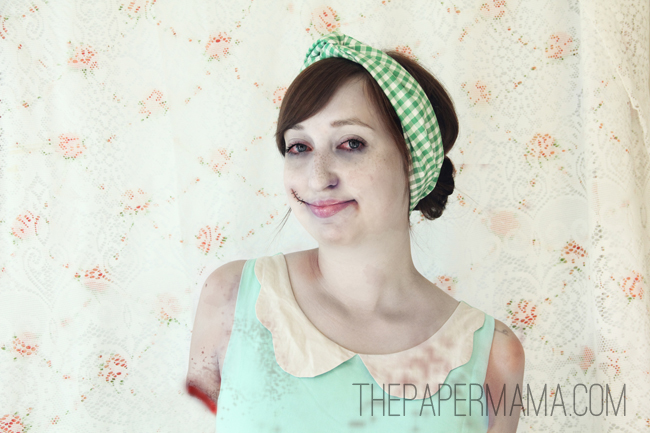
Zombie Chelsey says, “Blarhgle, Happy Hallllowspleen! Brains!!!!”

– Zombie Chelsey

 …………………………………………………………………………………………………………………………………………………………..

{If you have a Wordless{ish} Wednesday, please feel free to link it up below. And, feel free to link up to these blogs too… Parenting by DummiesProject AliciaJenni from the BlogBree: his honey and her mommy, and Live and Love Outloud.


Day 6: Thrifted Glassware Candles

I don’t know why, but I’ve never tried making my own candles. I guess I’ve always thought, “Why make, when you can buy?” BUT, most candles don’t come in cool containers that would look cute to have around your house (unless you’re paying $30 a candle). SO, that’s why I’m making mine this year. They also make great gifts (especially a hostess gift) for this holiday season. Here’s how I made it:

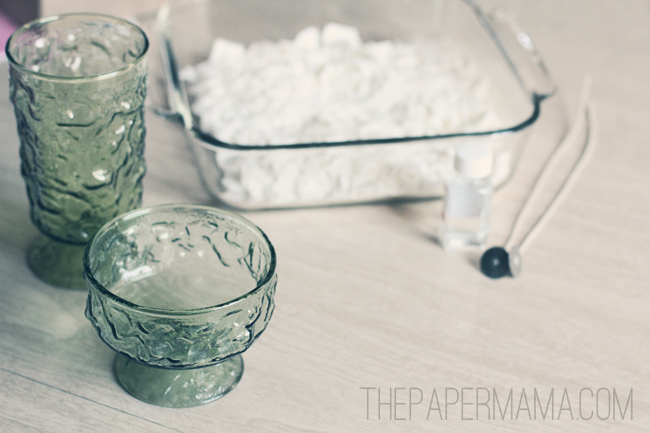
Supplies needed:

– Soy wax (I like microwaveable wax)

– Candle wick (found here)

– Essential oil (I chose apple cinnamon)

– 2 vintage glasses
How to:

– Clean up your vintage glassware (you can find some glassware at any thrift store, for pretty cheap).

Optional: preheat your vintage glassware in the oven. I set the oven to as low as it would go. I just wanted the glassware a little warm (hopefully this will help the wax to adhere better).

– Follow the directions, of your soy wax package, to melt the amount of wax you will need. My wax was easily melted in the microwave after about 5 minutes, in a microwave safe container. Once the wax was clear, combine about an ounce of oil into the melted wax.

– Take your glassware out of the oven, place your wicks into the glassware, and pour the hot wax in. Adjust the wick so it’s centered in the container.

– The wicks are heavy, and do tend to drift away from the center. To solve this problem, I used some scotch tape to make a criss-cross support around the wick. This held it up.

– Allow your candle(s) to cool, overnight if necessary.

– You’re done! You can add a little gift tag to give these candles as a gift…. or, keep them for yourself.

Chelsey 

If you’d like to keep up with all the 50 DIY day posts… they’ll be here:


The meet up is this Saturday!

Hello fellow PNW Bloggers,

Guess what? Our meet up is this Saturday! Oh my goodness. I can’t wait to see all of you. Some of you have asked who’s going to be at the meet up, and to keep things a little private… I’ve decided to leave that up to you! If you’re coming to the meet up, and want to share your blog, you can link it up below! I can’t wait to see you all.

AND, if you wanted to make it to this meet up… but, just couldn’t quite make it… no worries! There is another meet up happening this Spring and we will wander up to the Seattle area!

See you sooooon!

– Chelsey


Categories: announcement


Day 5: A Little Something For You gift tag printable

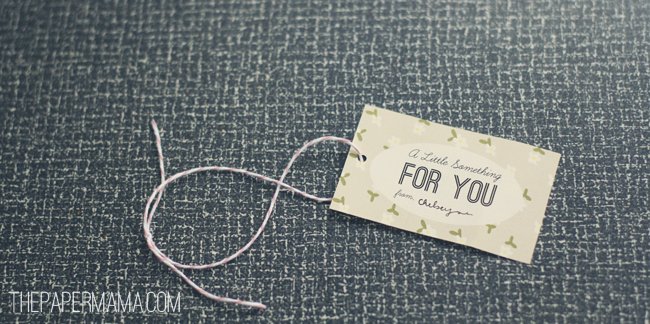
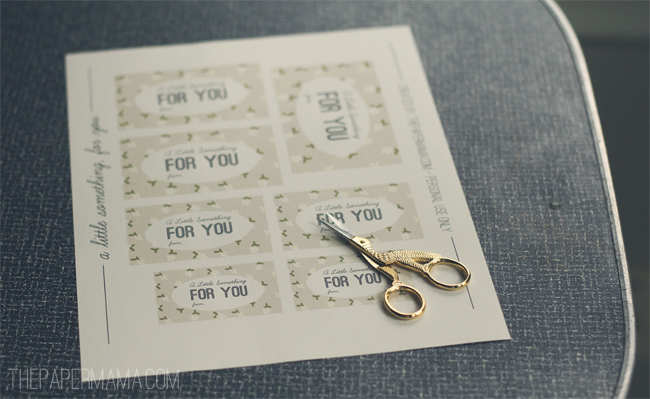
DAY 5: We are on our way to the holiday season! That means you’ll soon be making presents, sweet treats, and more to share with your favorite people. Instead of buying a gift tag, how about just print one some from home? Well, here’s your first set of holiday gift tags: A Little Something, For You!

If you’d like these tags for yourself, click here (or the image below) and right-click + save the image. When printing, scale to fit the image. Cut it out, add a punch hole, and add to a gift. Enjoy!

– Chelsey

If you’d like to keep up with all the 50 DIY day posts… they’ll be here: