Day 24: Rockwell style Christmas photo!

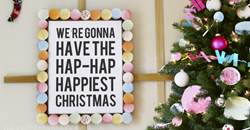
Day 24: Today I’m sharing how I created my Rockwell style Christmas card. It’s a bit complicated… and, WILL take some time. BUT, so worth it. Really. I absolutely love wandering back and looking at my past Christmas photos. Something I will have forever and get to enjoy with my family! Below is the intense amount of info on how I created this… P.S. don’t forget to enter the Holiday Photo Challenge here!

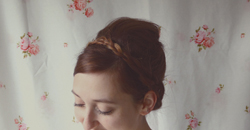
The image itself was created from 5 different photos. See below:

To blend these photos together, I layer the photos (one by one in Photoshop) on top of each other, and erase bits and pieces of each image… until I get the photo I’d like! If you need more info about this, here’s a tutorial I did a couple years ago on Paper Heart Camera. Here was my finished blended image (before photoshop color edits):

OK, onto the real fun…. How I created the Rockwell Style Photo (note: I use Photoshop CS5): 

1. When you have the photo you want, it’s time to do any brightness/contrast edits now (if you need to).

2. Duplicate your original photo.

3. Above all the other layers, create a New Adjustment Layer> Levels and increase the amount of dark black (the little black arrow on the left) into the photo by 7 to 12 (decide what you like best). Merge the Levels Layer down with the original photo copy. (click on image to enlarge).

4. Let’s add some contrast. Go to Filter> Other> High Pass and use a radius of 10 to 16 (your choice) and set that new layer to Overlay. (click on image to enlarge).

5. Click on your Background Layer (the original photo) and go to New Adjustment Layer> Brightness/Contrast. Set the Contrast setting to – 18 to -22 (your choice). (click on image to enlarge).

6. Above your Brightness/Contrast layer, add a new layer: New Adjustment Layer> Curves. For the Red Channel: increase highlights and decrease lowlights (creating an “S” shape). For the Green Channel: Increase the highlights, set the mid tones to neutral (set in the center), and decrease the lowlights. For the Blue Channel: Decrease the highlights and increase the lowlights (backwards “S” shape). (click on image to enlarge).

7. Above the Curves layer add a new layer: New Adjustment Layer> Solid Color. Choose a magenta color (my color # was: c14683). Set that layer to Screen, and reduce it’s opacity to 15 – 35% (your choice). (click on image to enlarge).

8. Click on your Background Layer (the original photo) and go to New Adjustment Layer> Hue/Saturation and move the Saturation to -20 to -30 (your choice). This will take out a bit of the pink/red from the skin. (click on image to enlarge).

9. Click on your Background Layer (the original photo) and duplicate that layer to create a Background Copy. Go to Filter> Noise> Add Noise. Add a bit of noise, this is completely up to you. I added just a TINY bit of noise (.19). Note: make sure Uniform is selected and Monochrome is deselected.

10. Staying on the Background Copy layer you just created, go to Filter> Lens Correction and in the Vignette section change the Amount to – 20 to – 50 (your choice) and the midpoint to +30 to +50 (your choice). This is to add a vignette. (click on image to enlarge).

11. This step is totally you! Adjust each layer. Maybe the numbers I shared weren’t really your taste, adjust opacities and numbers. Make it your own. Have fun!

Extras:

– I was way too distracted by the background in this photo…. so, I replaced it with a grey solid background. I felt that was more Rockwell, anyway.

– Optional: add some rosy red spots to the cheeks. Adjust the opacity.

– Add extra bits and pieces. I added in a newspaper (to tell the photo’s story better), flames to the candles, and splashes to the mugs.

Now that you’re all done, time to enter my Holiday Photo Challenge to win some AHmazing prizes!

– Chelsey

…………………………………………………………………………………………………………………………………………………

To keep up with my 50 DIY Days, click here:


I think she’s potty trained.

::warning, this post contains some extreme parenting talk about toilets and poop::

I’m 99% sure my kiddo is finally potty trained. She’s been going on the toilet for a while… and has only had a few minor accidents. She’s not nighttime trained, and I’m not even going to worry about that yet. BUT, daytime training is done. I think. She’s got it down. Can I get a, “Heck, yeah!” Thank goodness. That whole potty training battle was pretty much my least favorite thing ever. So many times I considered giving up, throwing in the towel and accepting the fact that my kid would be wearing a diaper until she was 40. BUT, she did it. We did it. ::highfives::

I’m happy to announce, my brain will not be battling over potty training any more!

– Chelsey


Day 23: Framed Vintage Ornaments

DAY 23 is brought to you by, the lovely Denise of Spittin ToadWhen Denise shared this on her blog the other day, I instantly fell in love. I love vintage glass ornaments… and I tend to buy these anytime I find them at a flea market/thrift store (I have a bit of a Christmas addiction… hee). This is just the sweetest way to really display your favorite pieces!

How to:

– Find an old frame. Take out the backing/glass/etc.

– Paint it if you’d like. Maybe add some glitter? Polka dots? A bow?

– Pick out some favorite ribbon, string, strands of beads, etc to hang your vintage ornaments.

– To hang the ribbon/etc. on the back of the frame, you can staple them onto the back. OR, if you don’t want to staple all over the back of your lovely frame, maybe add a string of wire to the back and tie your ornaments from there.

– Hang on the wall, enjoy!

So lovely.

– Chelsey

P.S. Denise is my cousin! Love her.

…………………………………………………………………………………………………………………………………………………

A very big THANK you to Denise for sharing this fantastic DIY. Please, be sure to give her blog home a visit.

To keep up with my 50 DIY Days, click here:


The first few entries…

The Holiday Photo Challenge started just a couple days ago… and, I’m happy to see we’ve had our first few entries! What do you think? Are you entering this year? Here are the first 4 entries:

Just in case you need a little reminder…. here are the prizes you can win! SO, don’t forget to share your photo:

Enter your photo here: 

 Happy Monday!

– Chelsey

Tags:

Categories: announcement


Day 22: Chocolate Covered Bacon Bites!

Day 22: This DIY is a favorite of mine because, well yeah… bacon covered in chocolate. I bet some of you are thinking, “What the? Nope.” Let me tell you, it’s fantastic. Things you need to enjoy this: you need to love bacon. You need to love chocolate. Done. That’s it. I love a good combo of salty and sweet, this is perfect!

I’m pretty sure you’d be the COOLest guest EVer if you brought over a gift of chocolate covered bacon bites!!! You will need to make this day of (or, day before) for the best flavor/quality. Plus, it needs to be refrigerated.

Supplies:

– Roughly 8 slices of bacon (find a good quality bacon… it will taste better)

– 1/2 bag of Wilton Candy Melts milk or dark chocolate (I prefer milk)

– A jar

Ok, how you do this:

– Preheat your oven to 400 degrees F.

– Cut up your bacon into 1/4 inch to 1/2 inch pieces, place on a baking sheet (that has sides, to keep the grease in), and bake for 10 to 20 minutes. The time all depends on your oven/type of bacon. It took about 17 minutes to cook my pieces. I like them to be a little more crunchy (less chewy when covered in chocolate).

– Make sure your bacon is patted dry and get all the grease off the bacon bites.

– Follow the directions on the back of your Wilton Chocolate Melts bag, melt the chocolate in the microwave, and start covering your bacon bits in chocolate! (tip: if your chocolate is microwaved too long, and get’s stiff…. add a tablespoon of lard. Mix it in. It helps. and is so good for you… ha!).

– Using a pair of tongs, place your chocolate covered bacon bites onto a piece of wax paper.

– Let the chocolate cool for about 1 hour. I recommend putting the chocolate bites in a container and into the fridge, for a couple of hours, before putting in the jar. This will make sure the chocolate is all cool and won’t smudge inside your pretty jar.

– When your chocolate covered bacon bites are cool and all ready: put them in a jar, add a ribbon, maybe a gift tag, and give to your favorite bacon loving friend!

Happy Saturday!

– Chelsey

…………………………………………………………………………………………………………………………………………………

To keep up with my 50 DIY Days, click here:


Day 21: Burlap and Lace Holiday Wreath (with pinecones)

DAY 21 is brought to you by, the lovely Katie of Loves of LifeI’m excited to share this little holiday wreath project with you!

Honestly, these days it feels rare that I don’t open up Pinterest, find something I like, and then go from there when it comes to creating. I feel kind of vintage (HA HA) doing it the old fashioned way and, well, seeing a photo at a craft store or something and running with it. Honestly? It was a combo of just that and my love for the pinecone hanging I’ve seen floating around, which I mentally combined to make this little pretty:

I love it. A lot.

It’s bound to spruce up an area of your home, and it’s not overly “Christmas’ey”, in fact, it’s so adorable and “wintery” I’m considering keeping it up from like, now till—March 🙂

What you need:

-Any size wreath base. I have found the trick is buying the cheapie straw wreaths versus the styrofoam ones. Who cares what it looks like underneath if you’re just going to cover it? Save the money!

-A roll of burlap

-Some pinecones

-Festive ribbon

-Lace “ribbon”

-Red festive fake berry thingies (I’m so fancy)…one bundle.

-Hot glue gun

Okay, let’s do this thing

1. Wrap the burlap around the wreath, pull tight. You’ll need to tack the first piece down with hot glue. Notice I didn’t even bother taking the plastic wrap off the straw wreath? Because, who cares!

2. Every few wraps, make sure to tack it a little here and there just to ensure the burlap stays put.

3. Stand back and admire your work. Oo-la-la.

4. Break out your lace. Tack it in the back with a dot of hot glue & wrap around the way you like it.

5. Stand back and say, dang, I’m good. Just kidding. Make sure it’s all evenly spaced and everything 🙂

6. Separate two ‘bundles’ from the fake-holiday-berry-thingies.

7. Lay them out and bend them a little to see where they’ll fit best once the bow is placed. You can hot glue them in place now, or wait until just before the bow goes on.

Making the Bow

1. Measure out (or eyeball) about 2.5ft + of burlap and lay like you see pictured.

2. Cinch it all together to make it ‘bow like’.

3. Use your holiday ribbon and slip-knot a long piece around the center. You may want to add an extra ‘knot’ to it to make it tight.

4. Continue adding strips of ribbon at differing lengths.

5. Glue your pinecones on, with one little line of glue, folding the ribbon back as pictured.

6. Admire the cutie pinecones.

Bow Part Two

1. Loosely ‘fold’ a 1.5 ft (maybe a little less) piece of burlap as shown.

2. Cinch at the center.

3. Lay on top of existing ribbon to make a “double” ribbon.

4. Attach to the wreath by using more holiday ribbon and wrapping it around the entire wreath base, and use a little hot glue to tack the bow back if need be.

Admire Your Creation

I hope you enjoy your sweet, little wreath as much as we are over here! Happy holidays.

…………………………………………………………………………………………………………………………………………………

A very big THANK you to Katie for sharing this fantastic DIY. Please, be sure to give her blog home a visit.

To keep up with my 50 DIY Days, click here:


2012 Holiday Photo Challenge!

WOW, is it already mid November? MY goodness. I can’t even believe it. You know what that means, right? Yes, time to share your holiday photos!

What is this Holiday Photo Challenge you ask? Well, it’s a chance to share a holiday photo you’d already be taking and have a chance to win big prizes! Yup! Guess what? The prizes are pretty crazy this year…. here you go…. are. you. ready? I mean… I want to win!

Prizes: There will be 3 big winners! When the challenge closes, the top 40 photos will be chosen by myself. From there, the judges and I will pick the Grand Prize winner and 1st place winner. The readers (that’s you) will also choose a favorite from the top 40!

Grand Prize: Amazon Kindle Fire HD 16GB!!!

First Place: Fuji Instax 210 Wide instant camera + 40 exposures!

Reader’s Fave: Canon Lens Coffee Mug + Macro Cell Lens band (works on most cell phones)!

AND, as usual… I’d like to share our Christmas Photo for 2012. Hopefully it will inspire you. This time we went a different route for our photo. Ha! Maybe a little more PG-13 than the last couple of years. You know Elf on the Shelf, yes?  We decided to incorporate this into our card this year. Inspired by the movie “Alien”, we thought the elf should pop out of my husbands chest. Ha! Soooo Christmasy. Perhaps the Peppermint Schnapps was expired?

 This card was actually a blend of 5 different photos. I’ll be sure to share how I did it next week. 

Some more inspiration for you…. here’s last year’s top 10 winners (top 3 are pictured below), and some photo inspiration here or here.

{Last years winners: Luvin’ Life, Ashley Sisk, and Six Cherries On Top}

What am I looking for? WELL I want to see your holiday photo for this year. Doesn’t matter if you don’t celebrate Christmas… whatever you celebrate in December, I’d like to see (Festivus?). You can edit the photo as much (or as little) as you’d like. Add wording, or not. Let’s see it!

Rules. Yup, there has to be rules.

– Only ONE entry per person.

– The photo MUST be taken by you (or, a family member). What I mean: no professional photos that you didn’t take.

– You are MORE than welcome to use any photo editing program. Edit away! If you do any edits/add anything to the photo, it must be done by you.

– Keep all photos PG-13. Please. Animals, humans, etc should NOT be harmed in the making of your photo. No nudity. Nada.

– You don’t have to have people/animals in the photo. Maybe an ornament? Stuffed Santa? It’s up to you.

Please, do not link to a facebook page. I’m unable to actually view the photo. You can share a link on your blog, tumblr, or flickr. A Tumblr can easily be started for free.

UPDATE: I will also accept entries in your instagram! How to enter with instagram: you post your photo to instagram, and find the URL to that photo online (one way st to login on Followgram). Make sure to grab the specific photo’s URL and link it to the link up below (must be in the link up to be entered). Also, you need to put @thepapermama and #HPHOLIDAYPHOTO in the comments. If you’re taking a photo OF a photo, be sure it’s clear and easy to see!

– All entries MUST link back to this Holiday Photo Challenge post. You can grab a button below, or just link to this post’s URL. Thanks!

– When the challenge closes, the top 40 photos will be chosen by myself. From there, the judges and I will pick the Grand Prize winner and 1st place winner. The readers (that’s you) will also choose a favorite from the top 40. That’s 3 prize winners!

– Top 40 photos are chosen based on MANY different things. No need to be a professional photographer, you can do it!

– If you enter this challenge: All photos entered into my Holiday Photo Challenge may/will be shared on a blog post(s), on The Paper Mama blog. There will always be a link back to the photographer’s URL that was shared.

– I have the right to delete or disqualify any entrant, if I feel it doesn’t follow the rules.

– The last day to enter a photo is December 17th, 2012.

Alright! When you’re ready, link your photos below… (be sure to link directly to the URL your photo is posted on). Post any questions in the comments below! Have fun!

– Chelsey

P.S. ONE more thing. My holiday photo this year (yup, the crazy one with the elf bursting out of my husband’s chest…), is also taking part in The Inappropriate Elf contest, from Baby Rabies. If you aren’t quite sure what that is… check it out. ANOTHER chance to win some amazing prizes.

Link up your entry below: