
Day 24: Today I’m sharing how I created my Rockwell style Christmas card. It’s a bit complicated… and, WILL take some time. BUT, so worth it. Really. I absolutely love wandering back and looking at my past Christmas photos. Something I will have forever and get to enjoy with my family! Below is the intense amount of info on how I created this… P.S. don’t forget to enter the Holiday Photo Challenge here!
The image itself was created from 5 different photos. See below:
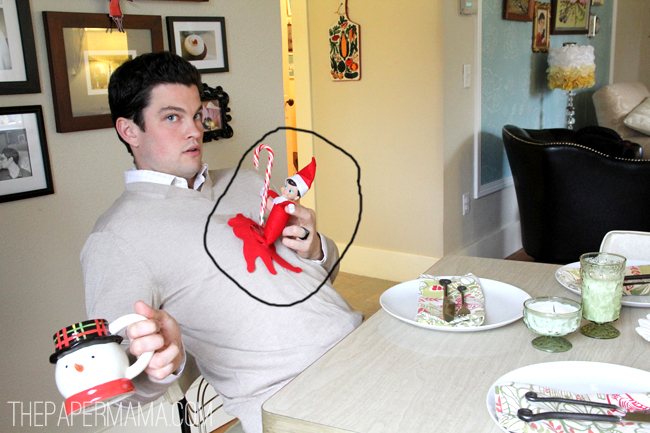
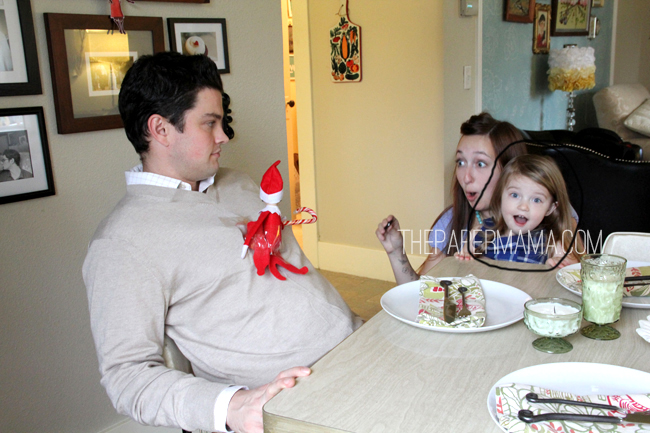

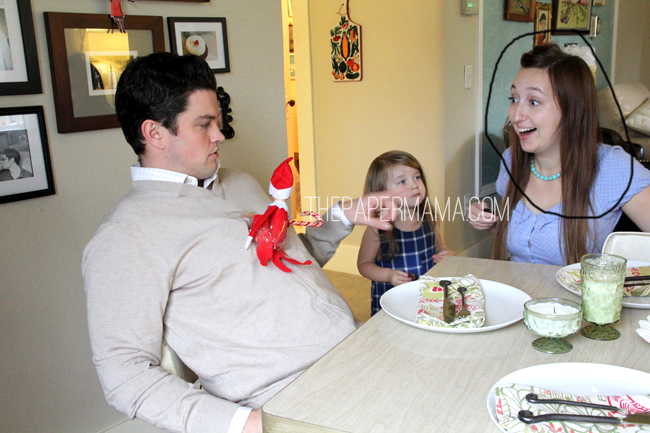
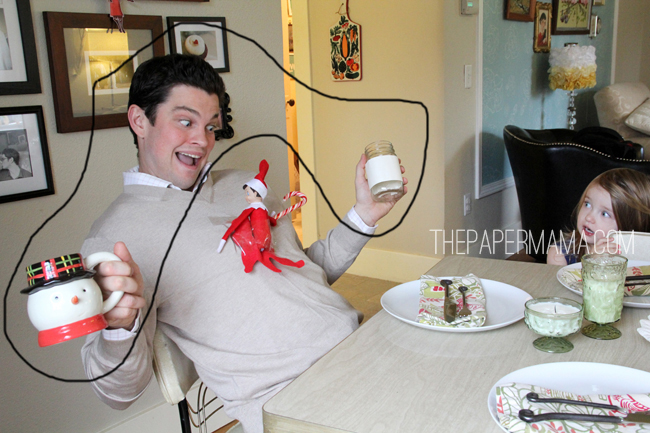
To blend these photos together, I layer the photos (one by one in Photoshop) on top of each other, and erase bits and pieces of each image… until I get the photo I’d like! If you need more info about this, here’s a tutorial I did a couple years ago on Paper Heart Camera. Here was my finished blended image (before photoshop color edits):
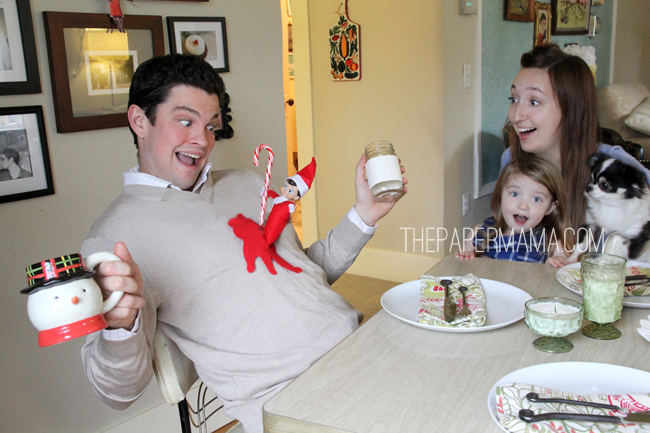
OK, onto the real fun…. How I created the Rockwell Style Photo (note: I use Photoshop CS5):
1. When you have the photo you want, it’s time to do any brightness/contrast edits now (if you need to).
2. Duplicate your original photo.
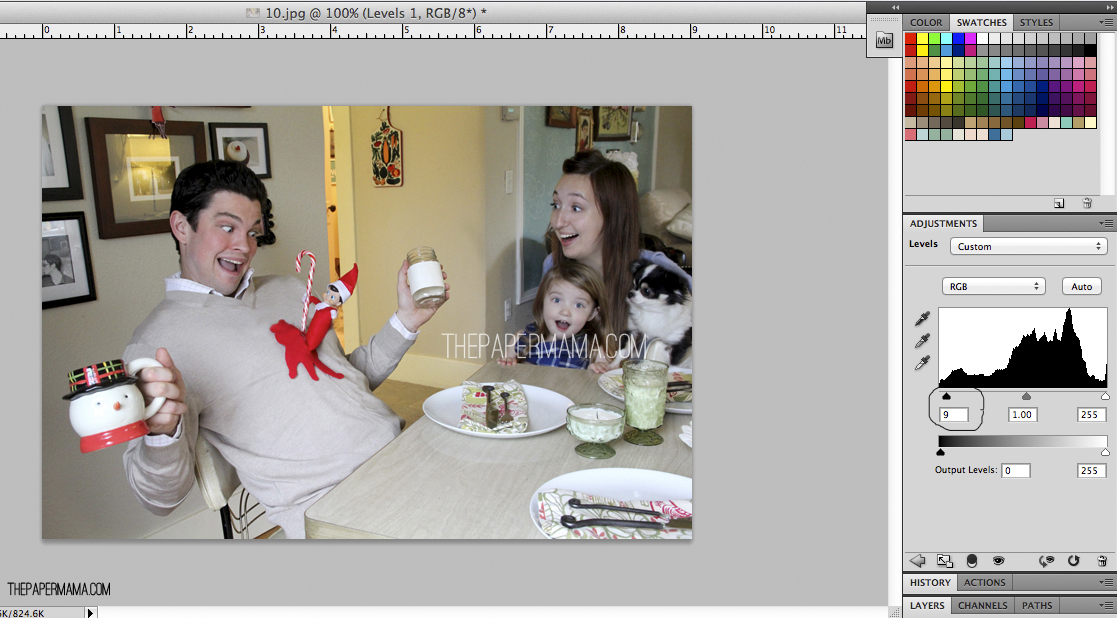
3. Above all the other layers, create a New Adjustment Layer> Levels and increase the amount of dark black (the little black arrow on the left) into the photo by 7 to 12 (decide what you like best). Merge the Levels Layer down with the original photo copy. (click on image to enlarge).
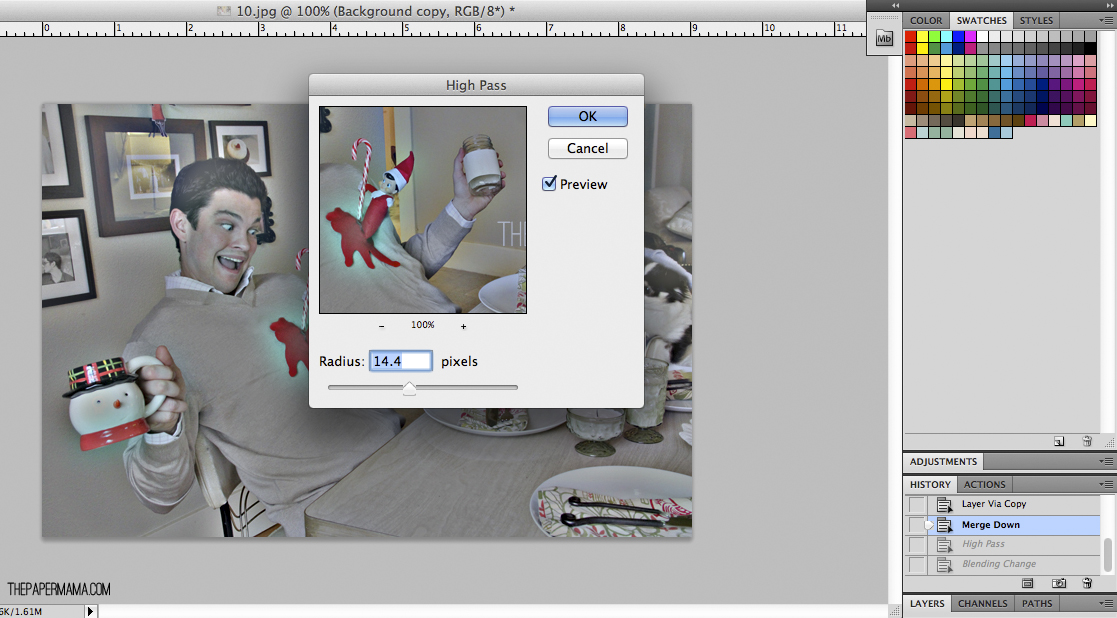
4. Let’s add some contrast. Go to Filter> Other> High Pass and use a radius of 10 to 16 (your choice) and set that new layer to Overlay. (click on image to enlarge).
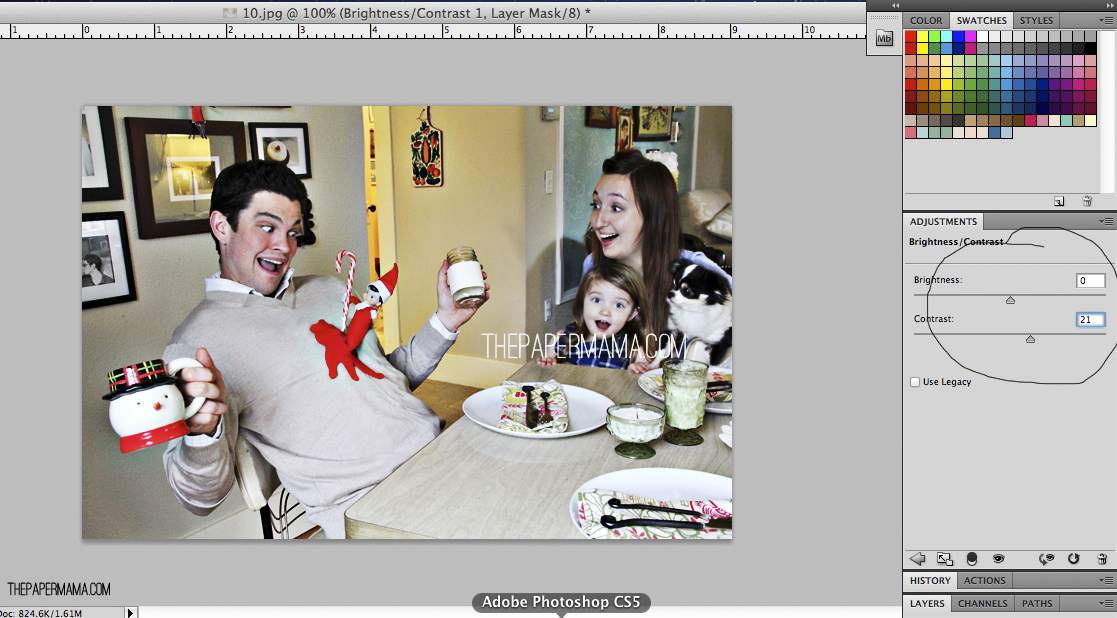
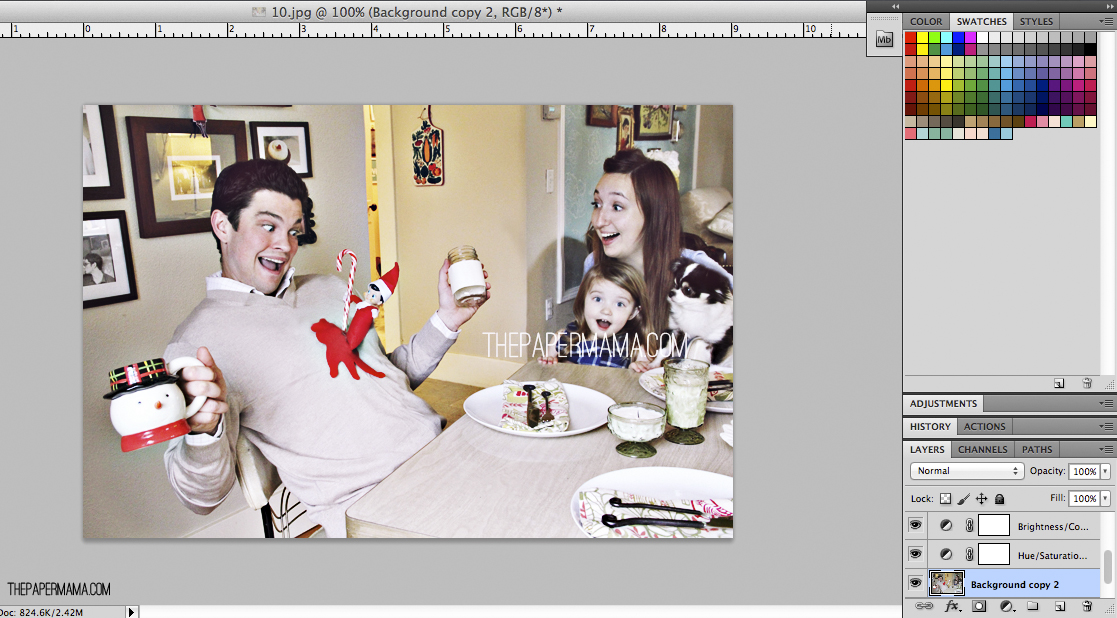
5. Click on your Background Layer (the original photo) and go to New Adjustment Layer> Brightness/Contrast. Set the Contrast setting to – 18 to -22 (your choice). (click on image to enlarge).
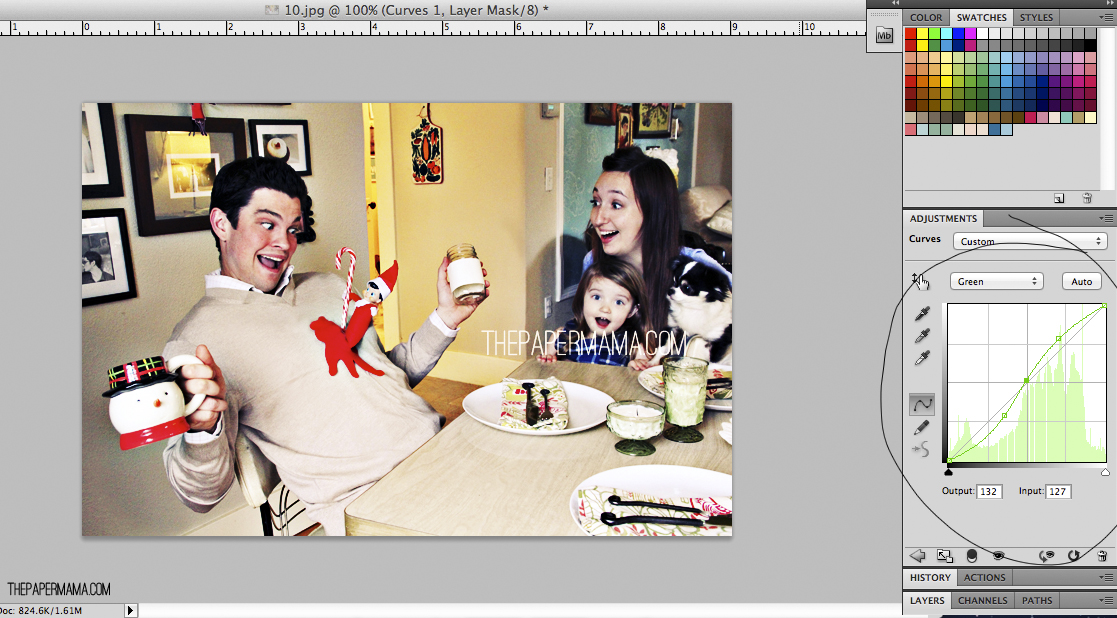
6. Above your Brightness/Contrast layer, add a new layer: New Adjustment Layer> Curves. For the Red Channel: increase highlights and decrease lowlights (creating an “S” shape). For the Green Channel: Increase the highlights, set the mid tones to neutral (set in the center), and decrease the lowlights. For the Blue Channel: Decrease the highlights and increase the lowlights (backwards “S” shape). (click on image to enlarge).
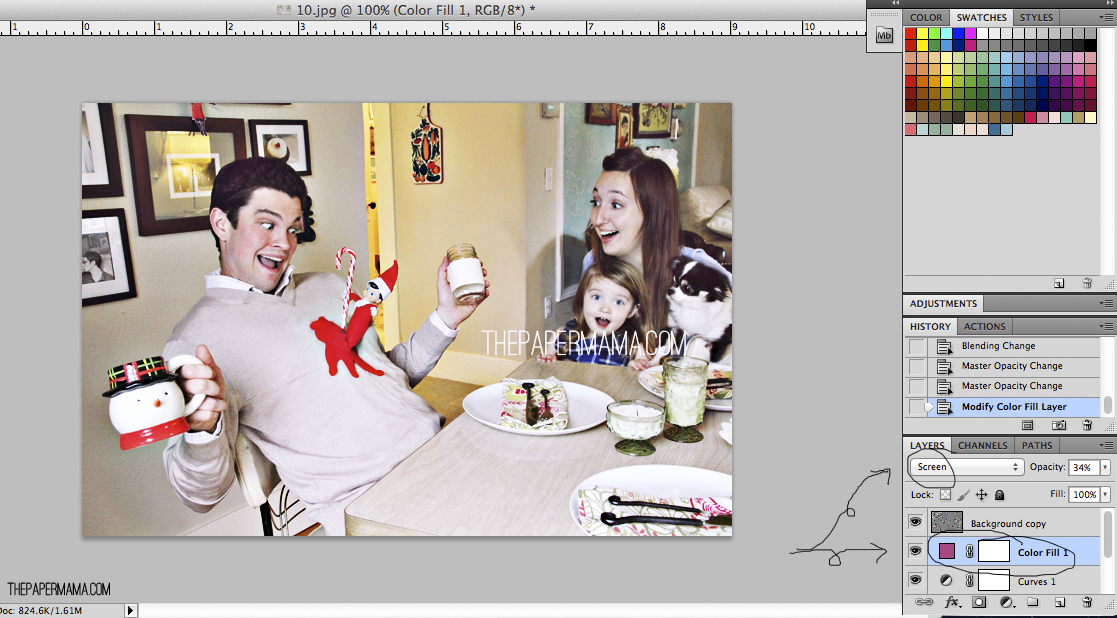
7. Above the Curves layer add a new layer: New Adjustment Layer> Solid Color. Choose a magenta color (my color # was: c14683). Set that layer to Screen, and reduce it’s opacity to 15 – 35% (your choice). (click on image to enlarge).
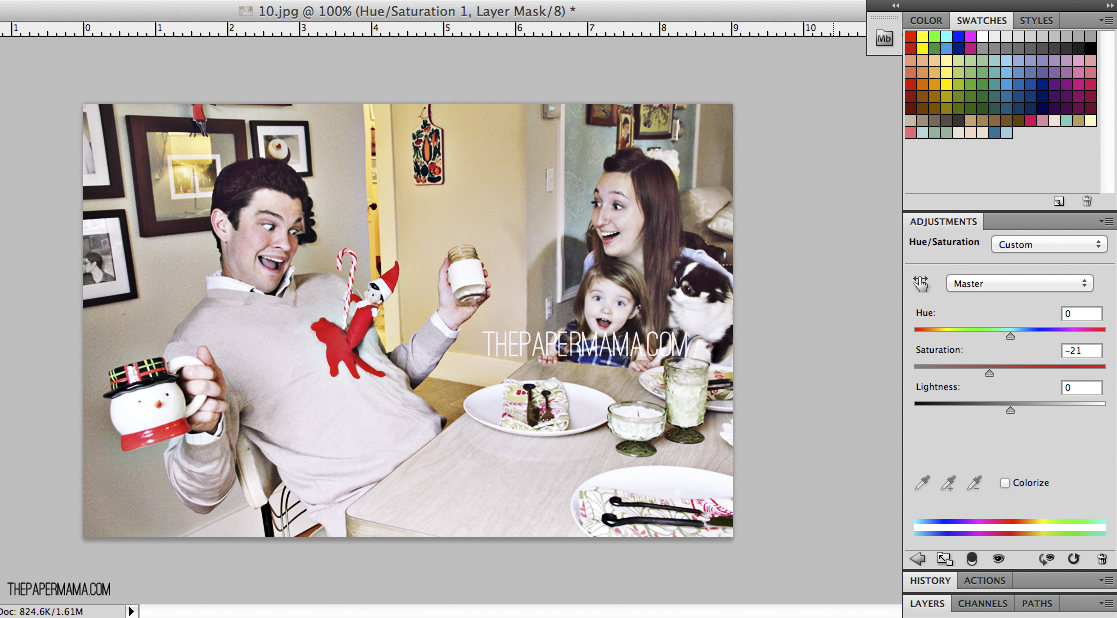
8. Click on your Background Layer (the original photo) and go to New Adjustment Layer> Hue/Saturation and move the Saturation to -20 to -30 (your choice). This will take out a bit of the pink/red from the skin. (click on image to enlarge).
9. Click on your Background Layer (the original photo) and duplicate that layer to create a Background Copy. Go to Filter> Noise> Add Noise. Add a bit of noise, this is completely up to you. I added just a TINY bit of noise (.19). Note: make sure Uniform is selected and Monochrome is deselected.
10. Staying on the Background Copy layer you just created, go to Filter> Lens Correction and in the Vignette section change the Amount to – 20 to – 50 (your choice) and the midpoint to +30 to +50 (your choice). This is to add a vignette. (click on image to enlarge).
11. This step is totally you! Adjust each layer. Maybe the numbers I shared weren’t really your taste, adjust opacities and numbers. Make it your own. Have fun!
Extras:
– I was way too distracted by the background in this photo…. so, I replaced it with a grey solid background. I felt that was more Rockwell, anyway.
– Optional: add some rosy red spots to the cheeks. Adjust the opacity.
– Add extra bits and pieces. I added in a newspaper (to tell the photo’s story better), flames to the candles, and splashes to the mugs.
Now that you’re all done, time to enter my Holiday Photo Challenge to win some AHmazing prizes!
– Chelsey
…………………………………………………………………………………………………………………………………………………
To keep up with my 50 DIY Days, click here:
Tags: 50 DIY Days of Christmas, photo, photo manipulation, photoshop, tutorial
Categories: 50 DIY Days, photography, photoshop









Would you be willing to do a similar Christmas card for us if we paid you?
I would love that, but I’m so crazy busy right now. Christmas is my busy season. Sorry, but thanks for asking.
Pingback: The Paper Mama Holiday Photo Challenge | the whimsical photographer
Wow this is amazing! Great tutorial too! I'll have to try this!
Thank you! Awesome!
😀
Pingback: Christmas Cards | JOYFUL scribblings
"Oh and then I just added splashes, rosy cheeks and a fancy pants newspaper because I'm magic." 😉 haha. Fantastic job 🙂 Thanks so much for sharing your tricks with everyone 🙂
Hee!
You are such a gifted artist Chelsey – I'm so impressed!
Phenomenal! I am going to try this………..
Great phot! I wish I could afford photoshop. LOL Thanks for sharing! It's hilarious.
http://mrsdchastain.blogspot.com
I'm not sure, but Photoshop Elements may be able to do most of this edit. 🙂
WOW- what a fun project. Your hubs is a trooper to play along. I would have a hard time convincing mine to help me out on that. This really came out great!!!
He looks forward to our Christmas Card photos. That's the only time he's into getting his photo taken. Ha! 😉
I'll have to check out your tutorial when I can see better. 😉 It looks awesome! You're so creative!
Bah! Let's not talk about your surgery… Lasers on eyes makes me scared.
this is so cool, chelsey!! thanks for sharing how you did it!! 🙂
Thank you for joining my Holiday Photo Challenge! Love your sweet photo. <3
Um. Um. VERY incredible.
I salute you!
Hee! Thank you.
Wauw !! Amazing
This is sooooooooooooooooooooooooooooooooooooooooooooooooooooooooooooooooo awesome!! lol
This is the coolest Holiday card!! I wish I had photoshop (and creativity) skills like you do. ha.
Lots of practice!
I so loved your edit when I saw your card, I can't wait to try your instructions out.
Let me know how it goes!
So very rockwell, I love it! You did a phenomenal job! Not to mention your family is adorable so your "models" are great ;] I think the addition of the grey background and rosy cheeks was so perfect.
Thank you!
Your holiday pictures crack me up. You did a great job merging all of those photos together! I love seeing the pictures you used 🙂
That is amazing and absolutely adorable! I'm obsessed.
It was so fun to put together!