First off… Quick note: Don’t forget to enter my giveaway! There are not too many entries… VERY good chance to win! Ends tomorrow evening 7/9.
Ok…
This Thursday’s Three is all about my Etsy shop: Paper Lady Invites. With being a new mama I haven’t been putting too much time into my shop in the past few months…. But, I’m just starting to figure out how to balance baby time and me time. 🙂
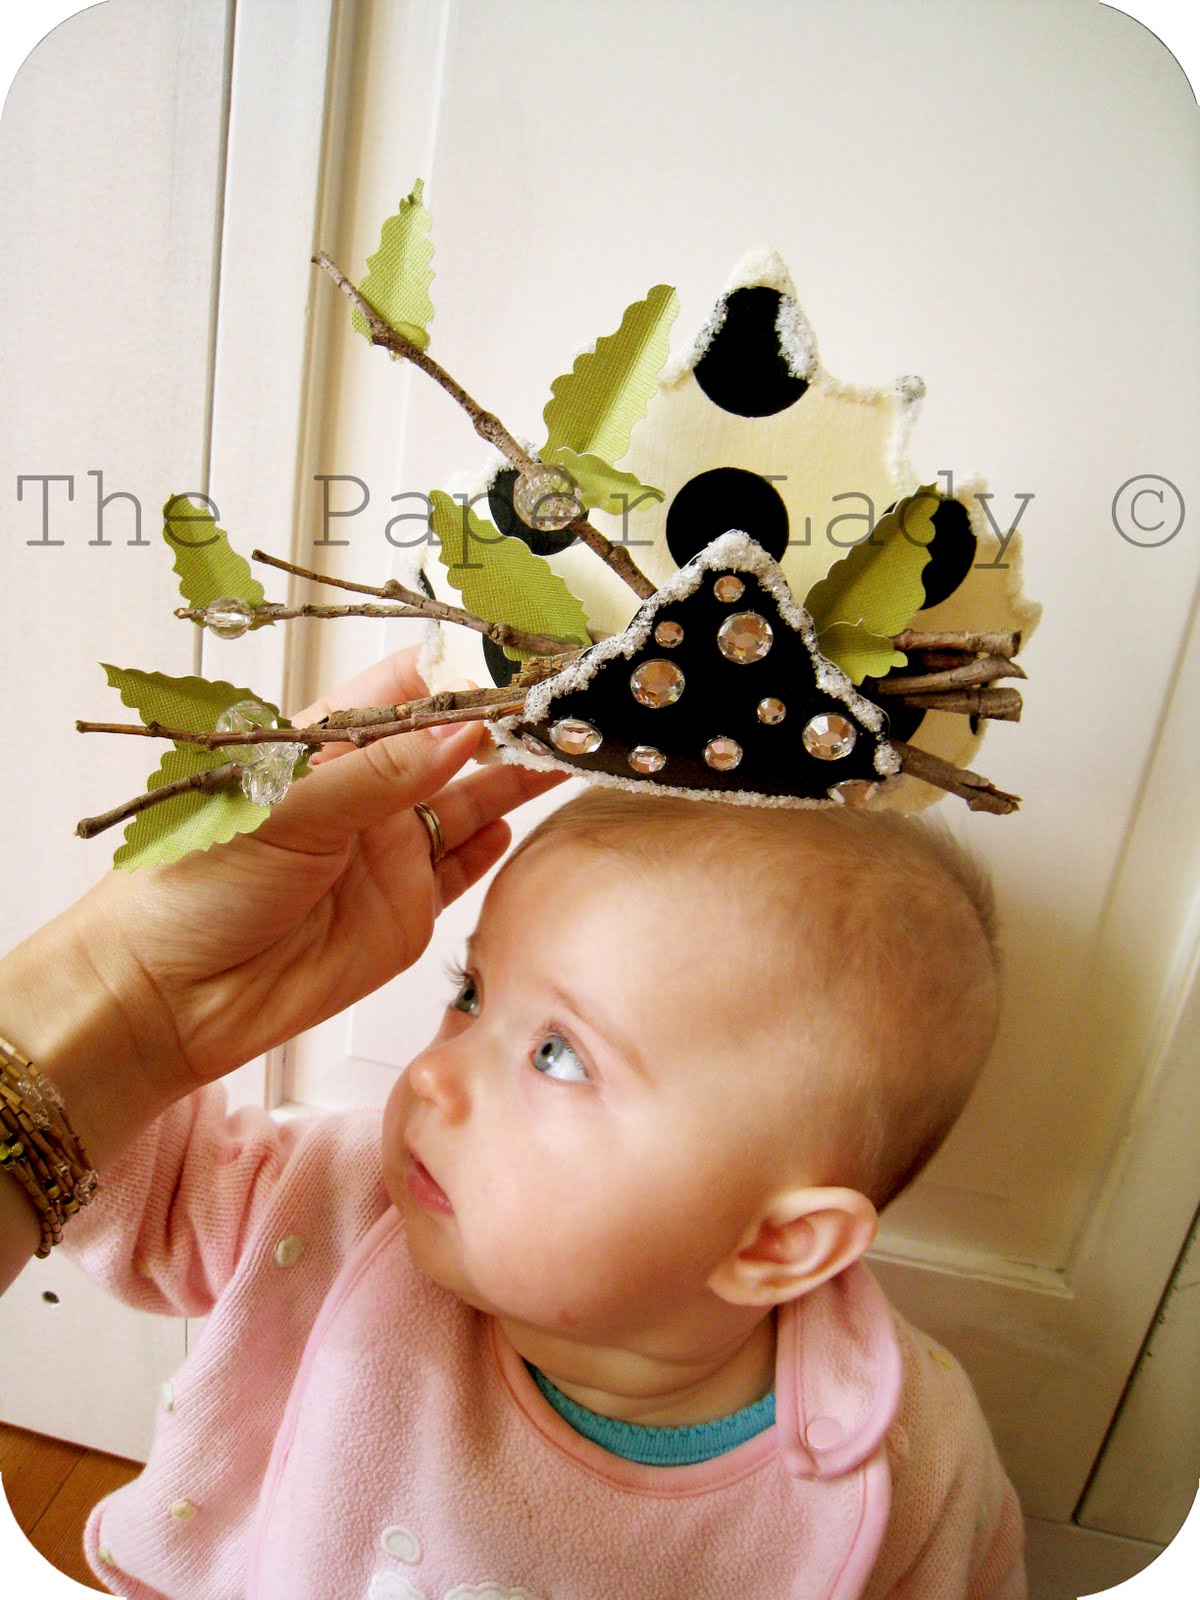
I’m so excited. I’ve sold 3 crowns in the past week! We had a little table setting event at Anthropologie (my job)… and I set up a table for a child’s tea party! I made 4 crowns to add to the table. Everyone loved them… so I ended up selling a couple! I don’t have photos of the table setting yet (it wasn’t taken on my camera) but, I did take some photos of the crowns I made. Ruari was kind enough to model them for me!
On to the Thursday’s Three (well, Thursday’s 6! ;D ):
1) This is a new design I have just started creating. Usually my adult crowns tie to the wearers head… this one is actually a tiara style! That way you can still have your hair all pretty and stylish! I will still be making both versions. My friend bought this tiara to wear to the Oregon Country Fair. I can’t wait to see photos!
2) This crown I made for my baby, Laureli. It will be decoration in her baby room until she’s old enough to not eat it! I do have one more of these crowns for sale in my Etsy shop. Please click here if you’re interested. 🙂
3) I made this child size crown for the table setting event. I’m going to give it to my buddy Kelsey. Her little girl’s name is Coral. She’s 3 months younger than Ruari.
4) This next crown was ALSO for the table setting event at Anthropologie. I plan to give this to my friend Roxana’s daughter: Kamilah. 🙂
5) This is the 4th crown I made for the table setting event. I really love it. I didn’t make this one for any specific person… so, I may put it up for sale. Probably later today.
Have a FABULOUS Thursday everyone! AND: don’t forget….
This weeks photo challenge: Favorite Toy! Last day is Friday!
Giveaway ends tomorrow!!!

The numbers have been reset! Help me get in the top 10! I ♥ you!