Venus Fly Trap Pumpkin Candy Holder DIY

Venus Fly Trap Pumpkin Candy Holder DIY Venus Fly Trap Pumpkin Candy Holder DIY

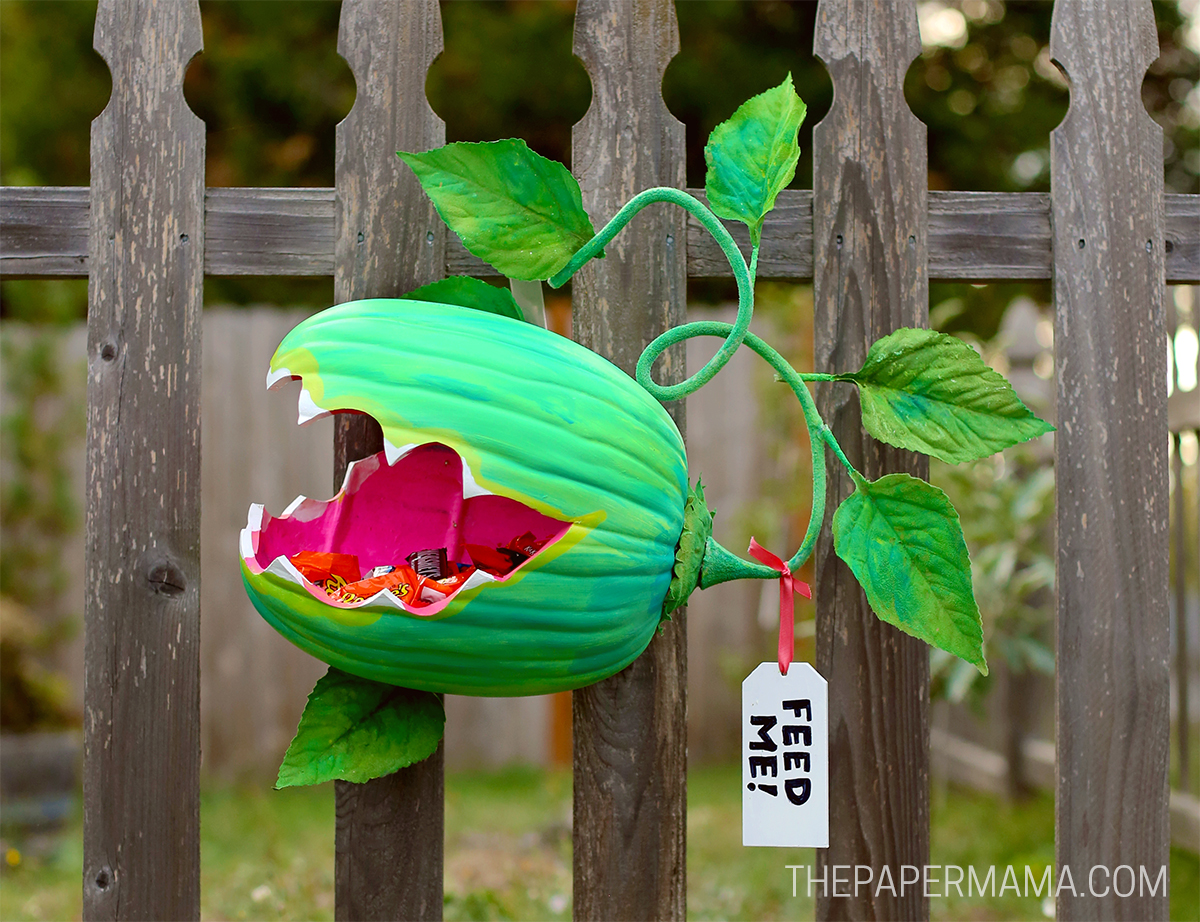
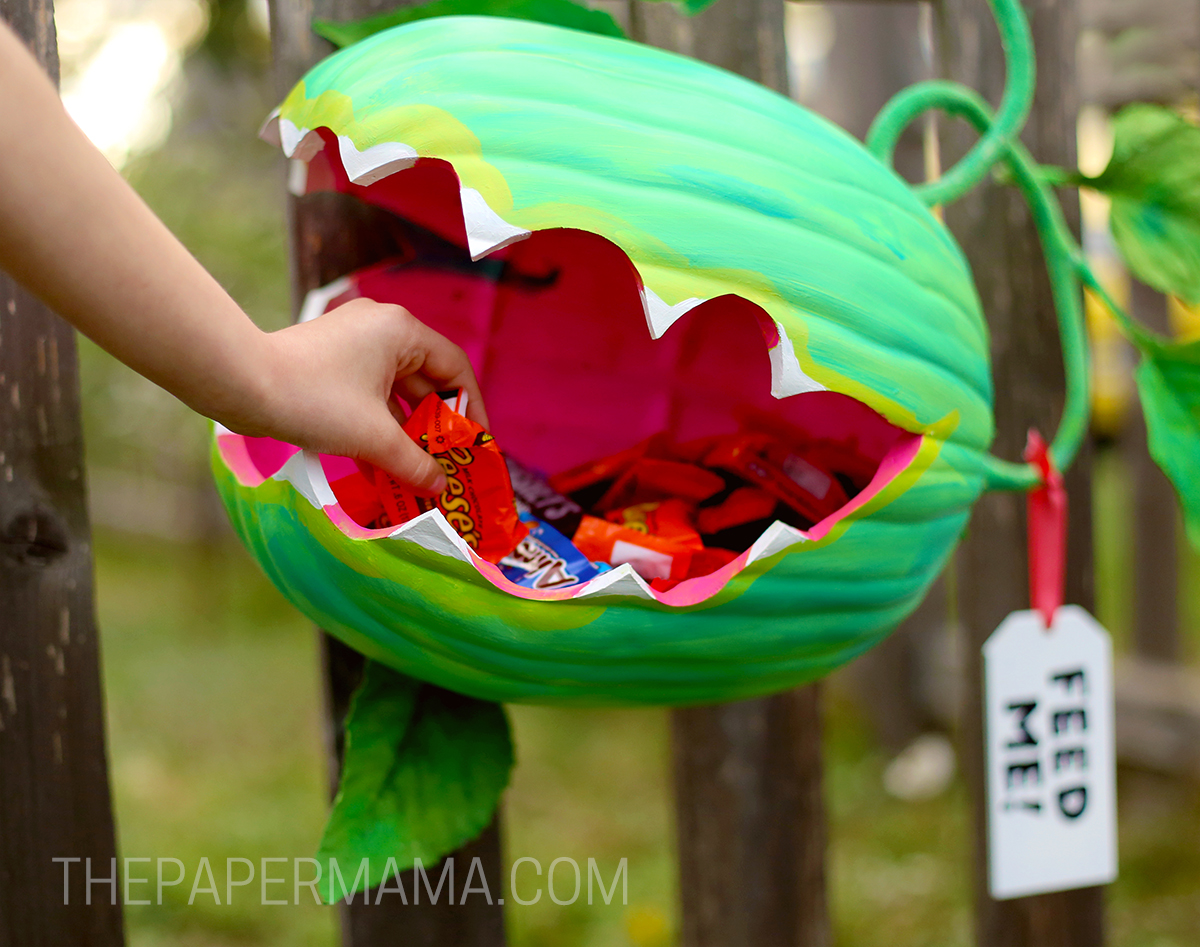
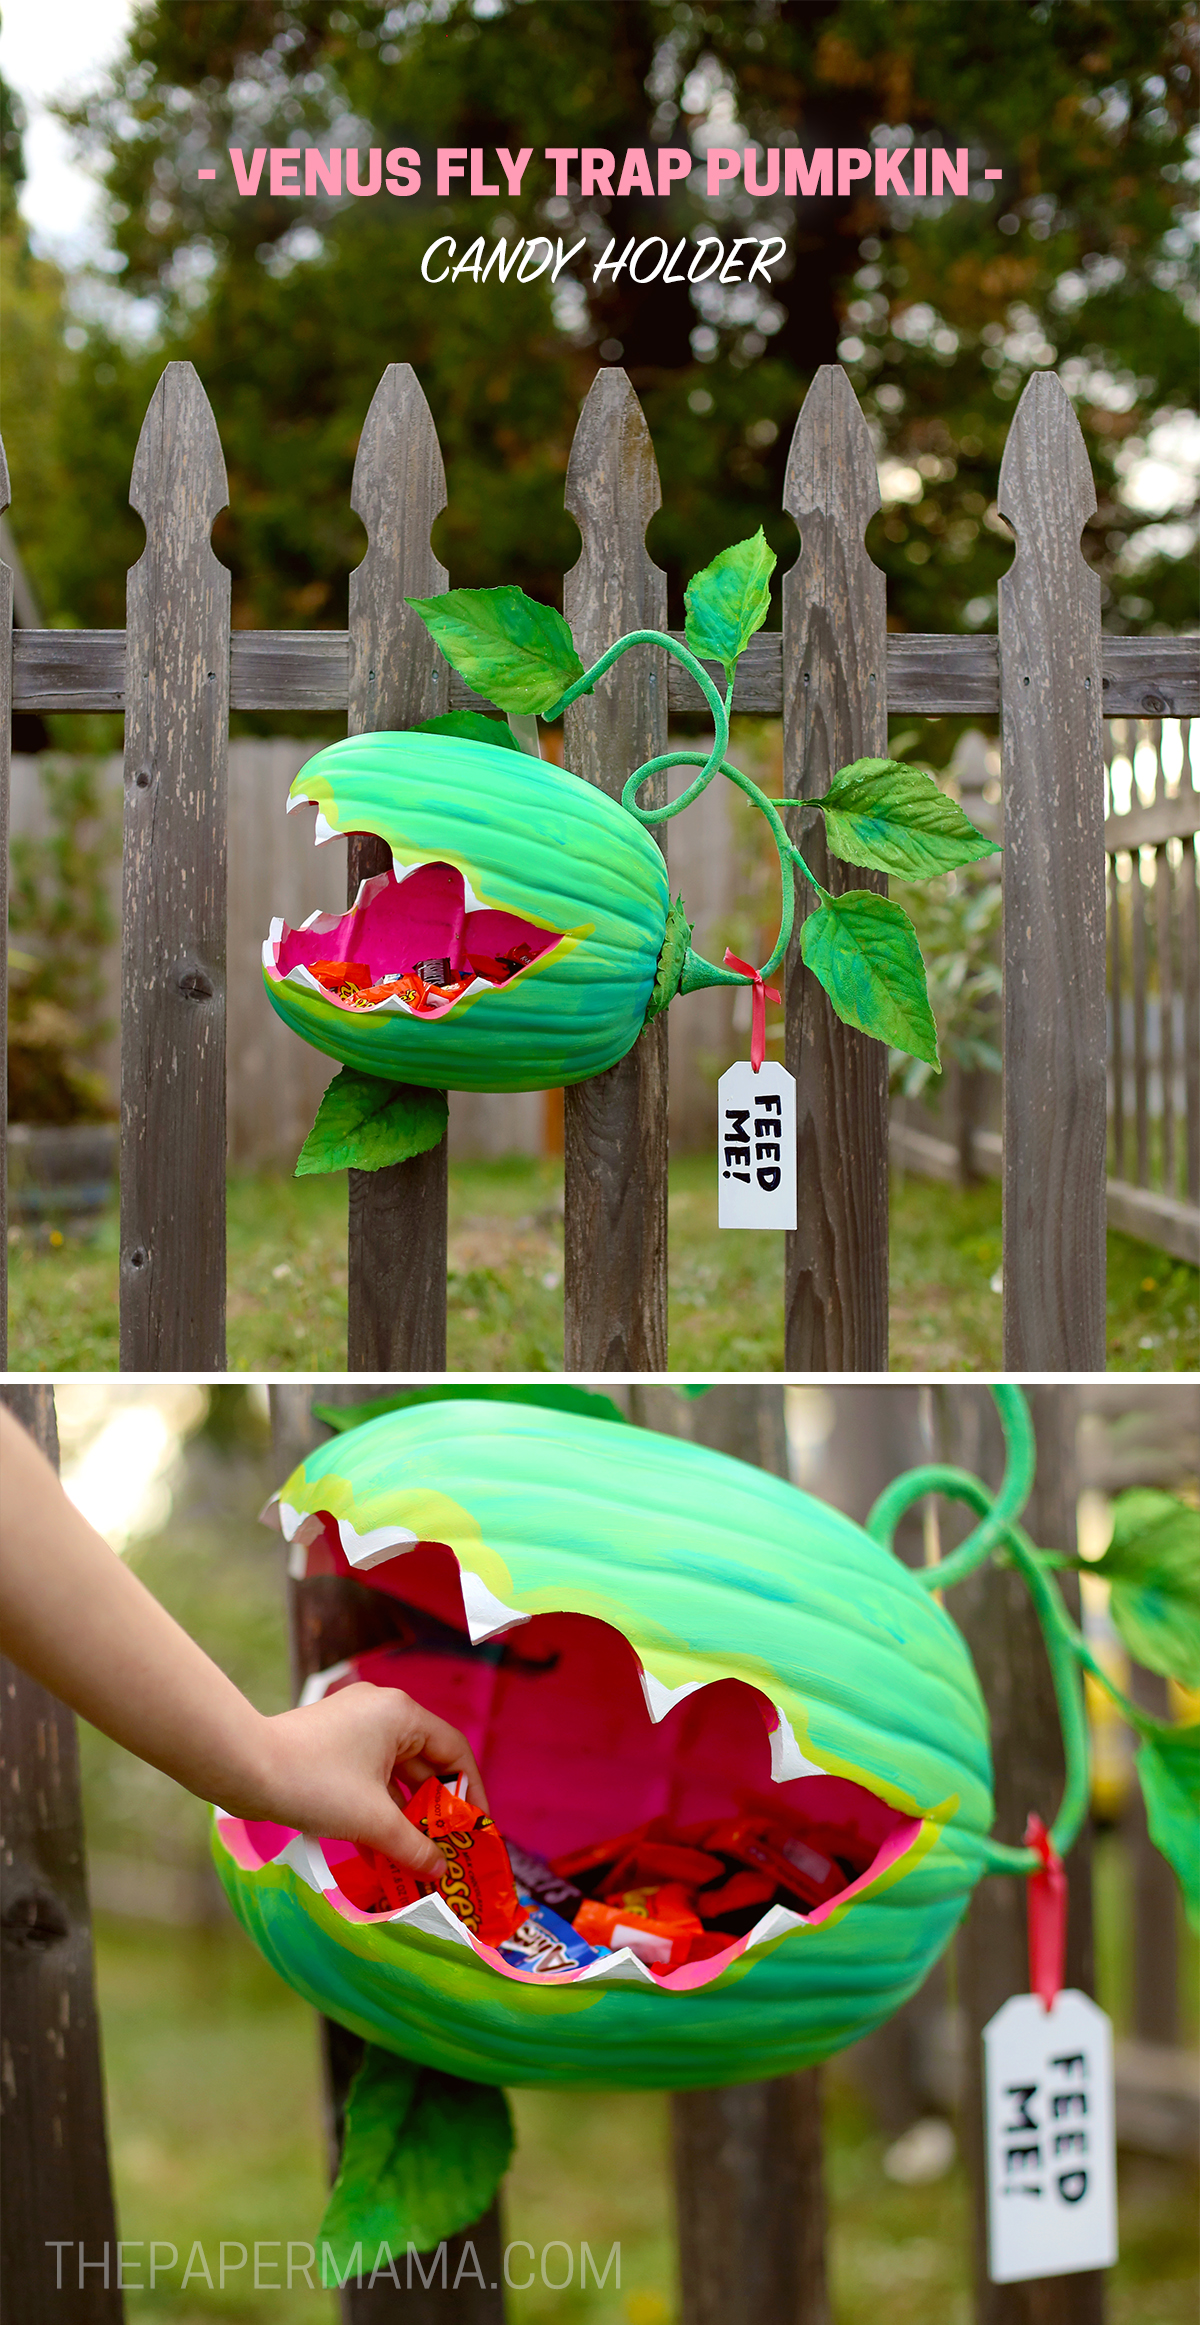
It’s just about Halloween, and I needed a new candy holder to set outside. That’s why I created this Venus Fly Trap Pumpkin Candy Holder. Because I have two young children to take trick-or-treating, I won’t be around the house to hand out candy. So this year I’ve made a Venus Fly Trap Pumpkin Candy Holder. All I need to do is toss a bag of candy into the mouth of this carnivorous plant, attach it to my door, and we can head out on our Halloween adventure. The neighborhood kids can help themselves to a piece of candy, or one teenager can help themselves to all of it. Haha!

It might look complicated, but it was quite easy to make, and you don’t need to be an amazing artist to create this plant friend.

Supplies needed:

Directions:

Step 1: Draw the Design

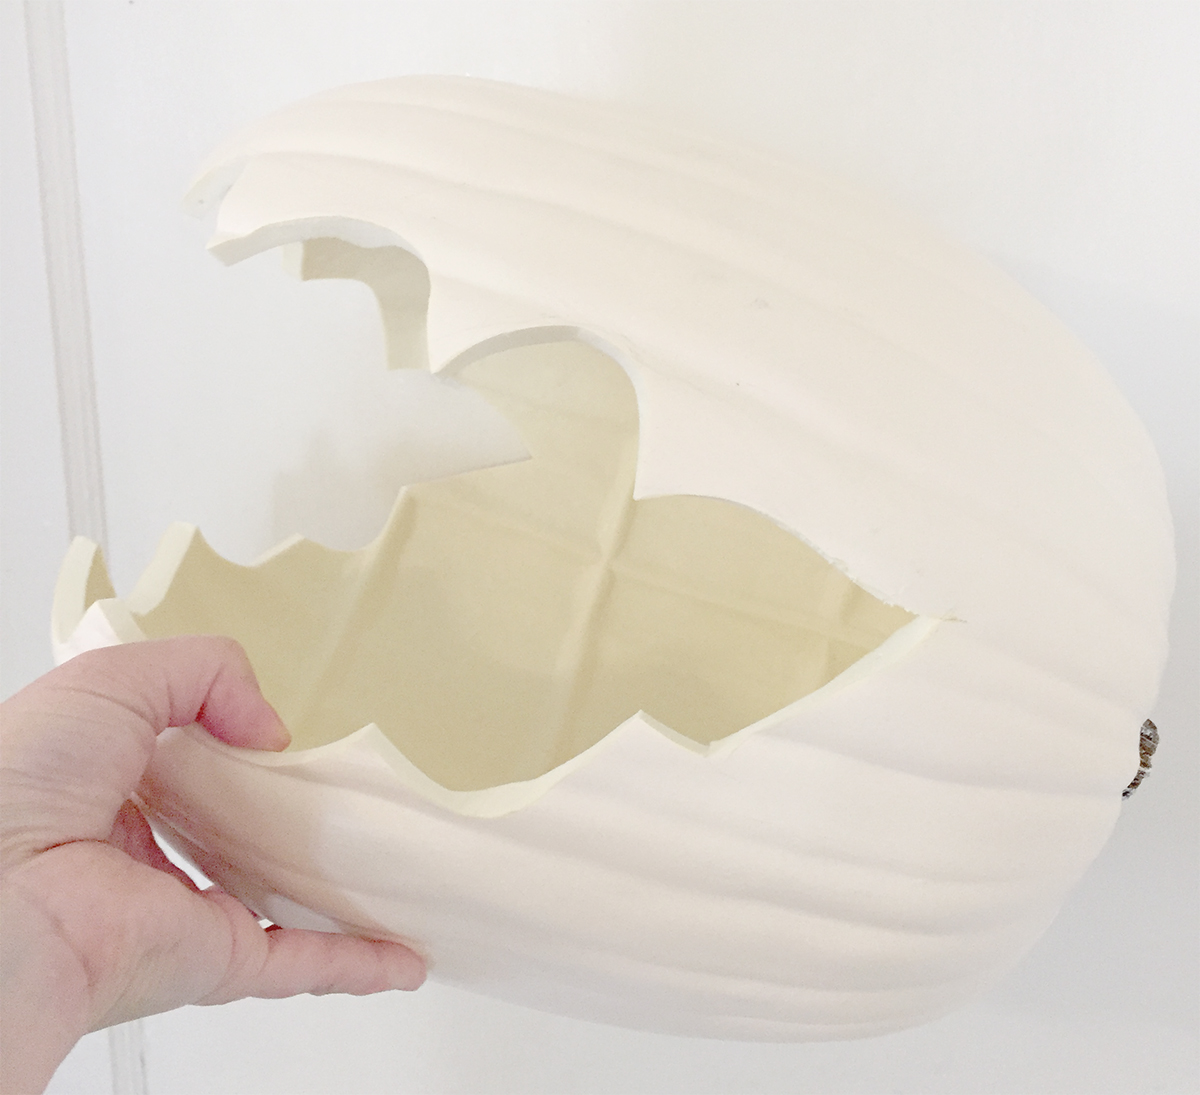
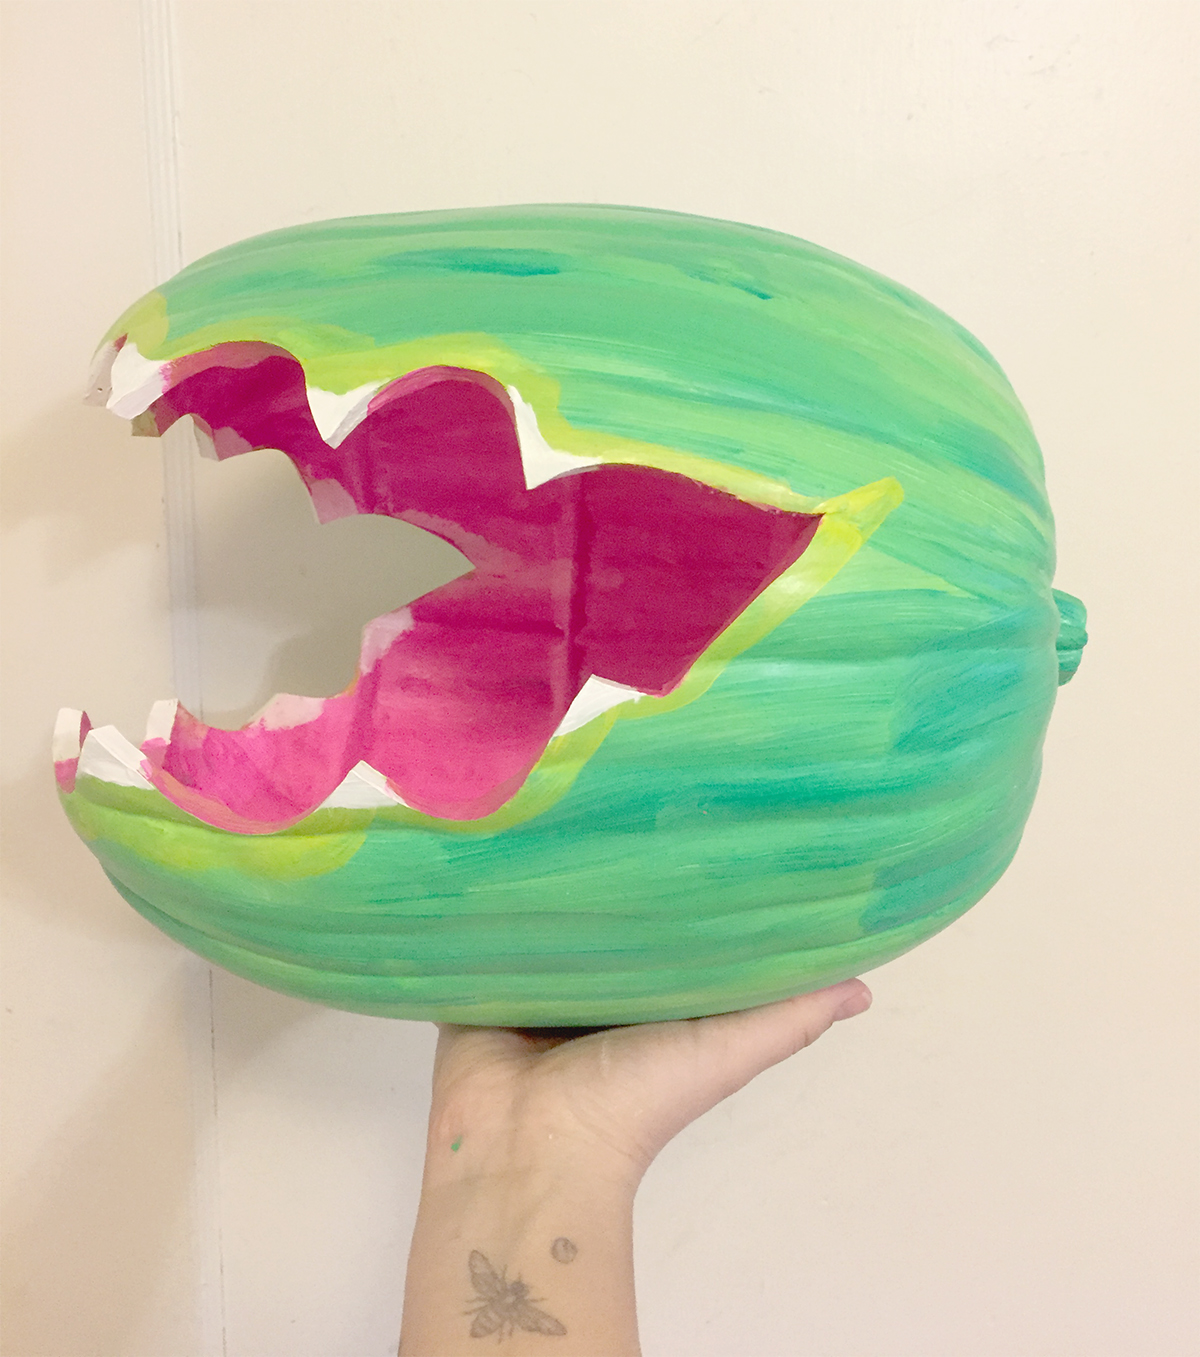
Figure out where the plant’s mouth will be. I chose to put the mouth on the base of the pumpkin. Use a pencil to draw the mouth with teeth on the pumpkin.

Note: be sure there’s enough room on the bottom of the mouth to hold candy. I cut one side of the mouth shorter than the other, so the pumpkin was more sturdy and could hold the weight of the candy.

Step 2: Cut the Pumpkin

Use the hot knife to cut along the line. You can use an X-Acto knife, but the hot knife makes it so much easier.

Step 3: Paint the Pumpkin

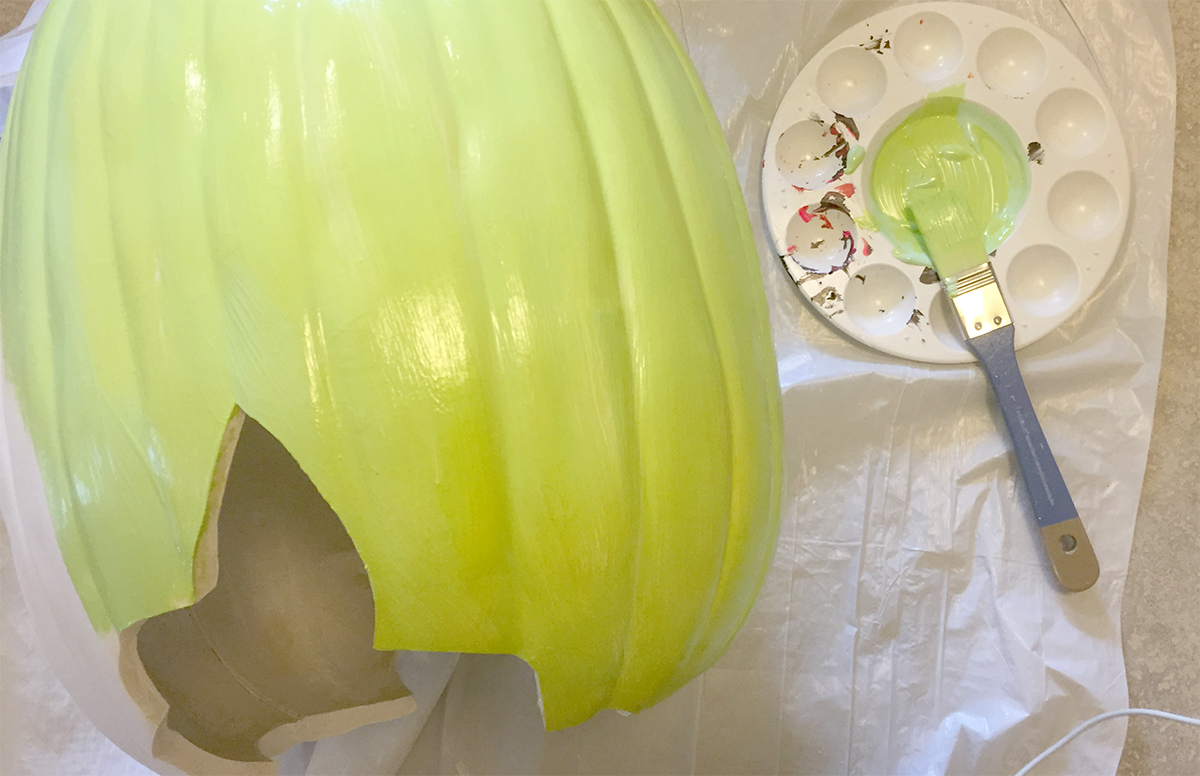
Now that your plant has a mouth, you can get to painting! For the inside of the mouth, I used two different pink colors to blend. For the outside of the outside, I used a bright green and bluish green. Once your paint dries use the white paint to add teeth. I also used the bright green to make “lips” for the mouth.

Step 4: Paint the Tag

Paint your wooden tag white, and let it dry completely. Use a sharpie marker to write “Feed Me!” and set aside.

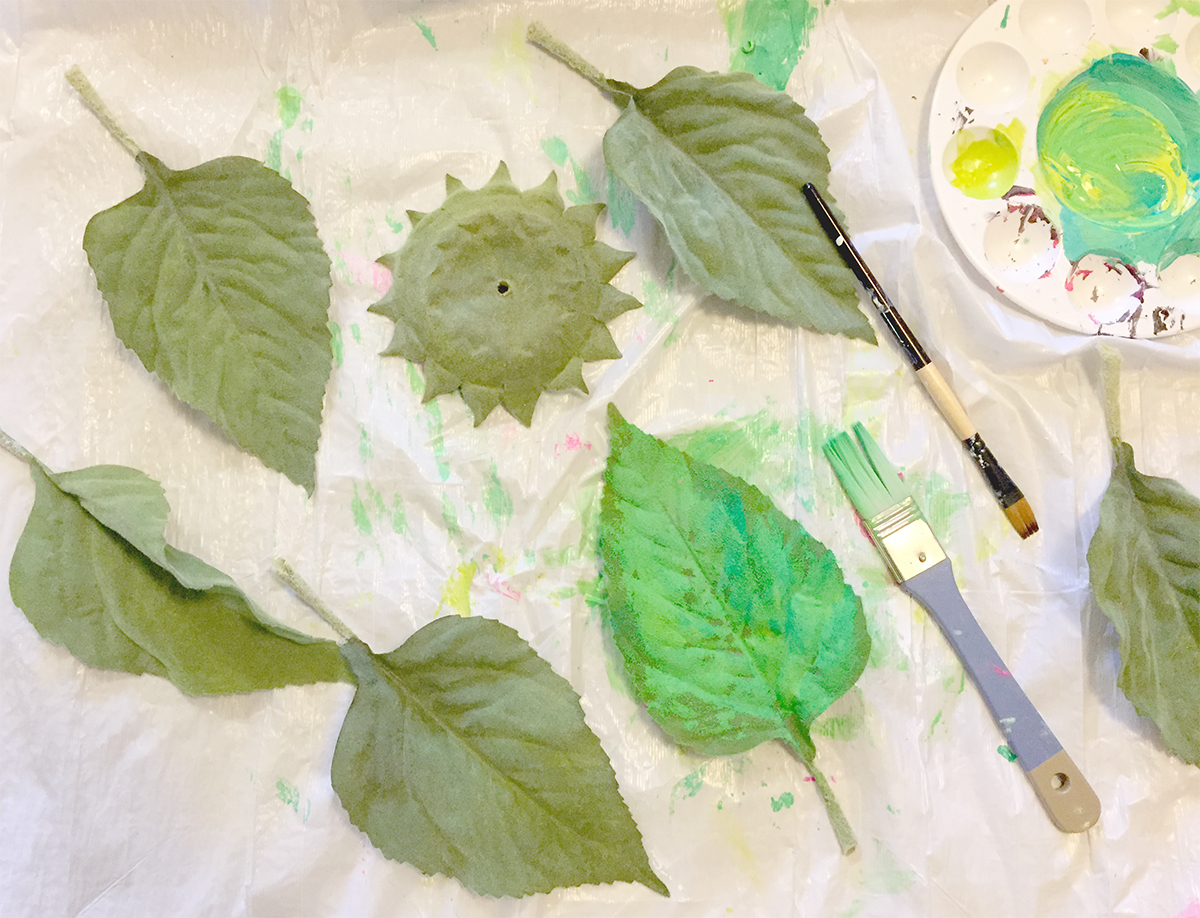
Step 5: Create the Stem

Grab your sunflowers and remove the flowers and leaves from the stem. I chose to paint the stems and leaves so the colors would work match the color of the painted pumpkin.

Step 6: Hang the Pumpkin

Where will you be hanging your pumpkin? On the door? The fence? Sitting in a planter? My pumpkin will be tied to our fence, so I used a door hanger. Using my hot knife, cut a little rectangle out of the base to push the hanger hook into the pumpkin. I then attached the top of the hanger to the pumpkin with a bit of wire.

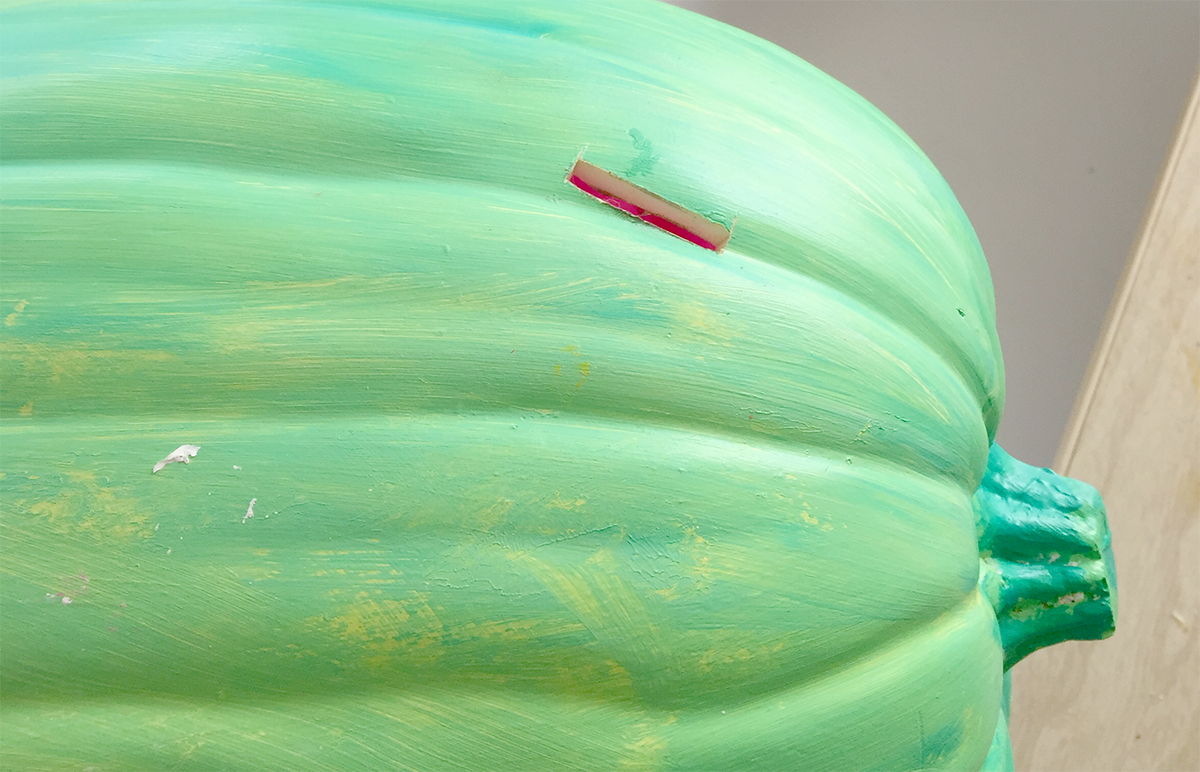
Step 7: Attach Leaves and Stem

With the hanger portion attached the pumpkin, you can now glue the stems and leaves to the pumpkin. First, using a hot knife, I cut off the pumpkin’s stem. I glued the base of the sunflower’s greenery to the stem portion of the pumpkin. Twist the sunflower’s stem into the desired shape, and then glue leaves along the stem. Use a bit of ribbon to tie the “feed me!” tag to the plant stem.

Hang up your cute carnivorous candy eating plant, add some candy and now you’re free to head out on Halloween.

If you make my Venus Fly Trap Pumpkin Candy Holder, please share it with me on Instagram or Facebook!

– Chelsey

Disclosure: I may earn a small commission for my endorsement, recommendation, testimonial, and/or link to any products or services from this website. There are affiliate links in this post. Thank you for your support. I was provided with a Michaels gift card to share this project with you.

Venus Fly Trap Pumpkin Candy Holder DIY


Tags:

Categories: diy, Holiday - Halloween


24 comments

  • Sue on said:

    OMG!!! I Love This!!! Such an Imagination! What did you make the stem with. I got the leaves…just wasn’t sure about the stem.

    • Chelsey on said:

      I used the stem from the sunflower I purchased. You can find a fake flower with a thick stem to use. Just take the flower off.

  • Darlynn on said:

    You could probably make the stem thicker by wrapping with floral tape and then painting it to make it more closely match your fly trap plant.

  • Marieanne Casse on said:

    I have no drawing capability! Did you free hand draw the mouth outline or is there a template? I would love to make this but fear my horrible drawing will ruin my efforts….

    • Chelsey on said:

      I drew it by hand. It’s basically a half circle repeating. Maybe practicing on some paper first will help?

  • Morgan on said:

    Where did you find the foam pumpkins? I cant find anything like that… 🙁

    • Chelsey on said:

      I bought mine at Michaels.

  • Rachel on said:

    I have read over the instructions looked at the pictures and read the comments multiple times and I still cannot figure out how you made the stem. The sunflowers that I have are much thinner and not as thick. Is there anyway you can provide photos of the stem or shoot me an email and walk me through exactly how you made the twisty curly stem.

    • Chelsey on said:

      The pumpkin is actually at my mom’s house right now. Were you able to find any other fake flowers with thicker stems? Which part of the stem do you need more details for? I can try and add more to the details, or try and get more photos of the pumpkin this weekend.

  • Rachel on said:

    Is it possible for you to send pictures of the stem part. Ive read the instructions and comments and still can’t figure it out. Your stem is far bigger than the sunflower stems I can find.

  • Cassie on said:

    I love this! Can you tell me the names of the paints you used for the greens and pinks? Thanks!

    • Chelsey on said:

      I don’t have a specific name. I did mix a green with a yellow and some white. The pinks were reds and pinks mixed with white.

  • carolyn on said:

    I love this! How did you string the pieces of wire together? In the middle of making…. 🙂 Thanks for the idea and gorgeous pics!

    • Chelsey on said:

      I was able to push the wire through the back of the foam pumpkin and sort of sew it to the wreath hanger. Is that what you were asking?

  • Leilani Cappetta on said:

    Can I purchase one of your creative venus fly trap? If so what is the cost? I am very interested. Thank you and have a great day.

    • Chelsey on said:

      I don’t actually sell them, but thanks!

  • Shana on said:

    Totally! I went to Michaels and tried to find what you used and I’m pretty sure I did but the three stems had me lost. Thank you so much for explaining. My family and I try to do a new porch idea each year and our neighborhood has many small children so finding wonderful ideas like this that aren’t gory is a challenge. Thank you again!

  • Shana on said:

    Love this so much! You mention in the instructions you need three sunflowers but I’m a little confused on how you did the stem. Can you please explain? Thanks!

    • Chelsey on said:

      Oh yes! I didn’t make it very clear. Three sunflowers are needed for the leaves (unless you can find a fake sunflower with more leaves on it). I used one stem for the pumpkin. First I glued the green backing of the flower over the stem of the pumpkin. I twisted the flower stem and glued the end onto the pumpkin stem. More glue to secure the curved stem portion onto the back of the pumpkin. Does that make sense?

  • Provident Kenworth on said:

    I want this!

    • Chelsey on said:

      Ha! Hopefully no one steals it this year.

Leave a comment!

Your email address will not be published. Required fields are marked *

This site uses Akismet to reduce spam. Learn how your comment data is processed.