Day 15 of my 50 DIY Days of Christmas: Christmas Card Photoshop Tutorial with Crystalyn of Flavor Pink! The Clone Stamp Tool in Photoshop is probably my FAVORITE out of ALL the tools. Did you take a photo and have a telephone poll standing out of the top of your head? Cloning Tool. Boom. It’s gone. A close second to the Clone Stamp is the Quick Selection Tool. I use both of these tools almost every time I work in Photoshop.
They’re both so handy and perfect for creating that unique Christmas card. I mean, I DO love a classic photo of the family together in front of the Christmas Tree, but I can’t seem to leave well-enough alone and I’m not the only one… Crystalyn shared the photo above in my Holiday Photo Challenge last year (and came in 2nd place). I asked her if I could share her photo for this tutorial and she said yes! I shared some of my own examples, plus some input from how Crystalyn set up her image, on how to use the Clone Stamp Tool + Quick Selection Tool to make your own unique Christmas (Valentine, Halloween, birthday, or whatever) card. Check it out below:
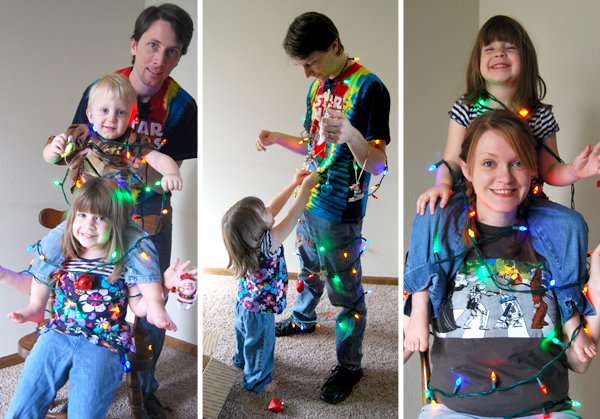
1. Crystalyn set up and planned the photos she wanted to take. She knew she wanted her family to be stacked up on their shoulders to create the “Christmas tree”. SO, she took photos of her, the hubs, and kids 2-at-a-time stacked on shoulders. Here’s what Crystalyn said about taking the photos with her family:
“Taking the pictures for this project was a ton of fun. I can’t stop looking at it, it makes me laugh. I lost track of how many photographs went into this, I think it was around 14. Little bits from here and there. Juniper took 65 photos of me getting up on Shaun’s shoulders. Maybe someday I’ll make an animated gif haha! I think the most amazing thing was the photo of Flynn on Juniper’s shoulders. I thought that was going to be the hardest part, but we got the perfect photo first try! Both kids looking at the camera with relatively happy expressions on their tiny faces? That almost never happens!! I did have to do a lot of reconstructing of Flynn’s torso to remove Shaun’s hands from his arm pits though.”
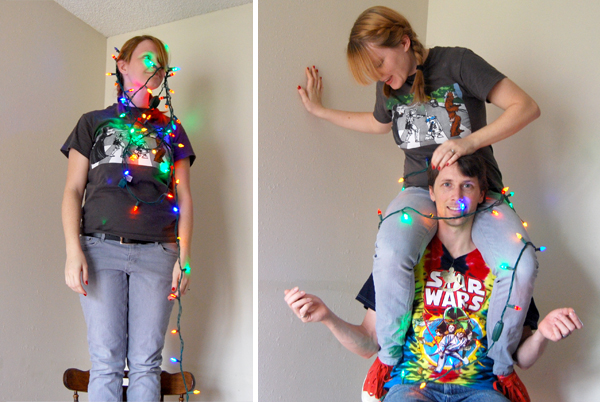
2. When her photos were shot, she got to work on the edits. When I start a big photoshop project, I always choose a “base photo”. This is usually the photo that will be in the “front” of the image. I would start with the image of Shaun (her husband) since his whole body will be shown in the photo.
3. Duplicate your base photo and work on the copy (I always work on a copy, just in case I mess up). Click on your duplicate copy layer and select the Clone Stamp Tool. Choose a “Soft Round” brush for the Clone Stamp Tool.
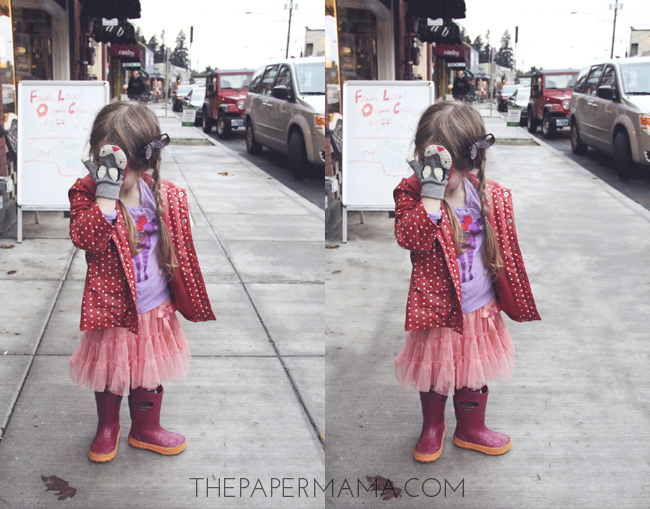
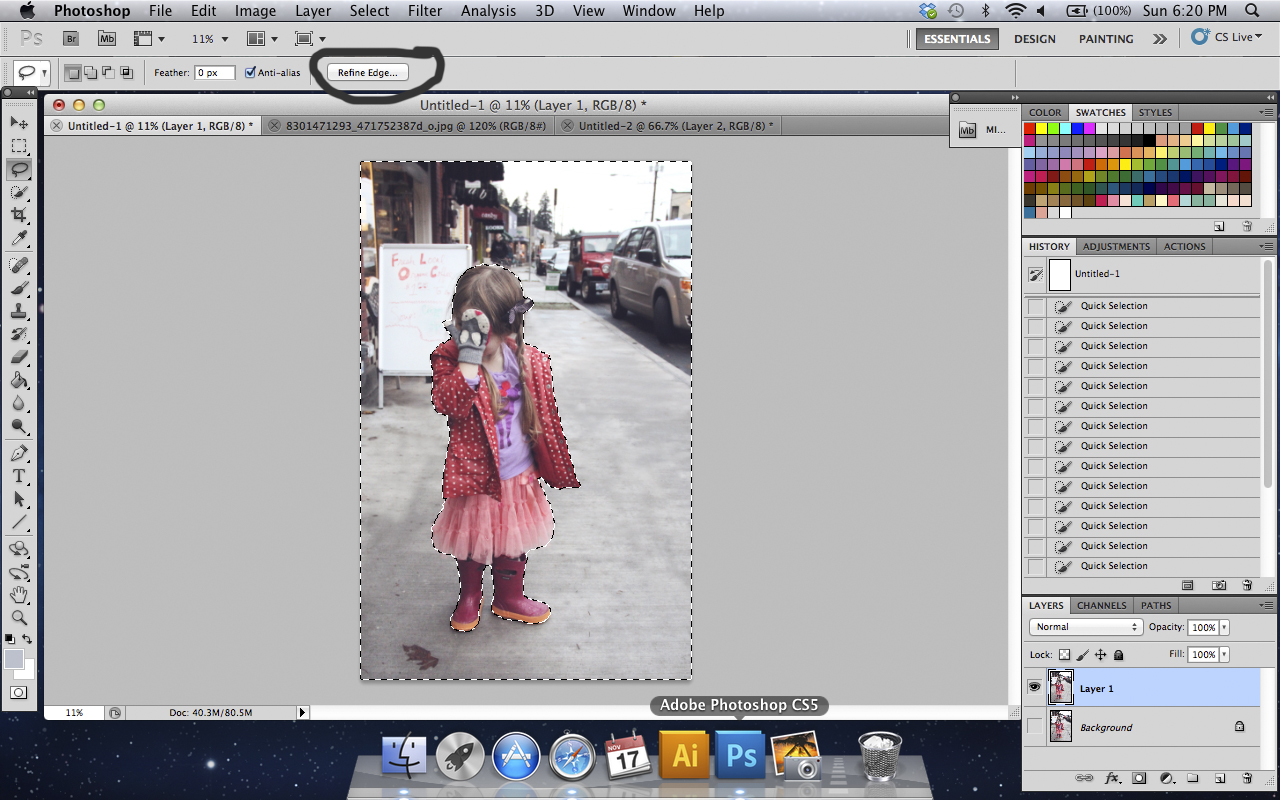
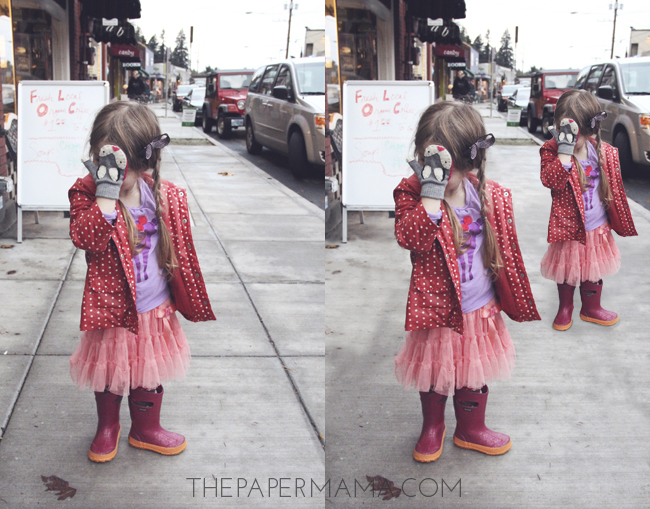
4. Find the area you’d like to make changes to. For the examples I’m using a photo of my kiddo on a sidewalk, I’m going to remove the lines in the sidewalk. Choose the part of the image you’d like to clone. In my kiddo’s photo I chose the blank portion of the sidewalk. Hold the Alt Key + Right Click and release. You’ve selected the cloned area. Right Click on the spot you’d like to fix (for me this was the line on the sidewalk). You’ve just cloned! (click on the image below to see a larger version)

5. Continue cloning out the portions of the photo you want to remove. An example for Crystalyn’s image: she needed to remove hands from under her son’s armpits and used the clone tool to clone his shirt and remove her husband’s hands. Below you can see how I cloned out the sidewalk lines in my kiddo’s photo.
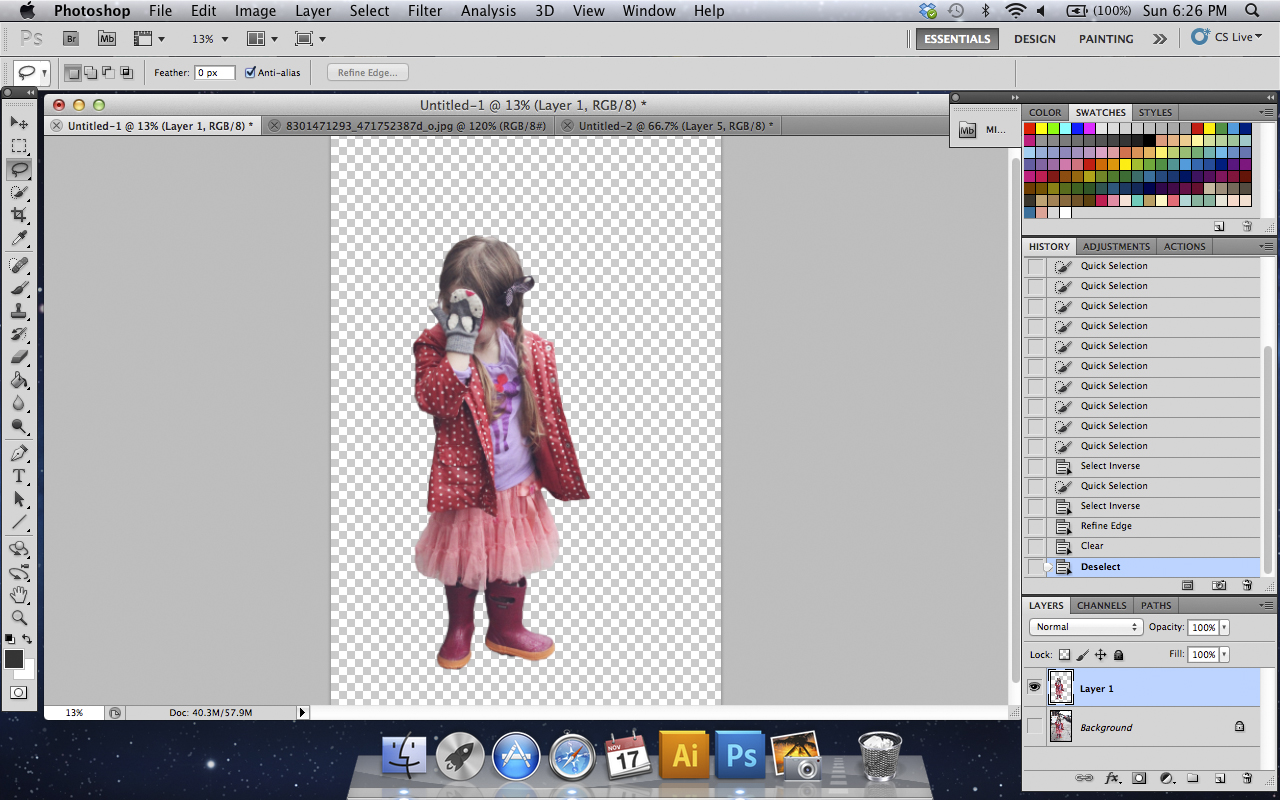
6. Ok, the Cloning Stamp Tool is super cool, but how did she cut out the background out from each image? The Quick Selection Tool will do this. Use this tool to select the background of your image. There’s a + and – brush for this tool, so if you select MORE than just the background, use the – tool to deselect. Tip: Taking your photos in front of a blank/white wall helps a LOT when editing in Photoshop. When you’re ready, click on the “Refine Edge” option. Here you can adjust the smoothness of the Quick Selection Tool’s line. I tend to do about 25% feather, 60% contrast, and a little smoothing. Press ok.
7. Push the delete button on your keyboard to delete the background. yay! Now you have a cut out human.
8. Drag and drop the cut out human into the base photo and get to editing. Using your Clone Stamp Tool plus Quick Selection Tool will help you finish this project. Use your paintbrush + opacity to paint on “shadows” behind your newly cut out section.
I hope this quick Cloning Stamp Tool and Quick Selection Tool tutorial will help you on your quest to the perfect Christmas card!
– Chelsey & Crystalyn
To keep up with the series, click here or on the image below!

P.S. I do have a couple of spots open for the DIY Days, so if you think you have the perfect project to share send me an email. First, check out the DIY/Submission section in my FAQ’s for a bit of post submission info. If you’d like to reminisce in the past 50 DIY Days of Christmas… here you are: 2011 & 2012. Reminder: all printables are for personal use only. Thanks!
This post is brought to you by,

Tags: christmas photo, clone stamp tool, cs4, cs5, cs6, how to, photo-manipulation, photography, photoshop, quick selection tool, tutorial
Categories: 50 DIY Days, diy, Holiday - Christmas, photography, photoshop