
After about one million years I’ve finally finished Miss R’s teepee! Back in November I planned this whole teepee deal. And, because I procrastinated like to plan…. it took me 4 months to do. Well, 4 months to start. Ha! The whole teepee project took about 3 hours. Not bad. And, I enjoyed the whole process!
I don’t have any exact instructions/measurements… but, I can share with you how I did it! If you know how to sew a straight line: you can do this!
Supplies needed:
– A large sheet. I think mine was king size. Found it while thrifting for $2.
– 4 poles/sticks. Mine are 54 inches high and were given to me for free.
– Rubberbands.
– Rope/ribbon to tie the sticks together.
– Pretty ribbon.
– Grommets
– Sewing machine
(did you notice the total cost of this was $2? I had all the other materials already. Yeah!)

First, I gathered up the four sticks. Holding them standing straight I wrapped a couple rubber bands around them to hold the sticks in place. Then, I grabbed my rope and started tying the sticks together. Lots of knots and wrapping. I’m sure there’s some special way to do this…. but, I didn’t really look up instructions. Hee.
Once everything was all tied together I tested the teepee out. Made sure the sticks opened out to how wide I want them for Miss R’s teepee.
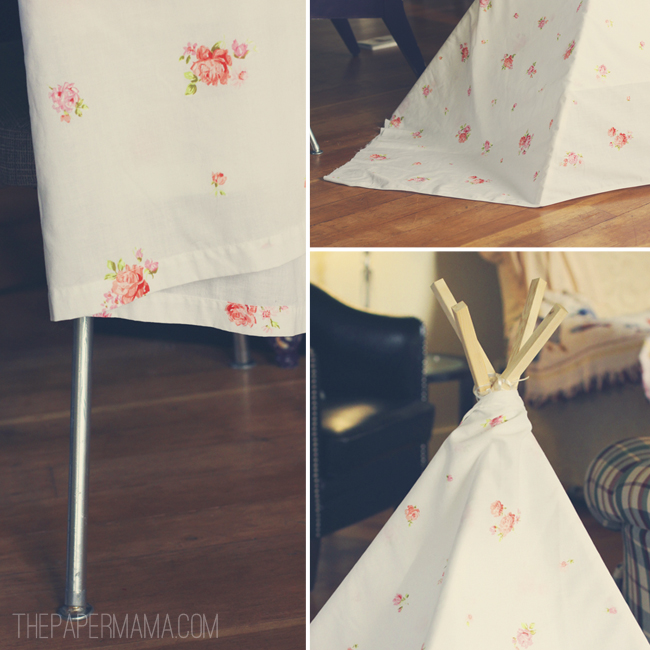
Next up, measure your sticks from the tied up section to the floor. Mine measured 45 inches. So, I folded my thrifted sheet to measure 45 inches exactly. I pinned that up and sewed a straight line.
Then, you’ll drape your sheet onto the poles and line it up so everything is covered and the fabric is where you will want it. You may notice there’s a little triangle flap on two sides. You’re going to fold those under and pin them.
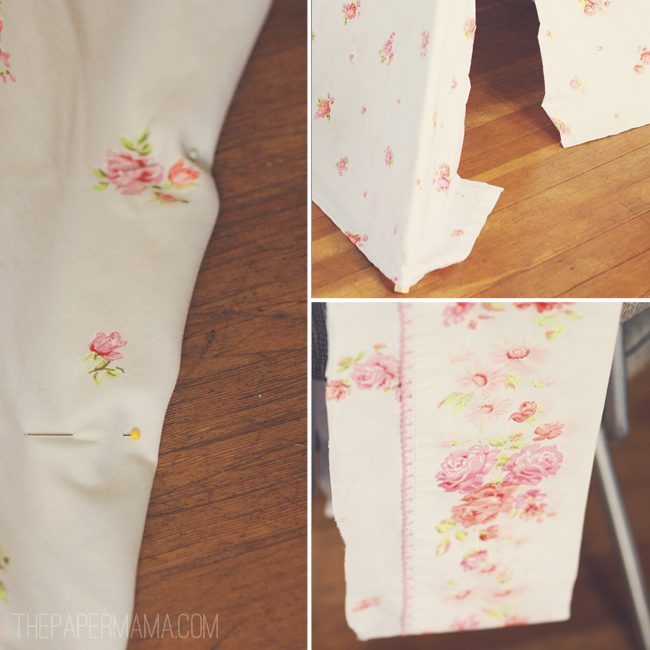
Once you’ve sewn up the triangles, trim the excess fabric and fit your fabric over the poles again. So, my sheet had this really neat trim, that I had cut off, and wanted to use somewhere. I figured out where to put it, right in the opening to the tent. The doors. I pinned the trim on to the flaps, sewed them on…. and fit the fabric back onto the polls again.
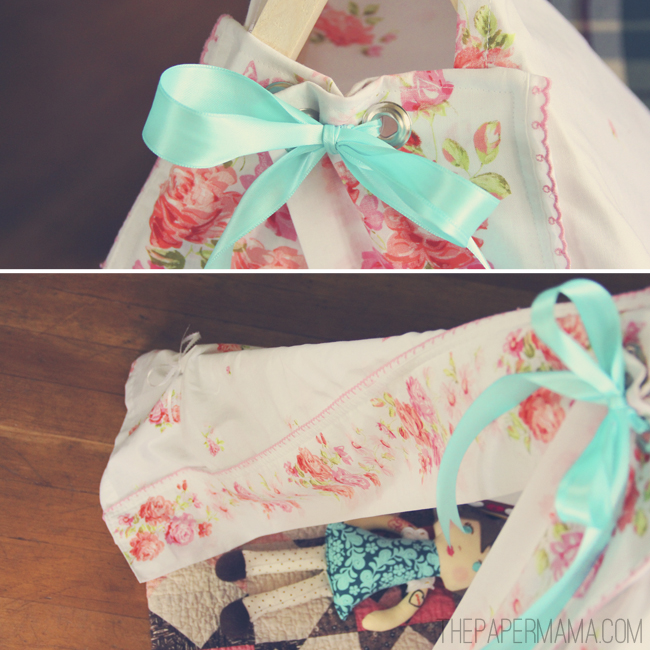
To keep my fabric secure on the poles, I added grommets to the flaps, and around each poll. That way I was able to tie some pretty ribbon on to keep it all in place. AND, that’s it! You’re done! Really very simple. I just guess each time I sew. Seems to work out. (ha!).
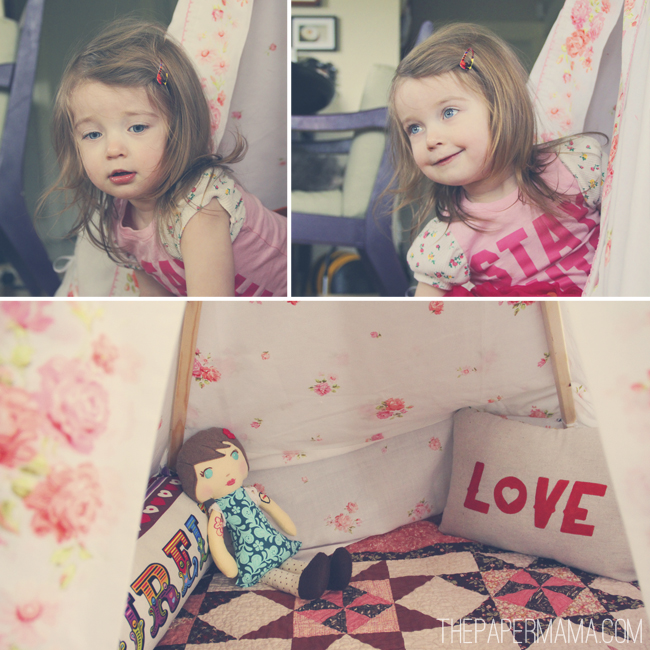
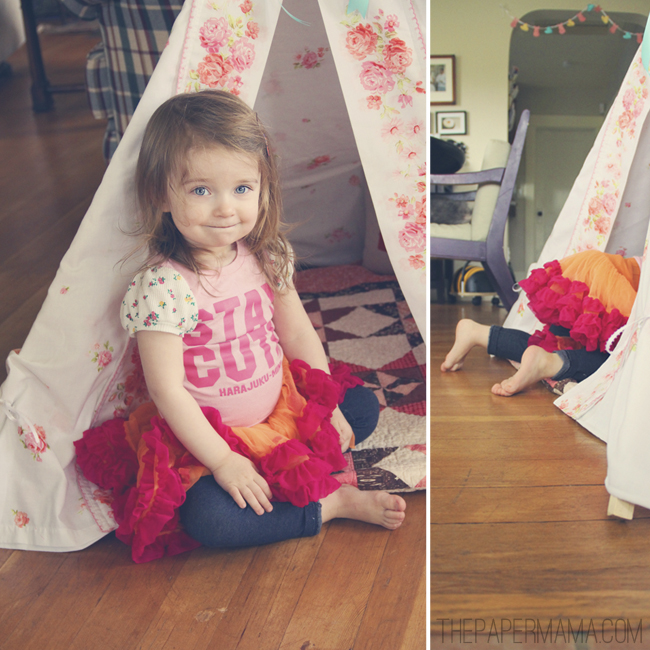
You guys should know the best part about this thing: Ruari said she wanted to nap in it… so, I said yes. We set up blankets, books, horses, and dolls. I said good night and sat in my chair 10 feet away catching up on emails. She did NOT nap (what’s new these days), but she did sit/lay there for 2 glorious hours singing/chatting/giggling to herself. For those that may not understand: that is the most amazing thing on this planet! My 2-year-old toddler sat still and entertained herself for 2 hours straight. I’m still in awe.
When she was finally done… she peaked her head out and said, “Mama I’m all done. I’ve been sleeping all day! In my dog house!” Silly.
I hope you all enjoyed!
{Related Posts://Placemat Apron//No Sew Bow//Rainy Day Jar for Kids//}
Tags: a thrifting i will go, cheap, child, craft tutorial, diy, how to, kid, laureli, pup tent, Ruari, teepee, tent, toddler, tutorial, used materials
Categories: diy, favorite posts




Hi! I featured your post on this Teepee tent on my blog with a link to your teepee tent tutorial after making one myself! Please go and check it out 🙂 http://www.heytheredelilahfashion.blogspot.com
Pingback: Links to Love « The Budget Maven
Awe, what a neat teeppee! :p
This has been on my list forever!! I'm feeling inspired to try again and I have the perfect sheet 🙂 Now, to find some ribbon…
Love this! I wish I was thrifty & crafty. I have no idea how to use a sewing machine! It's perfect though! And where did you get R's cute skirt?!
I only know how to do basics on sewing machines. Practice has been helping. And, her skirt is thrifted. 🙂
I love It! It turned out so darn pretty! I'm pretty sure my kid would get inside one of these and just try and walk around in it.
Ha ha! Well, maybe if you used longer polls? 😉
Oh my goodness. My mom made my brother and I a temporary Teepee + log cabin every year (blog here … http://laviediy.blogspot.com/2011/11/traditions-p… and those were my favorite childhood memories. I've never thought of making a permanent one 🙂
Your mom is AWESOME! I bet those memories are the best!
Seriously, she is the cutest! The teepee is so pretty, especially with the aqua ribbon detail and the lovely bedsheet pattern 🙂
Ruari is so adorable. And that teepee is so excellent!
oh my goodness. I so want to make one of these for my niece! Adorable.
I need to make one of these for my son! He just turned one, and his room consists of a crib and a dresser… Seriously, I need to do something in there for him. And he is obsessed with hiding so this would be perfect. My daughter also never naps, but sometimes she'll get annoyed and announce "I'm going to sleep, three days!" (She adds 'three days' on the end of almost every sentence for some reason.)
This is so pretty I wouldn't mind having it in my living room forever! I foresee lots of fun memories in this little tent. I think I need to go thrifting today…feeling inspired…
Have fun! We moved it to her room…. but, I'm considering bringing it back out to the living room. 🙂
i want a grown up version!
MEEEeeeeee too.
Dude, this is so awesome! I have aspirations to make one of these for Margaux eventually. We'll see how long it takes me ha!
Ha! You are so crafty I bet it will be awesome.
This is adorable! Residing in an oversized fort, I have had a tent making plan in the works for a while. I will just have to get over the planning portion and execute. Way to inspire!
Let me know how it goes! 🙂
By herself? NO WAY! My son would never… Wait. Maybe I need to try this. It looks so fun!
I was shocked. But, she just sat there! Yeah!
Omigosh, adorable! I've been trying to decide whether or not I wanted to make one of these lately… (the whole fear of more kid
clutter everywhere) but its sooo sweet! (For now I'm just making a play-house tablecloth that fits over the dinner table)… but you
sound just like me for these projects – just WINGIN' it!
She's gorgeous by the way.. and that 'nap' sounds miraculous indeed, good job crafty mama!
Mel ;o)
needle and nest design
I love her. I was shocked how grown up she looked in these photos! I like the dining table play area! Sounds fun…. New craft idea. 🙂
Thank you so much for sharing this! You did a really great job and you have inspired me to give it a try for my 2 1/2 year old. But, I have a question: how do you add grommets? is it easy for a first timer? Thanks!
Oh yes. I didn't really talk about that. So, it's pretty simple. BUT, you need the right tools. I use grommets a lot in my crafting, so I already had it all. It's not too expensive and good for other crafts. Go to a local craft store and ask someone where to find the tools got grommets. You could google a how to as well. Let me know how it goes! 🙂
Oh this is darling! Good job! I have been wanting to make/buy one of these for my kids forever now! I just might have to finally do it after seeing this!!! xoxo
It was surprisingly easy. Just cut/pin/edit as you go.
Wow that is awesome and it's super cute. Sounds like a fun project my DD's would love this. I might look into doing this for my girls.
Let me know how it goes ! 😀
Awesome job, Mama!
Thanks lady!
That is so adorable!! I love it! So feminine and cute. No wonder she doesn't want to get out!
I wish I fit in it. I will have to make one for myself. 🙂 and, thanks for the sweet comment on Life with Kaishon.
Hi, what a great one!!! i have seen a few but yours is very pretty. i will be book marking this for charlie one day. i am the same way, i like to um…. 'plan' lol.
Ha ha ha! Yes…. All my "planning" just makes everything take longer. 😉