I was wandering a local antique shop the other day…. and, I saw a sweet little image of a child framed by some pressed flowers. It looked like it was very very old. The flowers were long gone and very brown…. but, so very sweet. Someone loved this child and took the time to press and create this image.
When I was younger I did the whole pressed flowers/clovers/whatever experiment…. and, I probably have some of those old flowers in some old books somewhere I’m sure. But, I wasn’t really into doing that this time around. How about something new…. from old inspiration?
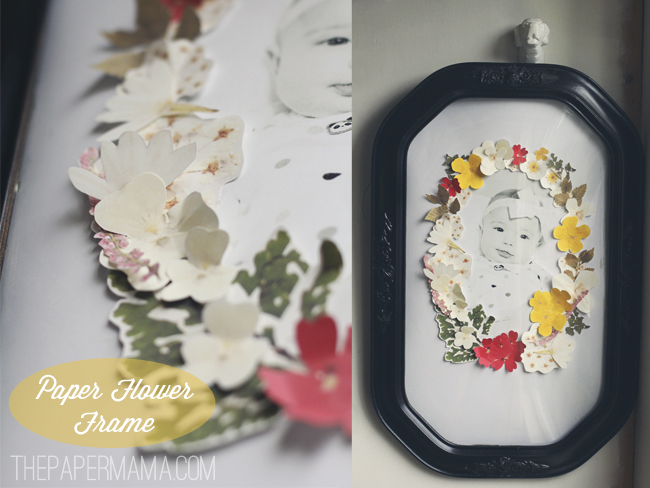
So, here’s my Paper Flower Frame! The paper flowers are new… the image is new… but, the frame is very old. My mom bought this frame from and antique shop when I was little. It used to hold the creepiest photo of a baby…. you know… the old photos of babies where the eyes followed you. Yup. So creepy. But, I safely removed the poor baby and have transformed the frame.
I’ve added one of my favorite photos of Ruari…. added a paper flower frame…. and, there it is! I am absolutely in love with this.
The how-to:
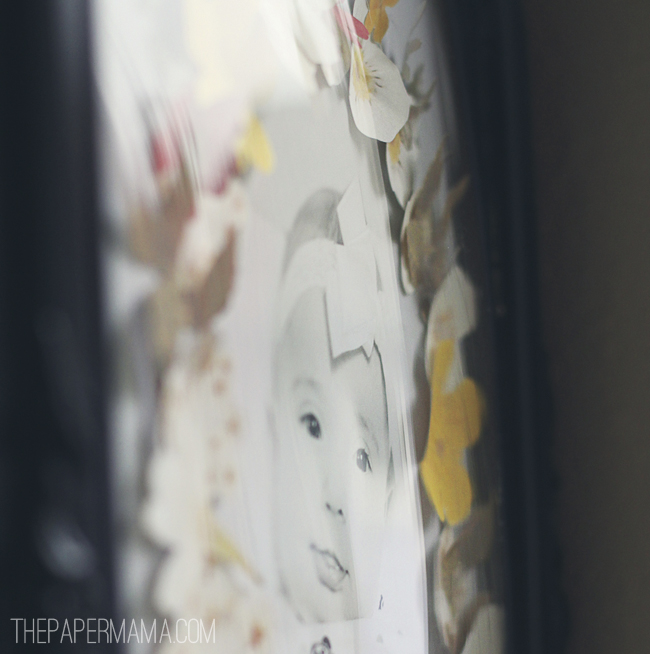
– Choose your frame. I completely recommend checking out thrift shops for an old frame. You might not be able to find a frame like mine…. My frame has bubble glass! It’s so lovely. Do you see? Yes…. it pops right out there! I love it… but, that’s ok! You can always take the glass out of the frame you choose if you’d like to add volume/bend the flowers like I did.
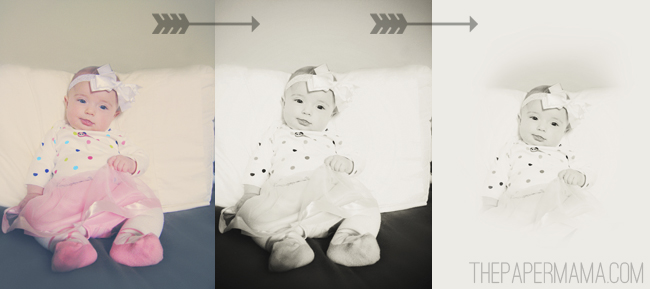
– Print out the image you’d like to frame! The photo I chose is an absolute favorite of mine from when Ruari was 4-months-old. I just used a Florabella Action in Photoshop to turn it black and white…. with a vintage feel. If you would like some free actions I recommend The CoffeeShop….. lots of free actions to download. Or, if you don’t have PS… there are many free programs online that will turn your photo black and white. When I had a black and white photo I just erased the edges of my image to give a faded look. PLUS: I had my image printed at a print shop on just plain old card stock. I feel like that gave it more of a vintage look.

– Next up: print out your paper flowers! You can download the flower printouts here, here, and here. Cut them out.
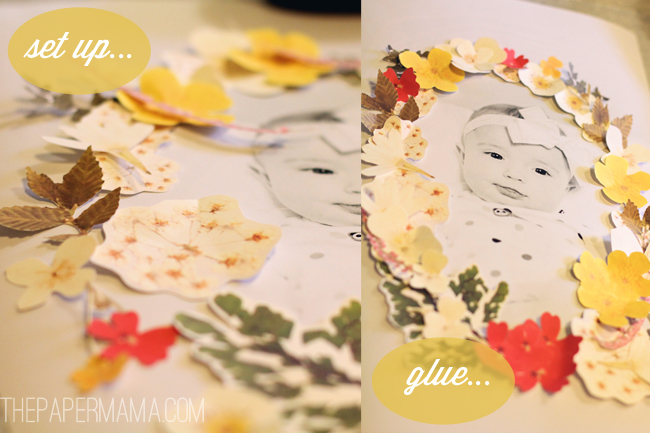
– When everything is all cut out…. do a test set up with your flower frame. Arrange them all the way you’d like them to look. That way you’re already for gluing!
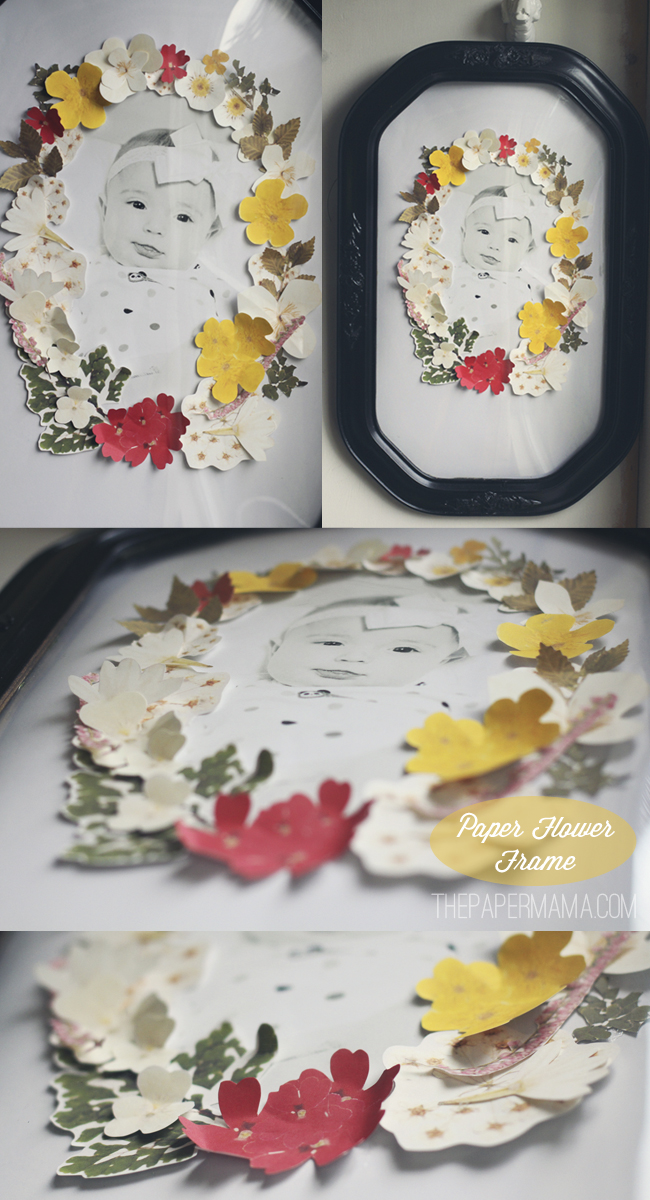
– Grab your hot glue gun*. Start gluing your flowers onto the photo you’ve printed out! Creating a little floral frame! I bent all my flowers before I glued them to make them a little 3D. *Tip: keep a little cup of water nearby for when you get hot glue on your poor little fingers… seriously. It helps!!! Put your beautiful creation back in the frame…. and, you’re all done! Hang and enjoy! <3
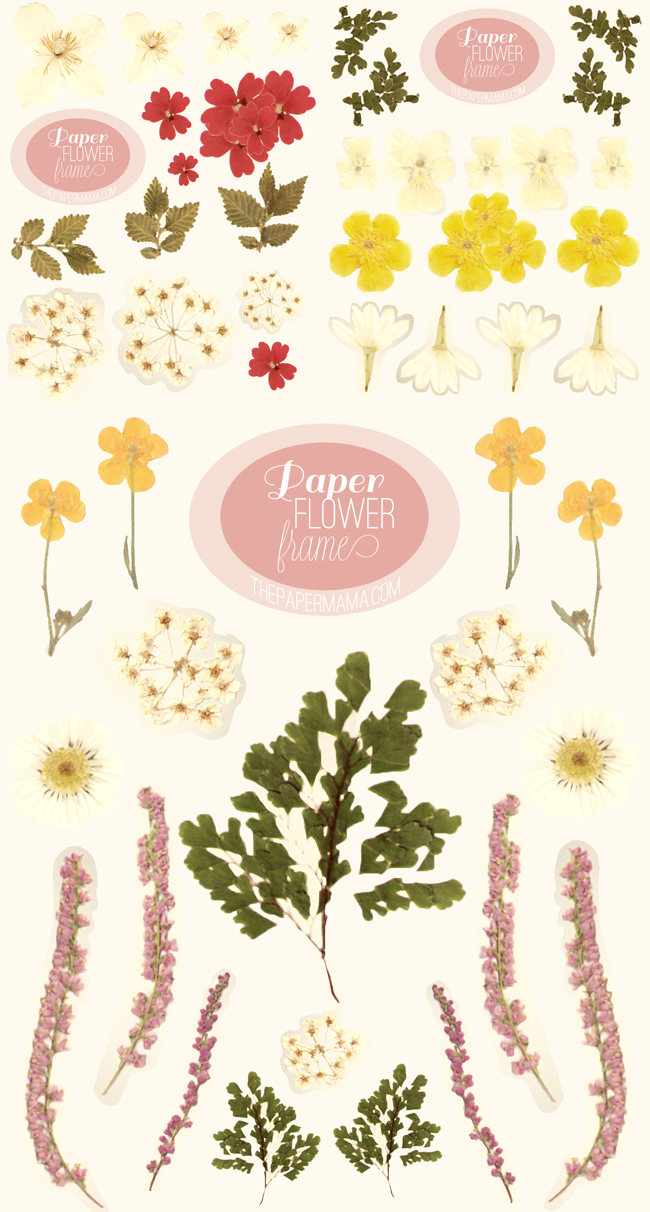
{You can download these flower printouts here, here, and here.}
Please let me know if you try this out! I’d love to see what you create! I think it would be a wonderful gift. <3
{Related Posts: //Paper Terrarium//Vintage Style Silhouette Tutorial//Diy Sewing Kit…. in a jar.//}
Linking up with Harper’s Happening for High On Thrifting!





What a nice tutorial… I love it!
Thanks for sharing!
Lovely greetings from Germany, Marielle
wow. this is absolutely gorgeous.
and, erasing the edges of your photo really makes it look vintage.
thank you, chelsey, for the inspiration & those gorgeous flower downloads!
you're welcome!
I love this. So adorable. Now only if i had a baby girl to use it on! 🙂 Hmm maybe I could adapt it with something around boys…cars or rocket ships.
rocks, dirt, sticks? hee!
What a cute idea! I love the three dimensional look with the flowers. And beautiful photo of your lil' girl! =)
Love it! I would have never known it wasn't vintage if you hadn't said so. Thanks for the great idea and downloads!!
Thank you! It's so old. I had spray painted black like 5 years ago. Finally JUST now using it. 🙂
So cute, thanks for posting this!
Oh my goodness you just gave me the most wonderful idea! My mother-in-law’s birthday is this month so she will be getting a very lovely gift. I will for sure show you when it is done.
Oh yay! I hope she loves it!
Can’t wait to do this! I’m redecorating my daughter’s room and this will be perfect!
Oh yay! Enjoy!
omg, this is too cute! Making some for pics of my pups =)
Oh yes! So cute with puppies. 🙂 <3
chelsey, i love this! it would also make a great gift for mother's day. i'm thinking for my mom 😉 thanks for sharing!!
I agree!
Oh my goodness I am in love with this project! The pressed flowers are gorgeous, I'm dedicating this weekend to finding a really good frame. Thank you for the downloads. ^_^
Oh yay! Share when you're done!
Those flowers are so adorable. I'll have to try this at some point.
Let me know if you try it out!
I really like this ! Thankyou for sharing 🙂
I love it.
Absolutely gorgeous! Thanks for this tutorial, it's amazing 🙂
You're welcome Leah. 🙂
Very cute idea. Just discovered your blog through your headband curl video. Glad i did – all good stuff! =) http://megansilianoff.blogspot.com/
Welcome! And, thank you!
Very cute Chelsea!
Thank you!
I love this tutorial so much. I want to try it out. Thanks for sharing. xo, rv
http://aneclecticheap.blogspot.com/
Let me know if you do!