Day 16: It’s a pine-cone extravaganza.
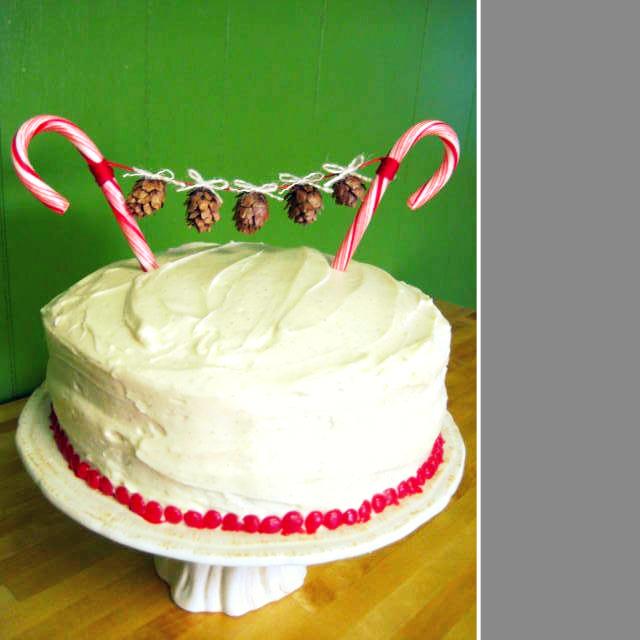
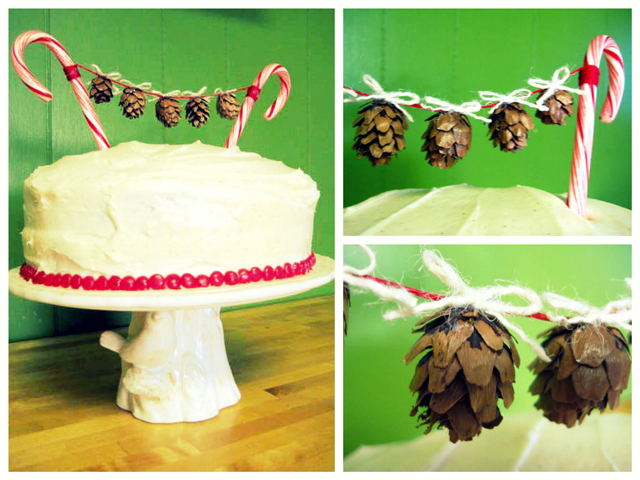
Mini Pine-cone Cake Bunting
This mini pine-cone bunting is a super easy cake topper, and I think it’s adorable… Perfect for a winter wonderland party! You need to build your little bunting first, and then when it’s assembled, stick it into the cake. First measure the length for your bunting with embroidery floss; for stability’s sake, you don’t want to put the candy canes super close to the edge of the cake. Wrap one end of your embroidery floss around a candycane, and secure the end with a dot of hot-glue. Then, put a teeny dot of hot glue on top of each pinecone, and one at a time, add them to your bunting. Secure the end with hot glue, just like you did with the first one. Then, go back and add your teeny little bows on top of each pinecone. I used a strand of burlap, but you could use embroidery floss, or thin ribbon. Now you can place your bunting on the cake! Yay!
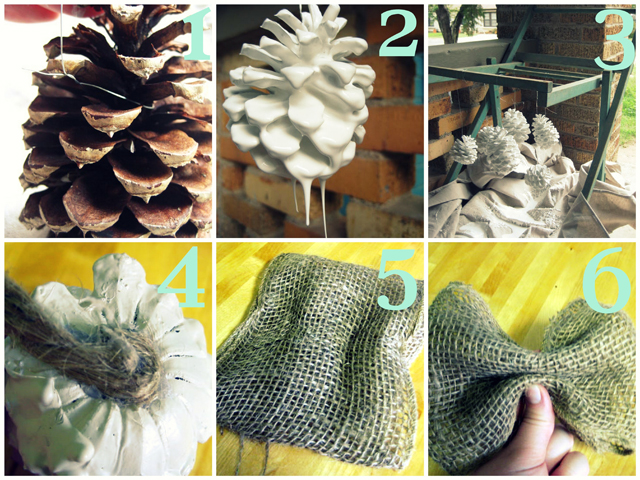
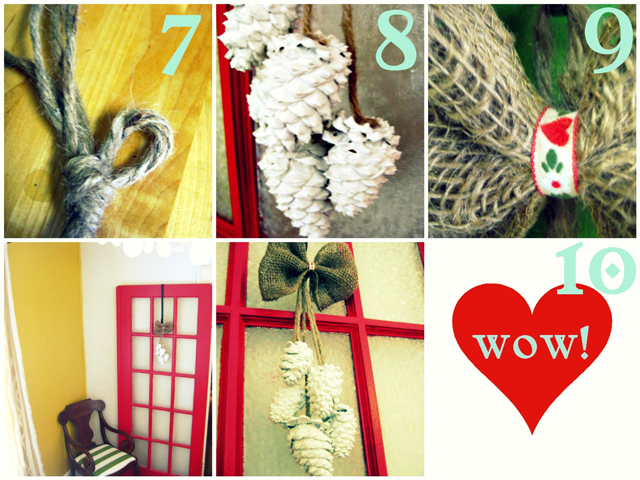
Paint-Dipped Pine-Cone Swag
Because my home is super colorful, I tend to gravitate toward holiday decor that is more understated. This pine-cone swag looks great hanging on my red dining rooms french doors. You could easily make it to fit your own decor, and I think it would look great any color!
Directions:
1) securely wrap a piece of craft wire around the pine-cone. 2) dip the pine-cone in your paint. 3) hang your pine-cones out to dry overnight 4) hot-glue a piece of jute rope to the top of each pine-cone 5) construct your bow by folding over a rectangular strip of burlap 6) pinch the burlap in the middle, and secure with craft wire 7) gather all of your jute strands together, and tie them in a knot. Be sure to create a loop, so you can hang your swag. 8)Secure your bow around the jute knot you created. 9)cover the wire in the middle of your bow with a piece of ribbon 10) Taada!
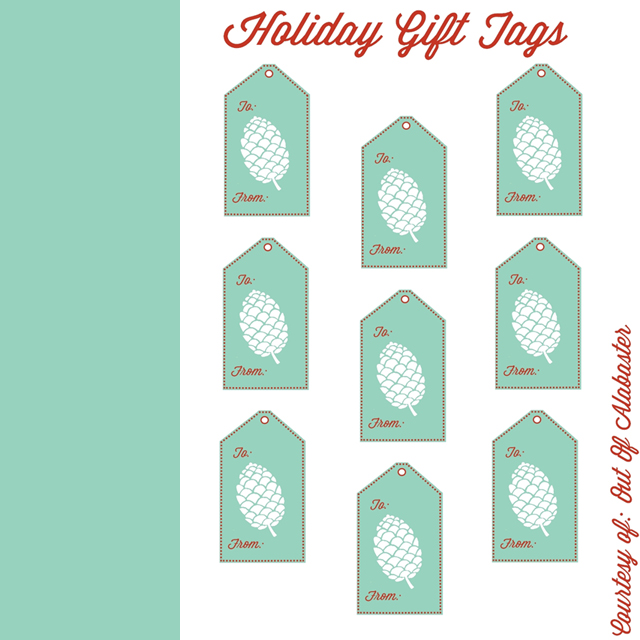
Free Printable Pine-Cone Gift Tags
Oh you know, just because I love you, you internet peoples, you 😉
Print these to add that extra little handmade touch to your gifts. Click here or the image below!
………………………………………………..
Thank you SO much to Lindsey from Out of Alabaster! What a LOVELY guest post. I’ve already printed those gift tags! Thank you for joining my 50 DIY Days of Christmas!

