Baby chicks!!!!!!!!!!!!

Baby Chicks // thepapermama.com

Baby Chicks // thepapermama.com

You guys. The baby chicks are hatching! I don’t think there’s much I need to say… cause adorable chicks! Yeah. That’s right. We put 6 eggs under her and by the time we tucked her in tonight, we had 4 chicks hatched… with one more egg almost ready to go. Hoping the other 2 are all hatched by tomorrow! Yay! Yay adorable babies! Warning, adorable baby chick video below…

– Chelsey

P.S. If you’re wondering… yes, my chicken is telling me to back up. Serious chicken is serious. Hee.

Tags: ,

Categories: paper mama farm


Custom Drink Stirrers and Straws DIY (with free printables)

Drink Stirrers and Straws on HP Create

I’ve been making some weird stuff. Ha!  The weirdness is not so much the adorable straw banner above, but the weirdo drink stirrers below (they make me laugh, I love them). I made this custom drink stirrers and straws DIY for the HP Create website to give all those new brides out there some inspiration for their wedding day drink decor. Yeah, you don’t really need pretty straws and decorations, but it’s so much fun (especially when you pop the bride and groom’s face all over the decorations).

Drink Stirrers and Straws on HP Create

Drink Stirrers and Straws on HP Create

What’s super cool is I provided some free printables with the “congrats” banner, stars, blank banners, and my face (ok, not my face) for you to use. So simple. You print it out and glue. I shared how you can do it over at HP. You can check out the full tutorial and get the printables on the post right here.

Drink Stirrers and Straws on HP Create

Enjoy!

– Chelsey

I am a paid contributor for the HP Create website. All opinions are my own.


Plastic Egg Popsicle Mold with a No Refined Sugar Popsicle Recipe

Plastic Egg Popsicle DIY // thepapermama.com

Ok. Yes, Easter is over… Now what to do with all those extra plastic eggs? I saw this blogger make these, so I had to try it: Plastic Egg Popsicle. My kiddo is sort of on a candy-addictive-craze right now, and I think we need to do a little tricking in the sweet treat department. The pops I created are made from yogurt, applesauce, cinnamon, and the teensiest bit of honey. Since it’s a frozen pop, my daughter thinks it’s some amazing sugar filled dessert. I win! Yay! Seriously though… That kid gets so grumpy/insane if she has too much sugar. Anywho, here’s how you can make your own.

Plastic Egg Popsicle DIY // thepapermama.com

No Refined Sugar Popsicle Recipe:

  • 1/2 cup plain yogurt
  • 1 cup applesauce
  • 1 teaspoon (or to taste) of honey
  • 1/4 teaspoon of cinnamon

Directions for Popsicle:

Blend the ingredients together in a bowl. Freeze in Popsicle forms or in the plastic egg pops I made for 24 hours. Check out the directions below for my egg pops. That recipe filled 5 eggs for me, increase the recipe if you want more pops.

Plastic Egg Popsicle DIY // thepapermama.com

Supplies for egg mold:

  • plastic eggs
  • wooden skewers
  • Popsicle mixture
  • nail (needs to be wider than the skewer)
  • plastic bag
  • optional: washi tape

Directions:

Plastic Egg Popsicle DIY // thepapermama.com

– Use the hammer and nail to put a hole in the bottom of the pointy egg side, add another small hole next to the skewer hole, if there aren’t holes there already (you need this extra hole to release pressure when pouring in the Popsicle mixture). Repeat with all your eggs and wash all the eggs with soap and water. Dry the eggs.

– Cut the skewers in half (and cut the points off).

Plastic Egg Popsicle DIY // thepapermama.com

– If your plastic eggs are like mine and have little holes in the bottom, use the washi tape to block the holes.

– Prop your eggs up in something, I used an egg carton. Pour the Popsicle mixture into the plastic bag. Trim off the tiniest corner at the bottom of the bag. Squeeze the mixture into the skewer hole of the egg. Fill the egg completely. Tap the bottom of the egg on the table to release air bubbles. Add more mixture if needed.

– Push the skewers half way into each egg. Pop the eggs into the freezer for about 24 hours.

Plastic Egg Popsicle DIY // thepapermama.com

Plastic Egg Popsicle DIY // thepapermama.com

If you have trouble opening the top of the egg pop, just warm the top of the egg with your hand for a second, then open it. Enjoy!

– Chelsey


Dessert Ideas!

Ok, I gotta be honest. I stayed up way too late watching The Game of Thrones and I didn’t finish the post I had planned for today. No worries! I think that gives me the perfect excuse to wander back through my archives and share some yummy dessert ideas from The Paper Mama blog! Easter is coming up this Sunday, so maybe this will inspire you?

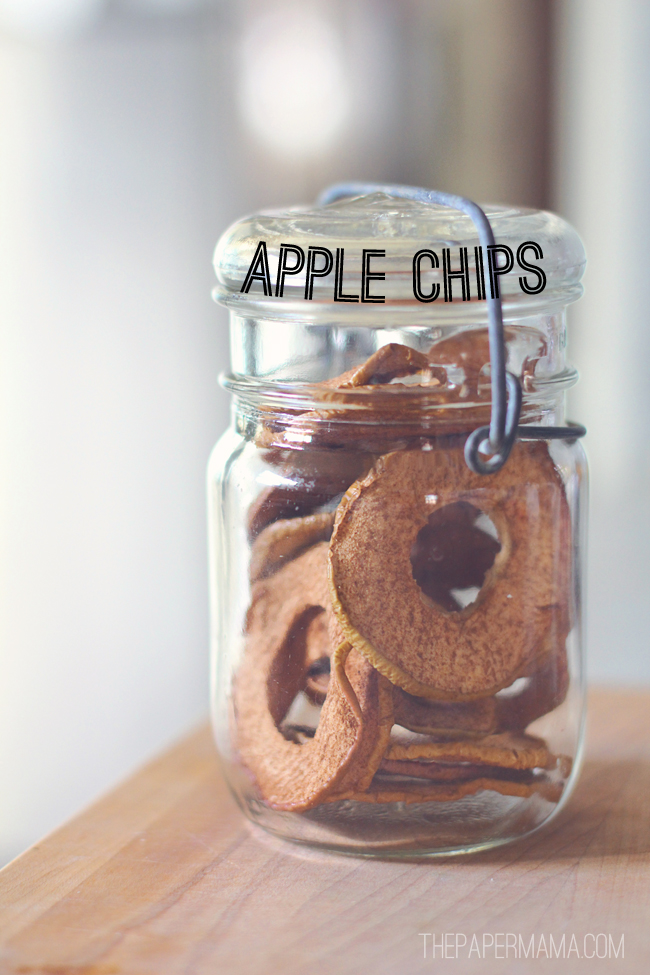
Homemade Apple Chips.

Homemade Apple Chips

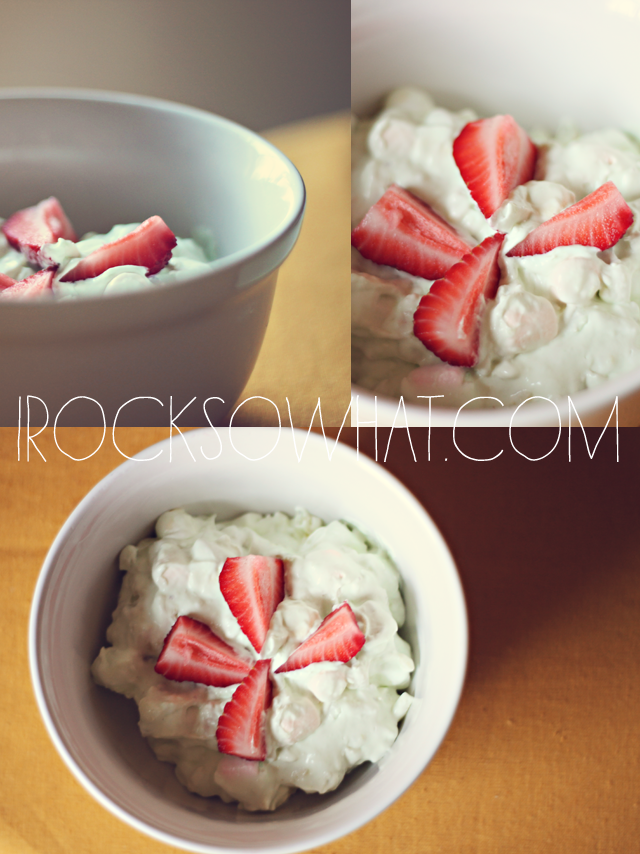
Watergate Salad (made by IROCKSOWHAT for The Paper Mama blog).

Watergate Salad (made by IROCKSOWHAT for The Paper Mama blog).

Rainbow Cupcakes.

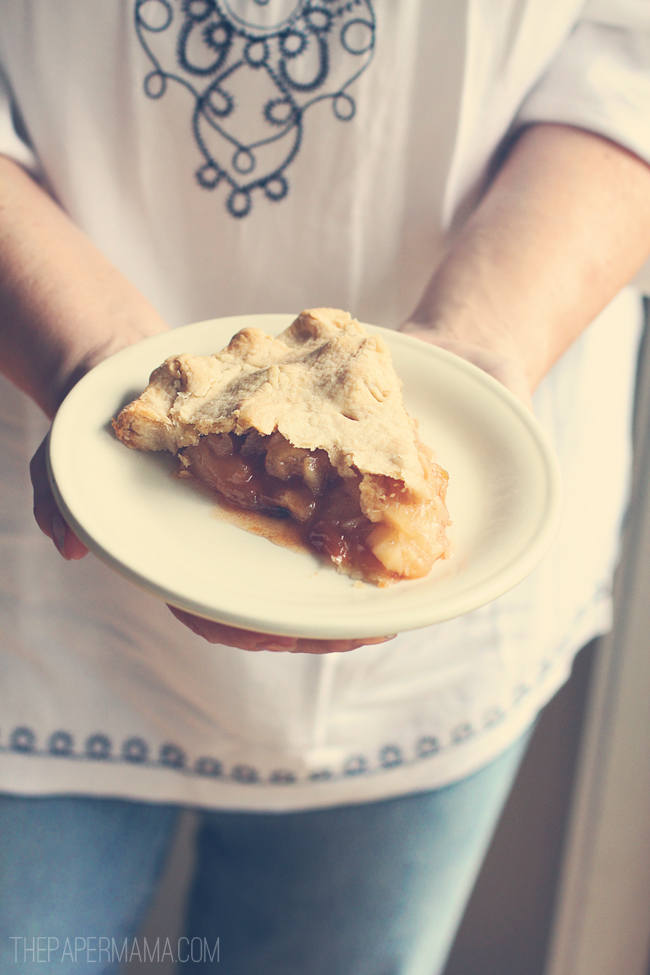
Favorite Apple Pie Recipe.

Super Simple Strawberry Shortcake.

Super Simple Strawberry Shortcake

Chocolate Covered Bacon Bites.

Chocolate Covered Bacon Bites

Stained Glass Cookies.

Stained Glass Cookies

Mini Doughnut Muffins with Cinnamon Sugar (made for The Paper Blog from Sweet Lavender Bake Shoppe).

Mini Donut Muffins with Cinnamon Sugar

Well, now I wish I had a pile of cookies and doughnuts in front of me. Happy Monday!

– Chelsey


Pressed Flower Cake Decor

Paper Flowers Cake Decor // thepapermama.com

Paper Flowers Cake Decor // thepapermama.com

It’s Spring. Yes it is. I thought this would be the perfect time to share this cute cake. I’ve officially used my pressed flowers printable 3 times: paper flower frame, decoupaged flower eggs, and now my pressed flower cake decor! I think this little cake turned out pretty adorable. How sweet would this be for Easter or Mother’s Day? It’s so easy, especially if you buy a cake instead of make it. Hee.

Supplies:

pressed flowers printable

– toothpicks

– hot glue

– delicious cake

Directions:

Paper Flowers Cake Decor // thepapermama.com

1. Print out your pressed flowers printable. Use some scissors to cut out the flowers you’d like to use. Use your hot glue to attach the toothpicks to the back of the flowers.

Paper Flowers Cake Decor // thepapermama.com

2. Pick off any lose bits of hot glue string, and your cake decorating flowers are ready.

Paper Flowers Cake Decor // thepapermama.com

3. Organize then on the top of your cake. I arranged the flowers so the taller blooms were in the back.

Paper Flowers Cake Decor // thepapermama.com

Enjoy!

– Chelsey

P.S. I picked up this beautiful cake from a local Portland bakery, The Cakery. Highly recommended if you’re in the area and don’t want to bake a cake.


Fortune Cookie Cash Jar

Fortune Cookie Cash Jar (with free printables)

Fortune Cookie Cash Jar (with free printables)

Have you been wracking your brain to come up with the best graduation gift, instead of your typical card with money? Well, I have an idea for you: The Fortune Cookie Cash Jar. Make that graduate work for the cash. It’s a unique way to celebrate a new step in life and a little bit of money always helps. Ready to create this? Let’s go!

Supplies:

Fortune Cookie Cash Jar (with free printables)

Directions:

1. Print out all three printables: the Fortune Cookie Template (print as many pages as you need, I printed four), Fortunes and Congrats Labels.

Fortune Cookie Cash Jar (with free printables)

2. Cut out your the fortunes you like (the final sizes of each fortune should be about 4 inches wide x 1/2 inch high).

3. Cut out the fortune cookie circles, from the Fortune Cookie Template.

Fortune Cookie Cash Jar (with free printables)

4. Pinch a line about 1 inch long onto the center of a fortune cookie circle.

Fortune Cookie Cash Jar (with free printables)

5. Fold your dollar (or whatever cash you’re using) to be about 4 inches wide by 1/2 inch high.

6. I’ll refer to the left and right side of the 1 inch folded line as sides “A” and “B”. Place your fortune and folded dollar perpendicular to the 1 inch folded line (the a-b line).

Fortune Cookie Cash Jar (with free printables)

7. Fold together sides “A” and “B” (see photo below).

Fortune Cookie Cash Jar (with free printables)

8. Here’s the fun step: With sides “A” and “B” touching, push in the center of the 1 inch folded line. Put one Zot adhesive dot (you can use hot glue, but the zots are quick and easy) and squeeze together. You now have a paper cash fortune cookie! Yay!

Fortune Cookie Cash Jar (with free printables)

9. Pick out which color/size Congrats label you’d like for your jar. Cut it out and attach the label with a couple Zot adhesive dots. Fill the jar with your fortunes and give this gift to the lucky graduate!

Fortune Cookie Cash Jar (with free printables)

This gift would also be perfect as a birthday, wedding or even a baby shower gift!

I want to see what you’re making! Share your creations with me in the comments below, or tag me on Instagram @thepapermama!

– Chelsey

I was paid to create this post for HP Create.

The Paper Mama Shop

Tags: , ,

Categories: diy, Gifts, HP


DIY Flavored Sea Salts

DIY-flavored-salts

It’s always fun to give homemade gifts, especially when they’re food related, even more especially when they’re very fancy and very gourmet. Flavored sea salts are one of those great little gifts that don’t cost much to make, but look really beautiful and are very much appreciated by the recipients. They’re perfect for hostess gifts, housewarming presents, and neighbor gifts for the holidays, and would make excellent take-home party favors. They look especially lovely packaged in small glass jars and bottles, and are pretty enough to be left out on the kitchen counter. Below you’ll find a 3 different lovely recipes to make your own DIY Flavored Sea Salts!

flavored-sugar-gifts

Rosemary Sea Salt

1 cup sea salt
1/4 cup chopped fresh rosemary

Combine the sea salt and fresh rosemary in a medium bowl. Spread out on a parchment-covered baking sheet, and place in the oven on the lowest temperature setting for 1 hour. Let cool, package, and give.

Good on meats and veggies!

Vanilla Bean Sea Salt

1 cup sea salt
4 vanilla beans

Pour the salt into a medium bowl. Cut each vanilla bean in half lengthwise with a sharp paring knife. Using the tip of the knife, scrape the seeds out of all of the vanilla bean halves, and add them to the salt. Mix well with clean hands, rubbing the salt and vanilla seeds together until well-combined. Package and give.

Perfect for sprinkling on chocolate chips cookies, homemade caramels, and other sweets!

Lemon Sea Salt

1 cup sea salt
2 Tablespoons fresh lemon zest

Combine the sea salt and lemon zest in a medium bowl. Spread out on a parchment-covered baking sheet, and bake for 1 hour on the lowest temperature setting. Remove from oven, allow to cool, package, and give.

Great on chicken, fish, and veggies!

* * *

Of course, you can’t give a cute jar of homemade flavored sea salt without a matching tag, right?! I’ve created three simple graphics, one for each type of salt, that you can download and use to make printable labels. Use them to make squares or circles or rectangles, stickers, hang tags, etc! Just right click on the graphic you want, save the image, and use it in whatever program you want to create your labels in!

DIY rosemary salt label DIY vanilla salt labelDIY lemon salt label

flavored-salt-favors

– Melissa Bahen, Lulu the Baker