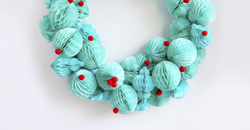
How To Make Mini Pom-Poms

Bike Basket Makeover

I don’t know why it took me so long to actually make a pom-pom, but now I’m a pom-pom pro. It turns out it’s pretty easy to do and requires very little supplies. I recently needed some poms for a project I made, and had to teach myself how to make these tiny fluff balls. I took some photos along the way and I thought I should share how to make mini pom-poms with you.

Supplies needed to make a mini pom:

  • Yarn
  • Twine
  • Fork
  • Scissors

1) Wrap your yarn around the tines of the fork a few times. The more times you wrap the yarn around the fork, the thicker and fluffier the pom will be.

2) Cut out a small piece of twine. Slip the piece of twine through the center tine, wrap the twine around the yarn, tighten the twine and tie a knot around the yarn.

3) Grab the scissors and cut right and left sides of the yarn.

4) Pull the pom off the fork. Fluff up the pom with your hands.

5) Use your scissors to shape the pom-pom, and you’re done!

Repeat all the steps above to make more.

If you make some poms, I want to see your project!

– Chelsey

Categories: diy, Tips and Tricks


Mini Ice Cream Sandwich

Mini Ice Cream Sandwich

Mini Ice Cream Sandwich

Did you know that this upcoming Sunday is National Ice Cream Sandwich day? I know, there’s a day for everything, but this day is fantastic. I love a good ice cream sandwich. It’s a hot hot summer and these are the perfect little bite size treats for a party, or just for fun.

Supplies needed for this yummy treat:

  • Mini chocolate chip cookies (I used Mini Nabisco Chips Ahoy Cookies)
  • Ice cream (I used some yummy vanilla chocolate chip gelato and mint chocolate chip gelato).
  • Melon baller (or small spoon)
  • A sweet tooth!

Mini Ice Cream Sandwich

First: Gather those supplies! You’ll need super cold ice cream (don’t pull out the ice cream until you’re ready for it).

Mini Ice Cream Sandwich

Second: When you’re ready to assemble the ice cream sandwiches, pull the ice cream out of the fridge. Grab the melon baller and scoop a tiny bit of ice cream (or gelato).

Mini Ice Cream Sandwich

Third: Push the little ice cream ball onto the cookie.

4Mini Ice Cream Sandwich

Fourth: Squish the second cookie onto the top!

Mini Ice Cream Sandwich

You’re done: Just repeat those steps until you have all the sandwiches you need. Tip: I suggest making a few minutes ahead of time, and then place them back into the freezer. Ice cream melts fast, so placing it back in the fridge before serving will help it set. 

Mini Ice Cream Sandwich

I hope you enjoy this treat and Happy Friday (and happy almost National Ice Cream Sandwich Day)!

– Chelsey

If you loved this treat, check out these other yummy goodies: Banana Ice CreamDelicious Apple Pie, Plastic Egg Popsicles

Tags:

Categories: food, Sweets


Sea Glass Candy Recipe and Gift (with free printable gift tags)

Sea Glass Candy Recipe and Gift (with free printable gift tags) - the paper mama blog

See all that glass in the photo above? Yeah, it’s not glass… it’s candy! You can hold and eat it and it will not cut you. One of the coolest things to do at the beach is search for shells, rocks, and sea glass! As a kid sea glass was always fun to find because it was so pretty and I was amazed that this smooth glass rock was once a sharp piece of broken glass. The ocean is amazing.

So, I was inspired by the beach and created this tasty Sea Glass Candy recipe (and free sea glass candy printable gift tags) for HP Create. How fun would these be for a beach themed wedding favor? Or, makes some bright and colorful glass for a kids summer party!

Sea Glass Candy Recipe and Gift (with free printable gift tags) - the paper mama blog

Sea Glass Candy Recipe Ingredients:

  • 1 3/4 cup granulated sugar
  • 1/2 cup powdered sugar
  • 1/2 cup corn syrup
  • 1/2 cup water
  • 1 tsp. candy flavoring (flavor of choice)
  • Blue and green food coloring

Supplies needed to make this treat:

  • Paper
  • Large Rectangle Baking Dish
  • Candy Thermometer
  • Scissors
  • Baker’s Twine
  • Mason Jars

STEP 1: In a medium size saucepan, mix together granulated sugar, water, and corn syrup at medium-high heat. Attach a candy thermometer to the pan.

Sea Glass Candy Recipe and Gift (with free printable gift tags) - the paper mama blog

STEP 2: While the mixture is coming to a boil, grease the baking dish and combine one drop of blue and one drop of green food coloring in a bowl. If you want a darker color, feel free to add a few more drops in of each.

Sea Glass Candy Recipe and Gift (with free printable gift tags) - the paper mama blog

STEP 3: Once the mixture has reached 300 degrees, remove it quickly from the stove, pour in the food coloring and flavoring. Mix together and pour the mixture into the baking dish.

You want it to spread out as much as possible in the baking dish so that it turns out to be a nice thin layer of candy.

Sea Glass Candy Recipe and Gift (with free printable gift tags) - the paper mama blog

STEP 4: Allow the candy mixture to completely cool. Use a knife to crack the candy into pieces.

Sea Glass Candy Recipe and Gift (with free printable gift tags) - the paper mama blog

STEP 5: It will turn out pretty and shiny like this, but we want to add a cloudy effect to it just like sea glass.

Sea Glass Candy Recipe and Gift (with free printable gift tags) - the paper mama blog

STEP 6: Combine powdered sugar and candy pieces in a plastic bag until they are fully coated.

Sea Glass Candy Recipe and Gift (with free printable gift tags) - the paper mama blog

STEP 7: Remove candy from bag and dust off excess powdered sugar.

Sea Glass Candy Recipe and Gift (with free printable gift tags) - the paper mama blog

STEP 8: Print and cut Sea Glass Candy labels.

Sea Glass Candy Recipe and Gift (with free printable gift tags) - the paper mama blog

STEP 9: Fill jars with candy and attach tags with baker’s twine.

Sea Glass Candy Recipe and Gift (with free printable gift tags) - the paper mama blog

Sea Glass Candy Recipe and Gift (with free printable gift tags) - the paper mama blog

Hand out jars of tasty sea glass candy at your next summer party!

Sea Glass Candy Recipe and Gift (with free printable gift tags) - the paper mama blog

I want to see what you’re crafting! You can share a link to what you’ve made in the comments below, or tag me on Instagram with a photo (my user name is @thepapermama).

– Chelsey

P.S. I was a paid contributor for the HP Create blog and was paid to create this blog post.

Tags: , ,

Categories: diy, food, Gifts, HP, Sweets


Pineapple Picnic Cooler Makeover

Pineapple Picnic Cooler Makeover

For me the beginning of this summer was mostly spent indoors, due to some crazy pregnancy morning sickness (it’s so nice to be alive again). Anywho, now that I’m finally feeling better we are headed out for more picnics in this warm weather. I’ve never really had a cute picnic basket or container to carry food to a picnic, so I made one.

Instead of packing your meal in a plain container, make your own pretty Pineapple Picnic Cooler. You can update most any cooler with some paint and pineapples (I made a free printable so you can make your own). This colorful and cute creation will be the fanciest cooler in the park.

Pineapple Picnic Cooler Makeover

Supplies needed to create my Pineapple Picnic Cooler:

Directions:

STEP 1: Rub the sandpaper over the portion of the cooler you’re spray painting (for me it’s the bottom dark blue part of the cooler). Wipe the sanded portion down with a wet rag, and let dry completely.

Pineapple Picnic Cooler Makeover Pineapple Picnic Cooler Makeover

STEP 2: Tape off the portion of the cooler that you don’t want to paint with the painter’s tape. In a well ventilated space (preferably outdoors) and wearing a mask, spray the primer onto the cooler (following the spray can directions). After a few coats of primer, start to apply the color spray paint. Let the paint dry for 24 hours.

Pineapple Picnic Cooler Makeover

STEP 3: Print out the free printable pineapples onto the printer paper. Cut them out just around the edge.

Pineapple Picnic Cooler Makeover

STEP 4: Use the Mod Podge to apply the pineapples to the cooler. Apply a couple of layers of Mod Podge over the pineapples and the whole painted portion of the cooler (allowing about an hour dry time between each coat).

Pineapple Picnic Cooler Makeover

STEP 5: In a well ventilated space (preferably outdoors) and wearing a mask, spray the clear acrylic spray onto the cooler and over the pineapples (following the spray can directions). Let the paint dry for over 24 hours.

STEP 6: When the cooler is dry, remove the tape and you’re done.

Tip: I recommend letting the paint sit for a couple of days on the cooler. The paint will get harder the longer you let it set.

Pineapple Picnic Cooler Makeover

Pineapple Picnic Cooler Makeover

I want to see what you’re crafting! You can share a link to what you’ve made in the comments below, or tag me on Instagram with a photo (my user name is @thepapermama).

– Chelsey

P.S. I was a paid contributor for the HP Create blog.

Tags: ,

Categories: diy, For The Outdoors, HP


Bucket Hose Holder DIY

Bucket Hose Holder DIY

For years we’ve had an plastic hose holder attached to the side of our home and I’ve wanted to replace it forever. It was ugly and it’s not so great to have holes drilled into the siding of a home. It’s now gone because I made this Bucket Hose Holder to replace the old plastic piece, and I shared it on the Better Homes and Garden blog.

Supplies needed to make this Bucket Hose Holder project:

Tools needed:

  • drill
  • 3/8 drill bit (for metal and wood)
  • paintbrush

Head on over to the Better Homes and Gardens blog to get the full tutorial and make your own.

– Chelsey

P.S. I’m a paid contributor on the Better Homes and Gardens blog.

Save

Save

Tags:

Categories: BHG, diy, For The Outdoors


Color Block Serving Tray DIY

Color Block Serving Tray DIY

Hosting a party can be crazy, but it’s also fun. Especially if you have pretty plates and trays to serve your food on. Seriously, a pretty party set up can really make all the difference. Last week, on the Better Homes and Gardens blog, I shared this easy tutorial so you can make your own Color Block Serving Tray DIY. Total cost was under $15 and it took me less than two hours to make. It would go even faster if I didn’t have to wait for paint to dry.

Color Block Serving Tray DIY

Supplies needed for this project (full tutorial can be found here): 

  • 24 inch x 12 inch x 1 inch Poplar wood piece (if you use a different type of wood, make sure to avoid porous woods)
  • 2 cabinet drawer pulls with screws (I used the champagne bronze 3 inch Brainerd pulls from Lowes)
  • Paint (I used this small sample bottle of Valspar Belle Grove Sorbet)
  • Paint brush
  • Painters tape
  • Pencil
  • Drill
  • Cabinet bumpers
  • Optional: Food safe block oil (I recommend this if you will be placing food on the tray)

If you create this project (or any of the projects on my blog), feel free to share a link to the photo in the comments below. OR, tag me in a photo on Instagram @thepapermama with the #papermamafriends hashtag. To check out the full tutorial, head on over to the Better Homes and Gardens blog.

– Chelsey

P.S. I am a paid contributor for Better Homes and Gardens blog. Here are some other fun tutorial I’ve made for their blog: Bucket Hose Holder, Photo Canvas DIY, and $15 mailbox makeover

Tags: , ,

Categories: BHG, diy, For The Kitchen


Seed Packet Party Favor DIY

Seed Packet Party Favor DIY

Do you have a baby/wedding shower, or any other celebration, coming up soon? This Seed Packet Party Favor DIY will be the perfect gift to hand out to your guests. I created two different printables (for HP Create) for you to use and make your own. Hand them out to the guests, and they can plant these seeds on your special day!

Seed Packet Party Favor DIY

Supplies:

  • 8 x 10 vellum paper
  • Scissors or a paper trimmer
  • Sewing machine
  • Seed packets (regular size)
  • Printable seed packet covers (found on the HP Create blog)
  • Washi tape

Directions:

STEP 1: Print out the seed packet covers onto the vellum paper.

Seed Packet Party Favor DIY

STEP 2: Cut out the seed packet rectangles about a ¼ inch outside of each grey line (you can trim right down the middle of the center lines).

Seed Packet Party Favor DIY

STEP 3: Place the front and back of the seed packet covers together. Use the sewing machine to sew around the sides and bottom of the packet (leaving the top open). Trim the extra thread.

Seed Packet Party Favor DIY

STEP 4: Add the seed packets to your seed packet covers.

Seed Packet Party Favor DIY

STEP 5: Seal the packet with some washi tape.

Seed Packet Party Favor DIY

You’re all done. Hand these cute favors out to your friends and have a great Spring!

– Chelsey

P.S. I’m a paid contributor for the HP Create blog.

Save