Wordless{ish} Wednesday: Thank you!

Thanks to all your wonderful photo entries! I’ve had a few people ask, so I want to let you know I hope to have a top 10 for you all to vote on by Thursday! If you haven’t checked out the entries yet, click here to view them. They are wonderful!

Happy Wednesday!

– Chelsey

…………………………………………………………………………………………………………………………………………………………..

{If you have a Wordless{ish} Wednesday, please feel free to link it up below. And, feel free to link up to these blogs too… Parenting by DummiesProject AliciaJenni from the BlogBree: his honey and her mommy, and Live and Love Outloud.


Tags:

Categories: Uncategorized


Day 45: “Poop” Treat Labels

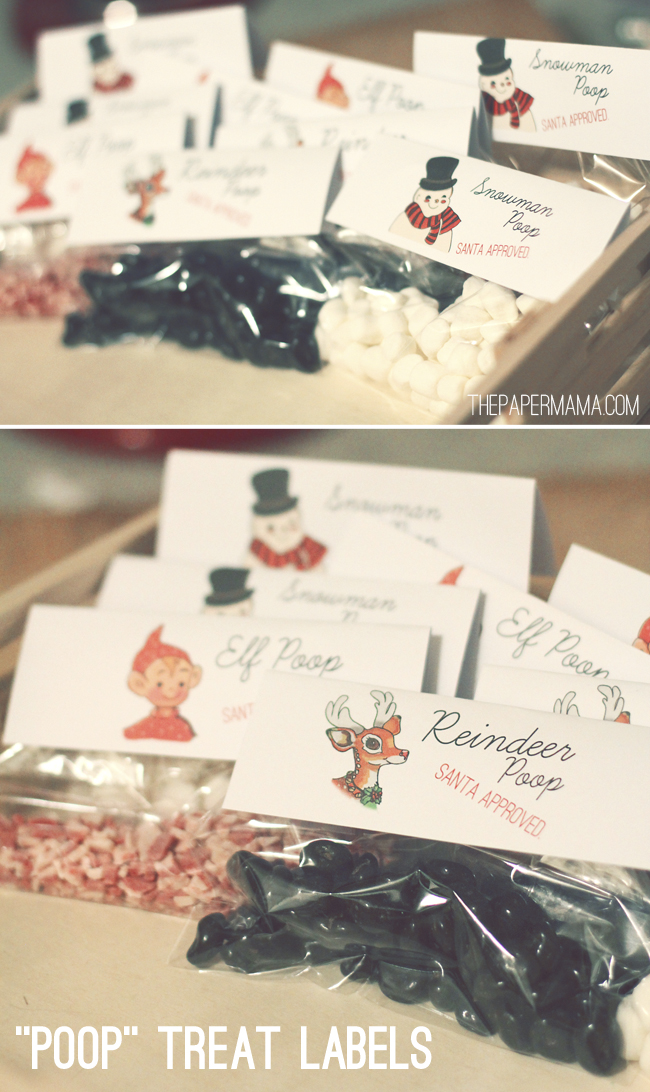
Day 45: Poop. Yup, poop. Poop is funny. Well, fake poop is funny. The word “poop” is funny. When I was a little girl, I received a little “Snowman Poop” treat bag. As an 8-year-old… I’m pretty sure that was the FUNNiest thing ever. Ha! Since that time, I’ve seen many different versions of these treat goodies. It’s time for me to share my own. I’m sharing three different labels with you: Elf Poop, Snowman Poop, and Reindeer Poop.

There are two different sizes you can print. The smaller size is around 3 inches wide, and the larger is around 5 inches wide. Click on one of the links below to get your freebie! Right-click + Save. Print them, cut them out, fold and attach to some sort of bag with “Poop” Treats inside. For the reindeer I used chocolate covered raisins. For the elf label, I used peppermint chocolate pieces. Then, for the snowman I used mini marshmallows.

3 inch wide printouts:

Elf Poop

Snowman Poop

Reindeer Poop

5 inch wide printouts:

Elf Poop

Snowman Poop

Reindeer Poop

Chelsey

…………………………………………………………………………………………………………………………………………………

To keep up with my 50 DIY Days, click here:


Day 44: Pipe Cleaner Crown!

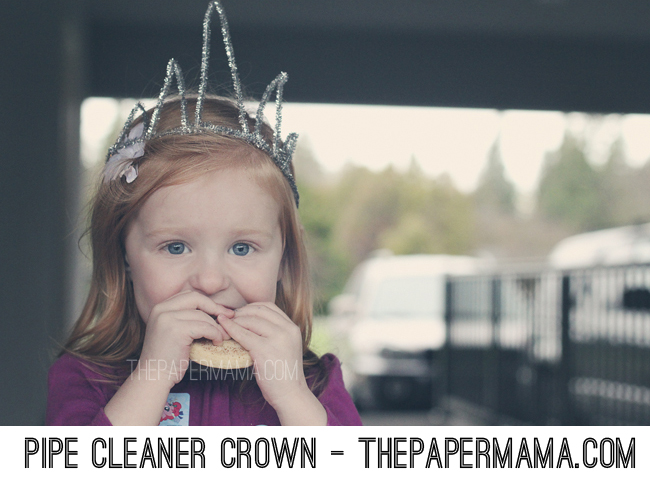
Day 44: The Pipe Cleaner Crown! The perfect favor for all those kiddo’s coming over for Christmas! It’s SO amazingly simple to make. IN FACT, I made quite a few for Ruari’s birthday party. The kid’s loved them. I originally found this idea on the lovely Blythe Ponytail Parades blog.

It’s VERY simple to create. Violet will give you a more detailed how-to on her blog, but pretty much…. here’s how I did it:

– Take two pipe cleaners and make a circle out of those.

– Fold another pipe cleaner in half to create the center point of the crown.

– The next pipe cleaner can create two crown points, on the right of the center crown point. Do this for the left side, too.

That’s a pretty confusing how-to… so, check out Violet’s post.

Enjoy!

– Chelsey

…………………………………………………………………………………………………………………………………………………

To keep up with my 50 DIY Days, click here:


Day 43: Silver Glitter Chain

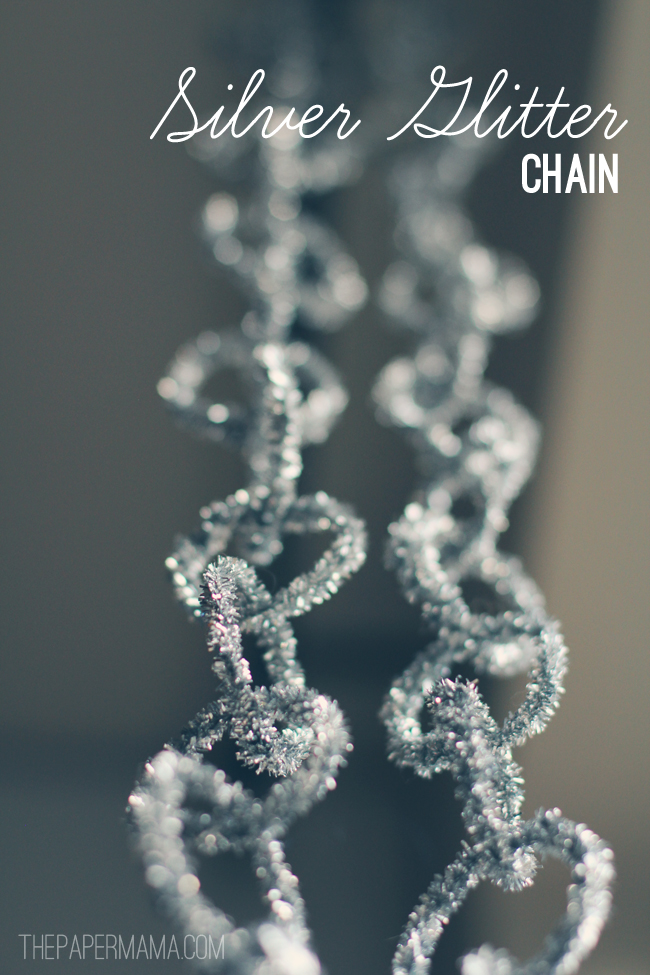
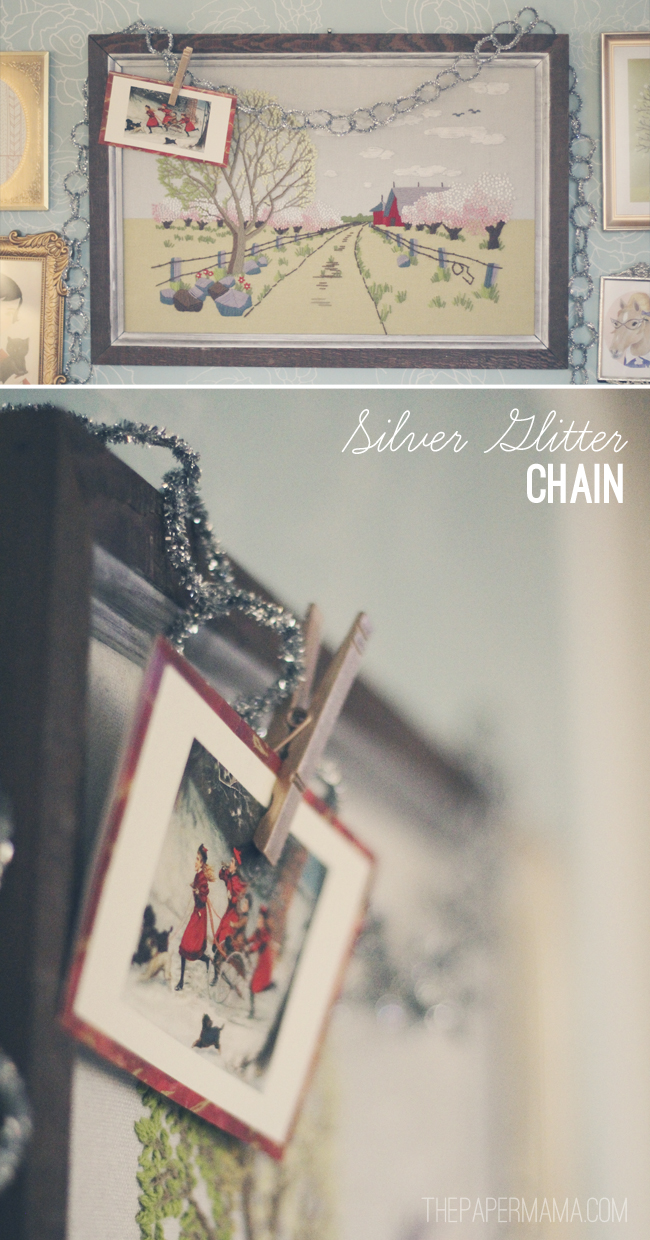
Day 43: This silver glitter chain is the perfect christmas garland! You can’t go wrong with sparkles! I found a chain, at one of my favorite stores, VERY similar to this… but, it was $30 for about 3 feet. I’m too cheap for that. SO, I made my own. Ha! This project can be a bit time consuming, but this is the perfect project to work on while watching television. Sort of mindless and repetitive. Perfect.

Supplies:

– Silver Sparkle Pipe Cleaners (I’m guessing 1 pipe cleaner equals a 1 inch circle, so the amount depends on your length. I made mine 48 inches, so I needed 48 pipe cleaners).

Directions:

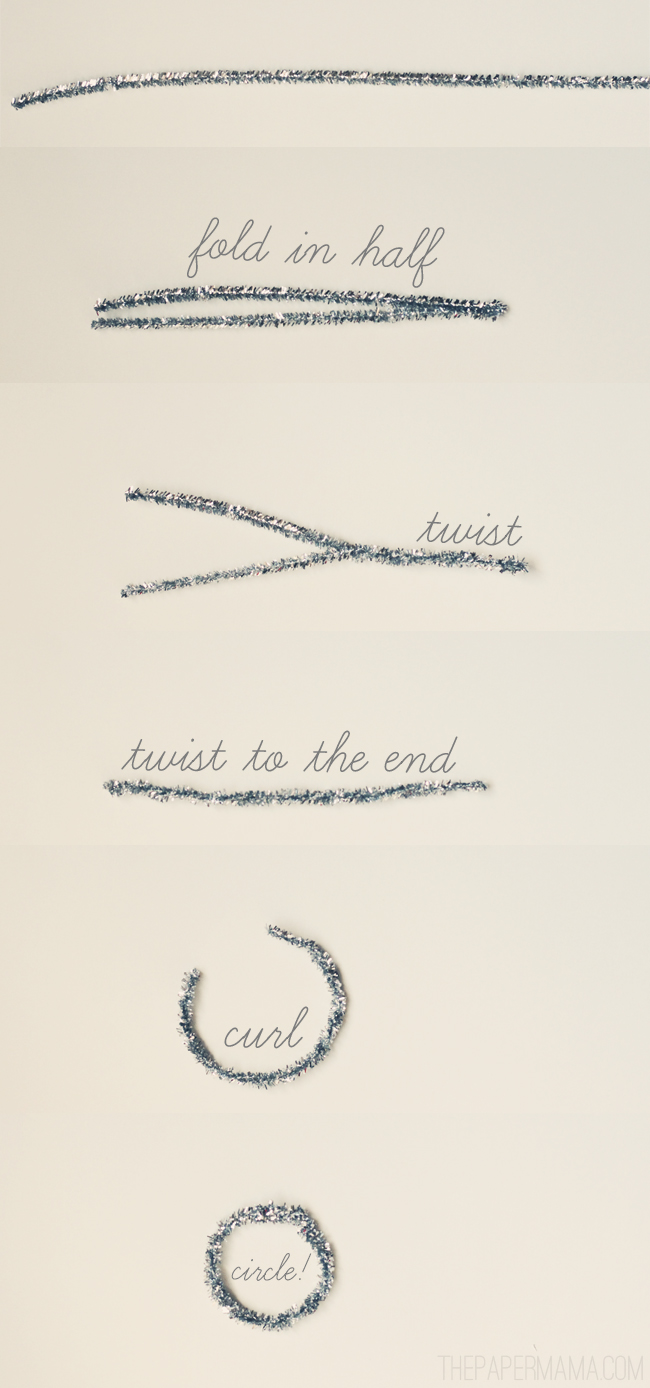
– I’m going to make it even EASIER for you. I’ve photographed how I make each chain link (see below). Pretty much: fold one piece in half. Twist to the end. Form it into a circle (twisting the ends around each other). AND, repeat. Link as you go.


When you’re done, hang it wherever you’d like! I had mine around my tree for a bit, then moved it to hang on a frame. I needed a spot to hang my Christmas cards. Perfect spot!

– Chelsey

…………………………………………………………………………………………………………………………………………………

To keep up with my 50 DIY Days, click here:


Day 42: Patterned Aztec Leggings

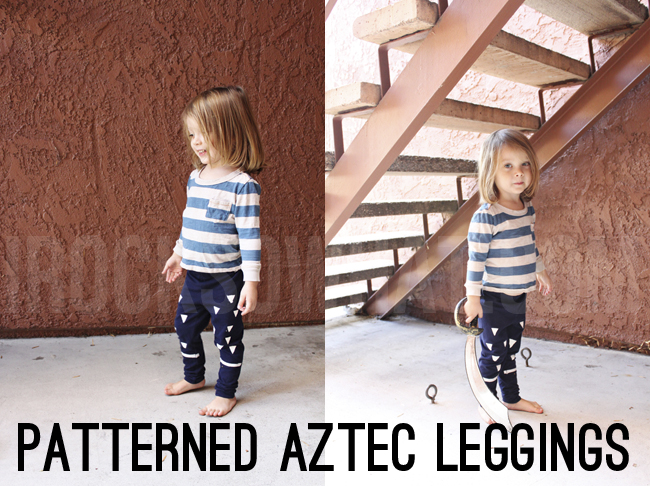
DAY 42 is brought to you by, the lovely Jess of IROCKSOWHATIt’s just not fair. It’s not fair that boys get jipped in the clothing department. To find awesome clothes for your boy means you’re gonna have to PAY for it. I’m sorry, if it’s not at Target or Old Navy (and sometimes The Gap clearance) Wyatt will probably not wear it. Thrift stores are okay, but with the cost of some of them nowadays, I mind as well just buy new.

There were pictures going around of some awesome Walmart aztec printed pants that EVERYONE got (I’ve seriously spent the last hour searching for these online and I can’t even find the specific ones I’m talking about). I too, tried to get those pants, but my Walmart was sold out. I set out to make Wyatt some cool patterned pants for himself, so I picked up some leggings from the girl’s department at Target and some fabric paint and got started (I chose girl’s leggings because I can never find fitted cotton pants for boys. Everything is baggy style.)
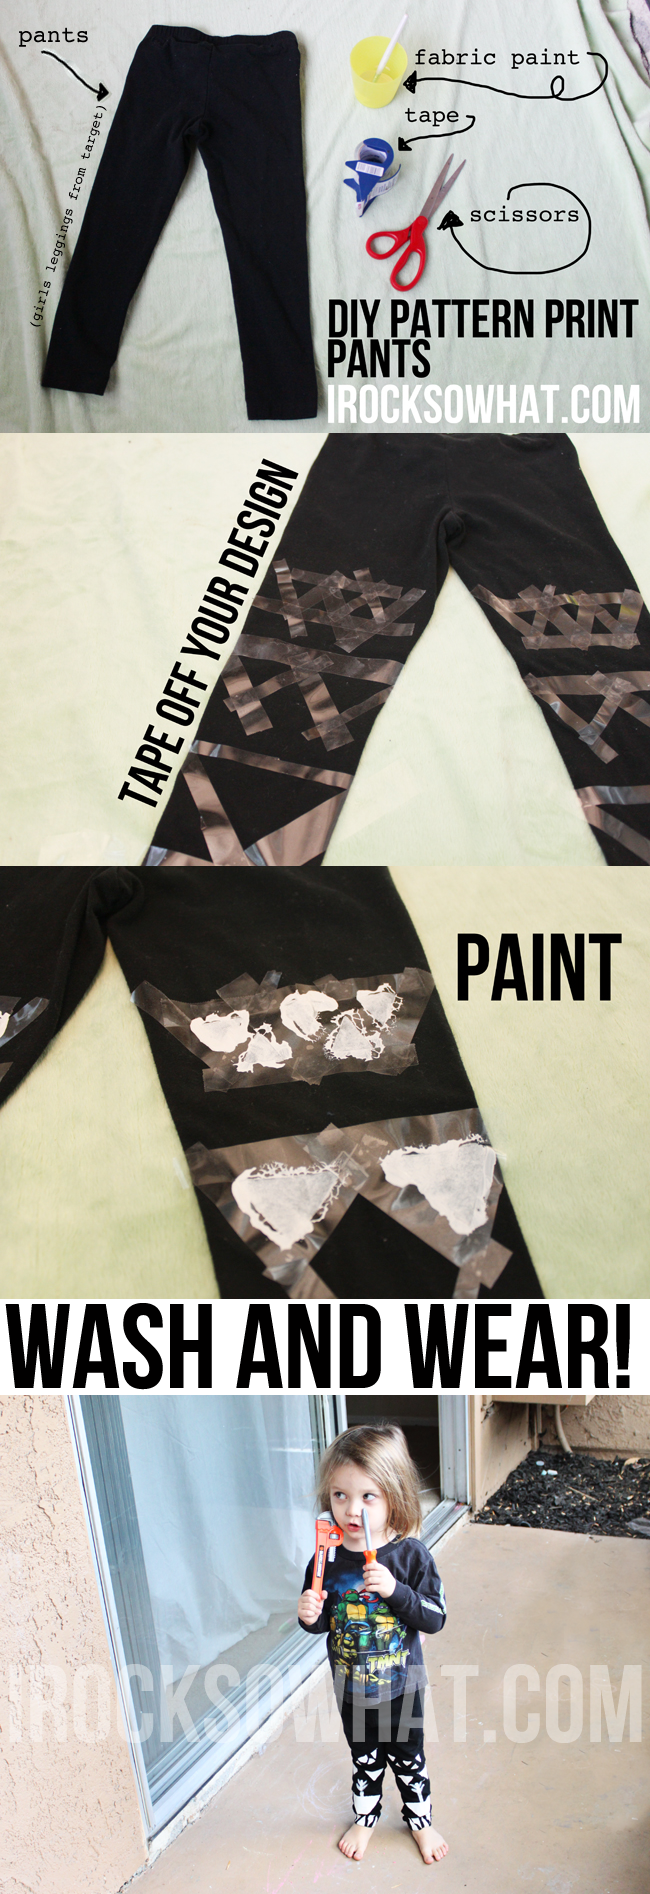
This was a crazy easy project and taping off my design gave me a little bit of confidence to not mess up (pro tip : use painters tape. I didn’t and I wish I had. It would have probably made cleaner lines and would have been easier to peel off). I’m not that awesome at painting. I did one coat, let it dry, and then went ahead and did another coat. I didn’t remove the tape until after everything dried. I let my pants sit over night to make sure they were super dry, and then I threw them in the wash and dried them (also, it’s best to work with pants/shirts that have washed and dried already). Also be sure to only use fabric paint (which I got at Michael’s). It’s made for fabrics. You can wash and dry it.

Perfect gift for your kiddo!

– Jess, IROCKSOWHAT

…………………………………………………………………………………………………………………………………………………

A very big THANK you to Jess for sharing this fantastic DIY. Please, be sure to give her blog home a visit.

To keep up with my 50 DIY Days, click here: