Disclosure: Lowe’s Home Improvement provided me with free products in exchange for this post. All opinions are my own.
My DIY Outdoor Sofa Hack, For Those Scared of Building Furniture from Scratch, is for anyone that wants build a large outdoor seating area with minimal building skills. Don’t stress about building a stunning outdoor piece from scratch when you can use a seating set that’s already cut and ready for you to transform.
To get this project started Lowe’s sent us two of these conversation sets and we are turning all of those separate seating pieces and two coffee tables into two large sofas and a dining table.
Note: head over here to see the final makeover photos for our backyard!
Sofa build materials:
- One conversation set (I used the Safavieh Ozark Set)
- 4: 3/8″ x 3″ Hex Bolts
- 4: 3/8″ Stop Nuts
- 1 box of #8 x 3 in. Construction Screws
- Titebond Wood Glue – Water Resistant/Exterior
- 4: Clamps
- 1 @ 1in. x 4in. x 8ft. Cedar Board
- 1 @ 2in. x 6in. x 8ft. Cedar Board
- 2 @ 1in. x 6in. x 8ft. Cedar Flat-top Wood Fence Picket
- 1 @ 4in. x 4in. x 4ft. Cedar Deck Post
Tools:
- Saw (or get the boards cut to size at Lowe’s)
- Screwdriver
- Socket Wrench
- Optional: Pocket Hole Jig
Directions:
Step 1:
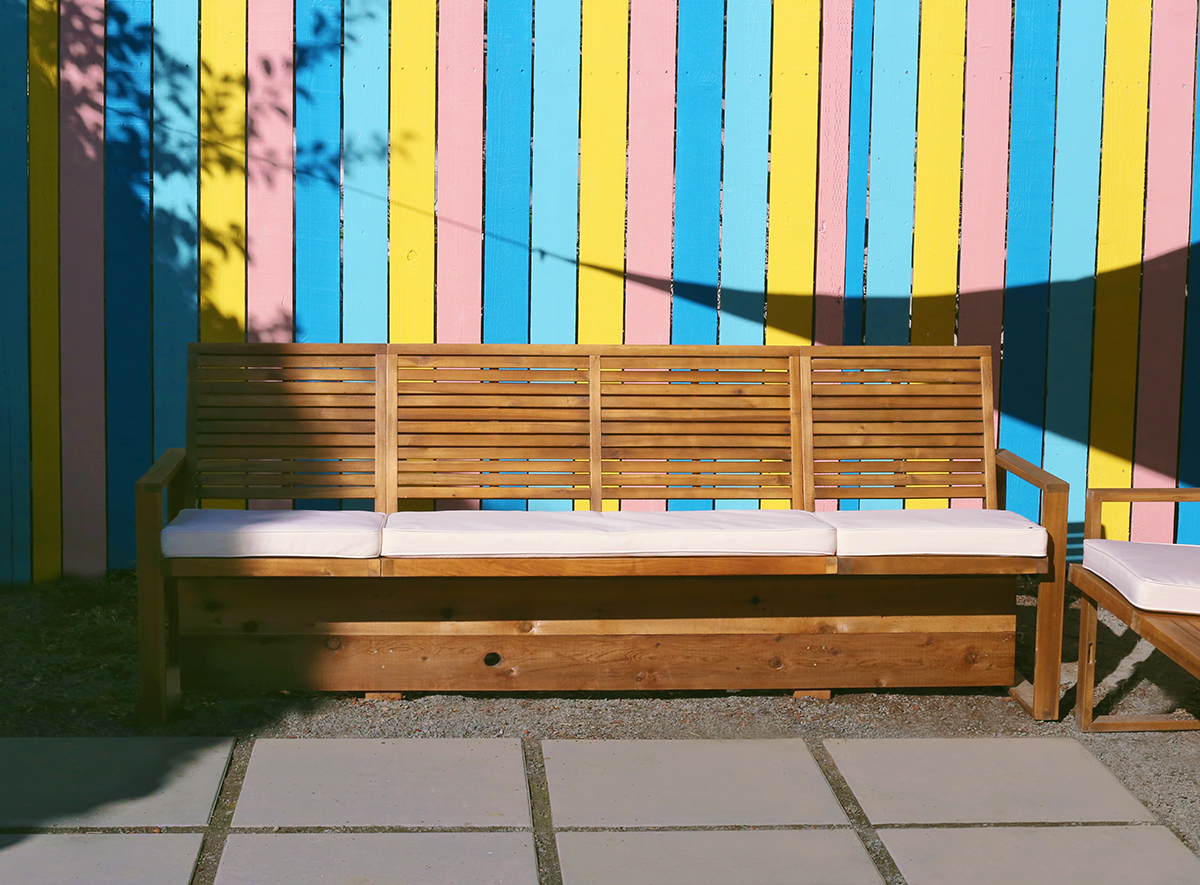
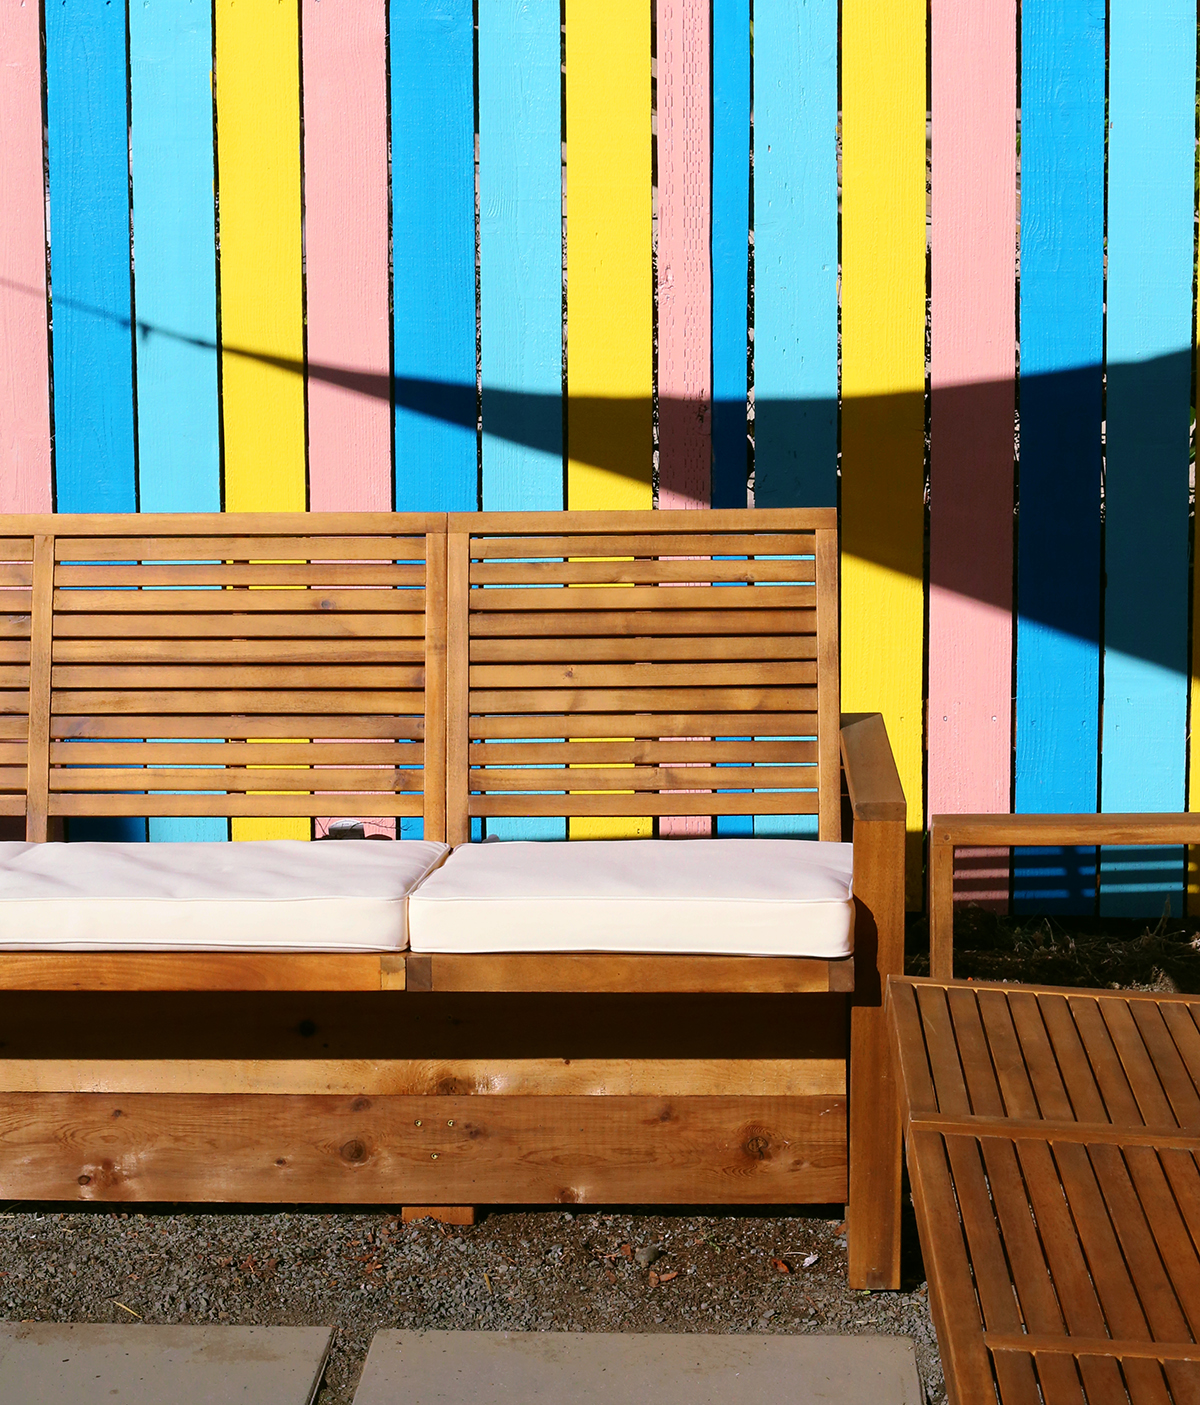
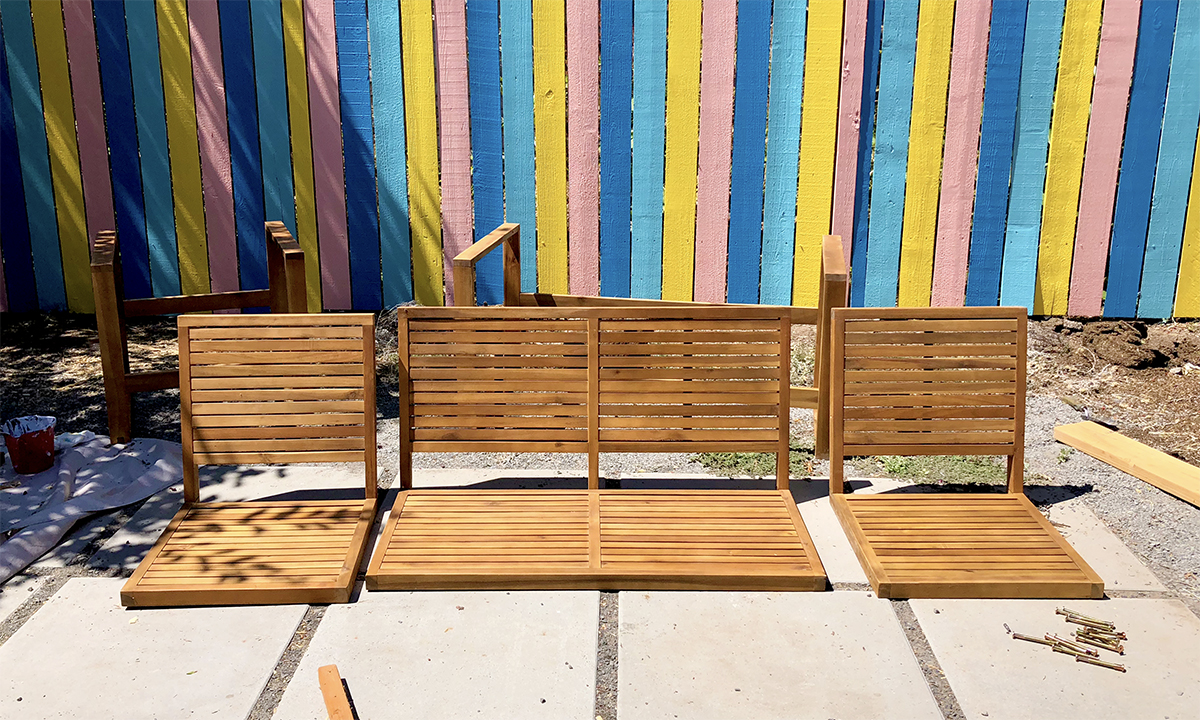
Start by taking your conversation seating set out of the box and building the loveseat and chairs with the backs. Line them up.
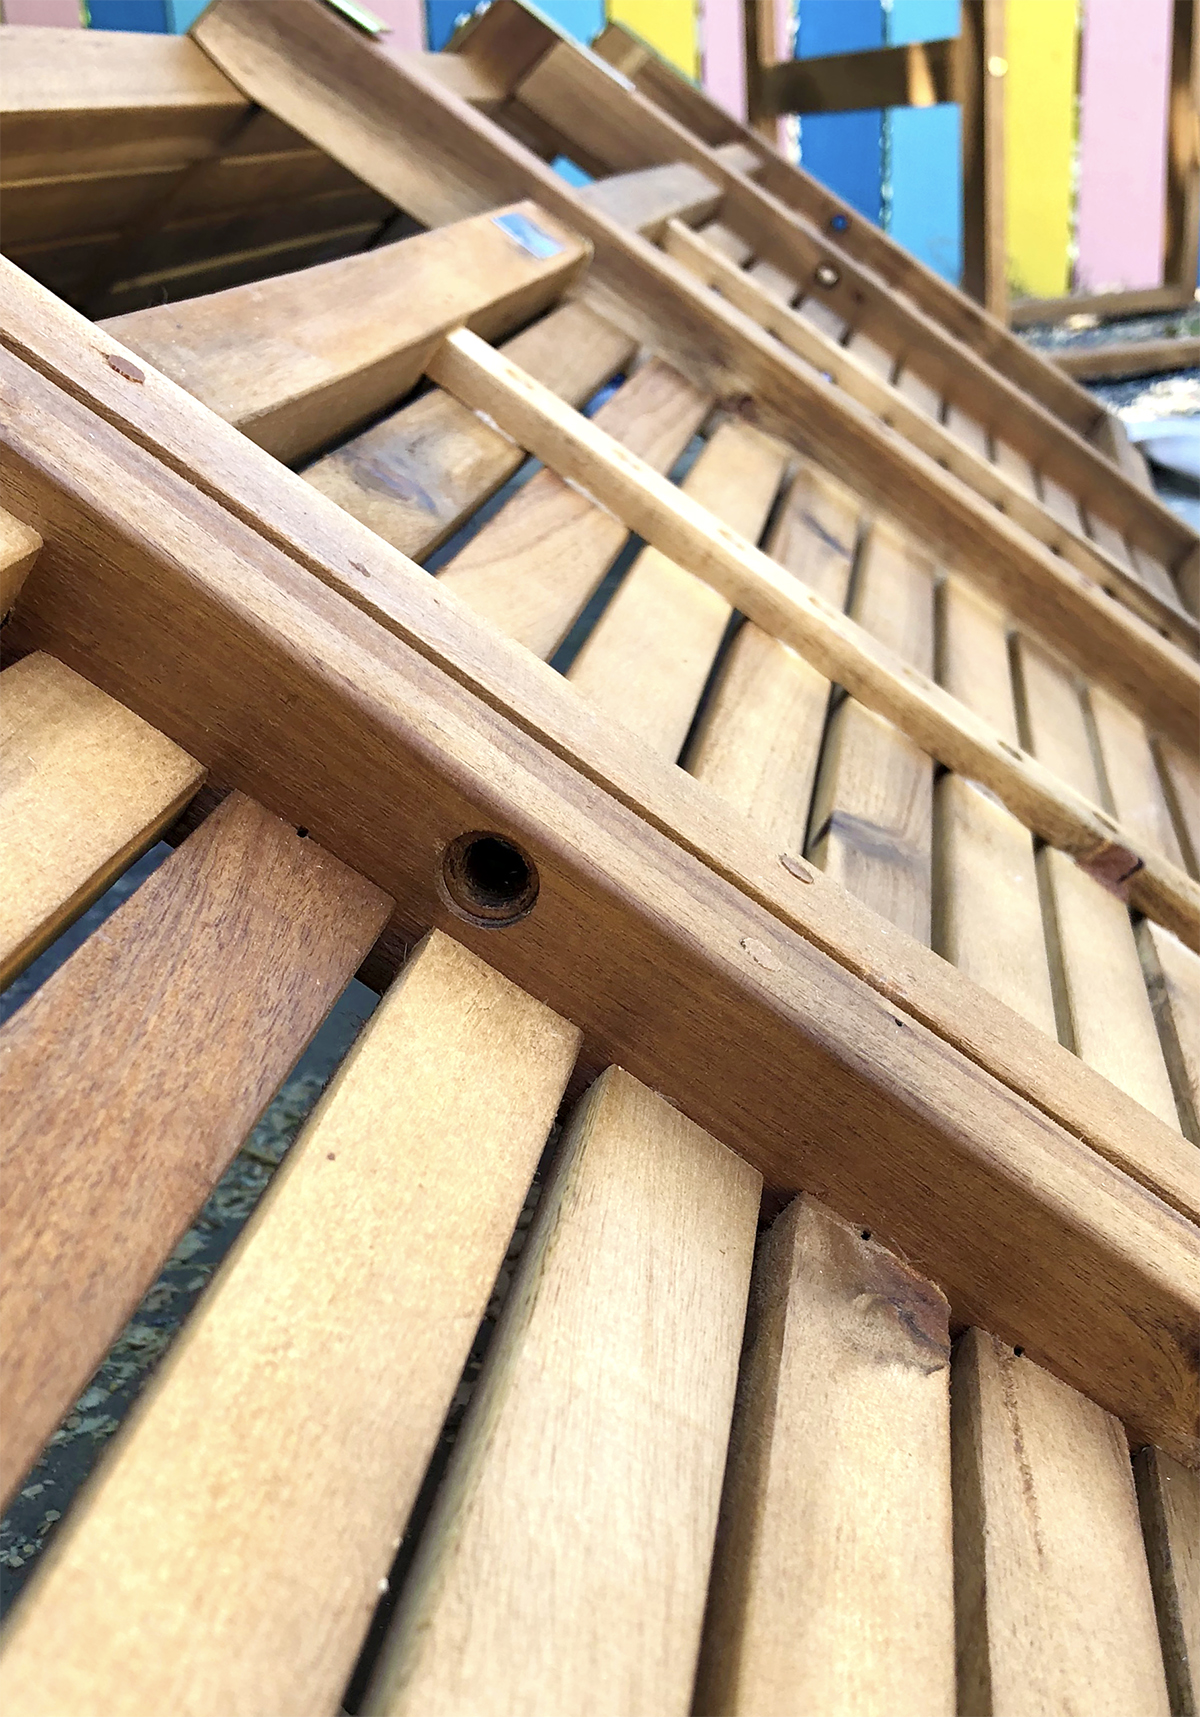
Step 2:
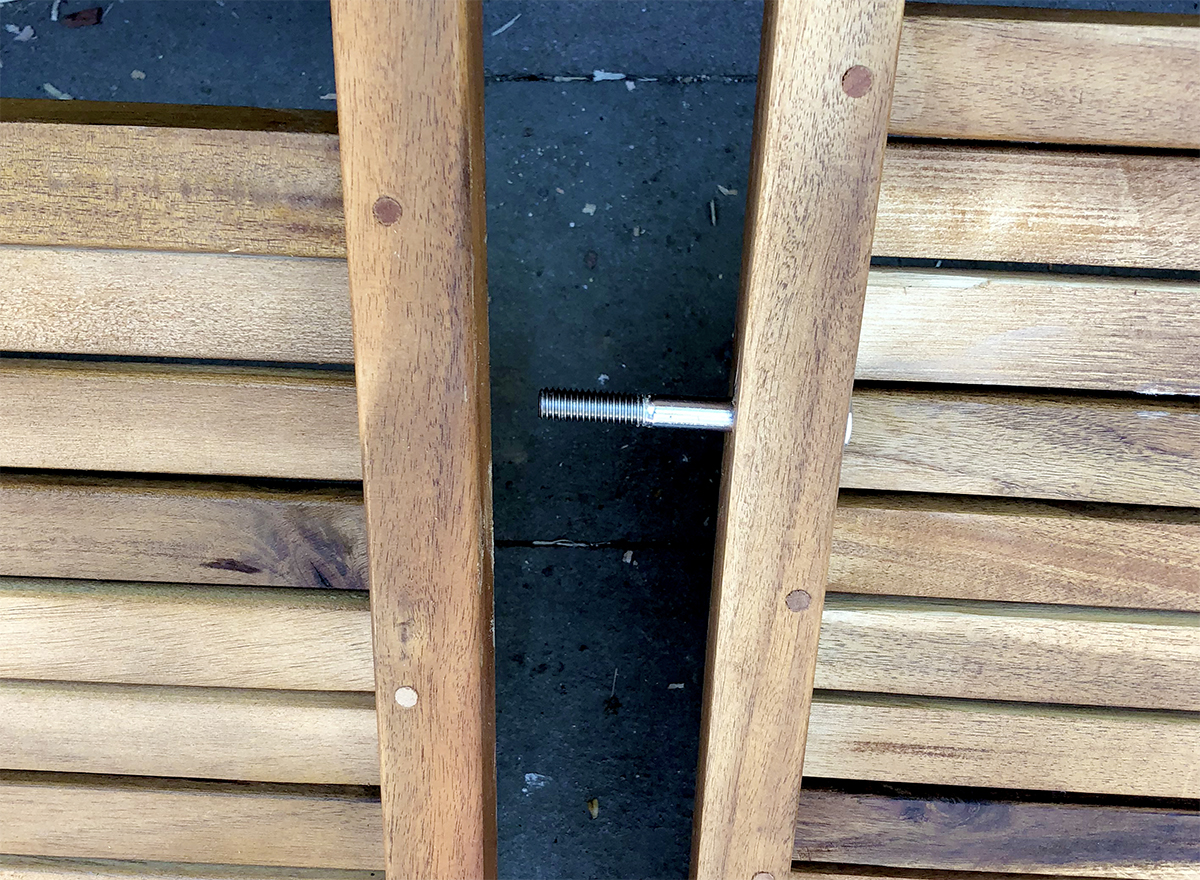
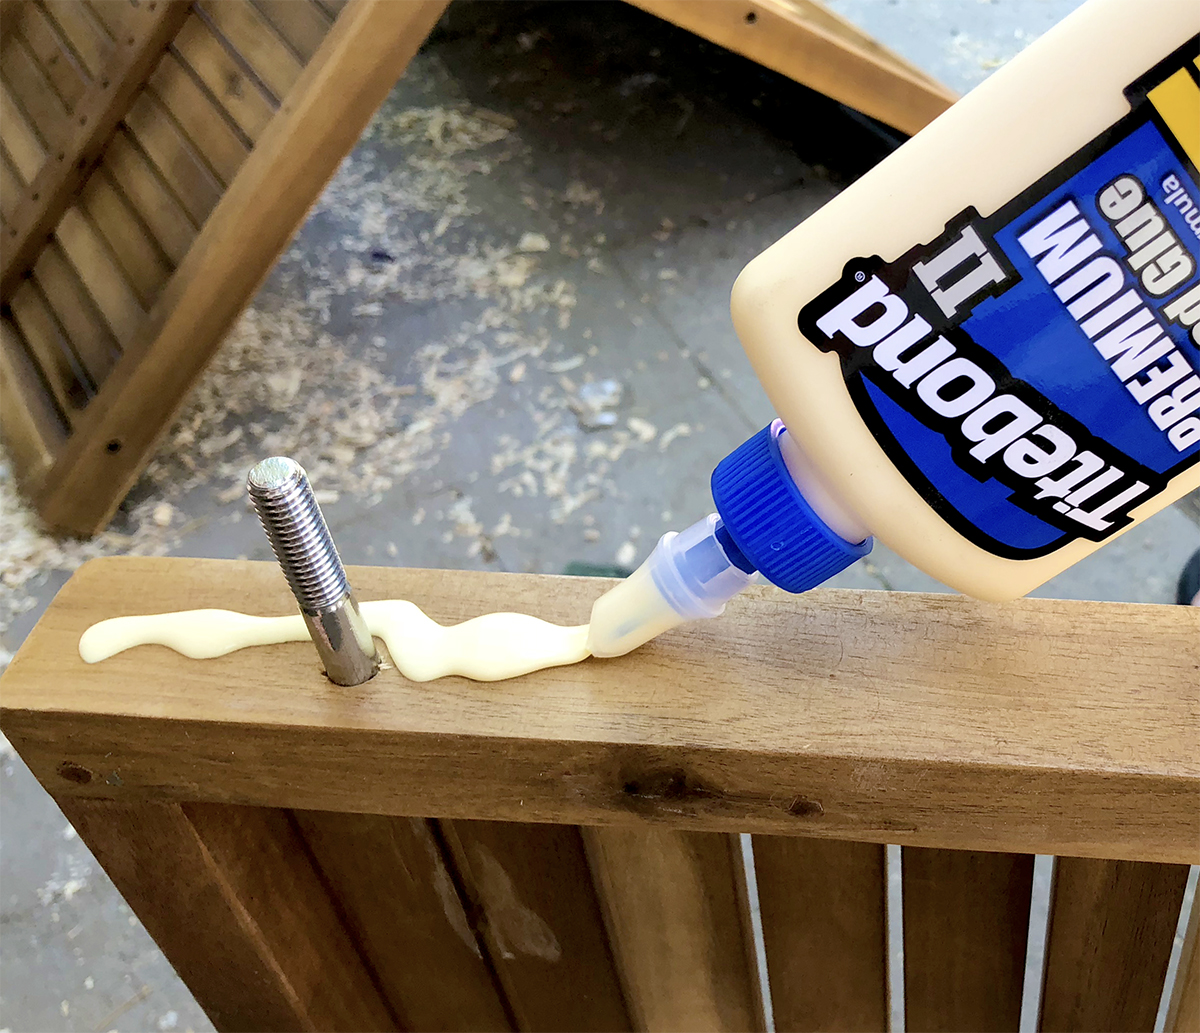
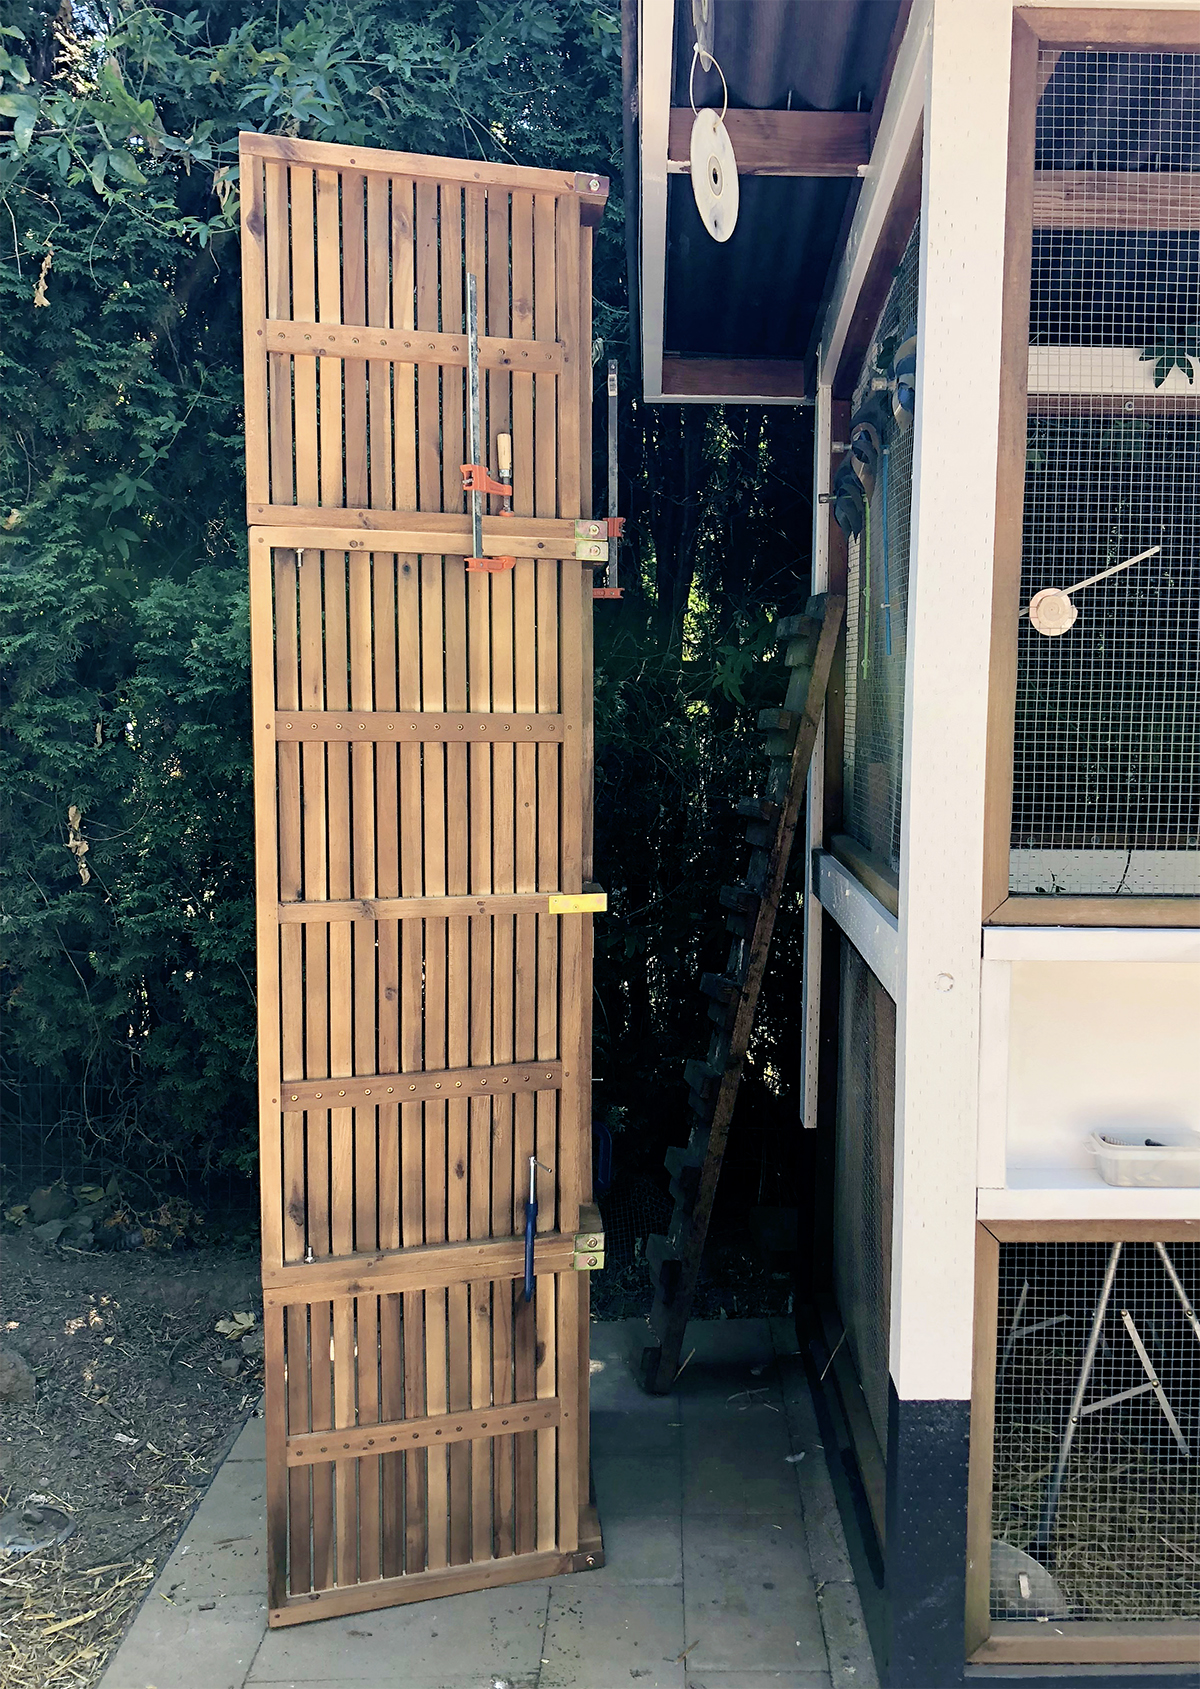
There are precut holes that were intended to use to attach the arms to each set. Instead you will use these holes to attach the chairs to each side of the loveseat. Apply a line of wood glue to the edge where the sofa and chair will be connected. Place your hex bolts and stop nuts in each hole and tighten with a socket wrench. As you tighten the hex bolts and nuts the excess glue will squeeze out. Use a damp cloth to clean up the glue before it dries. Attach the clamps to the bottoms and backs of the sofa and let dry for 24 hours.
Step 3:
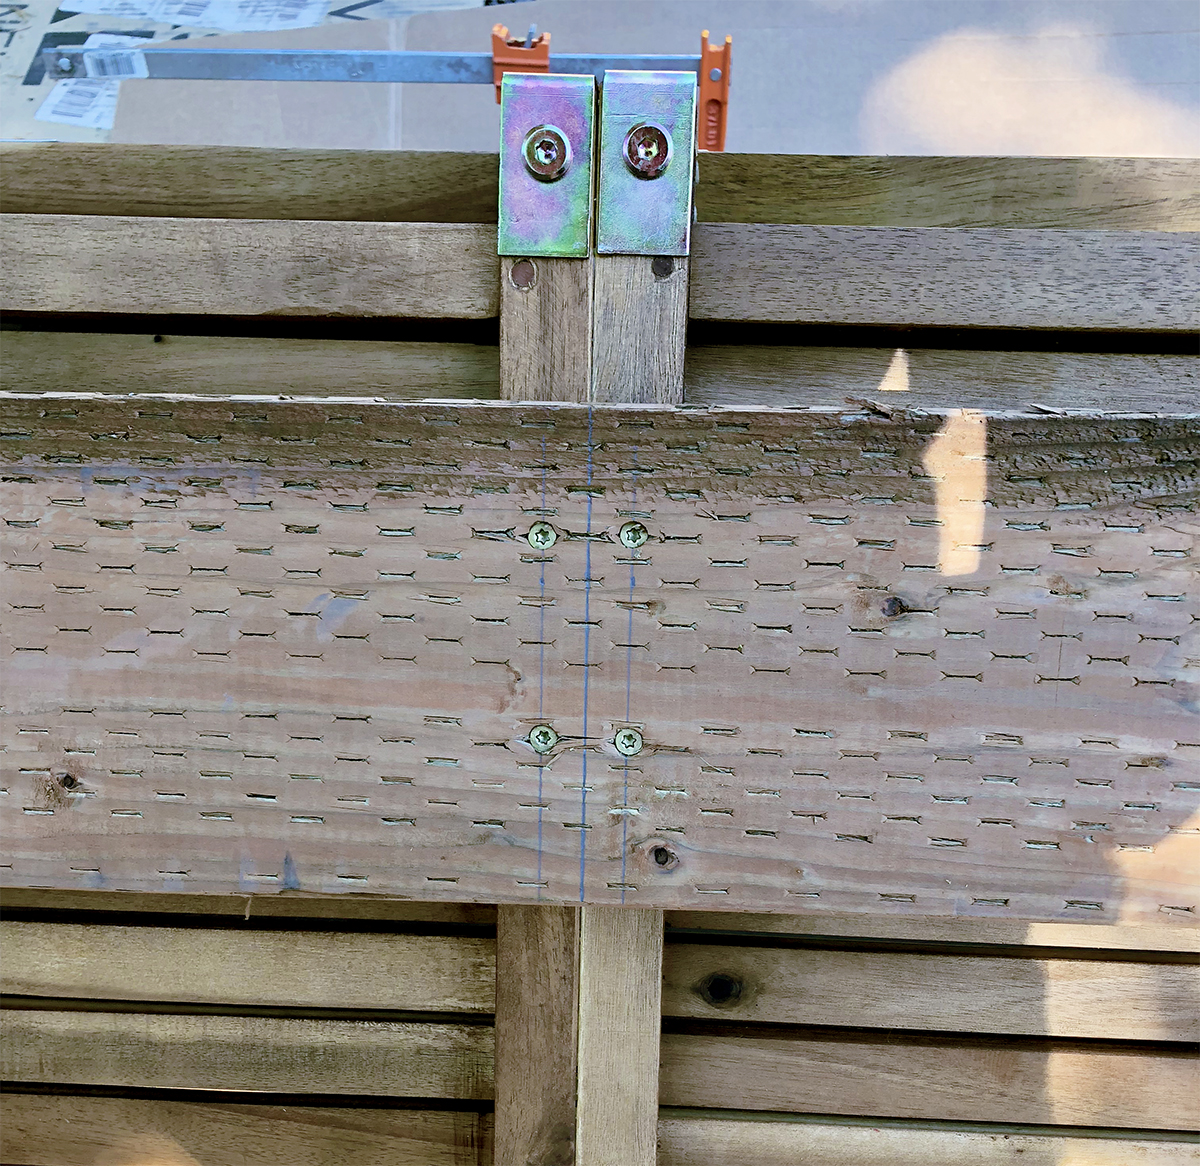
Measure the length of the glued bench. Ours came out to 85.5″ long when when the chairs and loveseat were all glued together. Cut all the wood boards, except the deck post, to the length you measured.
Because we took the arm/legs off of these seats we needed to add some structural support to our hacked outdoor sofa. Use the 1in. x 4in. x 8ft. Cedar Board (cut to the correct measurements) and the #8 x 3 in. Construction Screws to attach the board to the seat-back of the sofa.
Use the 2in. x 6in. x 8ft. Cedar Board (cut to the correct measurements) and the #8 x 3 in. Construction Screws to attach the board to the bottom of the sofa.
Step 4:
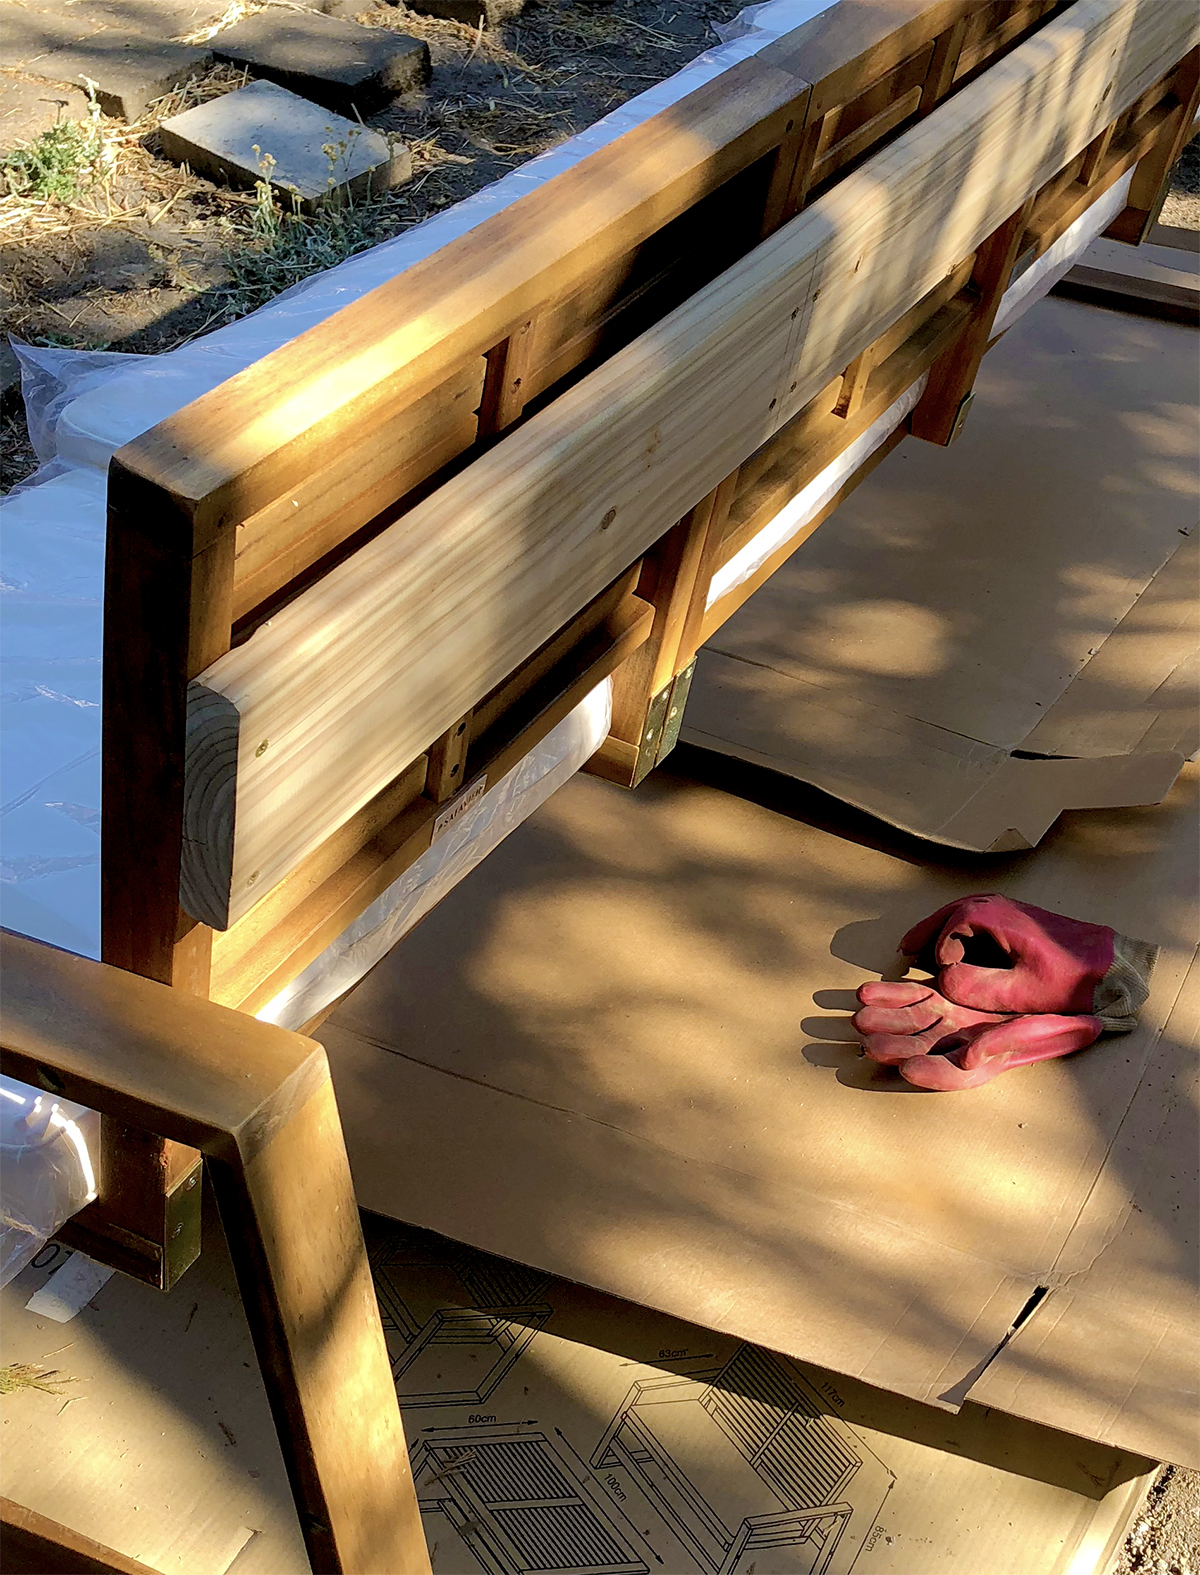
Measure from the board you attached to the bottom of the sofa seat to the ground. Cut two pieces of the 4in. x 4in. x 4ft. Cedar Deck Post to that size. Use your pocket hole jig to drill 2 holes on two opposite sides of each cut post. Use the #8 x 3 in. Construction Screws to attach the posts to the board you attached to the bottom of the sofa seat. I suggest attaching the posts directly below where the each seat meets the loveseat.
Note: You don’t have to purchase a pocket hole jig for this project, but it’s a great investment if you plan to build more items for your home. IF you don’t use the pocket hole jig you can attach the posts with some metal brackets. Here’s a great video tutorial from Lowe’s on how to use a pocket hole jig. It’s very easy and I don’t think we will build anything else without it!
Step 5:
To add more stability and to give the sofa a more finished look we attached the 2, cut to size, 1in. x 6in. x 8ft. Cedar Flat-top Wood Fence Picket pieces to the installed deck post supports under the sofa. They were attached with the #8 x 3 in. Construction Screws.
Step 6:
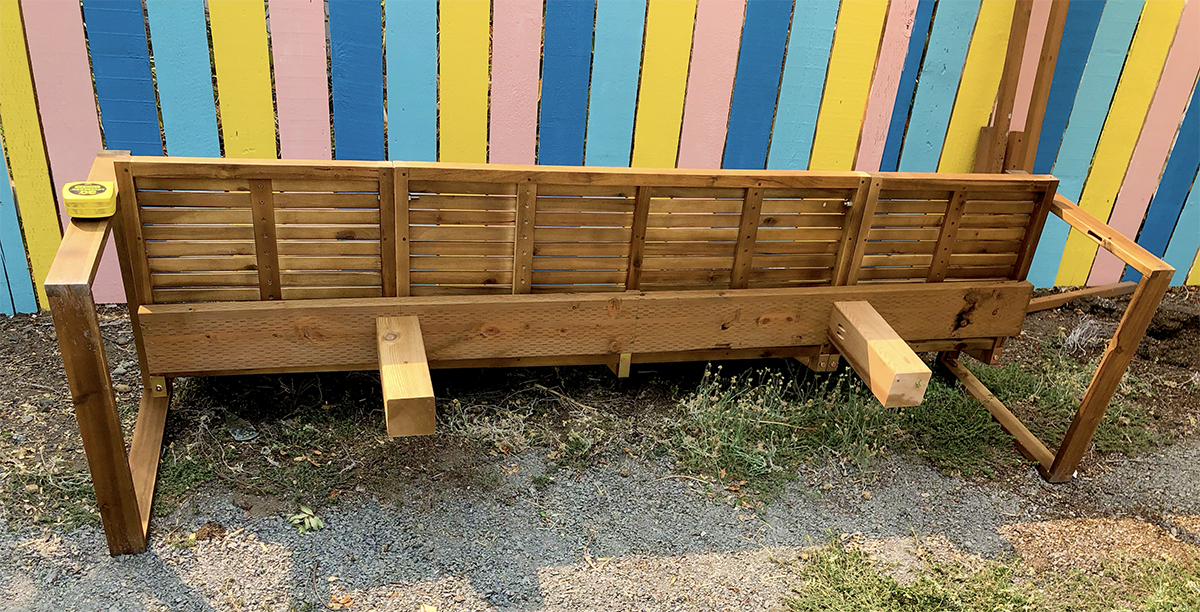
To extend the life of your sofa add a wood sealer or stain to the whole sofa.
That’s it! You are finished unless you want to build two of these sofas (like we did). Just double the supply list and repeat these steps. Want to build the dining tables? Follow my very quick directions below.
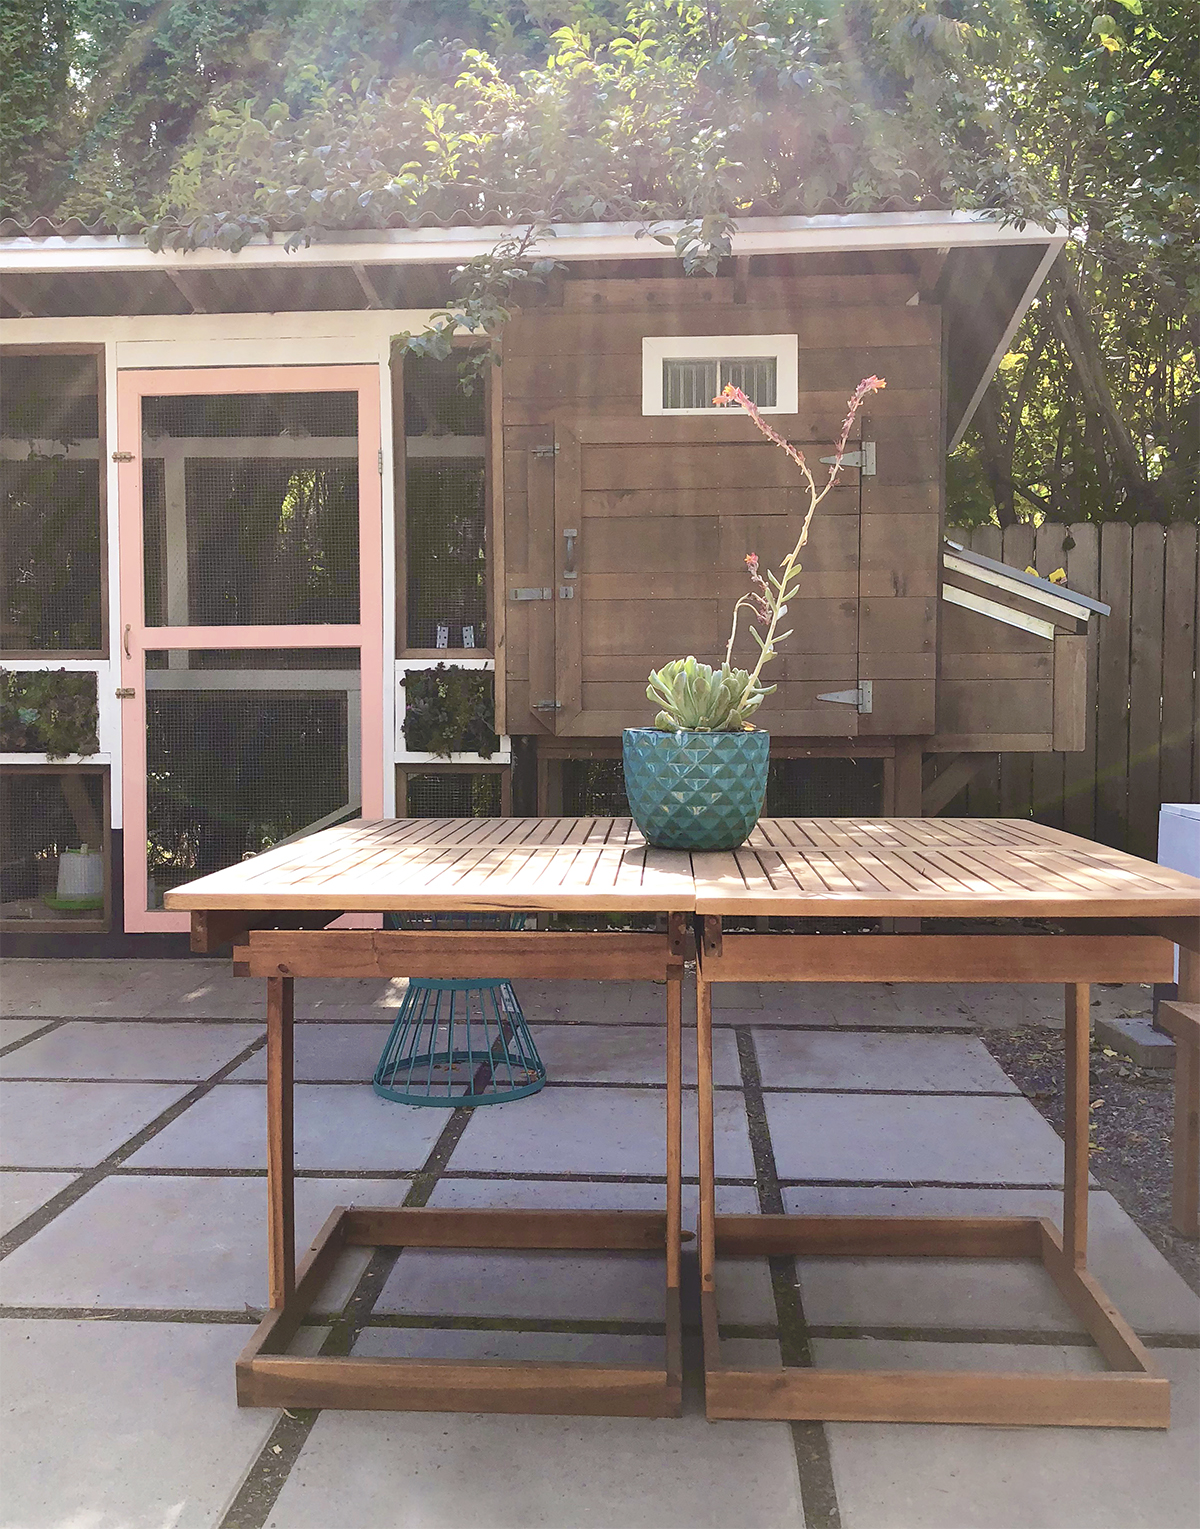
Please note: One conversation set is enough to build one coffee table sized dining table. To get a square dining table (like we did) you will need two conversation sets.
Dining table building materials:
- The coffee table top from the Safavieh Ozark Set
- One built support from the chair of the Safavieh Ozark Set
- Screws from the Safavieh Ozark Set
- Titebond Wood Glue – Water Resistant/Exterior
Tools:
- Screwdriver
- 2 clamps
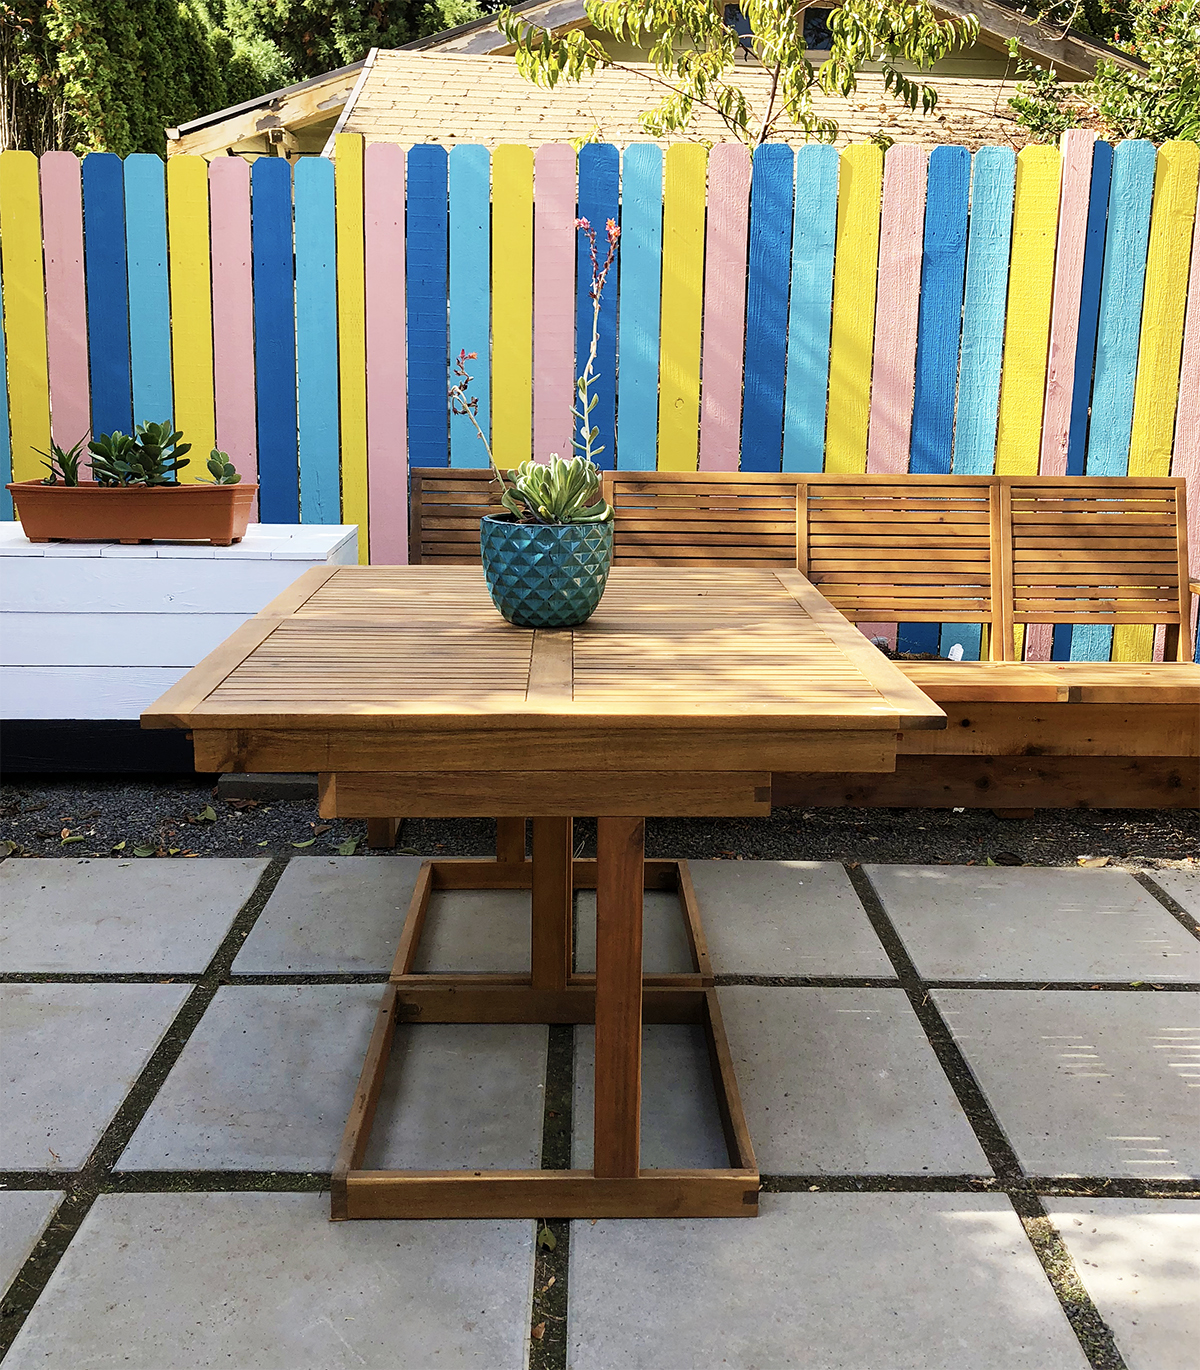
Step 1:
Transforming these coffee tables into dining tables is a very simple process. Build the support from the chairs (the two square arms and two supports). Turn it on it’s side (one square will be on the ground).
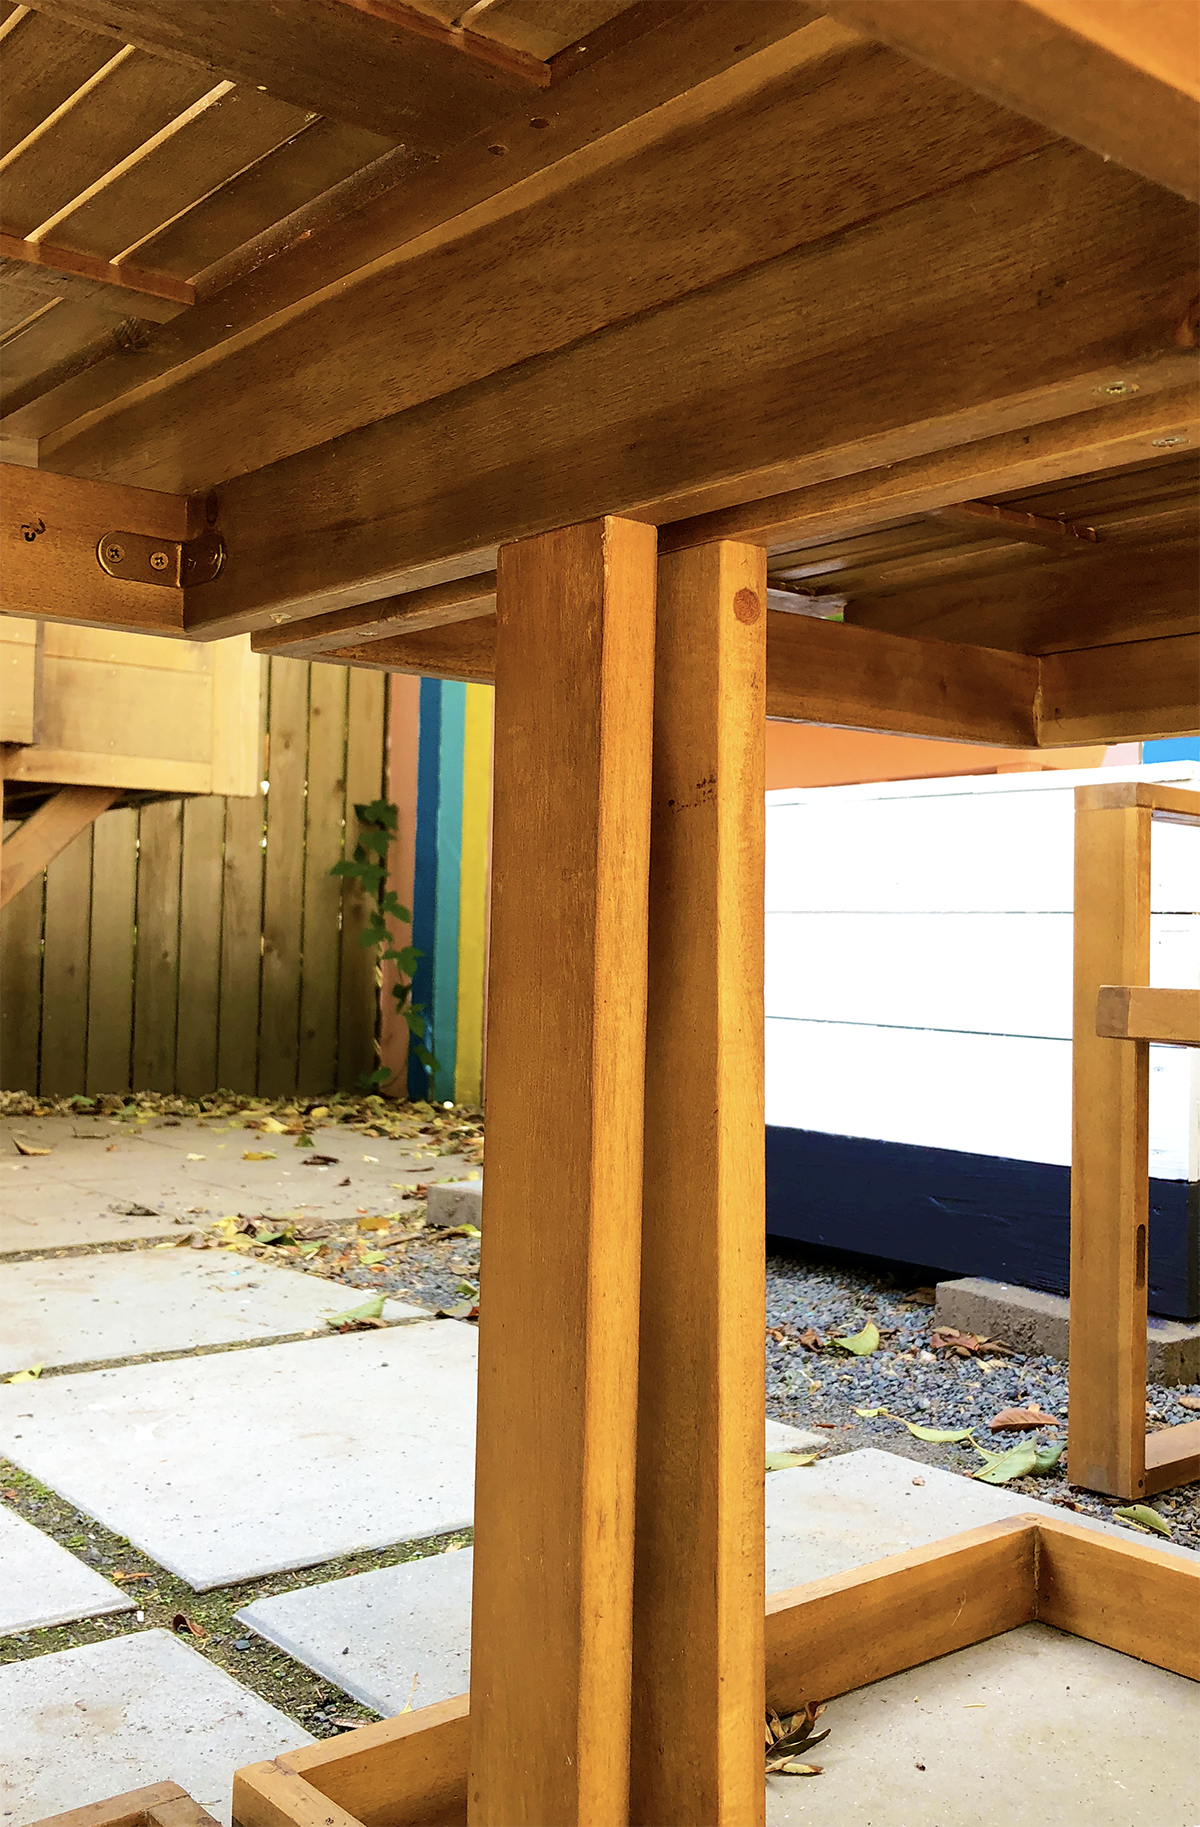
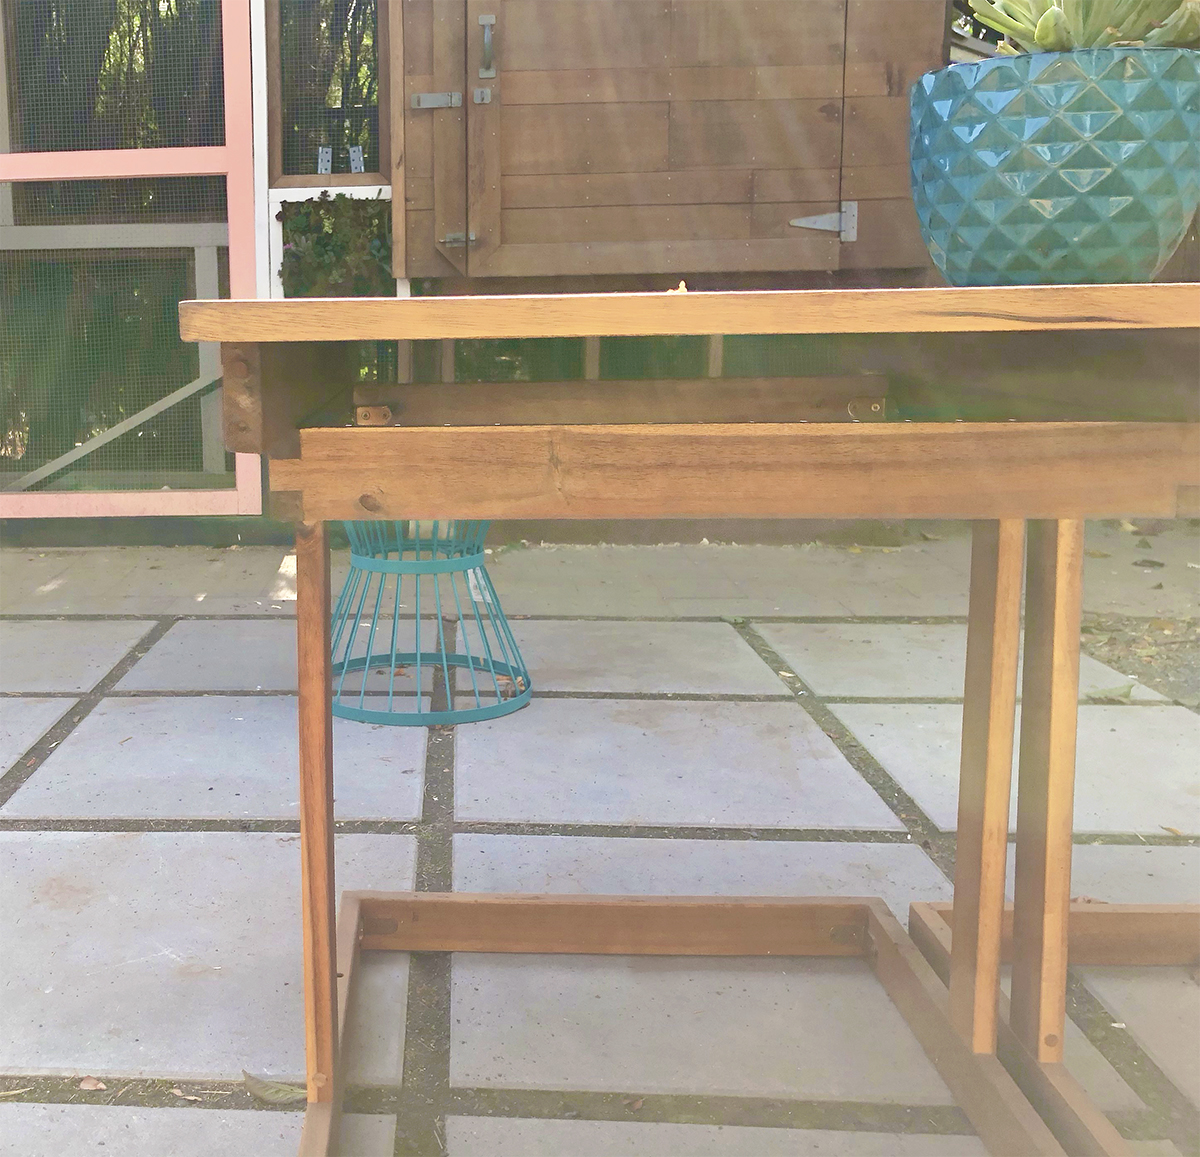
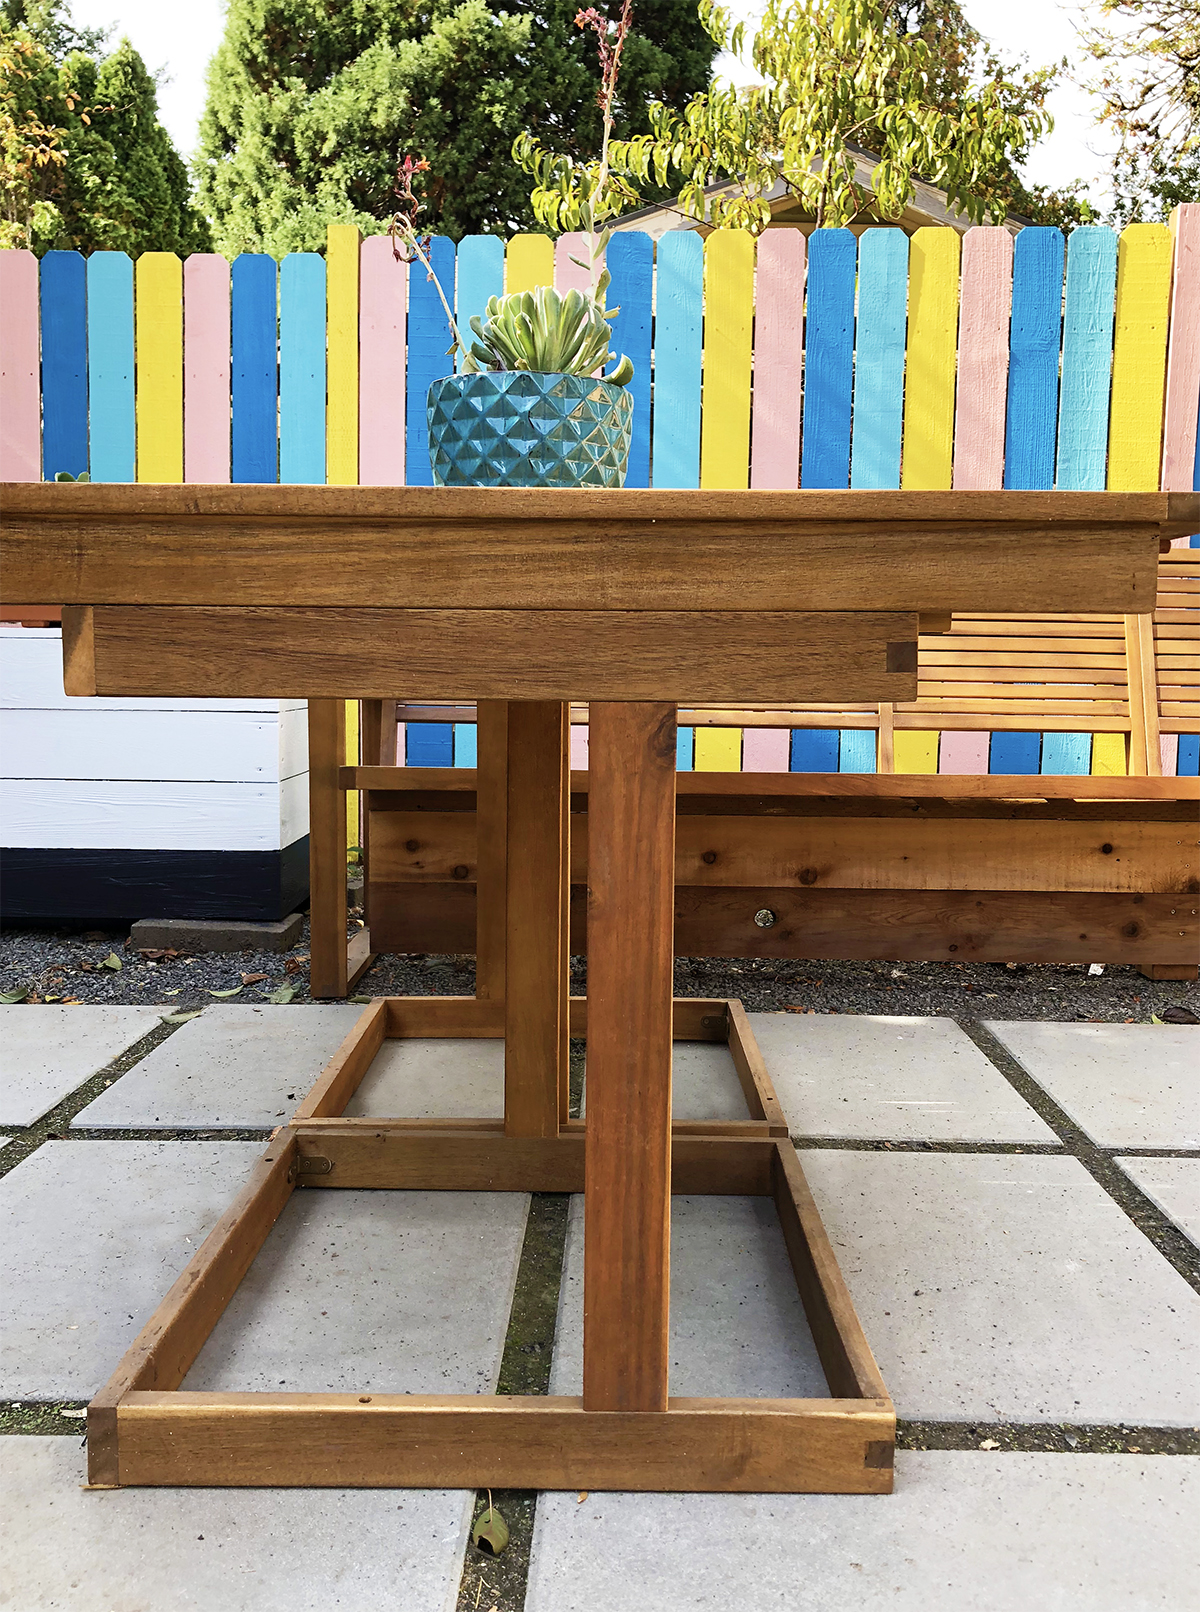
Step 2:
The coffee table will be attaching to two opposite sides of that top square. Test out where the table will go. When you know where the tabletop will go apply a thin layer of wood glue to the square where the table will sit. Use a screwdriver to attach the table (through the precut holes) to the square. Use clamps to secure the top to the base. Use a damp cloth to remove any excess glue that squeezes out. Let dry for 24 hours.
Step 3:
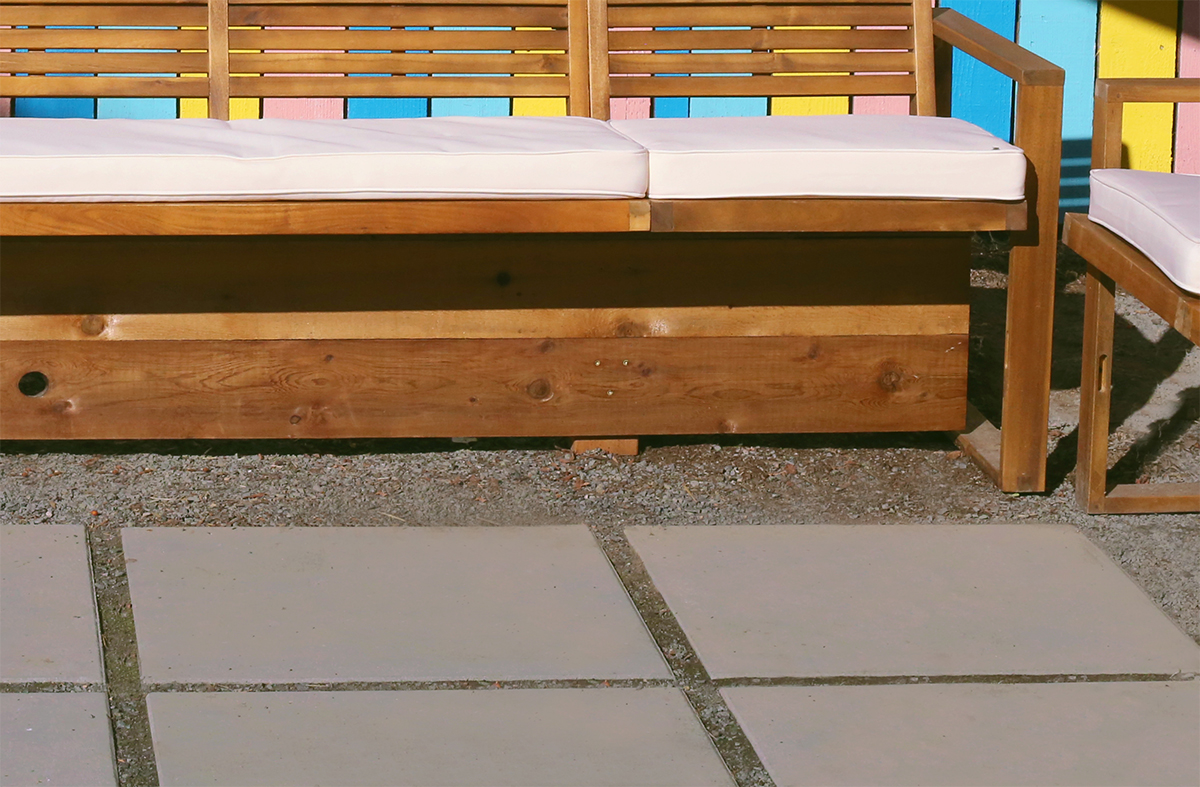
Your table should be done! Since we purchased two conversations sets we were able to create two tables. We can push these tables together for a larger table, or keep them separate for smaller table options.
Our backyard is finished and I can’t wait to share more details with you. Our hidden storage/planter and side table turned out great. Head over here to see my previously posted backyard inspiration.
– Chelsey
Disclosure: Lowe’s Home Improvement provided me with free products in exchange for this post. All opinions are my own. I may earn a small commission for my endorsement, recommendation, testimonial, and/or link to any products or services from this website. Thank you for your support.