Last day to get your PNW Blogger Holiday Party ticket!

PNW Blogger Holiday Party // thepapermama.com

Ok, today is the last day to buy your PNW Blogger Holiday Party tickets! It’s going to be a blast, I’m so excited. Hope to see you there!

– Chelsey

P.S. If you entered to win a free ticket to the event, the winners have been emailed! Thanks!


Day 1: Pacific Northwest Photo Booth Props

50 Diy Days of Christmas Pacific Northwest Photo Booth Props // thepapermama.com

Day 1 of 50 DIY Days of Christmas: Pacific Northwest Photo Booth Props! I’m prepping the final details for my PNW Blogger Holiday Party and I needed some perfect props for our photo booth. What screams PNW? Woodland creatures and well, beards. I can’t wait to put these to use at the party.

I think these would be perfect for the kiddos during the holidays. A little spur of the moment Christmas photo booth could be fun! My kiddo has been wearing some felt ears about once a week. She tells me they are Armadillo ears. Hee.

50 Diy Days of Christmas Pacific Northwest Photo Booth Props // thepapermama.com

Supplies:

– A variety of felt

– Headbands

– Hot glue

– Scissors

– Wire

– Free Patterns: Fox and Mouse, Rabbit and Doe, Antlers, and Beard

50 Diy Days of Christmas Pacific Northwest Photo Booth Props // thepapermama.com50 Diy Days of Christmas Pacific Northwest Photo Booth Props // thepapermama.com

Directions:

– Cut out the patterns for your ears and beards.

– Trace the patterns onto your felt. Cut out the traced felt.

– Glue the felt onto your headbands, folding the felt pieces together and gluing with hot glue. Some of the ears may need some extra support (like the antlers, rabbit ears, and fox ears), so use some wire to hold up the ears. Use wire to create ear hooks and glue onto your beards.

– Enjoy!

50 Diy Days of Christmas Pacific Northwest Photo Booth Props // thepapermama.com

50 Diy Days of Christmas Pacific Northwest Photo Booth Props // thepapermama.com

Happy Monday!

– Chelsey

To keep up with the series, click here or on the image below!

50 Diy Days of Christmas // thepapermama.com

P.S. I do have a couple of spots open for the DIY Days, so if you think you have the perfect project to share send me an email. First, check out theDIY/Submission section in my FAQ’s for a bit of post submission info.  If you’d like to reminisce in the past 50 DIY Days of Christmas… here you are:2011 & 2012


GIVEAWAY! Win a copy of Make Your Day DIY!

Make Your Day DIY // thepapermama.com

Make Your Day DIY // thepapermama.com

Make Your Day DIY // thepapermama.com

One week from today the Make Your Day eBook will be here! Ready to go and here for you to enjoy. To celebrate this momentous occasion Chelsea and I have decided to giveaway some copies of our book. Save that $12 bucks to buy some fried chicken.

We are giving away 3 copies each! If my math is correct, that’s 6 of you that get to enjoy our book for free. YES. Check out the Rafflecopter Widget below to see how you can win!

a Rafflecopter giveaway

Make Your Day DIY // thepapermama.com

If you want a quick entry, just answer this question in the comments below (and let us know you did this in the Rafflecopter widget): If you had to eat the same thing everyday, what would it be? FYI: Chelsey would eat fried chicken, and Chelsea loves homemade turkey sandwiches… with a pickle on the side. 

– Chelsey and Chelsea

This giveaway will end on Sunday, November 3rd, 2013 at 5 PM PST. Six winners will be chosen through Rafflecopter. Winners have 48 hours to respond to the winning entry email. Please see the Rafflecopter widget for full giveaway rules. 


50 DIY Days of Christmas 2013!

50 DIY Days of Christmas 2013

Every year I do this, I wonder if I’m nuts. Ha, but I really enjoy this series. I look forward to it each year and plan out what I’m up to starting in about July. There’s a lot of fun DIY’s coming your way. There will be a ton of ideas for gifts, decor, and food. I’m also adding a few holiday accessories to the mix.

Below you can keep up with all the DIY’s I’m sharing for the next 50ish days. Just click on the photos below and enjoy!

Day 1 of 50 DIY Days of Christmas: PNW Photo Booth Props // thepapermama.com

Glitter Wire Necklace: 50 DIY Days of Christmas // thepapermama.com

You Plus Me Pillow // thepapermama.com

Harvest Garland // thepapermama.com

Day 5 of 50 DIY Days of Christmas: Painted Party Tights // thepapermama.com

Day 6 of my 50 DIY Days of Christmas: Homemade Bath Soak // thepapermama.com

Day 7 of my 50 DIY Days of Christmas: Baked Brie with Apricot Jam and Figs // thepapermama.com

Day 8 of my 50 DIY Days of Christmas: Silhouette Wreath // thepapermama.com

Day 9 of 50 DIY Days of  Christmas: Painted Feather Ornaments // thepapermama.com

Day 10 of 50 DIY Days of Christmas: Wolf Mittens // thepapermama.com

Day 11 of 50 DIY Days of Christmas // thepapermama.com

Day 12 of 50 DIY Days of Christmas: Painted Silhouette Kid Craft // thepapermama.com

Day 13 of 50 DIY Days of Christmas: Tree Plus Heart Garland // thepapermama.com

Day 14 of 50 DIY Days of Christmas: Gem Gift Tags Freebie Printable // thepapermama.com

Day 15 of 50 DIY Days of Christmas: Photo Frame Place Markers // thepapermama.com

Day 16 of 50 DIY Days of Christmas: Christmas Photo Inspiration // thepapermama.com

Day 17 of 50 DIY Days of Christmas: Christmas Card Photoshop Tutorial // thepapermama.com

Day 18 of 50 DIY Days of Christmas: Paper Flower Frame (with free printables) // thepapermama.com

Day 19 of my 50 DIY Days of Christmas: Polka Dot Wreath // thepapermama.com

Day 20 of my 50 DIY Days of Christmas: Pepperoncini Cheese Dip Recipe // thepapermama.com

thankful banner

Day 22 of my 50 DIY Days of Christmas: Personalized Casserole Dish // thepapermama.com

Day 23 of my 50 DIY Days of Christmas: Santa Coloring Page // thepapermama.com

Day 24 of my 50 DIY Days of Christmas: 2013 Holiday Photo Challenge // thepapermama.com

Day 25 of my 50 DIY Days of Christmas: Modern Tree Advent Calendar // thepapermama.com

Day 26 of my 50 DIY Days of Christmas: Gem Place Markers // thepapermama.com

Day 27 of my 50 DIY Days of Christmas: 2013 Holiday Gift Guide // thepapermama.com

Day 28 of 50 DIY Days of Christmas: Mod Wood Advent Calendar // thepapermama.com

Day 29 of 50 DIY Days of Christmas: Mini Elf Doughnuts // thepapermama.com

Day 30 of my 50 DIY Days of Christmas: JOY Pillow!

Day 31 of my 50 DIY Days of Christmas: Photo Magnet Gift Tag // thepapermama.com

Day 32 of 50 DIY Days of Christmas: Quiz Advent Calendar // thepapermama.com

Day 33 of 50 DIY Days of Christmas: Reindeer Food Jar Labels // thepapermama.com

Day 34 of 50 DIY Days of Christmas: Burlap Wine Bottle Bags // hp create

Day 35 of 50 DIY Days of Christmas: Christmas Vacation Snow Globe // thepapermama.com

Day 36 of 50 DIY Days of Christmas: Merry and Bright Garland for Minnetonka // thepapermama.com

Day 37 of 50 DIY Days of Christmas: Clever & Silly Wrap Ideas // thepapermama.com

Day 38 of 50 DIY Days of Christmas: Joy Glitter Word // thepapermama.com

Day 39 of 50 DIY Days of Christmas: Merry Christmas Ya Filthy Animal Printable (freebie) // thepapermama.com

50 Diy Days of Christmas // thepapermama.com

– Chelsey

P.S. If you’d like to reminisce in the past 50 DIY Days of Christmas… here you are: 2011 & 2012. Also, thank you Jess (IROCKSOWHAT) for making this year’s logo (she also made the 2012 logo). 


Jack ‘O Lantern Coloring Page for the Kiddos

Jack 'O Lantern Coloring Page // thepapermama.com

Jack 'O Lantern Coloring Page // thepapermama.com

I created these little pumpkin faces for a Better Homes and Gardens post a couple of weeks ago… turns out it’s also an awesome coloring page for the childrens. My kiddo has loved these little printouts. All the coloring for her!

SO, I’m going to share these printouts for you. I don’t know about you, but I’m tired of buying all those coloring books. She tends to get tired of them ASAP and never finishes the book. That’s why printing out coloring pages is awesome. Saves a bit of paper. At least that’s what I like to tell myself. I don’t think I’ll ever be able to get out of purchasing My Little Pony coloring books. Ha!

Click here to download one and two. To download right click + save the image. Enjoy!

Happy Halloween!!!

– Chelsey

Tags: ,

Categories: diy, Holiday - Halloween


GIVEAWAY + Makeup stories

Girls Night Out Makeup // thepapermama.com
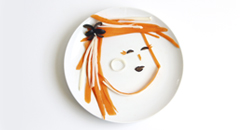
I’ve never been that great with makeup application. I don’t really know what I’m doing when putting on any makeup. It’s like a guessing game for me. I mean, I get mascara. I know how to do that (RANDOM FACT: my very first mascara was blue, oh the 90’s), but I WANT to know how to apply all the makeups, instead of constantly asking myself: – “What is this powder for?” – “How do I put 3 different shades of eye shadow on and make it look like that?” – “Oh, you mean that is supposed to look good when I put it on my face?” –  This leads to lots of searching for online makeup tutorials or removing makeup (so many times).

If I do mess up my makeup I’ll usually just say, “Pfft, oh well.” and move on. If I’m headed out on a date with my man or out for a girls’ night, I’ll try a bit harder. I might even start the whole thing over, especially if I screw up my eyeliner… multiple times. I’ve been using water and cotton swabs to start over, but turns out there’s actually something better: Eye makeup remover! Weirdly enough, this is my first time using an actual makeup remover. Almay sent me some Oil Free Gentle makeup remover, and it’s been working pretty awesome. Especially when starting over/correcting my eyeliner mistakes. I’ve been folding them into little corners to define the eyeliner edges. Works pretty well.

Girls Night Out Makeup // thepapermama.com

Do you start your makeup over 80 gazillion times (like me)? OR, are you pretty savvy when it comes to makeup application?

ONE MORE THING, A GIVEAWAY: So, Almay wants to give one of you a $100 Visa gift card (awesome). We’re going to make it super easy for you to try and win. I just need you to answer this question in the comments below, “How do your create you favorite girls’ night out look?

– Chelsey

Note: This is a sponsored post by, Almay. I was provided with Almay® Oil Free Gentle Eye Makeup Remover Pads and was paid for this post. All opinions are my own.


Sweepstakes Rules:

No duplicate comments. You may receive (2) total entries by selecting from the following entry methods: Leave a comment in response to the sweepstakes prompt on this postTweet (public message) about this promotion; including exactly the following unique term in your tweet message: “#SweepstakesEntry”; and leave the URL to that tweet in a comment on this post Blog about this promotion, including a disclosure that you are receiving a sweepstakes entry in exchange for writing the blog post, and leave the URL to that post in a comment on this post For those with no Twitter or blog, read the official rules to learn about an alternate form of entry. This giveaway is open to US Residents age 18 or older. Winner will be selected via random draw, and will be notified by e-mail. You have 72 hours to get back to me, otherwise a new winner will be selected. The Official Rules are available here. This sweepstakes runs from 10/23/13-11/19/13.

Be sure to visit the Almay Brand Page on BlogHer.com where you can read other bloggers’ posts and find more chances to win!

Tags: , ,

Categories: beauty, style