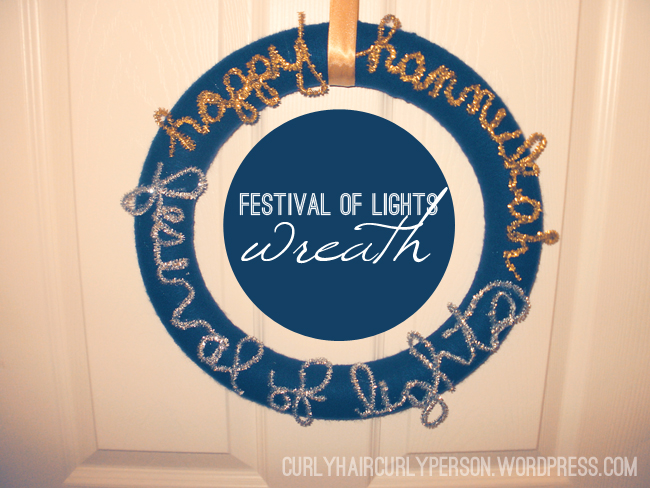
Day 26: Festival of Lights Hannukah Wreath!

DAY 26 is brought to you by, the lovely Jessica of Curlyhair Curlyperson. Jessica offered to share a fantastic Hanukkah DIY with you. Enjoy:

Hi everyone, jessica from Curlyhair Curlyperson here! If you don’t already know, I celebrate HBC (Hannukah-Birthday-Christmas). Since Hannukah usually comes first, and then of course, my birthday (30! this year!!! in HAWAII!!), and then Christmas. It’s fun celebrating them all, but I thought I’d represent my DIY and put the H back in HBC.

I originally intended for this wreath to be interactive, i.e. the ability to “light” the candles each night of Hannukah, but that didn’t work out, so this is just really a minimalist’s take on a Hannukah wreath. I got the supplies from Michael’s (before teacher discount and taxes, not including a glue gun–I already had one) for $20.43.

Supplies:
1. wreath form (14 inches)
2. your favorite color of yarn, you don’t need too much–less than 333m (I got navy; I recommend Red Heart Super Saver since it’s cheap and good quality yarn for a project like this–PLUS my Mimi always used Red Heart)
3. 1 yd of your favorite color ribbon (I got gold because I’m super into gold right now AND it’s festive)
4. pipe cleaners (I got silver and gold so it would look festive AND it would be really shiny around the candles)

Steps:
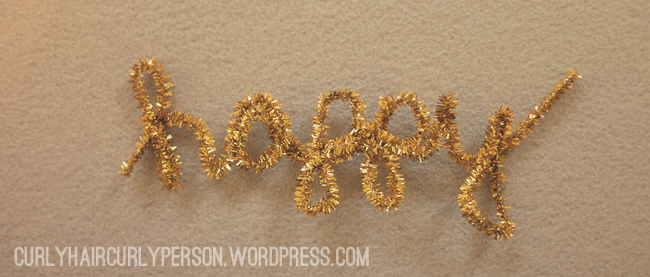
1. spell out the words, “happy”, “hannukah”, “festival,” “of”, and “lights”.
2. wrap your wreath–this takes for.EVER. Hours people. But you could watch your DVR while you do this. I made mine really, really, really tight by tightening the yarn every few inches of wrapping. **I started the wrapping with a line of glue from the glue gun…I don’t know if I would put as much glue next time. I ended the wrapping with a dot of glue.
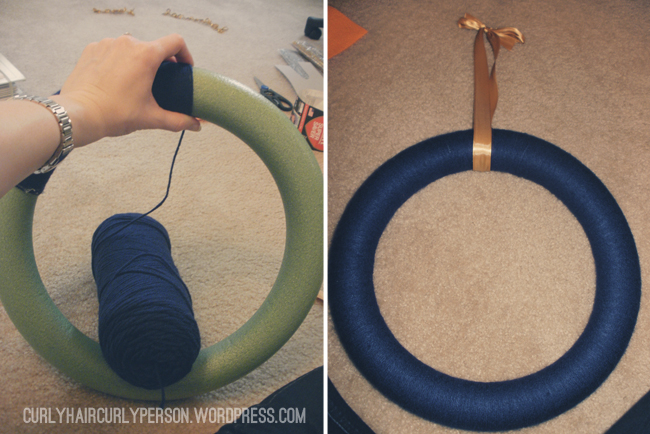
3. tie your ribbon and glue to the wreath over the place where you started the wrapping to cover it up.
4. arrange your words in the places you want them on your wreath (make sure it looks pretty)
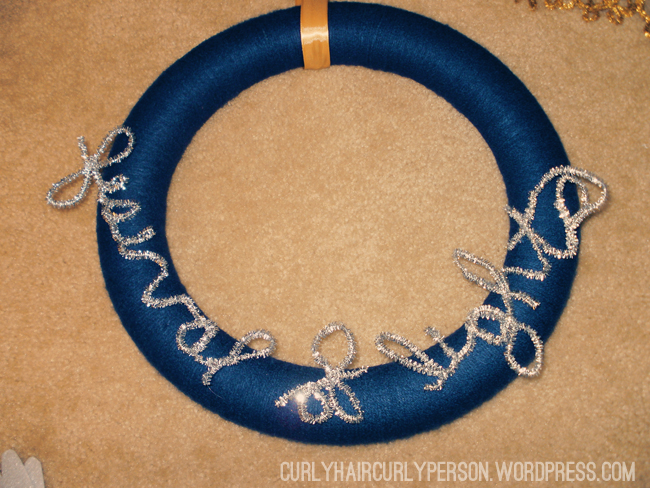
5. GLUE GUN IT!
6. And boom. You’re done. Hang your new wreath wherever you want and enjoy! (I think it’d look pretty hung on a wall in your house near where you’re going to light your candles to sparkle off all the flames during all 8 nights of Hannukah!)

– Jessica

…………………………………………………………………………………………………………………………………………………

A very big THANK you to Jessica for sharing this fantastic DIY. Please, be sure to give her blog home a visit.

To keep up with my 50 DIY Days, click here:


Day 25: Jalapeño Popper Dip!

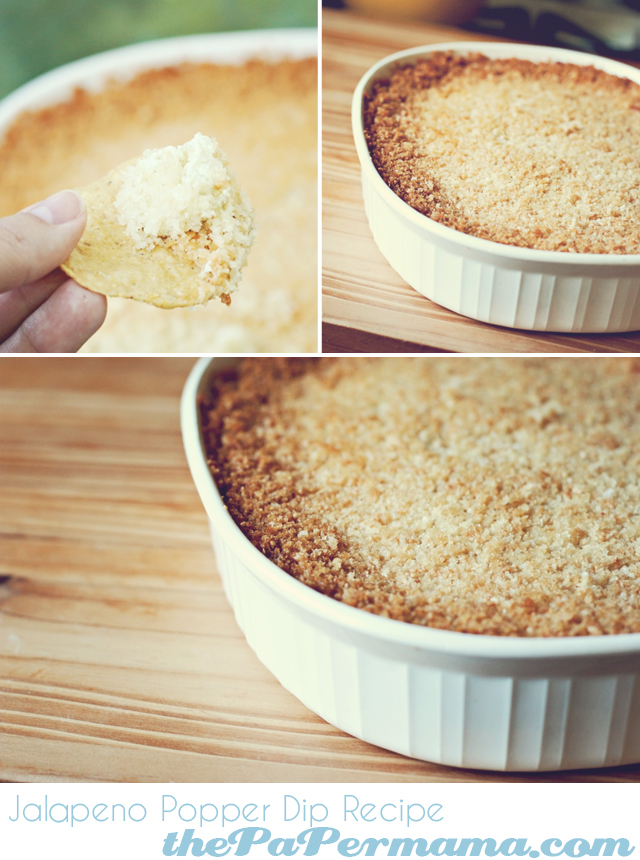
Day 25: This is a recipe I shared a year and a half ago, and with Thanksgiving tomorrow…. I really think this needed to be shared AHgain. The last couple of years my hubs has been making this dip to bring over for the holidays. It’s SO bad for your heart, but great for your soul? Ha. Ok, quick… run (or drive) to the store and get these ingredients! VERY worth it!

Jalapeño Popper Dip

By, Mike… the Paper Papa

Ingredients:

– 2 (8 oz) packages of cream cheese, room temp

– ½ cup mayonnaise

– ½ cup low fat sour cream

– 1 cup shredded cheese (combine: monteray jack, pepper jack, mozzarella, chedder)

– 1/2 cup finely grated parmesan cheese

– 1 (4 oz) can of green chiles

– 1 (4 oz) can of jalapenos

– 1-2 cups panko bread crumbs mixed with additional

– ½ cup of finely grated parmesan cheese

– ½ stick melted butter

Directions:

Combine first 7 ingredients in food processor and blend until smooth and everything is mixed. Transfer mixture to your serving dish (flat casserole dish works well) with room at the top to eventually put bread crumb mixture. Cover mixture with plastic wrap and put in fridge for a few hours at least (tastes better if made a few hours ahead). An hour or so before baking, take mixture out of fridge. Melt butter in microwave. Mix panko and ½ cup parmesan together and then mix with butter until all coated. Transfer panko mixture to top of dip and spread evenly making sure to pack it down well. Bake when ready at 375 F for about 15-20 minutes or until a butter knife placed down in center of dip mixture comes out very warm.

Enjoy, and Happy Thanksgiving!

– Chelsey


Holiday scents

…………………………………………………………………………………………………………………………………………………

In case you haven’t already figured it out…. I’m a bit crazy when it comes to Christmas. I LOOOOVE it so much. Always have. I didn’t think it was possible, but I am even MORE excited for this Christmas. My kiddo is turning 3 in December, and she’s at the age where she actually knows what’s going on (we can talk about her telling me I’m wrong allllll the time later, hee). Anywho, she keeps asking about Santa, and “When are we going to get a Christmas tree?” Gah! It’s so exciting.

Continue reading

Tags:

Categories: Uncategorized


Day 23: Framed Vintage Ornaments

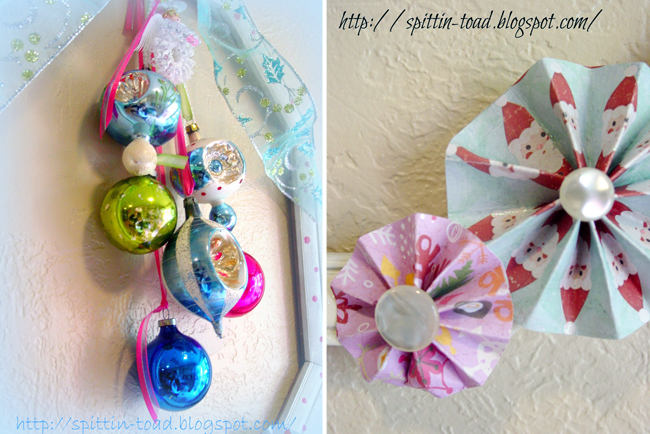
DAY 23 is brought to you by, the lovely Denise of Spittin ToadWhen Denise shared this on her blog the other day, I instantly fell in love. I love vintage glass ornaments… and I tend to buy these anytime I find them at a flea market/thrift store (I have a bit of a Christmas addiction… hee). This is just the sweetest way to really display your favorite pieces!

How to:

– Find an old frame. Take out the backing/glass/etc.

– Paint it if you’d like. Maybe add some glitter? Polka dots? A bow?

– Pick out some favorite ribbon, string, strands of beads, etc to hang your vintage ornaments.

– To hang the ribbon/etc. on the back of the frame, you can staple them onto the back. OR, if you don’t want to staple all over the back of your lovely frame, maybe add a string of wire to the back and tie your ornaments from there.

– Hang on the wall, enjoy!

So lovely.

– Chelsey

P.S. Denise is my cousin! Love her.

…………………………………………………………………………………………………………………………………………………

A very big THANK you to Denise for sharing this fantastic DIY. Please, be sure to give her blog home a visit.

To keep up with my 50 DIY Days, click here:


Day 22: Chocolate Covered Bacon Bites!

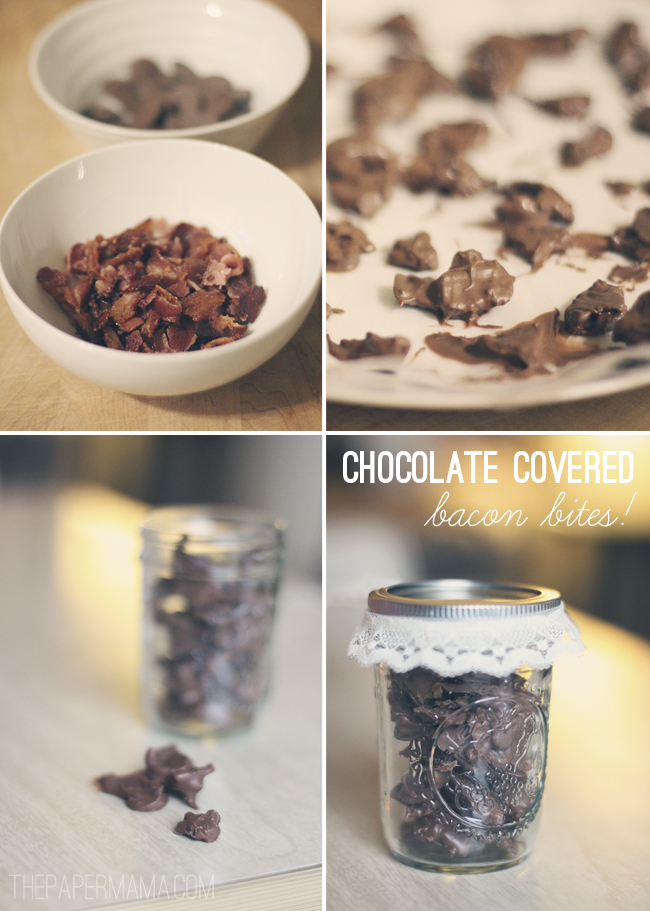
Day 22: This DIY is a favorite of mine because, well yeah… bacon covered in chocolate. I bet some of you are thinking, “What the? Nope.” Let me tell you, it’s fantastic. Things you need to enjoy this: you need to love bacon. You need to love chocolate. Done. That’s it. I love a good combo of salty and sweet, this is perfect!

I’m pretty sure you’d be the COOLest guest EVer if you brought over a gift of chocolate covered bacon bites!!! You will need to make this day of (or, day before) for the best flavor/quality. Plus, it needs to be refrigerated.

Supplies:

– Roughly 8 slices of bacon (find a good quality bacon… it will taste better)

– 1/2 bag of Wilton Candy Melts milk or dark chocolate (I prefer milk)

– A jar

Ok, how you do this:

– Preheat your oven to 400 degrees F.

– Cut up your bacon into 1/4 inch to 1/2 inch pieces, place on a baking sheet (that has sides, to keep the grease in), and bake for 10 to 20 minutes. The time all depends on your oven/type of bacon. It took about 17 minutes to cook my pieces. I like them to be a little more crunchy (less chewy when covered in chocolate).

– Make sure your bacon is patted dry and get all the grease off the bacon bites.

– Follow the directions on the back of your Wilton Chocolate Melts bag, melt the chocolate in the microwave, and start covering your bacon bits in chocolate! (tip: if your chocolate is microwaved too long, and get’s stiff…. add a tablespoon of lard. Mix it in. It helps. and is so good for you… ha!).

– Using a pair of tongs, place your chocolate covered bacon bites onto a piece of wax paper.

– Let the chocolate cool for about 1 hour. I recommend putting the chocolate bites in a container and into the fridge, for a couple of hours, before putting in the jar. This will make sure the chocolate is all cool and won’t smudge inside your pretty jar.

– When your chocolate covered bacon bites are cool and all ready: put them in a jar, add a ribbon, maybe a gift tag, and give to your favorite bacon loving friend!

Happy Saturday!

– Chelsey

…………………………………………………………………………………………………………………………………………………

To keep up with my 50 DIY Days, click here:


Day 21: Burlap and Lace Holiday Wreath (with pinecones)

DAY 21 is brought to you by, the lovely Katie of Loves of LifeI’m excited to share this little holiday wreath project with you!

Honestly, these days it feels rare that I don’t open up Pinterest, find something I like, and then go from there when it comes to creating. I feel kind of vintage (HA HA) doing it the old fashioned way and, well, seeing a photo at a craft store or something and running with it. Honestly? It was a combo of just that and my love for the pinecone hanging I’ve seen floating around, which I mentally combined to make this little pretty:

I love it. A lot.

It’s bound to spruce up an area of your home, and it’s not overly “Christmas’ey”, in fact, it’s so adorable and “wintery” I’m considering keeping it up from like, now till—March 🙂

What you need:

-Any size wreath base. I have found the trick is buying the cheapie straw wreaths versus the styrofoam ones. Who cares what it looks like underneath if you’re just going to cover it? Save the money!

-A roll of burlap

-Some pinecones

-Festive ribbon

-Lace “ribbon”

-Red festive fake berry thingies (I’m so fancy)…one bundle.

-Hot glue gun

Okay, let’s do this thing

1. Wrap the burlap around the wreath, pull tight. You’ll need to tack the first piece down with hot glue. Notice I didn’t even bother taking the plastic wrap off the straw wreath? Because, who cares!

2. Every few wraps, make sure to tack it a little here and there just to ensure the burlap stays put.

3. Stand back and admire your work. Oo-la-la.

4. Break out your lace. Tack it in the back with a dot of hot glue & wrap around the way you like it.

5. Stand back and say, dang, I’m good. Just kidding. Make sure it’s all evenly spaced and everything 🙂

6. Separate two ‘bundles’ from the fake-holiday-berry-thingies.

7. Lay them out and bend them a little to see where they’ll fit best once the bow is placed. You can hot glue them in place now, or wait until just before the bow goes on.

Making the Bow

1. Measure out (or eyeball) about 2.5ft + of burlap and lay like you see pictured.

2. Cinch it all together to make it ‘bow like’.

3. Use your holiday ribbon and slip-knot a long piece around the center. You may want to add an extra ‘knot’ to it to make it tight.

4. Continue adding strips of ribbon at differing lengths.

5. Glue your pinecones on, with one little line of glue, folding the ribbon back as pictured.

6. Admire the cutie pinecones.

Bow Part Two

1. Loosely ‘fold’ a 1.5 ft (maybe a little less) piece of burlap as shown.

2. Cinch at the center.

3. Lay on top of existing ribbon to make a “double” ribbon.

4. Attach to the wreath by using more holiday ribbon and wrapping it around the entire wreath base, and use a little hot glue to tack the bow back if need be.

Admire Your Creation

I hope you enjoy your sweet, little wreath as much as we are over here! Happy holidays.

…………………………………………………………………………………………………………………………………………………

A very big THANK you to Katie for sharing this fantastic DIY. Please, be sure to give her blog home a visit.

To keep up with my 50 DIY Days, click here:


Day 20: Popcorn Packaging!

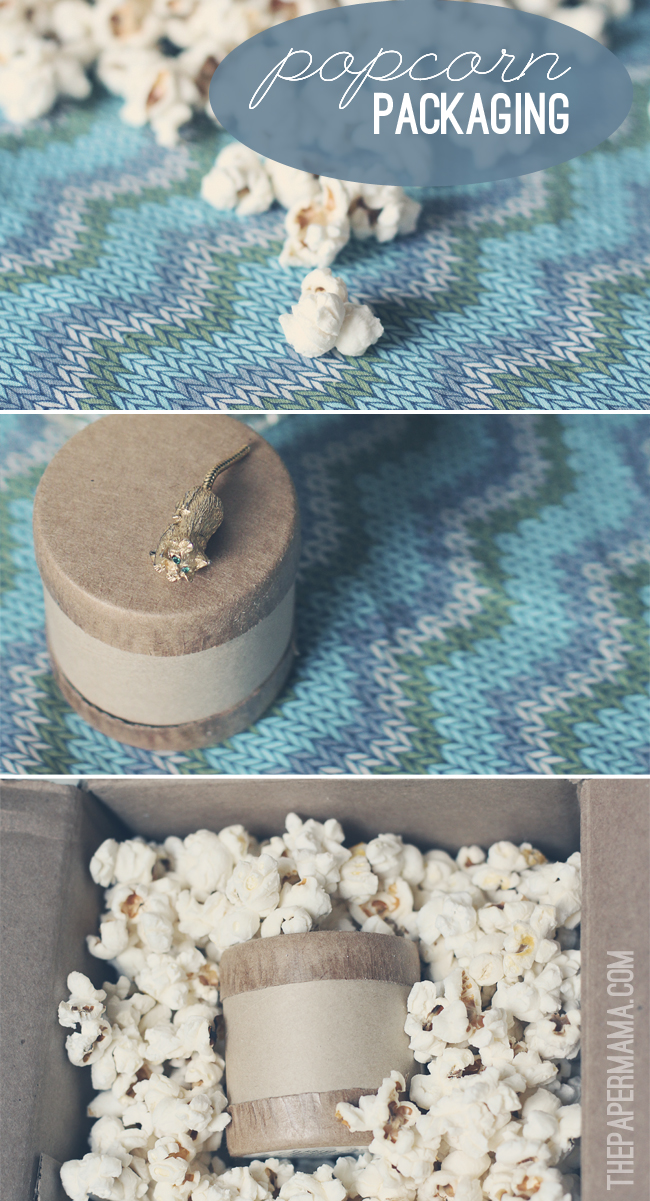
Day 20: Popcorn packaging! WHA? That’s right. It’s almost time. Almost time to send your packages out for the holidays! All you need: a box, a jar of popcorn kernels, and something to send. I sent this sweet little kitty brooch out to my friend a couple weeks ago. She was able to compost the packaging! No need to deal with those annoying styrofoam puffs.

How to pop kernels without oil:

– Heat up a large pan on your stove top to medium/high heat

– Pour 1/3 cup of kernels into the pan. This amount will fill a small box. If you need more, make a couple of batches.

– Place the pan on the stovetop, and cover with a lid.

– Shake the pan a few times to keep the kernels from sticking. When you hear the popcorn popping, remove from the heat.

– Your popcorn is done when you don’t hear any more popping.

– Let cool, use as packaging!

– Chelsey

…………………………………………………………………………………………………………………………………………………

To keep up with my 50 DIY Days, click here:

Tags: , , ,

Categories: 50 DIY Days