Day 33: Chocolate Covered Mini Oreos (with a $50 Pear Tree Greetings giveaway!)

Day 33: So… these are so good. Really good. I mean, Oreo’s are good just the way they are… but add some chocolate: OMG. It makes these mini Oreo’s addictive! Plus, since they’re bite-size, you don’t really know how many you’re eating until they’re all gone. Ha!

Continue reading


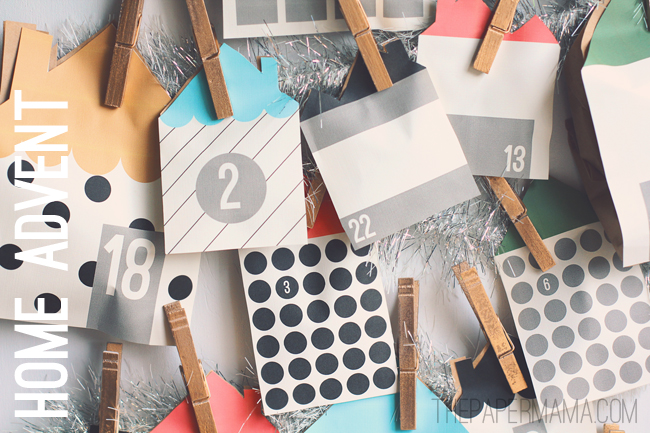
Day 32: Home Advent Calendar

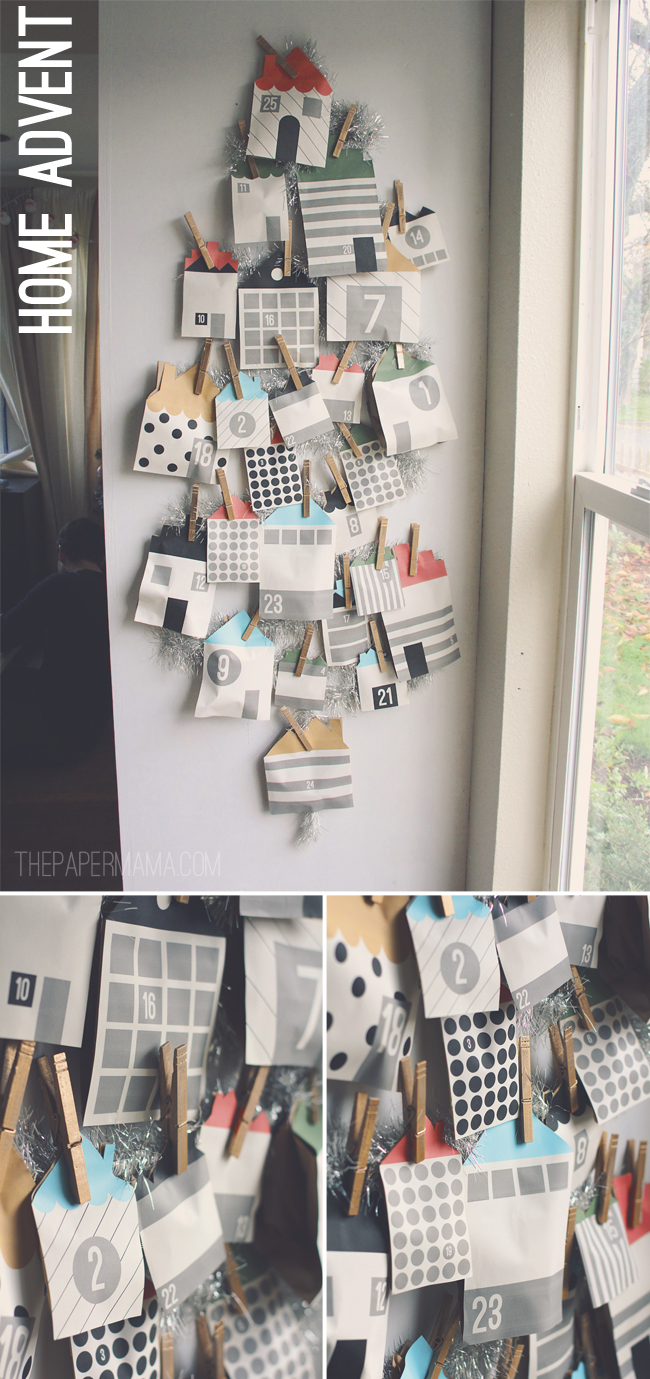
Day 32: I know… it’s December 1st. BUT, just in case you haven’t set up your advent calendar yet… here’s a fun one for you! My little home advent.

Supplies:

– My home printouts (right click + save: One, Two, Three, Four, Five, Six, Seven, Eight, Nine, Ten, Eleven, Twelve, Thirteen, Fourteen)

– Paper lunch bags (or any large pieces of paper)

– Clothes pins

– Tinsel garland, ribbon, or twine

– Tape

– Adhesive

Directions:

– Print out all the home printables.

– Cut out the sides and base of each house (leaving the roof untrimmed).

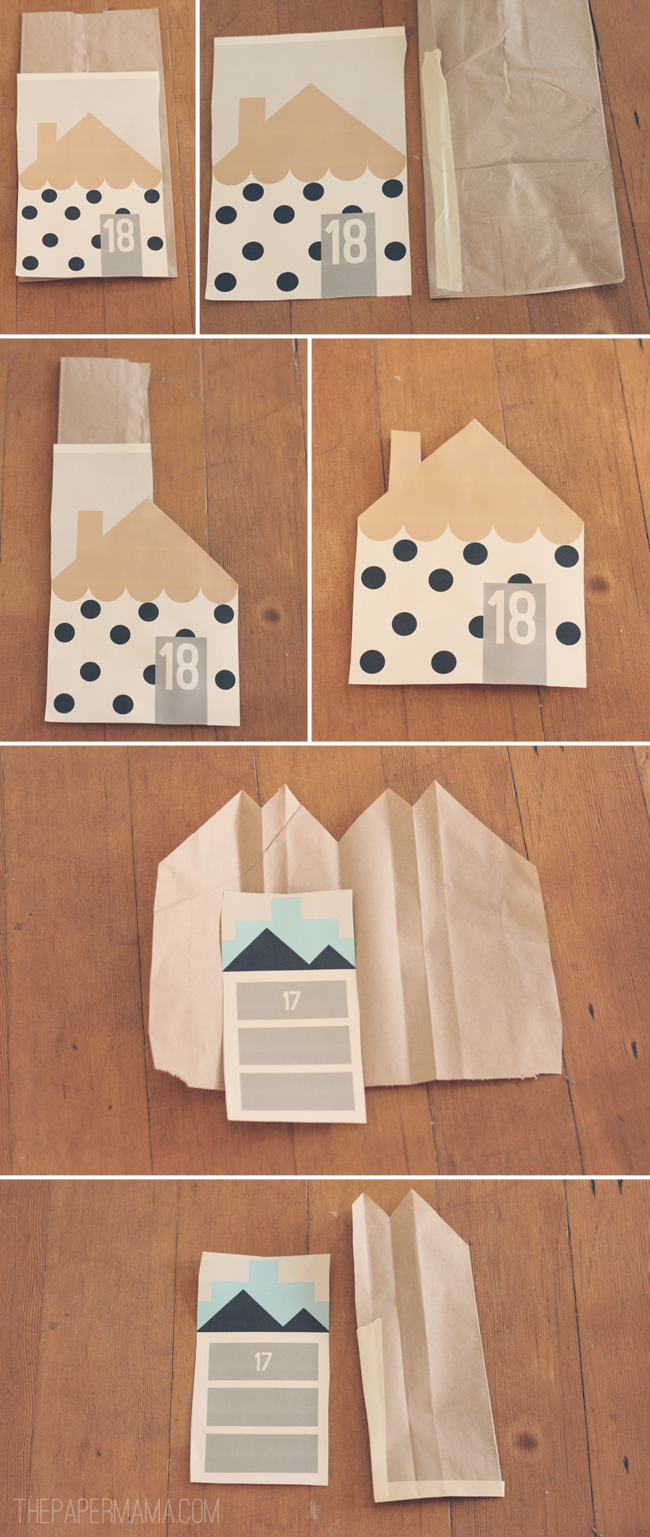
– Size them up next to the lunch bags. If the bag is too big, fold it smaller than the house and tape. Tape the house down over the face of the bag. Trim the excess paper where the roof is. Repeat this for all the homes (check out the photos below for help). If you don’t have paper bags, you can always fold up a piece of paper and tape it up. You’re pretty much creating a little paper pocket (behind the houses) for your advent goodies.

– Hang the houses however you’d like! I chose to string up a tinsel garland, in the shape of a tree, and pin up the houses with gold-spray-painted clothes pins.

– Fill with your favorite goodies, and enjoy!

– Chelsey

…………………………………………………………………………………………………………………………………………………

To keep up with my 50 DIY Days, click here:


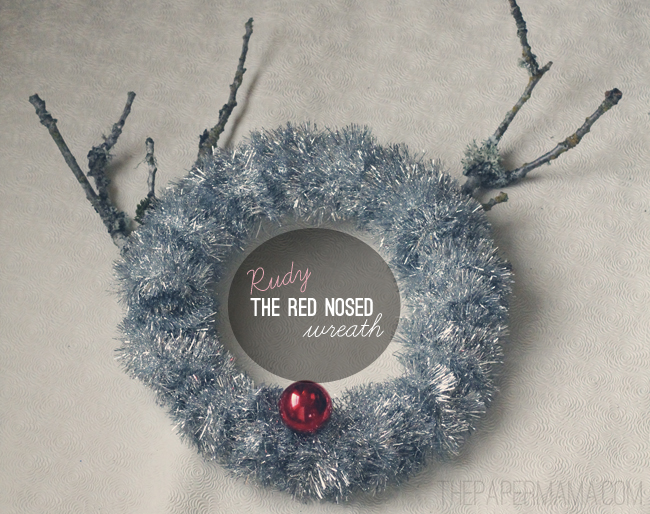
Day 31: Rudy the Red Nosed Wreath

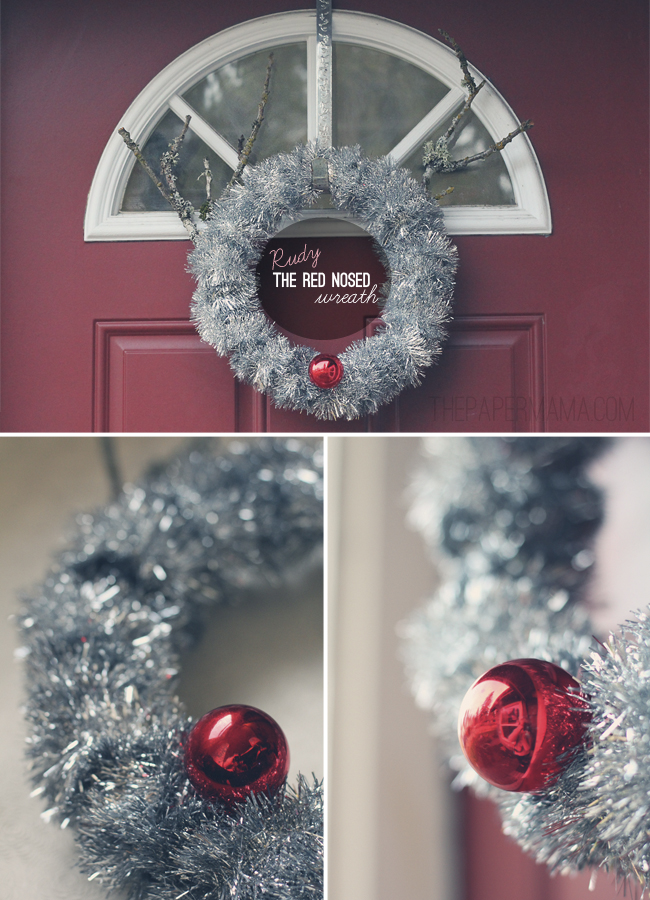
Day 31: Wow, I’ve past the 30-day mark for my 50 DIY Days! I can’t believe it…. Just 24 more DIY’s after this! Hee!!! Well, today I’m sharing a cute wreath for you Christmas junkies. It’s Rudy the Red Nosed Wreath! I was sad to retire my Polka Dot Wreath, but I needed something more…. Merry? Hmm. Anywho, here’s how I did it:

Supplies:

– Silver, or whatever color you’d like, garland. I used two packages (I’m not sure how long, since the packages were from an estate sale).

– Wreath

2 – 4 branches (any branches that resemble antlers)

– One red glass ornament

– 12 inches of wire

– Hot glue gun + glue sticks

– Masking Tape

Directions:

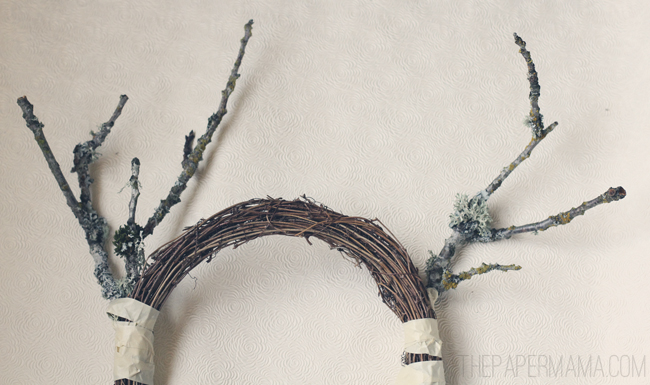
–  First things first, let’s attach the antlers (branches). Using your masking tape, wrap the tape around the wreath and branch on each side to make it look like antlers on the side of a reindeer head.

– With antlers attached, you can move on to wrapping the tinsel around the wreath. This is super easy and fast. Start it off my glueing the start of the tinsel with a bit of hot glue… wrap it around, and glue the end. Repeat with however much tinsel you need.

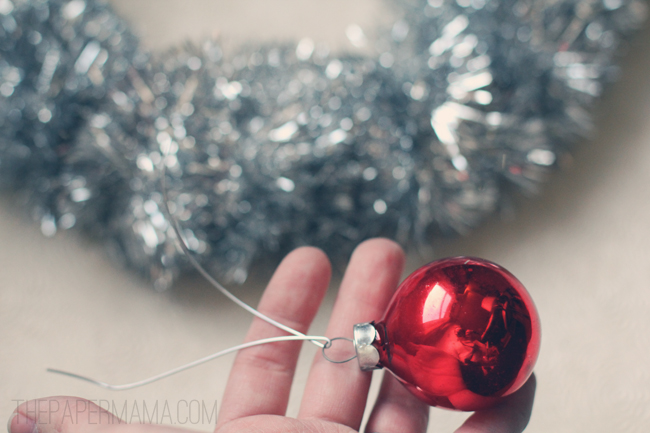
– When your tinsel is glued on, let’s add the nose! Thread the bit of wire through the ornament loop, find a good spot to make a “nose” on Rudy, and wrap the wire around the wreath. As you wrap you can hide the wire under the tinsel, to keep it hidden.

– Hang it up, you’re done! Yay!

I kid you not, this DIY took a total of 45 minutes for me. That includes the time I took to stop and take photos. Very simple. Cheap to make as well. Happy Thursday to all of you!

– Chelsey

…………………………………………………………………………………………………………………………………………………

To keep up with my 50 DIY Days, click here:


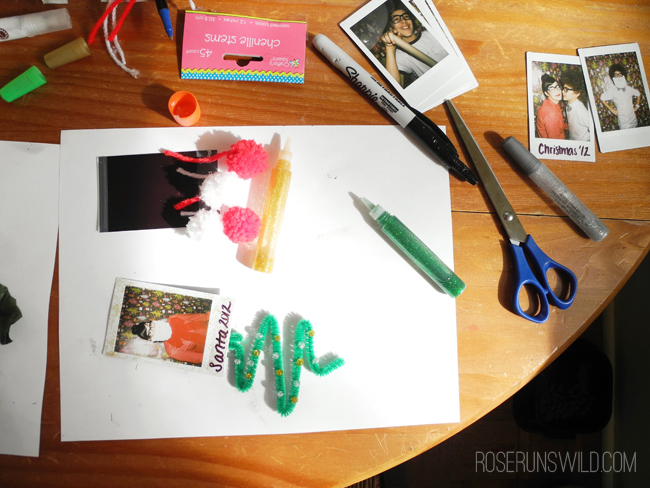
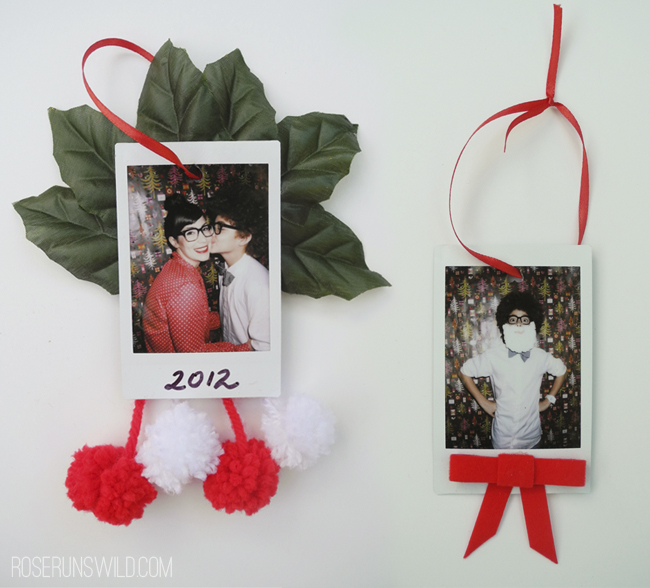
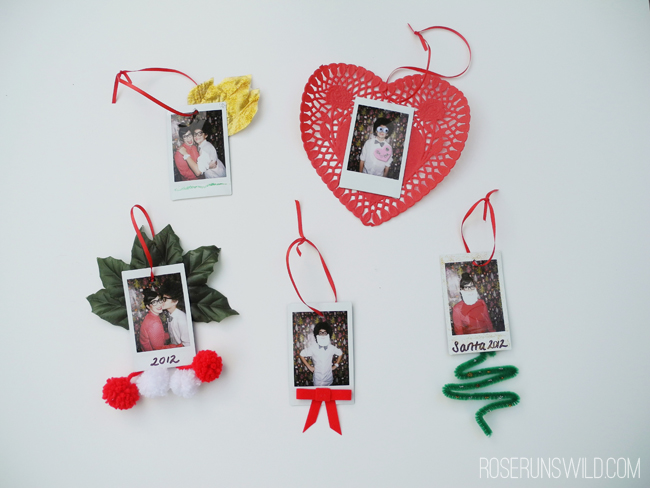
Day 30: Holiday Ornament Photo Booth

DAY 30 is brought to you by, the lovely Nicole of the Rose Runs Wild blog: Hello and Happy Holidays to you! I’m Nicole from the blog Rose Runs Wild. On Rose Runs Wild I blog about life as a mama to a 12 year old with a big red afro, my two pups and being engaged to the love of my life. Because my son is older I find it hard to find crafts to do that he will be interested in. When Chelsey asked me to be apart of this I knew I wanted to come up with something that all ages can enjoy doing, even moody pre-teens!

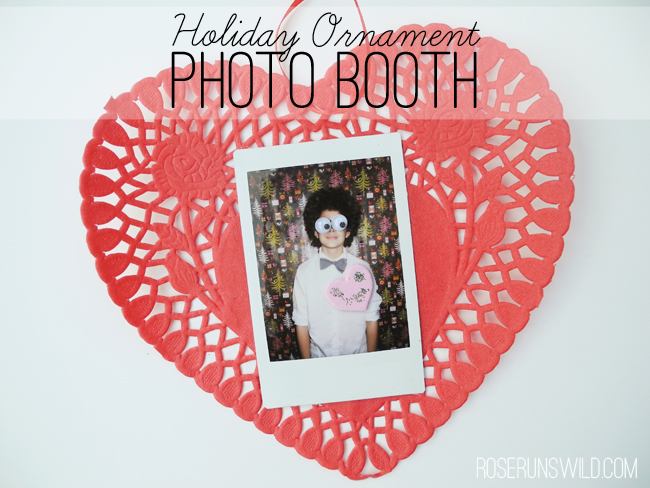
I’m happy to bring you the Holiday Ornament Photo Booth!

All you need is ::

Polaroid Camera (I used a mini Instax but any Polaroid camera will work)

Polaroid Film

Wrapping Paper

Tape

Hole Punch

Glue, glue sticks or hot glue gun

Ribbon

A big box full of your favorite crafting materials

1)      For the backdrop I used wrapping paper from the year before that we had left over. If you would like to by a new roll that works too or even fabric would look great and take away some of the glare from the camera flash. I found a bare wall and taped the wrapping paper to the wall tall and wide enough so two people could stand up and pose.

2)      Strike a pose and start taking your photos! Get creative and have fun! If you want to make props for the photos or a banner, go for it! Those always make for fun and hilarious photos. I made a Santa beard out of cotton balls, a piece of construction paper and some yarn for Logan and I to use.

3)      After your photos have developed punch a hole in the top and run some ribbon or even an ornament hook through the hole.

4)      Start decorating! Logan and I pulled our craft box out and got to work putting googily eyes, glitter and anything else we could find on our photos to make them special to us.

5)      Let them dry and hang on the tree! These would also make great gifts for grandparents or loved ones. You could also make a banner with them or hang them around the house. The possibilities are endless!

I hope you have fun with your family doing this DIY, I know we did! It would also be a blast to do at a holiday party with a group of friends and family. Thank you so much to Chelsey for having me a part of this awesome series! Happy Holidays!

Nicole, Rose Runs Wild

…………………………………………………………………………………………………………………………………………………

A very big THANK you to Nicole for sharing this fantastic DIY. Please, be sure to give her blog home a visit.

To keep up with my 50 DIY Days, click here:


Day 29: Vintage Inspired Stockings!

DAY 29 is brought to you by, the lovely Corey of the Corey Moortgat blogHello, Paper Mama readers!  I’m Corey, and I’m here to show you how to make a vintage-inspired felt Christmas stocking.  I’m obsessed with vintage and am constantly looking for ways to introduce vintage décor into my home.  I collect old Christmas decorations, and a couple years ago, I decided to make some stockings that fit amongst my collection.
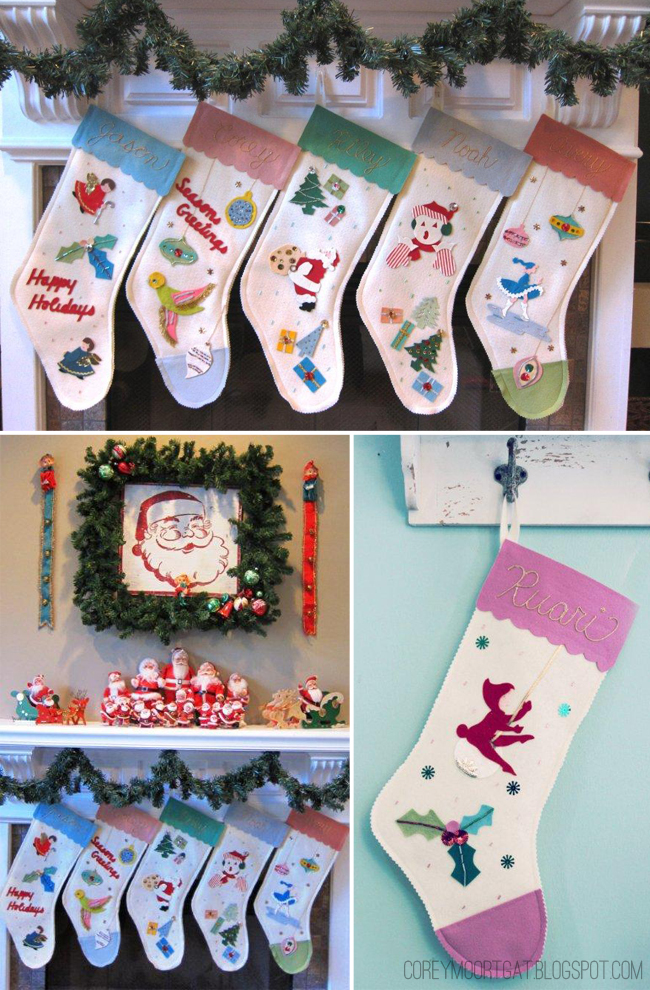
This is a really fun project, because you can use real vintage images, or you can just fake it and make your own “vintage” images!  Each of the stockings I made has a mix of pieces I thrifted, pieces I purchased online, and pieces I made myself.  This time of year is such a great time for junking, because you can find such cute vintage holiday items.  Every time I see an old item made from felt, like a tree skirt, or Christmas stocking, or tree ornament, I pick it up with the idea of repurposing it.  That way it has a little bit of its former life mingled in with a little bit of my own style.

And so, enough talking about it.  Let’s begin, shall we?

Materials needed:

Offwhite felt- twice as big as you want your stocking to be (because you’ll need front and back)

Tacky glue

Scissors- regular and pinking shears

Assorted holiday trims- shiny string, silver and gold ric-rac, etc.

Assorted sequins and beads

Vintage-y colors of felt (I like wool felt better than craft store felt- the colors are much prettier- just search under “wool felt” on Etsy)

Vintage felt images from old Christmas items, the thrift store, or anywhere else you find them (look on Etsy or Ebay for  “Walco” brand felt appliques- there are some really cute ones!)

Step 1:

Double up your offwhite felt, and cut a stocking shape.  I took another stocking and used it as a template.  You should end up with two stocking shapes.

Step 2:

Lay out your stocking and begin placing your images down.  In this case, I’m using one precut vintage fabric applique, and I’ll also cut some of my own images.

Step 3:

If you’re going to cut your own images , do that now.  You can look at my stockings for ideas, or here are a couple more good places to look as well:

http://christmas.tipnut.com/1561/vintage-holiday-templates/

http://myfantastictoys.blogspot.com/2009/11/felt-christmas-ornament-tutorial.html

http://www.flickr.com/photos/88602055@N00/5168144986/in/faves-coreymoortgat/  (This last link is to some ornaments that Pam Garrison made- they are what originally inspired me to do this project!)

Easy go-to images are Christmas trees, presents, and of course, holly!

Step 4:

Once you’ve got all your felt pieces out, begin adding the bling!  Sparkly sequins, beads, trims…  I lay them all out for placement first, to make sure I like it.

Step 5:

Now I’m going to let you in on a little secret here.  Really, if you were being a very diligent crafter, you would hand-sew all the felt and beads into place.  Ahem.  Well, as you can see, I didn’t do that- tacky glue for me!  My stockings have lasted two years so far, and nothing’s fallen off.  I suppose if I run into problems down the road, I could go back and sew, but “if it ain’t broke, don’t fix it” is my motto for now!
Step 6:

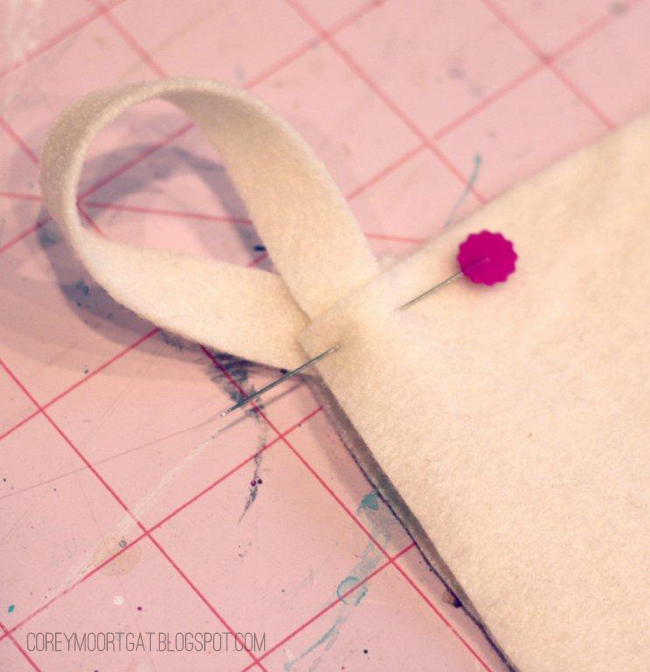
After everything’s been glued down and dried, it’s time to begin sewing the perimeter.  (I suppose if you don’t want to do ANY sewing, you could even glue around the perimeter, too, but this part’s on the machine, so it’s quick.)  Cut a narrow strip of felt (maybe ½” x 6”), loop it over, and pin it in place at the top corner in between the two layers, so the stocking has a way of hanging.

Step 7:

Sew around the perimeter of the pieces, making sure to catch the ends of your “loop” at the top.  Leave the top open, obviously.
Step 8:

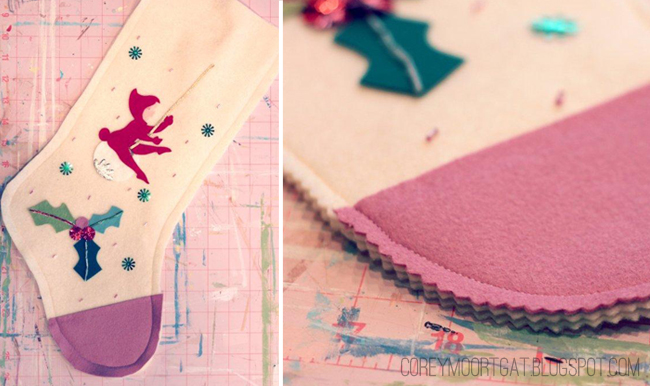
Using pinking shears, trim in about ½” away from your seam around all sides but the top.

Step 9:

Cut the piece that will go on the top of your stocking.  I like to cut it slightly wider than the stocking, and leave the edges straight (not cut with pinking shears).  “Write” the name using tacky glue.

Step 10:

Using gold string, follow the glue.  Cut the string instead of doubling over (like in real handwriting), so that it looks smoother.

And there you have it!  A vintage-inspired felt Christmas stocking, ready to fill with all kinds of goodies!  I wonder what Santa’s going to leave in there for Ruari this year??

I’d love it if you’d come visit me on my blog for more vintage artsy-craftsy goodness!

Corey

…………………………………………………………………………………………………………………………………………………

A very big THANK you to Corey for sharing this fantastic DIY. Please, be sure to give her blog home a visit.

P.S. Ruari and I LOVE the stocking. We will be making more, for the whole family!

To keep up with my 50 DIY Days, click here:


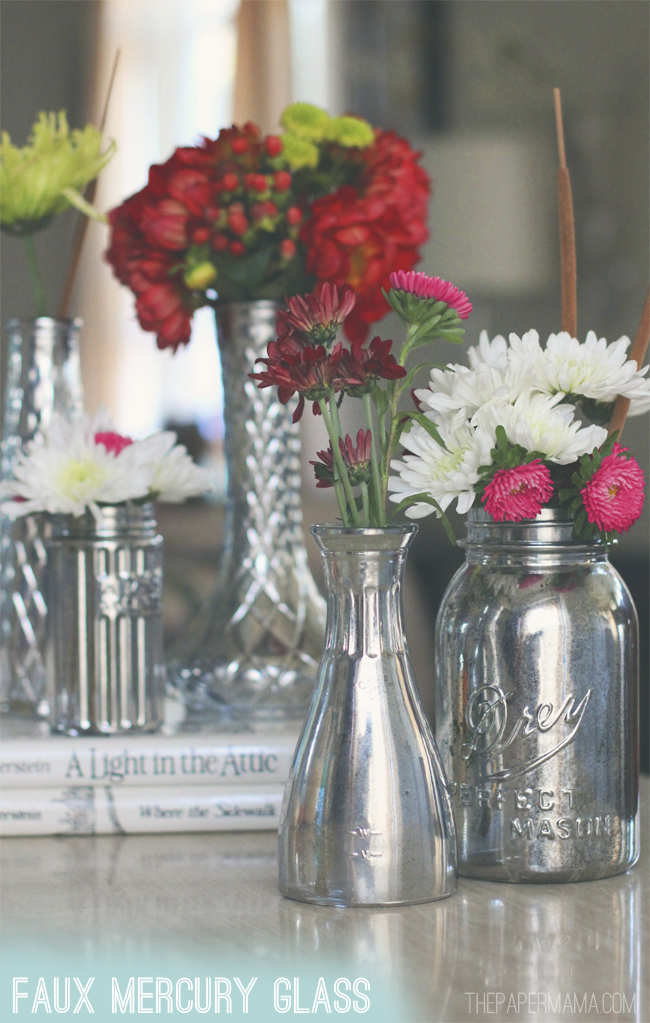
Faux Mercury Glass Vases DIY

My Faux Mercury Glass Vases are the perfect DIY for gifts, or for your home.

Faux Mercury Glass Vases DIY

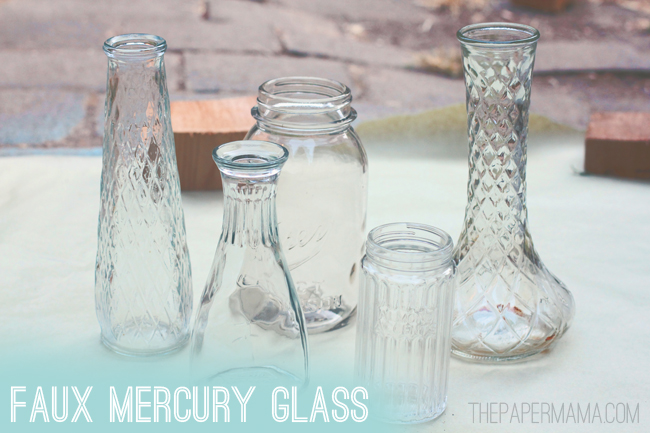
The leaves have fallen, and it’s chilly outside! Time to get cozy inside with some more DIY projects. Today I’m sharing how you can create some very pretty faux mercury glassware! All those pretty/aged candles and vases you find in the shops for $30+ can now be made for a few bucks. That’s a win! There are many tutorials for faux mercury glassware, but I have yet to see any DIY’s using a vase. The typical mercury glassware DIY sprays paint on the INSIDE of the glass, but I needed my vases to hold flowers. So I did some experimenting. Instead of spraying the paint inside the glassware, I sprayed it on the OUTSIDE. Check out below to see how I made my Faux Mercury Glass Vases.

Supplies:

  • Glassware: an old glass vase, jar, or even an old glass container. If you can’t find anything, head to your local thrift store.
  • Krylon Looking Glass Mirror Spray Paint
  • Spray bottle
  • White Vinegar and water mixture (1/2 water + 1/2 vinegar)
  • Paper towels
  • Drop cloth/paper
  • Respirator mask (safety first!)
  • Gloves (messy)
  • Optional: goggles

Directions:

  1. Clean and dry the glassware.
  2. Fill a spray bottle with 1/2 vinegar and 1/2 water. Set the nozzle to the lightest mist setting possible.
  3. Lay down your drop cloth and place the glassware.
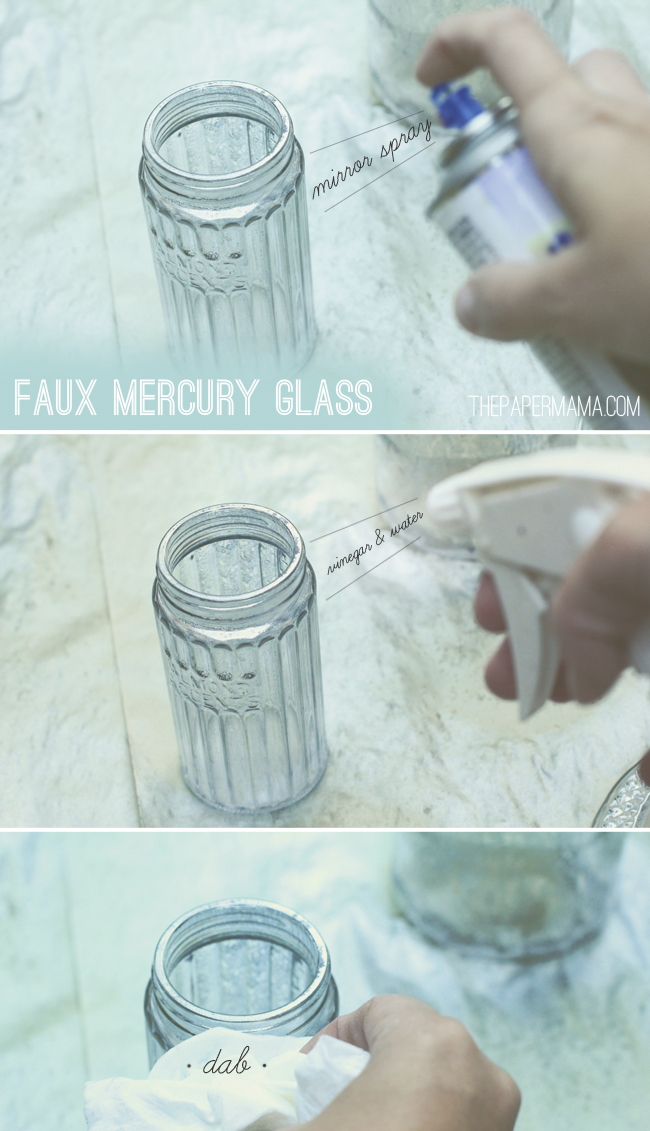
  4. With paper towels on hand, spray a layer of the mirrored paint on the outside of a glass. Follow this with a light spritz of the vinegar + water mixture. Let that sit for 2 – 4 minutes.
  5. When your wait time is up, dab the vinegar + water mixture off of the glass. Do NOT rub. That will smudge the paint. Just a light dab will do.
  6. Repeat steps 4 and 5 until you’re happy with how the glass looks. I added about 4 layers of mirror glass to each piece (each layer was followed by a spritz of vinegar + water and then dabs).
  7. Let the paint dry for 24 hours.
  8. Add a beautiful bouquet of flowers to your vase! Or, use those beauties as a candle holder.

If you make this DIY I’d love to see it. You can tag me on Instagram @thepapermama!

– Chelsey

Disclosure: I may earn a small commission for my endorsement, recommendation, testimonial, and/or link to any products or services from this website. There are affiliate links in this post. Thank you for your support.

Faux Mercury Glass Vases DIY


Tags: ,

Categories: 50 DIY Days, diy, For The Home


Day 27: Salt Dough Ornaments

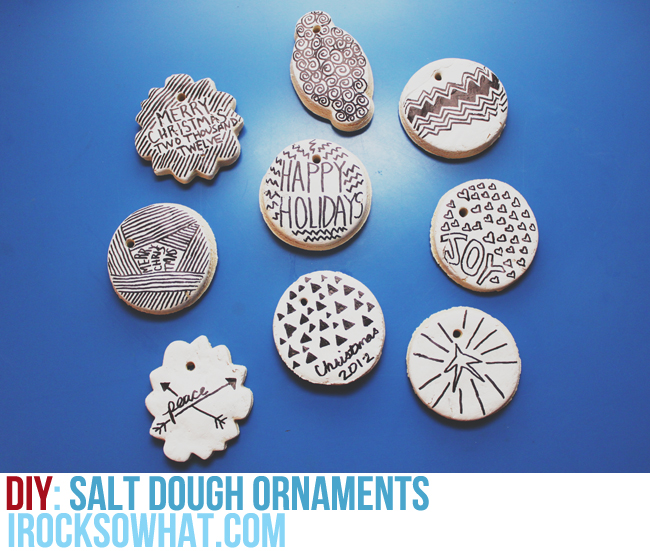
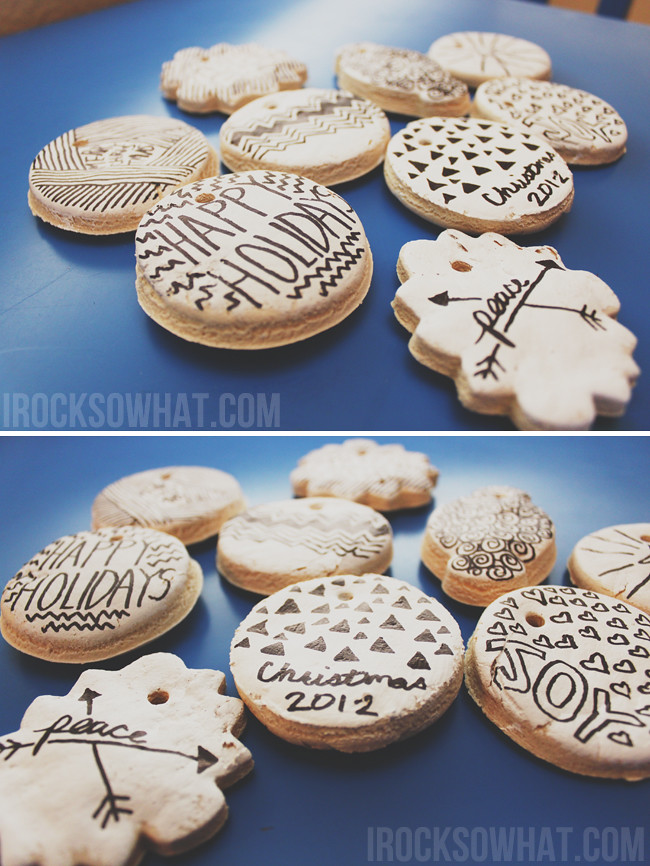
DAY 27 is brought to you by, the lovely Jess of IROCKSOWHAT: I have been a salt dough makin’ fool! There is nothing more festive for me than baking these special ornaments, knowing that it’ll add a handmade touch to my tree (or better yet, a friend or family member’s tree)!

To make salt dough ornaments it’s pretty simple-
All you need-
>>2 cups of flour
>>1 cup of salt
>>1 cup of water
>>5 TBS of cinnamon or whatever spice you like (this just adds a delicious smell but not necessary)
Directions:

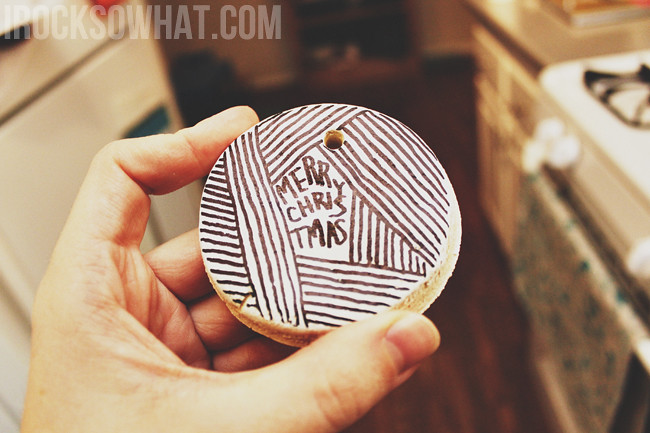
Mix together the ingredients and knead for a few minutes until you’re working with dough. Use a rolling pin and roll out your dough, cut out your ornaments with cookie cutters (or use a cup rim in my case), punch a hole in your ornament with a straw or pencil and bake at 325 degrees for an hour. Let your ornaments cool before painting and decorating. I painted mine with white paint and used a sharpie to decorate. I baked them again to seal the paint and ink (at 325 degrees for about 30 minutes), it’s not necessary but I thought it wouldn’t hurt.

These make the best gifts and are always well received. Salt dough ornaments are such a classic holiday diy project, have fun baking!

>>>>>>Jess Craig – IROCKSOWHAT.com

…………………………………………………………………………………………………………………………………………………

A very big THANK you to Jess for sharing this fantastic DIY. Please, be sure to give her blog home a visit.

To keep up with my 50 DIY Days, click here: