Happy happy birthday party!

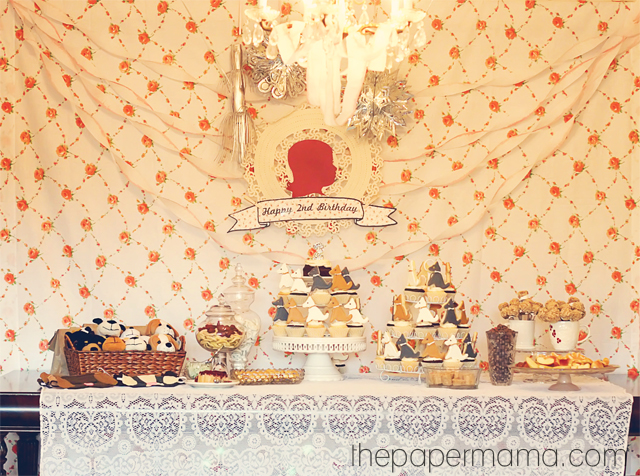
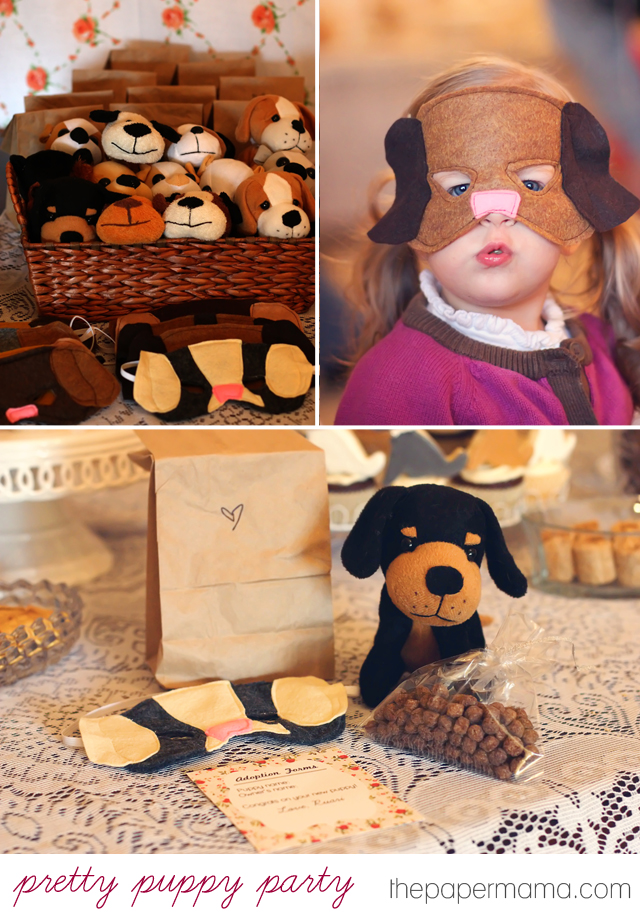
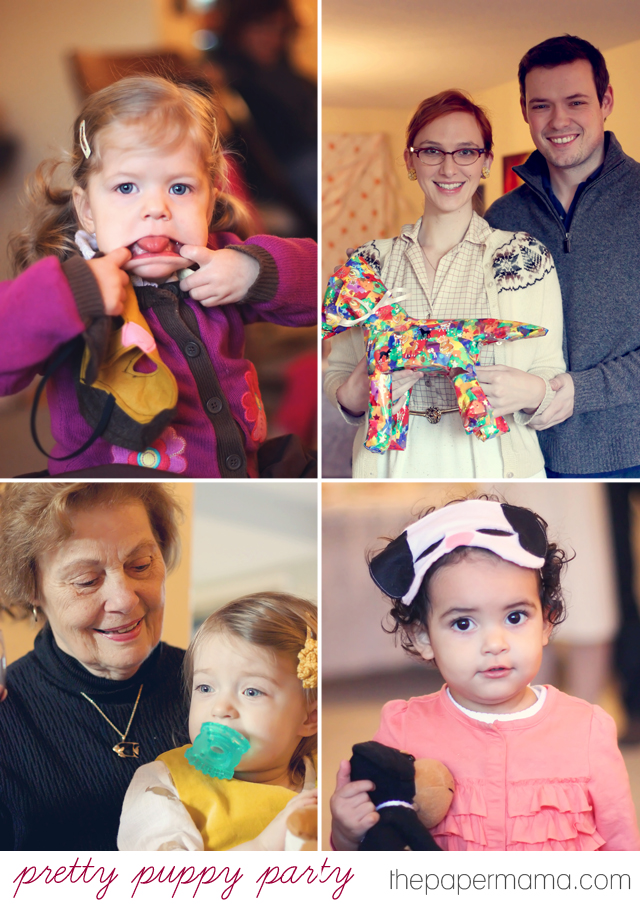
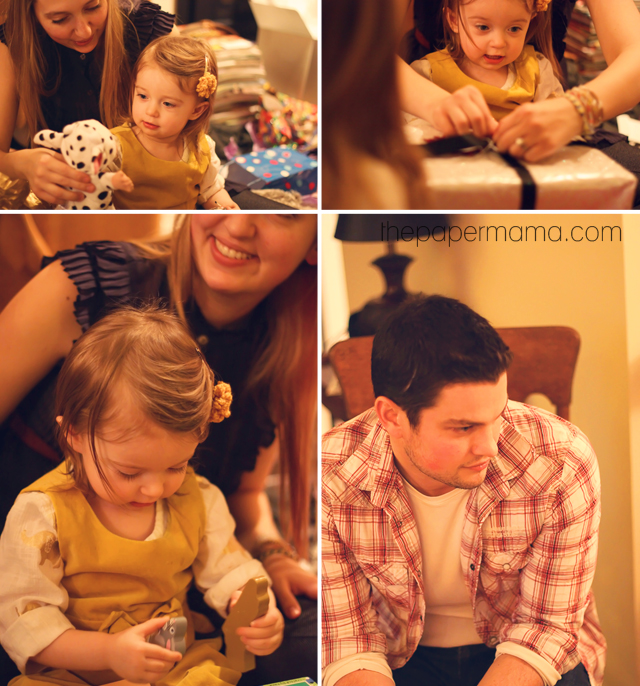
We celebrated my sweet girl’s 2nd birthday last Saturday… and, it was lovely! I had fun… I’m pretty sure she had fun… it was really just a great time. I did a puppy themed party since Ruari is very obsessed with doggies. VERY obsessed. I called it a “Pretty Puppy Party”. I really didn’t spend too much on the whole thing…. you can check out my list below the photos. 🙂

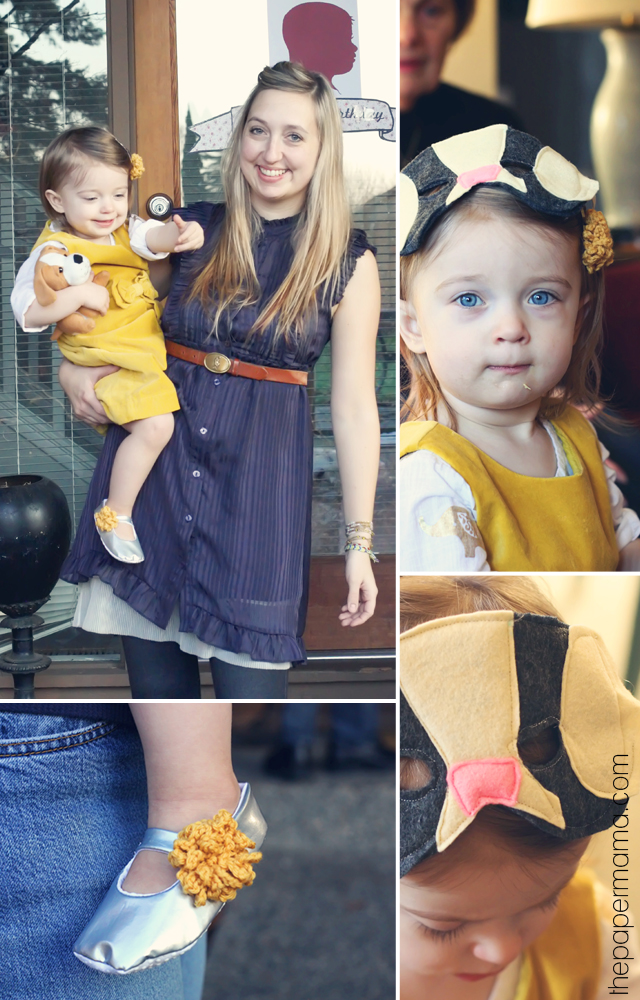
<< my outfit: //dress: f21//belt: thrift//leggings: Anthropologie//  >> << Ruari’s outfit: //dress: mini-Boden//shirt: gift//shoes: made by, my mom//doggy mask: The Rice Babies// >>

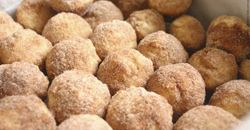
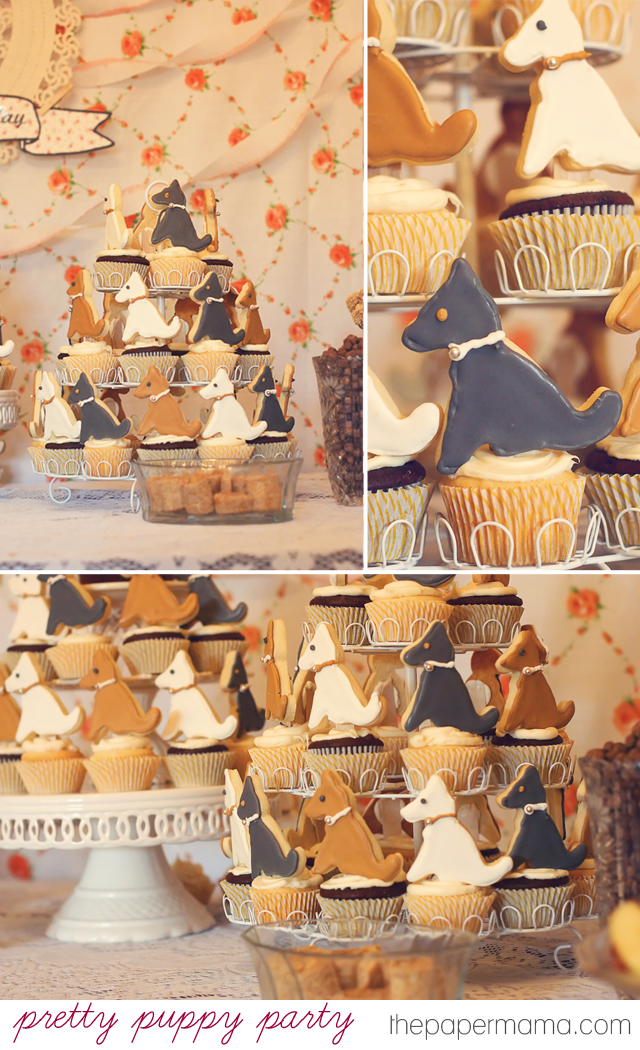
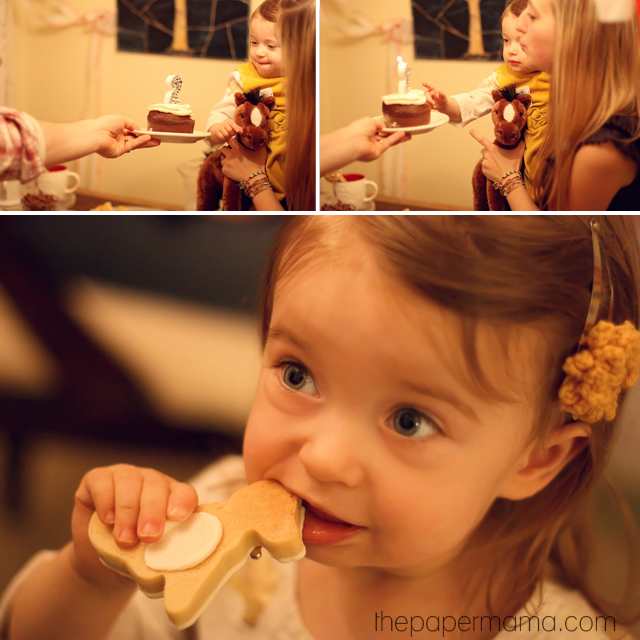
We had a large cupcake for Ruari… but, all she wanted was a doggy cookie!

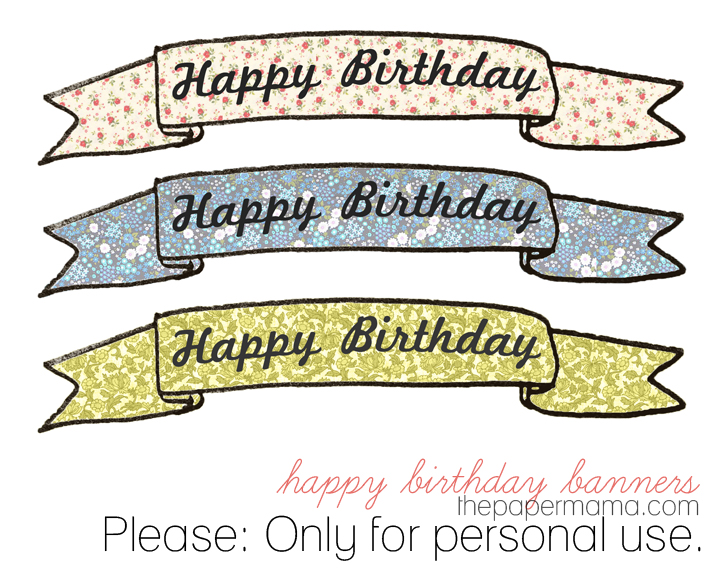
How about a little freebie for your upcoming birthday party? WELL, I made this sweet banner for R’s party. It turned out VERY cute. I printed it out on 3 different sheets of paper…. cut them out… taped them together. Done. Simple Cute. Click here to download the birthday banners for yourself!

Supply list:
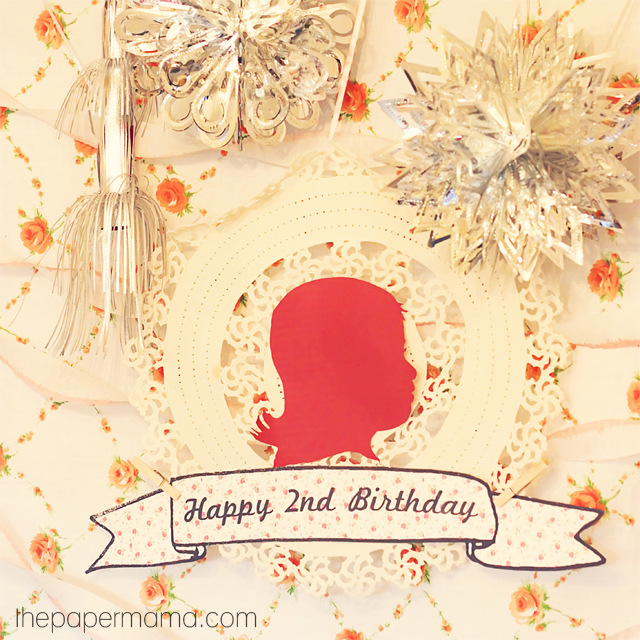
– Floral backdrop: thrifted
– Silver decor: thrifted.
– Ruari’s silhouette: made it myself (tutorial here).
– Lace tablecloth: thrifted.
– Number 2 birthday candle. (plus added bling)
– Stuffed doggies and crepe paper: dollar tree.
– Doggy mask favors: The Rice Babies.
– Ruari’s hair clip and slippers: made by, my mom.
– Cookie cutter for dog cookies and cupcake wrappers: a local cake decoration shop.
– Already owned: the doily behind the silhouette and all food containers.

Pin It
signature

Categories: Uncategorized


50 DIY Days: Salt Dough Ornaments

Do you still need some last minute gifts? Well, this one is PERFECT for your kiddos to make for your family! It’s cheap and handmade! And, sweet.

Salt Dough Ornament
Recipe from Food.com
4 cups all-purpose flour
1 cup salt
1 1/2 cups hot water

Preheat oven to 200 degrees. 

Mix the above 3 ingredients until combined thoroughly. I will add that the recipe calls for 4 cups of flour, but I probably had to add another 1/2 to 3/4 cups of flour to get a consistency that was pliable enough to roll with the rolling pin without being sticky.
Roll out with rolling pin until it is about 1/4 in or less thick. 
FYI-depending on the size of the cookie cutter you may get more or less ornaments.
Use cookie cutters to make individual ornaments. 
Place on cookie sheet, make a hole at the top for the ribbon to go through and bake for 2 – 4 hours at 200 degrees. Do not turn the ornaments over. However I do turn over once they are out of the oven so that the it dries completely.
Once dried, paint and design as desired, place ribbon and hang on tree!
Tip: It actually took my 3 handprint ornaments about 5 hours to cook in the oven. Mine were thicker and larger. I knew they were done when they weren’t squishy in the center anymore. 


Optional: Paint the handprint yourself (or, let your kid do it… we didn’t paint this year). Seal with an acrylic clear spray… so it can last for years. 🙂 Add a ribbon and any other sweet decor you’d like! Hang on a tree or give as a gift! Perfect gift for grandparents.

signature

Categories: 50 DIY Days


2nd Birthday Questions

Yup…. another Pinterest goody. You ask your kiddo the same 20 questions each year on their birthday starting at age 3… BUT, since my kid talks like a maniac I thought… “Hey, why not start it this year?” SO, we did. Ruari turned 2 this last Sunday. AND… here’s EXACTLY how she answered every question. Some might not make sense. And, yeah… she’s obsessed with Go Diego Go and Dora.

1. What is your favorite color? Green

2. What is your favorite toy? Horsies!

3. What is your favorite fruit? Color

4. What is your favorite tv show? Umi Zoomi

5. What is your favorite thing to eat for lunch? Diego

6. What is your favorite outfit? Shoes

7. What is your favorite game? Diego

8. What is your favorite snack? Horsies

9. What is your favorite animal? doggy horsey

10. What is your favorite song? abc’s

11. What is your favorite book? miss mary mack all dressed in black

12. Who is your best friend? Gabba {Gabba is my mom, her grandma.}

13. What is your favorite cereal?
Tico {from Dora the Explorer}

14. What is your favorite thing to do outside? Go to Farley {So, farley is my Mom’s dog. He goes outsite to go potty. ;D}

15. What is your favorite drink? wawa

16. What is your favorite holiday? holiday? {obviously I’ve never said the word “holiday” to her.}

17. What do you like to take to bed with you at night? elephant

18. What is your favorite thing to eat for breakfast? ABC’s

19. What do you want for dinner on your birthday? Toast and applesauce

20. What do you want to be when you grow up? Run. {this was followed by her running away.}

I absolutely love this idea and I know I will enjoy reading them as she gets older. <3 Any birthday traditions you have?

signature


Dinner with my girls! (and a little giveaway)

This post is sponsored by Serve from American Express. Sign up for Serve and receive $10 credit towards your first use. Comment below within the next 11 days for your chance to win an extra $100 credit to your account!
A couple Friday’s ago I was lucky enough to have the opportunity to take a few of my favorite girls out to dinner at Metrovino (thanks to Serve. Woo hoo!). It was an amazing time. I’ve been friends with these girls since we were all 15/16. AND… now we’re all 28/29 (there’s 4 girls missing from the dinner, but it’s hard to all get our schedules to work). Wow. We’ve been through a lot together (the good… the bad). And, it’s just so lovely that we could get together kid-free for a relaxing and fun evening with each other.
7:30 pm: The evening begins!
We started our night with a bottle of wine and a toast to being kid-free and with good friends! AND, chat. Catching up. We all have busy lives and so much to talk about… we decided to do a round table chat. That way we’d hit up each girl to see what they’ve been up to in the past month or two. <3

8:30: Time to eat!
We had finally shut our mouths long enough to look at the menu and actually order food…. which was delicious BY THE WAY.

9:00 pm: Faces stuffed…
Let the chit chat resume!

10:00 pm: Whoa, it’s 10?
Getting late… time to check on the kiddos.

10:15: Kids are still alive.
Time to chat some more.

10:30: Dessert?
Why not. Might as well! We devoured that thing in about 1 minute.

11:00: I guess we should go home.
Time to pay our patient waitress and head back home. Time to test out Serve! All my girls paid for their dinners with debit cards/cash… and, I paid with my Serve card. Since Serve was paying for the meal… I needed to reimburse my girls. So, I pulled out my smart phone… opened up the Serve app… asked each girl to tell me their emails… sent them the moolah and done! I paid everyone back! The money was in their Serve accounts now and they could use it whenever OR transfer it to their bank accounts.
I really like paying back friends this way… just because it’s awkward when my mom brain takes over and I forget to pay people back. Seriously. 🙂 (FYI: it is safe and secure because it’s from American Express. Word.) I’d really recommend checking out this page, it should explain quite a bit about the program. 🙂
GIVEAWAY: Ok, ONE more thing… Serve wants to give my gosh darn awesome readers a chance to win $100 for their Serve account! What? Yeah! Any one of my readers who opens up a Serve account and leaves a comment saying they have opened an account will be entered to win a $100 credit to their account! Last day to enter is 12/31/2011.

signature

Remember to sign up for Serve and receive $10 credit towards your first use. Comment below within the next 11 days for your chance to win an extra $100 credit to your account! Official sweepstakes rules and regulations may be found by clicking here. I was selected for this sponsorship by the Clever Girls Collective, which endorses Blog With Integrity, as I do.

Tags:

Categories: blogger business


Time to Vote! The Holiday Photo Challenge top 30!

So, I know I said I would have a top 20 to vote from, but there was just NO way I could narrow it down to 20. It was hard enough choosing a top 30! SO, say hello to the top 30 (in no particular order). 
It’s time to vote! Pick your top 3 favorite photos by voting in my polldaddy poll below! You can vote for your fave three through Wednesday. From there the judges and I will pick the first, second, and third place winners from the top 10! Good luck! Have fun!

{Hi, Baby}

{Tonight, we dine on milk}

{Don’t Blink Tammy}

{Six Cherries on Top}

{Olive Observer}

{The New Modern Momma}

{This Little Home of Mine}

{Dramatic Mama}

{Ribbons and Bows and Pink Sparkly Toes}

{A Sorta Fairytale}

{Luvin Life}

{The Mom Diggity}

{Nurse Loves Farmer}

{Jolio Design}

{Brenda Shares}

{Ashley Sisk}

{Gran in Training}

{Good Knits}

{Imprintalish}

{The Bonjour Family}
{Hot Coffee Mama}

{Keeping up with the Kohuts}

{Naptime Momtog}

{The Real Housewife of H20Ville}

{The Fabulous Baby Striblings}

{Holland Seasons}

{Life in Pajamas}

{L to the Third}

{Awesomeville.co.uk}

{The Mommyhood Memos}

Guess what: there are prizes for the winners! Yay! I’d like to thank the sponsors for donating! Thank you so much (First place winner picks a prize first, followed by second, followed by third place)!

– $50 shop credit to Gussy Sews shop.
– A Shine necklace from The Shine Project!
– $25 shop credit to Barely Measured.
– Beautiful Harper Wavy Shell Earrings from PoshLocket.
– $25 Shop credit to Pink Lemonade.
– $20 shop credit to The Paper Mama Shop.

The Paper Mama


signature

Categories: Uncategorized


50 DIY Days with Acute Designs: Paper Snowflake Garland

Day 41: I got this simple and cute idea from Pinterest.  Where else?  Garlands are an easy and fun way to spruce up your space for any holiday.For this garland, I went with snowflakes.  They are super easy {I am pretty sure we all made them in kindergarten} and are a fun “in front of the tv” project.Supplies Needed:-paper for snowflakes-scissors-tape-string, twine, or yarn1. Cute several snowflakes – I used silver and blue paper and make about 15…mine were done in various sizes.


Take a square piece of paper and fold in half to make a triangle.  Fold the triangle in half again and then bring each side to the center.  Cut off the bottom edge so you have a small folded triangle.  Make several cuts in the triangle and open – each one will be different!
2. Cut a piece of string, twine, or yarn that is about 10 feet long and pull the string through each snowflake.  If you are particular {like I am } you can line the snowflakes up first in the order you wish for them to appear on the string.


3. You might need to use a few small piece of tape to secure certain snowflakes so that they don’t slide around.4. At the end of the string, tie a knot to hold the last piece in place and hang.  I don’t have a mantle {which would be perfect for this craft} so I hung my garland about the windows in the dining room. 


It is so cute and festive and can stay up through the winter season – I love it!  
Have fun decorating for the holidays ~ xo, Gina {AcuteDesigns}
………………………………………………..
Thank you SO much to Gina from Acute Designs! What a LOVELY guest post. Thank you for joining my 50 DIY Days of Christmas!

Categories: 50 DIY Days