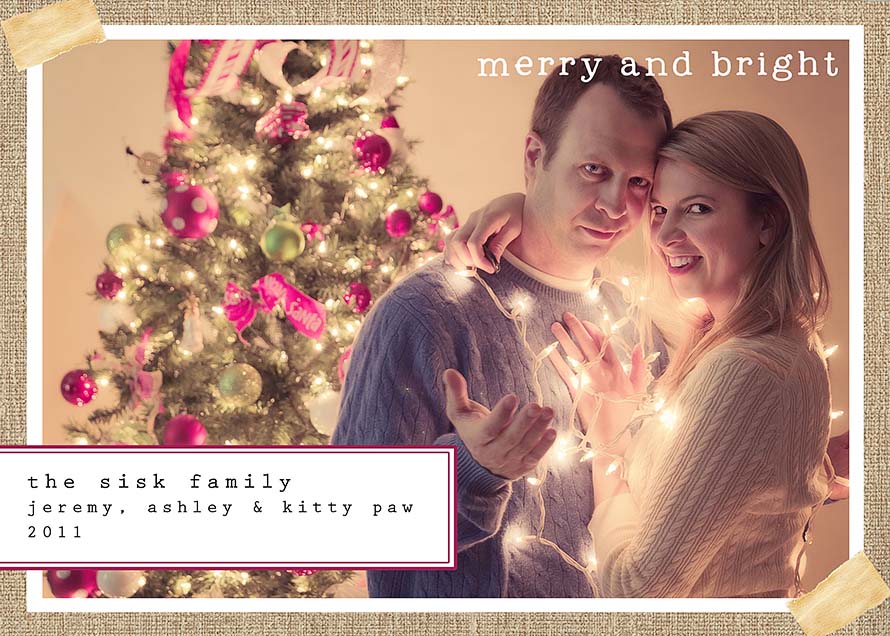
The Paper Mama "Fave Photo" Challenge

This weeks challenge: Favorite photo of December!
The challenge: All my photo challenges should be based around your children (pets are always welcome). I hope you all have a lovely Christmas! Share your favorite photo of this month!


My example of “Favorite Photo”:

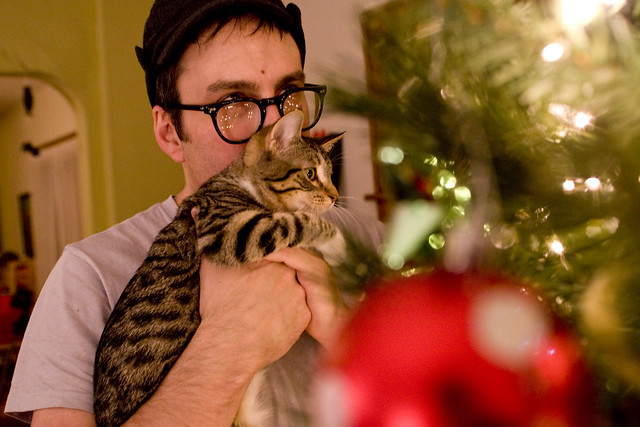
My favorite photo of this silly little face.

…………………………………………………………………………………………………………………………………………………
  • First time joining the Paper Mama photo challenge? Start here for rules and upcoming challenges. šŸ™‚
  • My photo challenges do require you to have either your children or one of your furry children (pets) in the photo (unless it’s a self portrait week). It could be just one finger… or a toe… but, they must be there.
Sparkle
…………………………………………………………………………………………………………………………………………………

The Paper Mama


signature

Categories: Uncategorized


"Red" Photo Challenge Winners

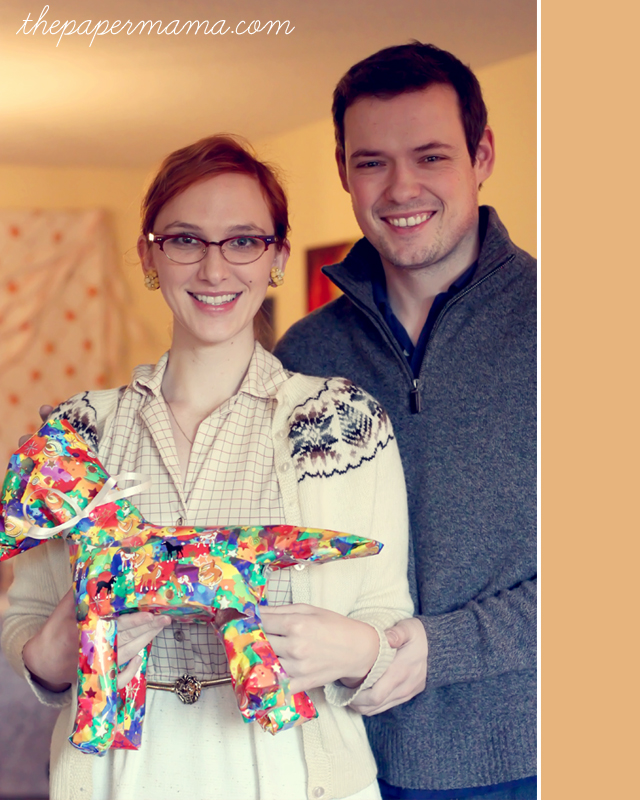
This weeks challenge was: Red!

First:
{Hot Coffee Mama}


Congrats to the winner! Great job, and please feel free to grab the Fact: I’m Awesome button! Because You are awesome!!

The Paper Mama


Second:
{Olive Observer}


Third:
{Walk With Me}


Fourth:
{Jack’s Paper Moon}


Fifth:
{Our Precious Jas}


Congrats to my top 5 winners! If you’d like… you are more than welcome to grab a Top 5 Photo button below!

The Paper Mama


My favorites (in no particular order):

{Living Our Love Song}


{Jenny Rain}


{A Shoe That Fits}


{My Stubborn Little Miss}


{Corey Moortgat}


{Audra Canestrari}


If you’re one of my favorites you are more than welcome to grab a “Paper mama hearts me” button below!

The Paper Mama

 . 2010 winners . 2011 winners .

Favorite Photo of December

ā™” Chelsey

Categories: Uncategorized


50 DIY Days: Wrap that gift!

Day 45: Christmas Eve is tomorrow (wow, that came fast!)! How about a fun way to wrap up your presents? These are my friends Christina and Eric (aren’t they just adorable?). On Saturday they came to Ruari’s 2nd birthday party with that beautiful present in hand. Ha! Ruari just loved it! What is it? It’s a stuffed horse. One of the cutest ways to wrap up a gift if you ask me. šŸ˜‰
If you celebrate Christmas: have a very merry Christmas this weekend!

signature

Categories: 50 DIY Days


The winners of the Holiday Photo Challenge!

First, I just wanted to say thanks to all of you that played along! It was so fun enjoying your holiday photos this year! Thank you! I’m looking forward to doing this again! Be sure to come back in late January for my Valentines Photo Challenge. That one is always adorable (so many cute kiddos eating candy).

SO, first I’ll share the 4th place through 10th place winners. You all did wonderful! Thank you!

{Awesomeville.co.uk}

{The New Modern Momma}

{Hi, Baby}
{Naptime Momtog}

{The Mom Diggity}

{Nurse Loves Farmer}

{Brenda Shares}

The Paper Mama

 
AND, the top 3 winners of the challenge:

Third: Six Cherries on Top

{Six Cherries on Top}

The Paper Mama

Second: Ashley Sisk
{Ashley Sisk}

The Paper Mama

First: Luvin Life
{Luvin Life}

The Paper Mama


Congrats to 1st, 2nd, and 3rd place! Here are prizes for you to choose from! Yay! First I’ll email first place to choose their prize… followed by second… then third! Thank you! AND, I’d like to thank the sponsors for donating! Thank you so much!

– $50 shop credit to Gussy Sews shop.
– $25 shop credit to Barely Measured.
– A Shine necklace from The Shine Project!
– Beautiful Harper Wavy Shell Earrings from PoshLocket.
– $25 Shop credit to Pink Lemonade.
– $20 shop credit to The Paper Mama Shop.

signature

Categories: Uncategorized


Linky dinky do’s to love.

It was my girl’s birthday this last Sunday. She’s 2! Yay! Love her. Party details here.
Looks yummy! Nice little treat for my girl.
Isn’t this piece of jewelry beautiful?
One of my earliest blog reads. Please check her out. Very lovely. <3
Guess what’s for Christmas Morning Breakfast? I wish.
I’m in love with the creations in this shop. Look in the “sold” section for more photos!
Love this streamers backdrop. Very inspiring. The painted tablecloth is very neat too.
I want to marry this closet.
I love this DIY keepsake ornament idea. I actually have a clear ornament I can do this to. I see a quick DIY before Christmas! ::I’m insane::
I know you’re doing some last minute wrapping. How about this sweet custom wrap? DIY.
Thanks to you, you and you for helping get to Alt Summit!

Do you love kitties? ME too. This is a cute story. And, yeah… I did worry a bit about the kitty getting lost. BUT, I think he’ll be fine. šŸ˜€

How about an end of the year clearance sale from BabyLegs? Sale ends 12/28. Use code to get 75% off and order of $75 (that’s like $19 for $75 worth of product. Neat.). Code: JOLLY75
I cannot afford this $500+ dollar dress… BUT, I love it.
Wow. This is a beautiful wedding.
This looks delicious. Yes please.

This is the last day to enter to win a giveaway for $100 to spend at Tea. šŸ™‚

signature

Categories: Uncategorized


50 DIY Days with Capturing Life’s Magick: Dream Pillows

Day 44: Hi, I am Danni from Capturning Life’s Magick! I am a SAHW and soon to be SAHM to my first child. I love blogging about my adventures in life, love and pregnancy (soon to be motherhood).Dream Pillow are really easy make, they are probably one of the easiest things to make (if you have a sewing machine). First off you would go to your local hobby/ craft store to pick out your ā€œingredientsā€ such as fabric, sachets and pillow stuffing. 
When you sow your pillows together make sure your fabric is inside out, this way you will get that seamless look to it. Only sew it on three sides leaving the fourth side open for your pillow stuffing and sachet.

Once you have those items you might want to head over to your local grocery store or all natural shop where you get your herbs from. What do you want out of your dream pillow? Well are a lot of ideas Google for more herbs if you want the sachet in your pillow to help you create a certain sleeping atmosphere. 


As for me I like Lavender, Chamomile and a cinnamon stick. It creates a lovely peaceful scent. You can use flax seed as filler if you like so your sachet is nice and full or you can let the herbs chill lose in the little baggie.


Once you are done filling your baggies up theyā€™ll look kind of like this:


Before you place your bag of herbs into your pillow you will need to stuff it. I got this at Wal*Mart for less than $5:

After you get your pillow half stuffed, stick your sachet of herbs in the middle, and then finish packing in the pillow filler.
Now if you are really handy with sewing by hand you can create that seamless stitch you created on the other three sides of your pillow by flipping a little section of the fabric inside the pillow and stitching it back and forth from one side to the other. Make sure that when you do this you have flipped your pillow right side out so whatever pretty fabric you picked out will be on the outside of your pillow.
If you are not handy with sewing by hand but you would like to have your pillow open so you can wash it from time to time you can take a string/ribbon and do the same thing as above but make sure that your flap that you flip inside your pillow covers your ribbon with enough room so you do not accidently sow that to your pillow. Use your sewing machine to sow all the way around from corner to corner. Pull your ribbon tight and tie it together in a bow a knot or whatever you choose to do. Donā€™t forget to tie off the end of your ribbon so it canā€™t get pulled through the little opening on the corners. Get creative with it. Truly make it your pillow.
Lastly, if you donā€™t care cause your never really going to show this pillow to very many people then take your two end of your pillow stick them together and sow from one end to the other with your sewing machine. You will see your stitches this time but it is really quick and simple if you donā€™t have the time to fiddle with the above.
So there you have it. Your very own Dream Pillow. This makes a very cute gift for friends and family members alike and smells absolutely divine. Happy Dreaming Folks!
………………………………………………..
Thank you SO much to Dannelle from Capturing Life’s Magick! What a LOVELY guest post. Thank you for joining my 50 DIY Days of Christmas!

Categories: 50 DIY Days