Links to love this week.

I’ve mentioned this before, but I want to mention it again. Toyota has this wonderful program: 100 Cars for Good. And, yes… it’s just as it sounds… they give away 100 cars in 100 days. All you have to do is vote on their Facebook page. SO simple. Extra awesome: you don’t have to “like” their page to vote. You can just plain vote. That’s nice.

So… anyway, I’m brining this up again because I wanted to share a foundation I think deserves this (they are all deserving, but this is local and I love it). It’s The Dreaming Zebra Foundation, based here in Portland, Oregon (that’s my town). It’s a public charity providing support so that children and young adults are given an equal opportunity to explore and develop their creativity in the arts. PLUS, they have an Art Recycling Program (free to the public) to donate art and music supplies to thousands of children and community organizations each year. Very awesome. I always have left over supplies that I won’t need. There’s a lot more they do. Supporting the arts in the community. I love it.

Well, today is THEE day that you can vote for them to win a much needed vehicle! If you’d like to vote for them, you can click here to vote. Today is the only day you can vote for this charity… but, the 100 Days continues on through August 21st! Be sure to check back and vote for some charities that need your help! I bet you’ll find someone in your community that needs a car. <3

Now, on to the other links I love this week:

– I love this home tour. My favorite part is in the baby’s room…. the closet with the dresser/hanger bar. Cute idea.

Glass jar typography. Love it.

– Very neat DIY Herringbone Table tutorial.

– Sweet vintage jelly jar lids.

– TV Armoire turned Garden Potting Center.

Paint wars photo session. Fun!

– I have a thing for plates, I love this whole collection.

ANOTher fun way to display your Instagram photos!

– This is probably super nerdy… but, I love this recessed outlet! So much better.

– I thought this was a great idea! I really don’t like our router sitting out… ugly. BUT, cute way to hide it!

– Vintage puzzle pieces turned magnets. Cute for the kiddo.

– And, this is a sweet little girls room.

I hope you all have a wonderful Friday! I’m in Colorado for the Wanderlust Festival… I’ll be sure to share many photos next week. <3

– Chelsey

Disclosure: I was selected for participation in the TWIN community through a program with Clever Girls Collective. I did not receive any compensation for writing this post, or payment in exchange for participating. The opinions expressed herein are mine, and do not reflect the views of the Toyota. 

Tags: ,

Categories: Uncategorized


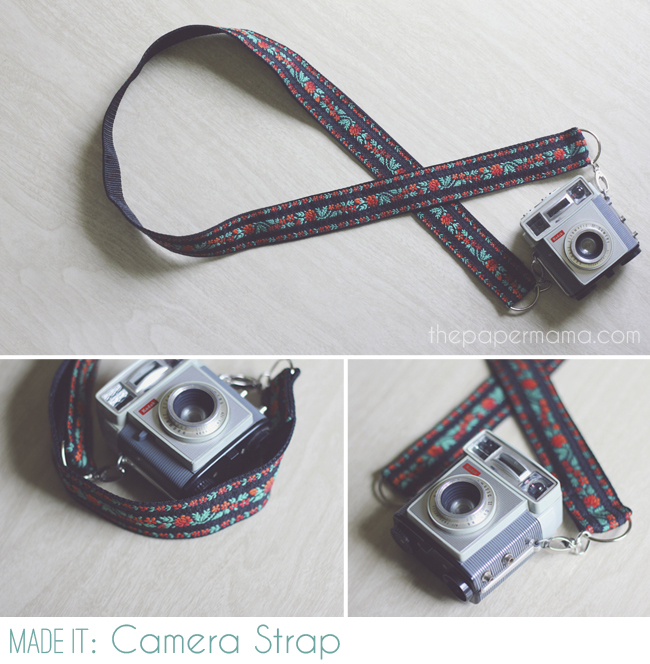
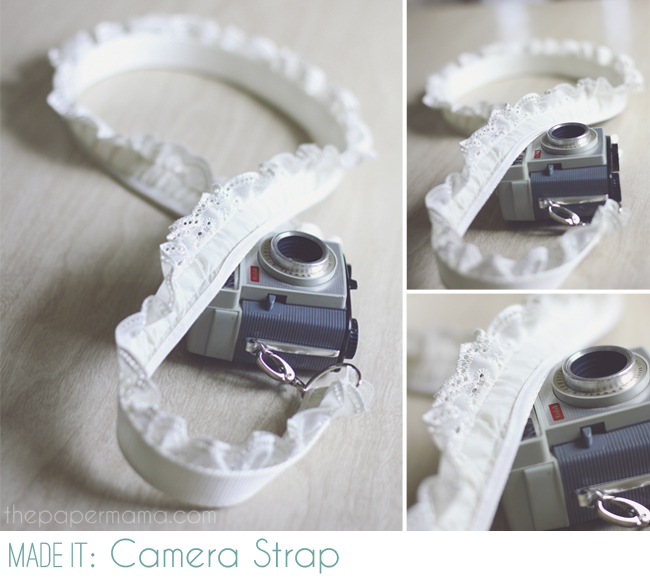
Made it: Camera Straps DIY

AAaaaand, then there was that day I went crazy and made 2 camera straps for myself.

Oh yes. One day I just decided that I could make my own camera strap! I’m slowly learning how to sew (really… I still don’t know how to thread a sewing machine…). One thing I do have down: stitching in a straight line. No problem. I got that. And, that’s exactly how I made these straps.

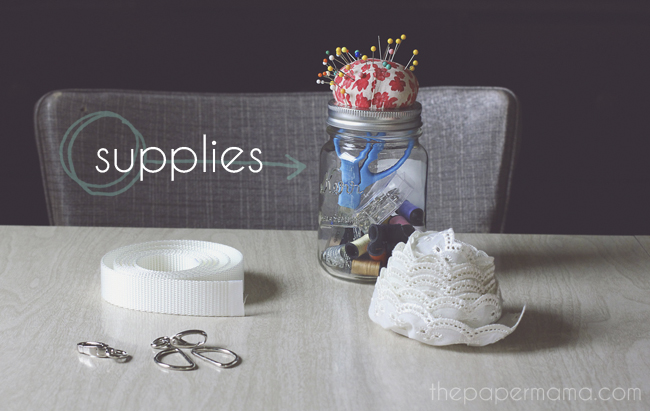
Supplies:

– Seat belt strap (can be found at most fabric stores): 1.5 yards

– Ribbon, lace, or whatever pretty fabric/material you’d like to decorate your camera strap with.

– 2 D-rings (make sure they are the right size for your seatbelt material).

– 2 swivel clasps (found at most craft/sewing stores in the bead or purse handle section).

– Sewing machine + pins+ scissors + thread

 Directions:

1. Cut your seatbelt and decorative trim to your desired length. I just measured this next to how long my camera strap already is, plus adding 5 inches.

2. Optional: this step all depends on what kind of seatbelt material you have. I bought the nylon material (they also have cotton, in which case you would skip this step). Carefully burn the edges of your seatbelt to seal in the thread (prevents fraying). **Be careful!**

3. Pin your decorative trim onto the seatbelt material. Then, sew two straight lines. One on each edge of the seatbelt material (see arrows in photo above).

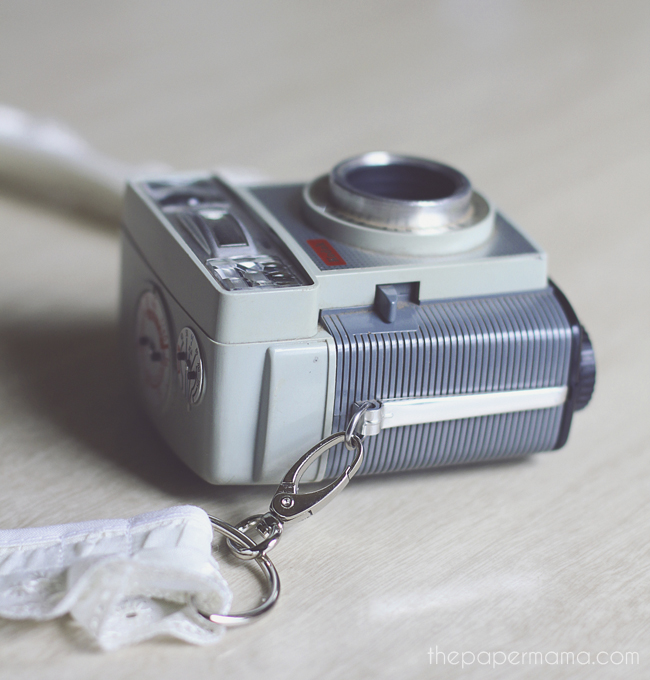
4. Slip one D-ring/clasp combo onto the end of the strap. Pull through about 2 inches and fold over. Sew two lines onto that 2 inches of folded strap (see arrows in photo above). And, repeat on the other side. You want to make sure your lovely camera stays attached!!! If you’d like… maybe add an “x” stitch for some extra hold.

5. Snap your clasps onto your camera… and go! You are ready to snap away and look snazzy: all at the same time.


Hey, if you make a camera strap: let me know! I love seeing other crafter’s projects. Share a link in the comments below to your blog post. <3

– Chelsey

{Related Posts: //Homemade Teepee//My Love Pillow//Revamped Play Kitchen//}


Wordless{ish} Wednesday: Turning 30

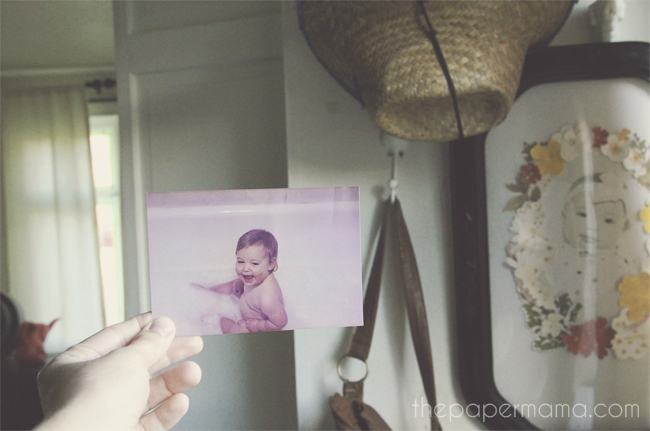
I’m turning 30 in 7 months. I keep having these grand ideas to do something wild and fantastic to celebrate this new age…. But, then my homebody side takes over and all I want to do is stay home and sleep for 3 days straight as a gift to myself (am I the only one that feels like they don’t get enough sleep? Kids.).

I want to have a party with pretty colors and photobooths and pretty dresses… And, at the same time I want to just hang out at some hotel, order room service, and just giggle with my girlfriends for hours. I want wine, glitter, and fried chicken! But, I also want chamomile tea, soft cozy relaxing time, and a plate of… Well, I still want fried chicken.

I don’t really have a problem with 30… I don’t feel different. I know when I wake up on February 1st…. I will feel just the Same as I did when I went to bed on January 31st. It’s a number… But, I like to celebrate things… and, why not celebrate me? Hee. Maybe I will get on a plane to go hang out with all my bloggy friends and enjoy a day of thrifting? Or, maybe I will make my favorite bloggers come to me. Hee. Maybe I will get a tattoo of Joseph Gordon Levitt on my bum? Who knows. All I know is it will be awesome. However I spend it. I love growing older (hallelujah for aging) and watching where my life takes me. Life has taken me on some peculiar paths… scary paths, but it was all for a reason. I learn with each mistake and experience. I get it. I’m ready. Whew! Here I come 30!

How’s aging treating you these days?

– Chelsey

P.S. Happy 4th of July everyone! Have fun and be safe! <3

…………………………………………………………………………………………………………………………………………………………..

{If you have a Wordless{ish} Wednesday, please feel free to link it up below. And, feel free to link up to these blogs too… Parenting by DummiesProject AliciaJenni from the Blog, and Live and Love Outloud.}


This work from home mom is tired.

You guys, I’m tired. I’m reeeealllly tired. It’s not a bad tired (ok, I’m thinking being tired all the time is probably bad… but…), I’m doing what I love. Goodness, just so busy. With the combination of blogging, keeping up on orders, and just plain life and being a mama… I’m exhausted.

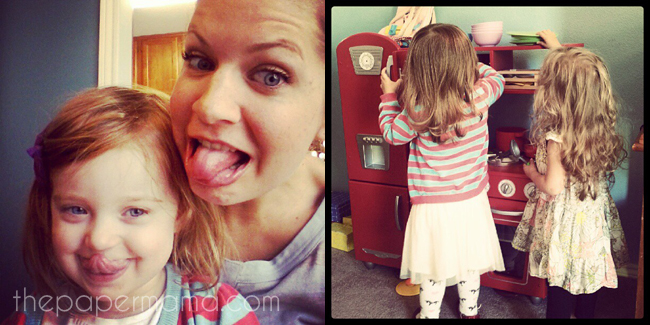
My friend Kelsey has started watching Miss R once or twice a week. It’s been so much help. I can actually catch up on emails and orders when she’s watching her. She has three wonderful kids and it’s been great for Ruari to socialize with them. Usually Ruari’s just hanging out with me all day, and I’m not as much fun as kids her age. My favorite part of this whole thing is when she comes home and tells me about her day. She’s just 2 1/2… so, when she’s tells me what she did it’s all over the place, and doesn’t make too much sense, BUT she’s excited and talks very fast.

I’ve been looking into preschools for her, but she’s too young for the schools in my budget. What really sucks is the preschool deadline age is 3 by November 15th… but, her birthday is December 18th. No one is lenient on the one month difference. SO, I wait. Apparently we have to wait until September 2013. Which seems about 5 million year away. So, for now we wait. Even though I know R will absolutely love preschool, she’s loving Kelsey’s right now.

– Chelsey

Linking up with Extraordinary Ordinary for Just Write.

Categories: about me


The Best Buttermilk Biscuits Recipe…. eveeer

The Best Buttermilk Biscuits Recipe

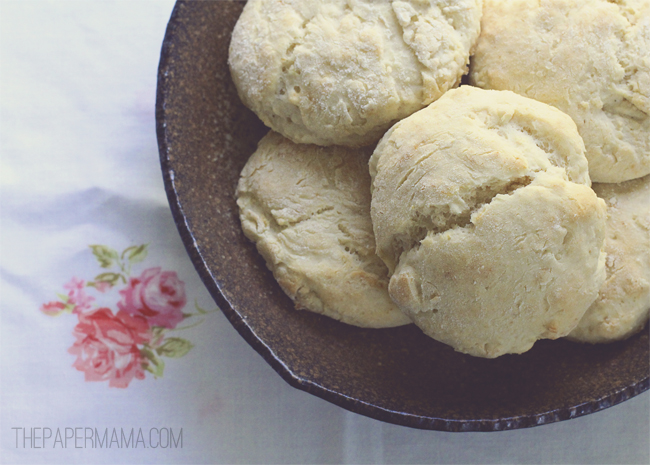
The best biscuits ever. Yup! That’s right. Ok, well… I’m sure there are some pretty amazing biscuits out there that I haven’t been lucky enough to taste, yet. But, for a quick homemade recipe…. this is the best. Yup. In my opinion. I’ve made many many many many biscuits in my life. I feel like it may have been the first thing I ever baked. As a kiddo, this was my favorite thing to have with breakfast (well, and bacon too), and it still sort of is a favorite breakfast item of mine.

Most nights my husband makes dinner, because he actually likes to (I know, weird). Though, there are some nights I need to cook dinner. SO, that usually means: biscuits, eggs, and hash browns. I know. I’m lazy. Ha! I just don’t enjoy cooking. Baking I enjoy. Cooking: Meh. Seriously. I’d rather clean the bathroom than cook a meal (unless I’m making some fried chicken… I might do anything for fried chicken).

I found the original recipe on Food.com. I changed up a couple things. For example: I don’t use the food processor, and I don’t use butter (vegetable oil instead). So, here’s MY version of this tasty recipe:

The Best Buttermilk Biscuits

2 cups unbleached all-purpose flour, plus more for dusting the board

1/4 teaspoon baking soda

1 tablespoon baking powder

1 1/2 teaspoons kosher salt

6 tablespoons vegetable oil (or butter)

1 cup buttermilk (approx)

Directions:

Preheat your oven to 450°F. Combine all the dry ingredients in a bowl. Cut in the vegetable oil until it’s a fine course meal texture. Add the buttermilk and blend it just until it’s combined (over blending makes hard biscuits). The mixture should be very wet, add more buttermilk if it’s too dry. Turn the dough onto a floured surface. Gently pat the dough (do not roll) until it is about 1″ thick. Use something round to cut out the biscuits. If you have scraps, you can combine them together to make a biscuit. Bake for 10 – 12 minutes (just until the biscuits are lightly browned).

The original recipe for these biscuits says it yields 10 biscuits… but, the most I ever get from this recipe is 6. So if you want more, just double the recipe. AND, enjoy! Yum yum yum.

{Related Posts: //Fried Egg + Polenta//Baked Ravioli//Beautiful Apple Pie//}

– Chelsey


The Paper Mama “Sweet” Photo Challenge

The challengeAll my photo challenges should be based around your children (pets are always welcome). Share a photo of the little one with something sweet. Or, maybe your kiddo is sweet enough?

My example of “Sweet”:

…………………………………………………………………………………………………………………………………………………
  • First time joining the Paper Mama photo challenge? Start here for rules and upcoming challenges.
  • My photo challenges do require you to have either your children or one of your furry children (pets) in the photo (unless it’s a self portrait week). It could be just one finger… or a toe… but, they must be there.

2010 winners . 2011 winners . 2012 winners .

Favorite photo from June!

…………………………………………………………………………………………………………………………………………………

Photo challenge buttons here:

The Paper Mama Photo Challenge


The “Summer” Photo Challenge Winners

First:

Congrats! You can grab your first place button here!

Second:

Third:

Fourth:

Fifth:

Congrats! You can grab your top 5 button here!

Favorites:
Congrats! You can grab your favorite button here!
…………………………………………………………………………………………………………………………………………………
  • First time joining the Paper Mama photo challenge? Start here for rules and upcoming challenges.
  • My photo challenges do require you to have either your children or one of your furry children (pets) in the photo (unless it’s a self portrait week). It could be just one finger… or a toe… but, they must be there.

2010 winners . 2011 winners . 2012 winners .

Party Time!

…………………………………………………………………………………………………………………………………………………