First:

Congrats! You can grab your first place button here!
2 Comments
Tags: 2012, pm photo challenge
Categories: Uncategorized

First:
Congrats! You can grab your first place button here!
Tags: 2012, pm photo challenge
Categories: Uncategorized

I hope my GIF’s don’t give you all massive headaches… but, I sort of love making them. Aaaaand, I had quite a few photo sets to work with from New York.
Tags: 2012, animation, blogher, blogher 2012, chelsey, gif, irocksowhat, jess, new york, photography, stephanie, travel, trip, vacation
Categories: favorite posts, gif, photography, photoshop, travel

I have another post up, for your enjoyment, on the Better Homes and Gardens blog today. This week I’m chatting about open pantry storage. Plus, I included a free printable label to hang in your pantry. Keep it organized! Enjoy.
Happy Thursday all! I’m still catching up on liiife! How are all of you?
– Chelsey
Tags: Better Homes and Gardens, BHG
Categories: BHG


My sister will be a married lady in just a few more days! A week ago (before I went to NY) we celebrated her, got all dolled up, and hit the town. It was a lot of fun but man, I cannot stay up late anymore. This lady is getting old!
Anyway, I want to share how simple and easy it is to make a bachelorette party veil, on the fly.
Supplies:
– 1/4 yard of tulle
– 1/4 yard sequin ribbon
– Hot glue
– Hair clip

Directions:
1. Fold your tulle in half (the width will now be 1/8 yard).
2. Stitch along the open edge of the tulle.
3. Bunch up the veil, creating a sort of flower.
4. Fold the bunched up tulle into itself, and sew the “flower” together.
5. Flatten the veil and hot glue the sequins onto the center of your new veil.
6. Stitch on a hair clip.
7. You’re done! Hit the town and celebrate the soon-to-be bride
Cost: $4 Time: 10 minutes
– Chelsey
…………………………………………………………………………………………………………………………………………………………..
{If you have a Wordless{ish} Wednesday, please feel free to link it up below. And, feel free to link up to these blogs too… Parenting by Dummies, Project Alicia, Jenni from the Blog, Bree: his honey and her mommy, and Live and Love Outloud.}

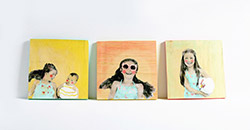
{Me in NY… that chandelier was so lovely}
How about some catch up? It’s been quite the crazy week. With the combination of going to BlogHer, with a cold… and, just plain being in the Big Apple: I AM exhausted.
Tags: blogger, bloggy meet up, blogher, blogher 2012, new york, travel, update, vacation
Categories: travel
Today I’m sharing how to build a garden box on a budget. It’s simple, and anyone with basic knowledge of power tools can build this project. Enjoy!

We’re growing things. Our garden is bursting at the seams with tomatoes, spinach, radishes, carrots and more. It’s been so wonderful to walk outside my door and grab the veggies for dinner! My favorite vegetable to grow has been radishes. I haven’t always liked them, but we recently realized the greens are delicious when sauteed with some garlic.
We built two of these boxes at 4′ x 4′ for our small garden. Check out the directions on How to Build a Garden Box below for more information.
2019 update: We built these boxes in 2012 and they are still holding up.
Cut your wood to size. Cut each 2×6 x 8′ to four feet long. You should now have eight 2×6 x 4′ boards.
Position two planks together. Screw in the corner bracket and repeat this with all the remaining pieces of wood, until you’ve created a square.


Now, it’s time to apply some boiled linseed oil. It’s not necessary to do this, but it will extend the life of your garden box. While wearing gloves, use a rag to apply a layer of the boiled linseed oil on the wood.
Side note: linseed oil can be flammable. Please be sure to read the directions carefully.

3. It’s time to put your box in the garden! We chose a spot in full sun. First, we had to dig a hole to level it out, which also helped to make the box sturdier. If you don’t plan on digging a hole to install, I suggest hammering some wooden stakes next to the box to make it stronger.

Add some dirt, fertilizer, and plants. Watch your garden grow!

Are you a gardener?
If you make this DIY I’d love to see it. You can tag me on Instagram @thepapermama!
– Chelsey
Disclosure: I may earn a small commission for my endorsement, recommendation, testimonial, and/or link to any products or services from this website. There are affiliate links in this post. Thank you for your support.

Tags: garden
Categories: diy, For The Outdoors, paper mama farm, paper mama house
All my photo challenges should be based around your children (pets are always welcome).
Tags: 2012, pm photo challenge
Categories: Uncategorized