Things I love this week…

Yesterday was our 4 year wedding anniversary! Wow. So excited to have a fun date night tomorrow. It includes fried chicken. Yeeeaaaah! Plus, in a couple of weeks, we will be celebrating 10 years together. I’m still a little in shock about that… and, I’m feeling a bit old. Hmmm.

Onto the things I love this week:

Make it yourself: plaited twine belt.

Time to get ready for fall! Cute acorn pillow.

This little Etsy shop is adorable.

I love all the lovely items in this shop! Especially the hot air balloons for baby’s room.

Did you see my framed wallpaper wall?

This backyard office/studio is lovely.

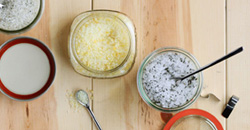
I hope this recipe works: the perfect Williams Sonoma concoction to make your home smell wonderful!

Crostini, prosciutto, goat cheese, and fig jam. Yum.

A couple of my photos are on the cover of a new ebook (They’re of Ruari when she was about 9 months old <3). 7 Steps to a Safe, Nurturing Nursery, by Dr. Frank Lipman.

Very cool info: how to get a perfect corner in sewing. Love it!

DIY: Marquee Letter

Looks like there’s a pretty cool paintbrush, that works with an iPad!

Very cool rope lampshade!

– Chelsey

Tags:

Categories: Uncategorized


Natural Dye Experiment: Turmeric

This past week I did a little bit ‘o experimenting! I really wanted to try and dye my own fabric…. But, I didn’t want to buy the dye from the store. Soooo, I used turmeric spice! Yup. And, it worked really well.

Supplies needed:

– Salt

– Water

– Fabric (I used an old white scarf)

– 2 Tbs. Turmeric

– Wooden spoon

Natural Turmeric Dye

Directions:

1. First, prep your fabric/material. Combine 4 cups of water and a 1/4 cup of salt, bring it to a boil, add your fabric and let it simmer for one hour. The salt acts as a “fixative”. It helps the fabric take the dye.

2. When the fabric is done, drain the water. Once cool, wring out the remaining water from the fabric.

3. Time to add some color! Combine 2 cups of water with 2 tablespoons of ground turmeric, bring to a boil, and let simmer for 20 minutes.

4. Turn off the heat and add your fabric to the turmeric dye mixture. Use your wooden spoon to push the fabric down into the dye, trying to coat it evenly. The longer the fabric soaks: the deeper the color will be. The dye also reacts differently for different fabrics.

4-1. To create an ombre color, dip your material partially in, and pull it out slowly. I moved my fabric out of the dye about 2 -4 inches every couple of minutes.

5. Rince your dyed fabric in the sink until the water runs clear and hang to dry. That’s it! You’re done!

Side note: You can double the recipe of the dye… for larger projects.

Plus, I have another post up on Better Homes and Gardens today! Using this same natural turmeric dye technique, I dyed a bunch of fabric and made a lovely lampshade! I really love how it turned out (and, so does the husband… double win). Here’s a photo:

– Chelsey


Wordless{ish} Wednesday: Fall wha?

If you follow my instagram, you might see my #papermamafarm photos. I’ve been THOROUGHLY enjoying my little itty bitty garden. This is the first year we’ve really put a lot of time, care, and effort into growing veggies. I’m learning what I like, what I won’t do next year, and which veggies are not worth all my water and effort (sorry cabbage, you’re out).

AND, now we’re headed into fall… YUP, I said it. It will be here before you know it. I’m really going to miss having a yard right there… full of yummy food for dinner or lunch. We have a ton of carrots that will keep on going and last for a while longer, but I will really miss the spinach and tomatoes.

I’m already getting the terrible idea to build a tiny green house (our yard is seriously small…..). We are no where near ready to build that… so, for now: I will just need to do some research about more fall/winter veggies. Next year I will be more prepared with my veggies. Maybe a green house next year? I gotta be careful… don’t want to freak my husband out tooooo much with all my crazy ideas. He’s finally accepted the fact that we will be getting little chickens next year! Hee…. I’ll bring up the greenhouse later….

 …………………………………………………………………………………………………………………………………………………………..

{If you have a Wordless{ish} Wednesday, please feel free to link it up below. And, feel free to link up to these blogs too… Parenting by DummiesProject AliciaJenni from the BlogBree: his honey and her mommy, and Live and Love Outloud.}


Categories: about me, paper mama farm


The Old Yellow Zephyr

{Photo via: SplatterGraphics on Flickr}

My old yellow Zephyr. What is that you ask? Well, it’s the finest automobile ever known to man ::insert sarcastic eyes here:: Yes, the fantastic 1981 Ford Mercury Zephyr (aka: Old Yeller, The Big Fish, Stupid Car That Won’t die).

This was my 3rd car I called my own. It was purchased and given to me by my Stepdad when I was 17. I can only assume the previous owner sold it for $2 or, they paid us to take it. Let’s just say I was not happy when my stepdad drove up in that thing…. the “new” car for this 17-year-old. But, I couldn’t complain. I didn’t have the cash to buy a car (my first car went to my sister, and my second had been totaled when someone read-ended me).

This car had beautiful bench seats covered in faux lambskin, it was solid as a damn rock, and it got me places. Most of the time. This freakin car could not be stopped. It just wouldn’t! Every time it broke down and died while I was driving it (my favorite time being the center of a busy intersection during rush hour) I’d hope that it couldn’t be fixed… But, it kept going.

One morning, on my way to work, I hit a deer! The only damage to my car: a teeny tiny knick on the heavy duty bumper (p.s. I’m afraid the deer did not make it).

So, all that ranting brings me down to the final days of the Zephyr. I was-22-years old (yes, that car managed to hang on for way too many years… Cramping my style) and living in Seattle. The day was beautiful, so I made sure to, manually, roll down the windows before I headed out to my destination. I was cruising along and I noticed a girl was waving at me. I smiled and waved back. She seemed nice. But then, I realized she was also yelling something… I turned down my radio and hollered, “What?” Then the girl said, “You’re freakin car is on fire!!!” I responded with a wtf? Omg. F#@$%^.! Pulled the freak over into the first driveway I saw (which just happened to be a Land Rover dealership. Ha).

Turning off my car, grabbing my phone, and running the bat heck outta there… I saw my Zephyr: dropping actual fireballs. Oh my. Over and over. These tennis ball sized fire balls were dropping onto the parking lot. I called 911 and told the lady I could not be put on hold (sorry, my car’s on fire) and requested the fire department.

When I was done with my call, a man came strolling by. He gave my car one look, and ran away. Yup. I thought he had abandoned me. Tuuuurns out he was just being awesome, and he came running back with a fire extinguisher. Put the fire out. Yeah!

When the fire truck rolled around, the fire was out. Nothing they could do, except tell me to keep a fire extinguisher in my car (for safety)… and, that I made a mistake when I took time to grab my phone (should have figured that out on my own, never run back to your flaming car for annnything). Fact: do not mess around with a car that’s on fire. Get all the humans out, get far far away, and find a phone to call 911.

As terrible as this car was, it got me from point A to point B (sometimes). Oh, sweet old Zephyr. RIP.

– Chelsey

Disclosure: I was selected for participation in the TWIN community through a program with Clever Girls Collective. I did not receive any compensation for writing this post, or payment in exchange for participating. The opinions expressed herein are mine, and do not reflect the views of the Toyota. 

Tags: ,

Categories: about me


Made it: Framed Wallpaper

Well, it’s done! Our lovely framed wallpaper wall. Annnd: I lurve it.

Our house is sort of awkward. It’s tiny and old with a weird shape. The living room/dining room is long and skinny, and setting up a comfortable space has been a challenge. Especially with this giant wall. Sooo, I gave up on it. Yup. I threw a couple of random frames up there, and let the wall die slowly until I didn’t even care anymore…. That’s a lie though. I do care, and have cared what that wall actually looks like. It’s what you see walking into my home. ::BAM:: Hello boring wall.

I needed a change. That’s where my wallpaper comes into play. Everyone say, “Hello, beautiful wallpaper!” When I was at Alt Summit last January, I met a few HP people. They were lovely. AND, I got a coupon to try out some custom wallpaper! Yup, that wallpaper is custom… my illustrations. It’s so exciting to see my work up on my wall! Next up: my own fabric line errr yeah. Hee.

How we did it:

– Put up your wallpaper (pre-measured/cut to the size you want). This wallpaper is easy to put up… it just requires water. There’s a whole video how-to if you’re interested (and, removing it is just as easy… with water). Siiide note: the video totally shows a lady doing this by herself… ummm. It required both my hubs and myself (along with some cursing). It is simple… but, a pain in my bum.

– Using trim, from a local home supply store, nail in a frame around the installed wallpaper.

– Time to paint the frame! If you have any gaps or spacing, use some caulk to fill the holes in before painting.

– You’re finished! Add some artwork if you’d like. Ta da!

 //Wallpaper c/o: Walls by, Gallery Direct//

We are in no way finished with this room… at all. I’m contemplating painting all my walls white. Crazy right? I just love adding color with accessories, etc. So, we’ll see. Plus, still in the process of working on our fireplace… hoping to be finished with that by fall (yeah).

Annnd. guess what? I have moooore wallpaper. I have all the wallpapers in the world!!! Sorry about that… anyway: it’s for a project we’re waiting to start after the heat wave…. it’s going in the hottest room in the home. I will definitely be sharing that when we’re done!

– Chelsey

P.S. I don’t believe Gallery Direct is set up for custom orders yet, but they will be soon!

Disclosure: I did not receive any payment for writing this post. The opinions expressed herein are mine, and do not reflect the views of the HP and Walls by, Gallery Direct. 


The “Green” photo challenge winners

First:

Congrats! You can grab your first place button here!

Second:

Third:

Fourth:

Fifth:

Congrats! You can grab your top 5 button here!

Favorites:
Congrats! You can grab your favorite button here!
…………………………………………………………………………………………………………………………………………………
  • First time joining the Paper Mama photo challenge? Start here for rules and upcoming challenges.
  • My photo challenges do require you to have either your children or one of your furry children (pets) in the photo (unless it’s a self portrait week). It could be just one finger… or a toe… but, they must be there.

2010 winners . 2011 winners . 2012 winners .

…………………………………………………………………………………………………………………………………………………
Thank you to our photo challenge sponsor: