Glitter Starbucks Cup

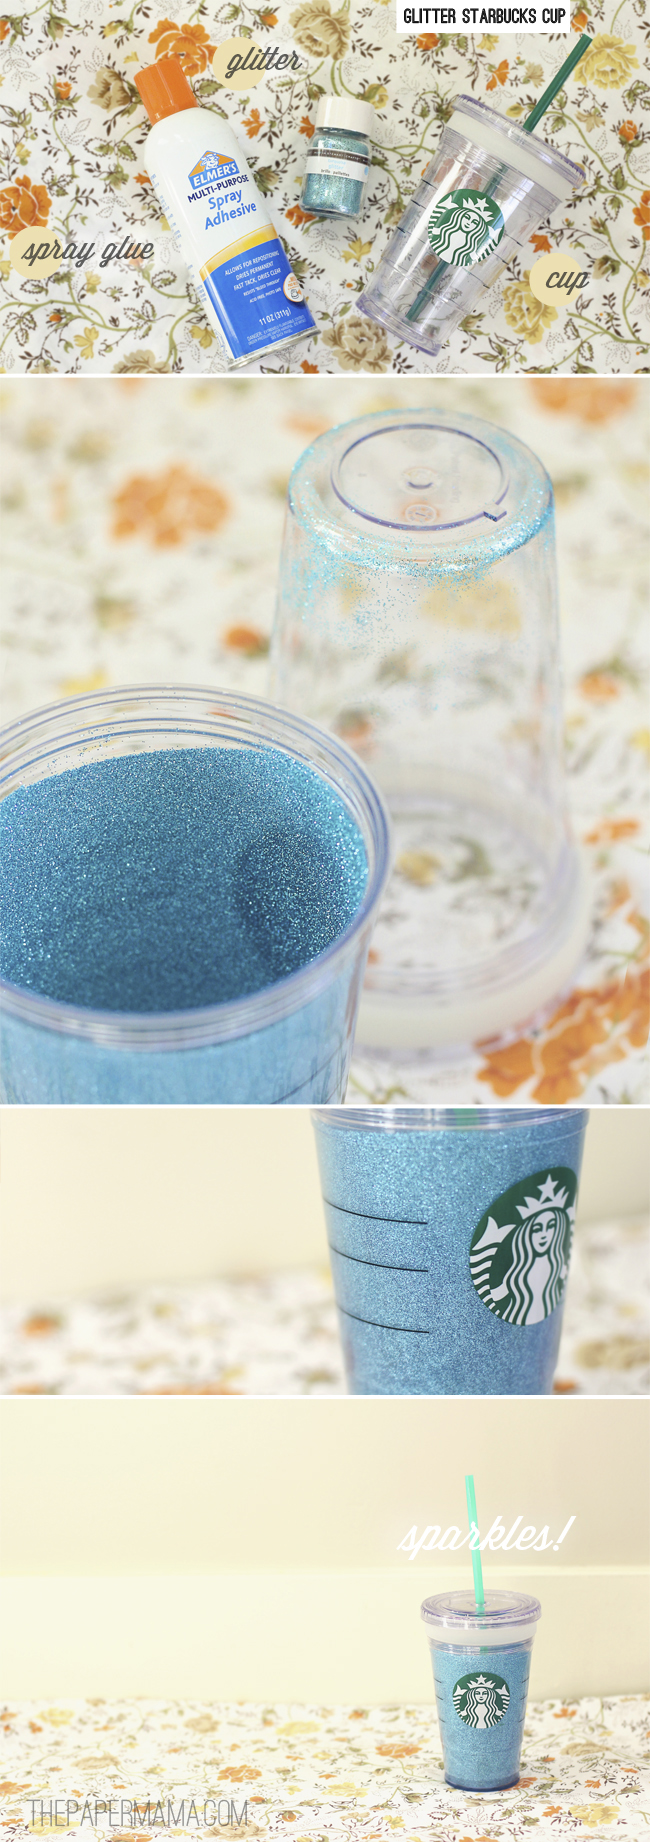
So, I found this on Pinterest. Thought it was a wonderful idea! This girl just happened to share her Starbucks cup upgrade on instagram! I’ve had this cup for over a year… and, just haven’t taken the time to personalize it. No inspiration. Finally, here it is. So simple, so lovely. All you need: spray adhesive, glitter, and a customizable Starbucks cup.

Just spray the inside of the cup with the adhesive, pour in glitter (make sure glitter coats everything), and let dry overnight. Next day: you have a wonderful custom Starbucks cup! Enoy!

Happy Thursday.

– Chelsey

 P.S. I noticed people mentioning they can’t find Starbucks cups to customize anymore… I’m not sure if this is true or not. I hope it’s not.

Tags: , , , , ,

Categories: diy


Wordless{ish} Wednesday: Spring, I mean, fall cleaning?

This would be why I don’t have much to say on this lovely Wednesday:

I found this sweet little hutch yesterday, and I spent most of the day cleaning and organizing (out with the old and in with the new-to-me). I still haven’t decided how I’ll fix it up… and, it sort of smells like an old lady’s home. Hee. New knobs for sure, and fixing a couple damaged spots… but, then what? Color? Refinishing? Hmmm…. Thoughts?

– Chelsey

 …………………………………………………………………………………………………………………………………………………………..

{If you have a Wordless{ish} Wednesday, please feel free to link it up below. And, feel free to link up to these blogs too… Parenting by DummiesProject AliciaJenni from the BlogBree: his honey and her mommy, and Live and Love Outloud.}


Tried it: Homemade mod podge

Hello sweet friends! Another Tried It post. In case you missed it before, my Tried It series is all about what actually works from Pinterest. And, hopefully I can add tips to make it better. So, this time I tried out homemade Mod Podge. What’s Mod Podge? Well, it’s a brand of glue that helps you decoupage. What’s decoupage? You’ll just have to google. Hee.

The recipe is simple… in fact, I don’t even know if I should call it a recipe…. Anyway…

Ingredients and supplies:

– White school glue (like Elmer’s… you know, the stuff that weird kid would drink in your first grade class).

– Water

– Jar with a lid

Directions:

– Add equal parts white school glue and water to your jar. Put the lid on the jar, and shake it! Shake it real good.

– You’re done! You have your own homemade Podge. And, it really does work.

My tips:

– This homemade podge is not waterproof. If you want it waterproof, you can spray it with with a sealant (especially if your craft will be coming into contact with moisture).

– If you want a thicker podge, add less water. Do a couple tests, maybe don’t add all the water right away.

Cost:

– Well, ok. I’m guessing I made close to 16 oz (I compared it to a mayo jar… ha). So, a 16 oz jar of Mod Podge is around $12. My jar was .70 cents (found while thrifting), the glue was $3.50, and the water was free. I saved about $7 – $8. It took no time, seriously.

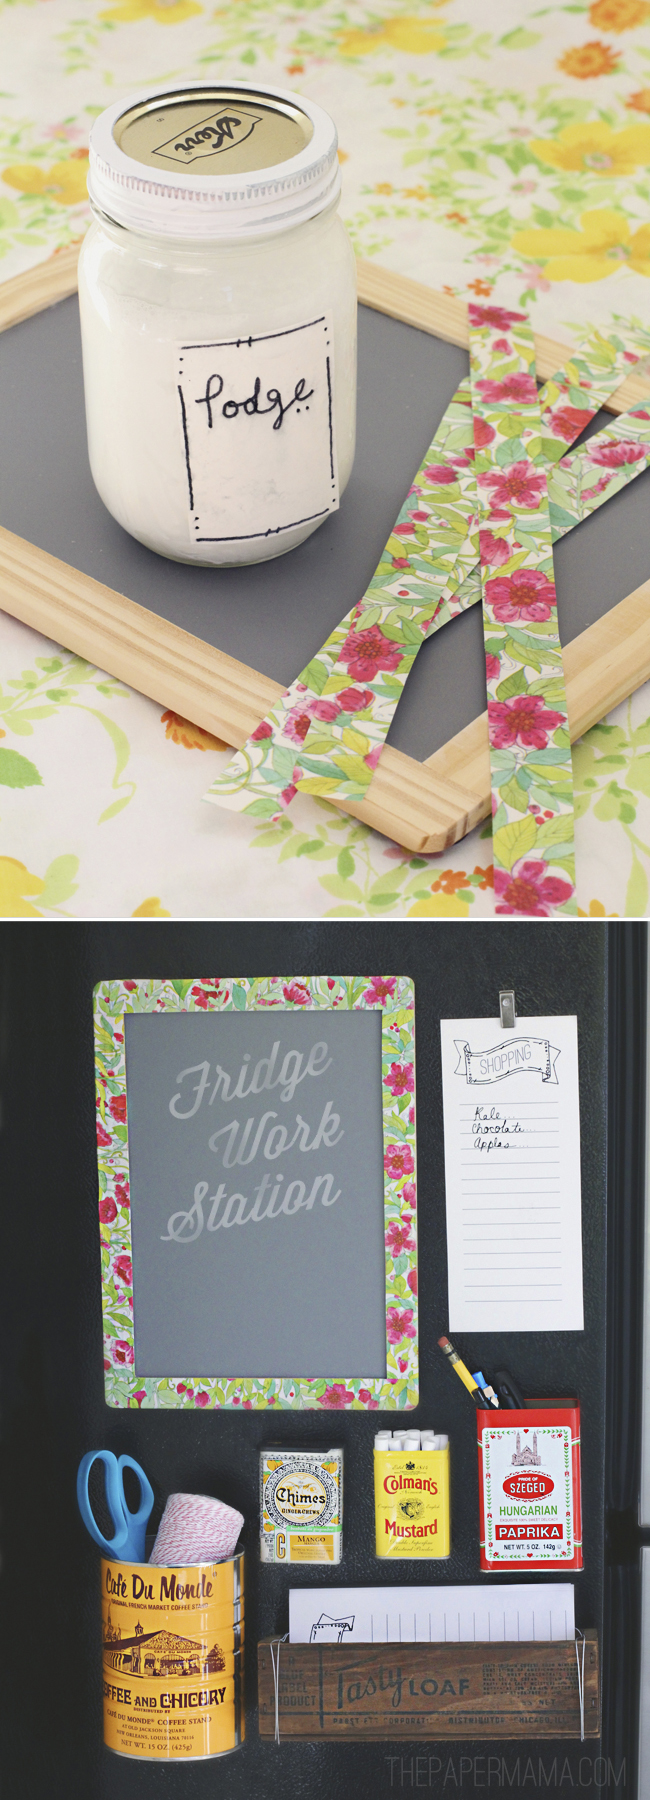
This is definitely a great recipe to have. I tested it out to add pretty vintage paper to my Fridge Work Station chalkboard (see the photo below). If you need directions on how to use your podge, here’s a link.
– Chelsey
Tags: , , , , , ,

Categories: diy, tried it


Getting home.

Well, the family and I just got home from a little trip to Maupin, OR. We are trying to take advantage of the last little bits of summer, before the weather heads to fall. It was relaxing, hot, and beautiful. Perfect little weekend. So, we are sleeping in today!

How was your weekend?

Tags: , , ,

Categories: Uncategorized


10 years ago…

Ten years ago I was 19.

Ten years ago I met this guy.

Ten years ago I took this photo with this guy.

Ten years ago I met my future husband.

Ten years ago I met the father of my future child.

Ten years ago we started dating.

Ten years later, here we are.

My husband. Family.

<3