
Disclosure: The Bead Chest provided product for me to create this sponsored Pretty Wood Bead Chandelier DIY. All opinions are my own. Thank you for supporting the sponsors that make The Paper Mama site possible.
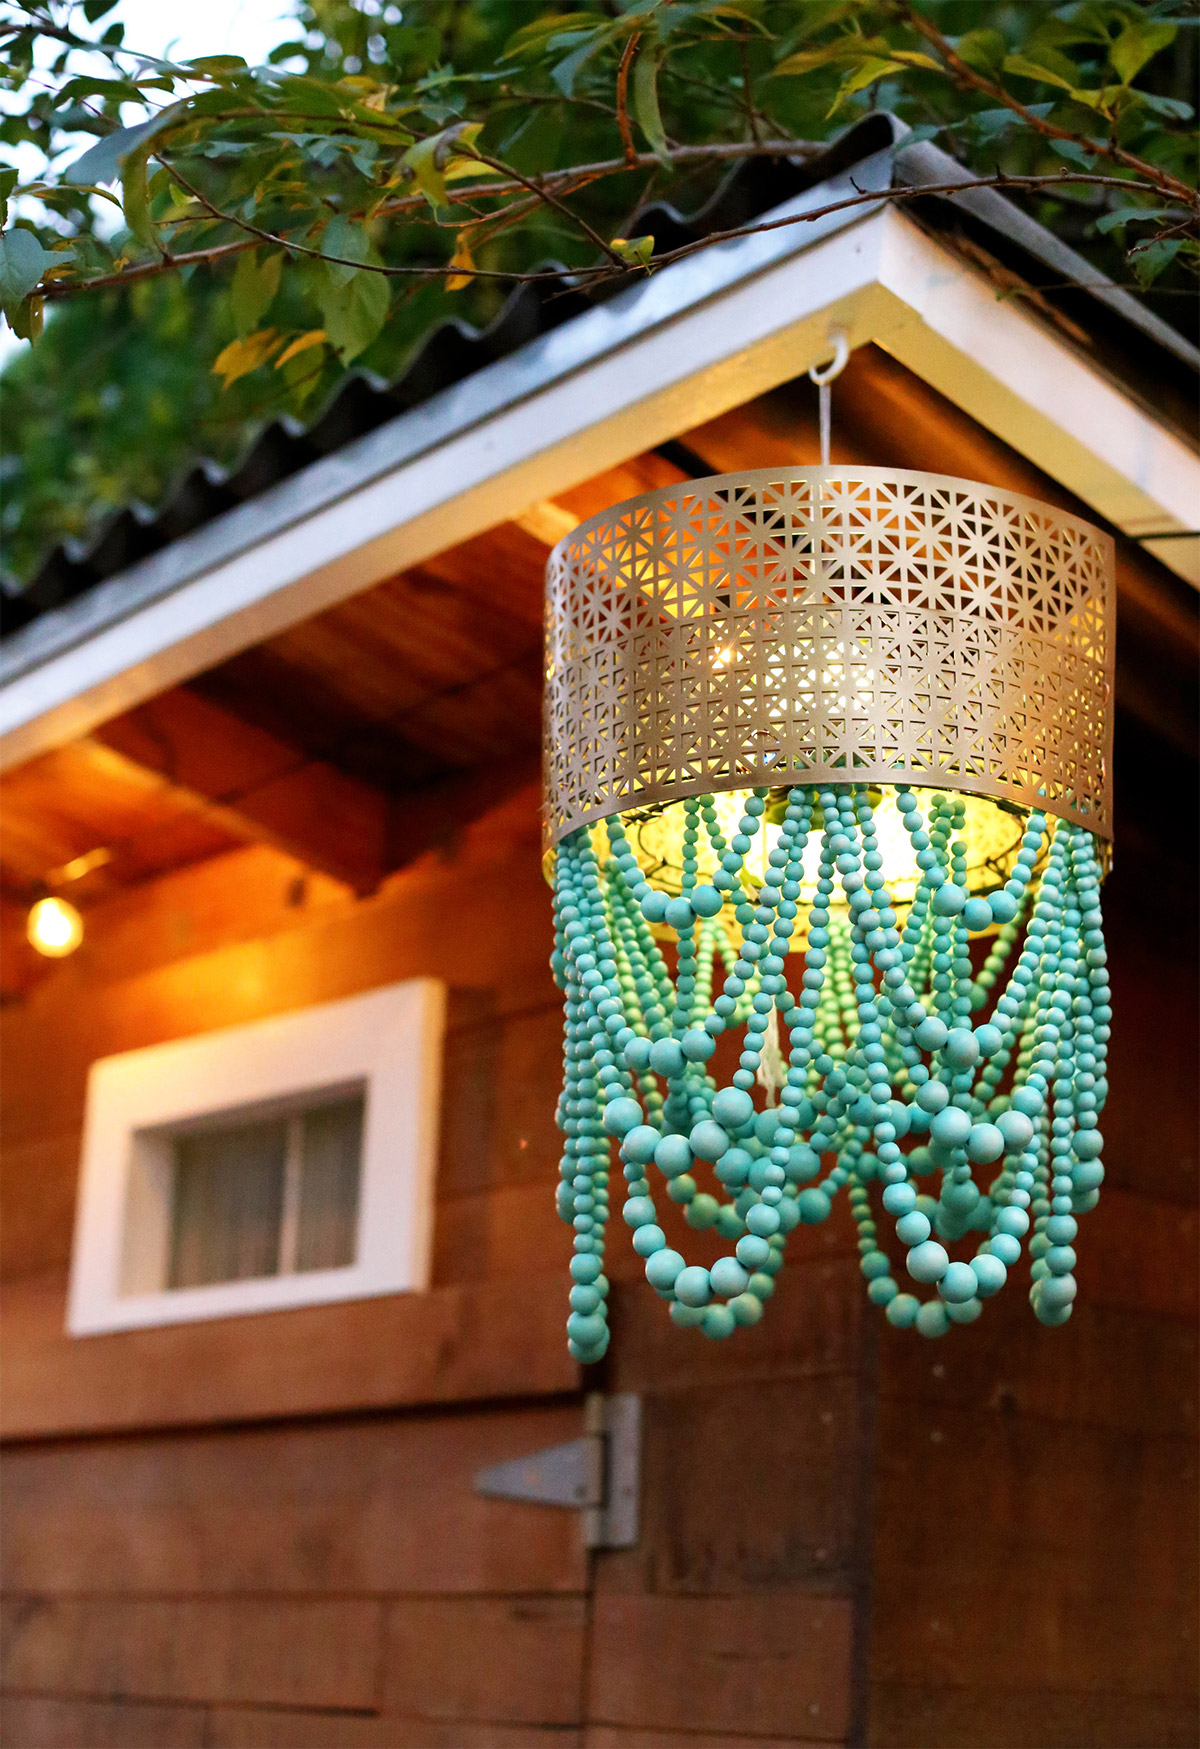

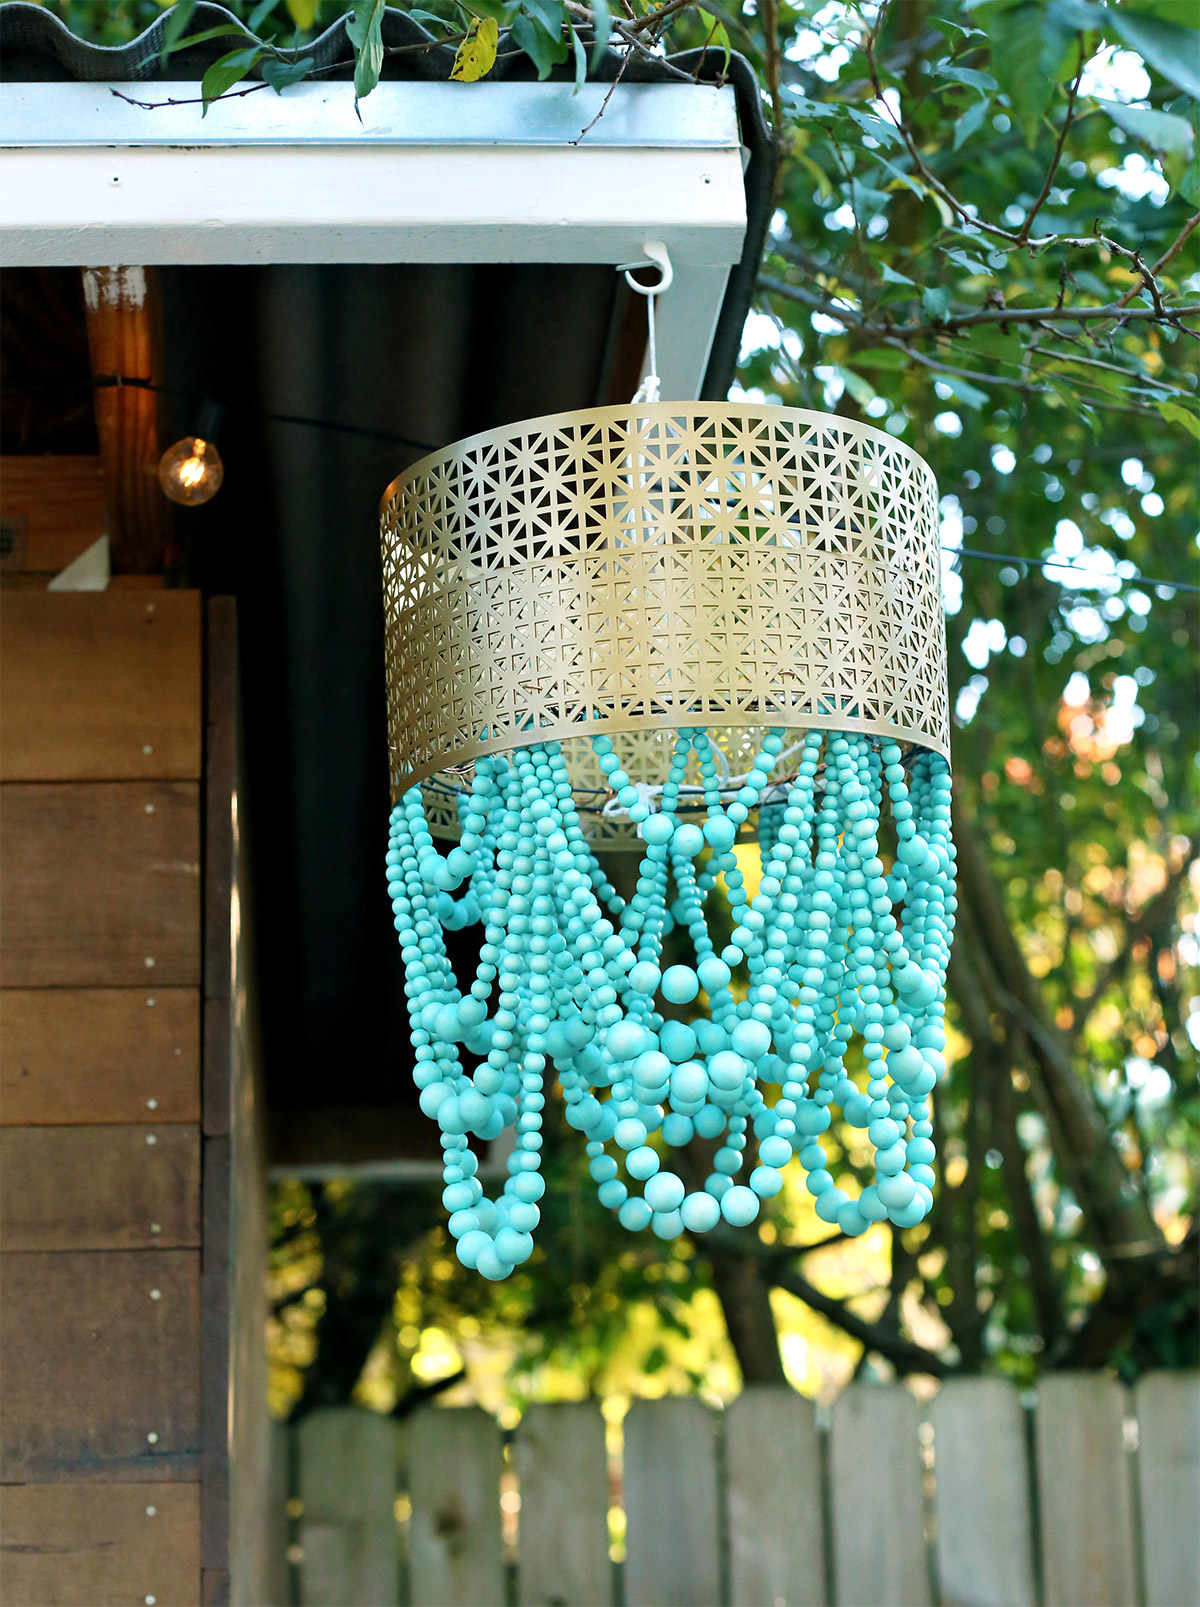
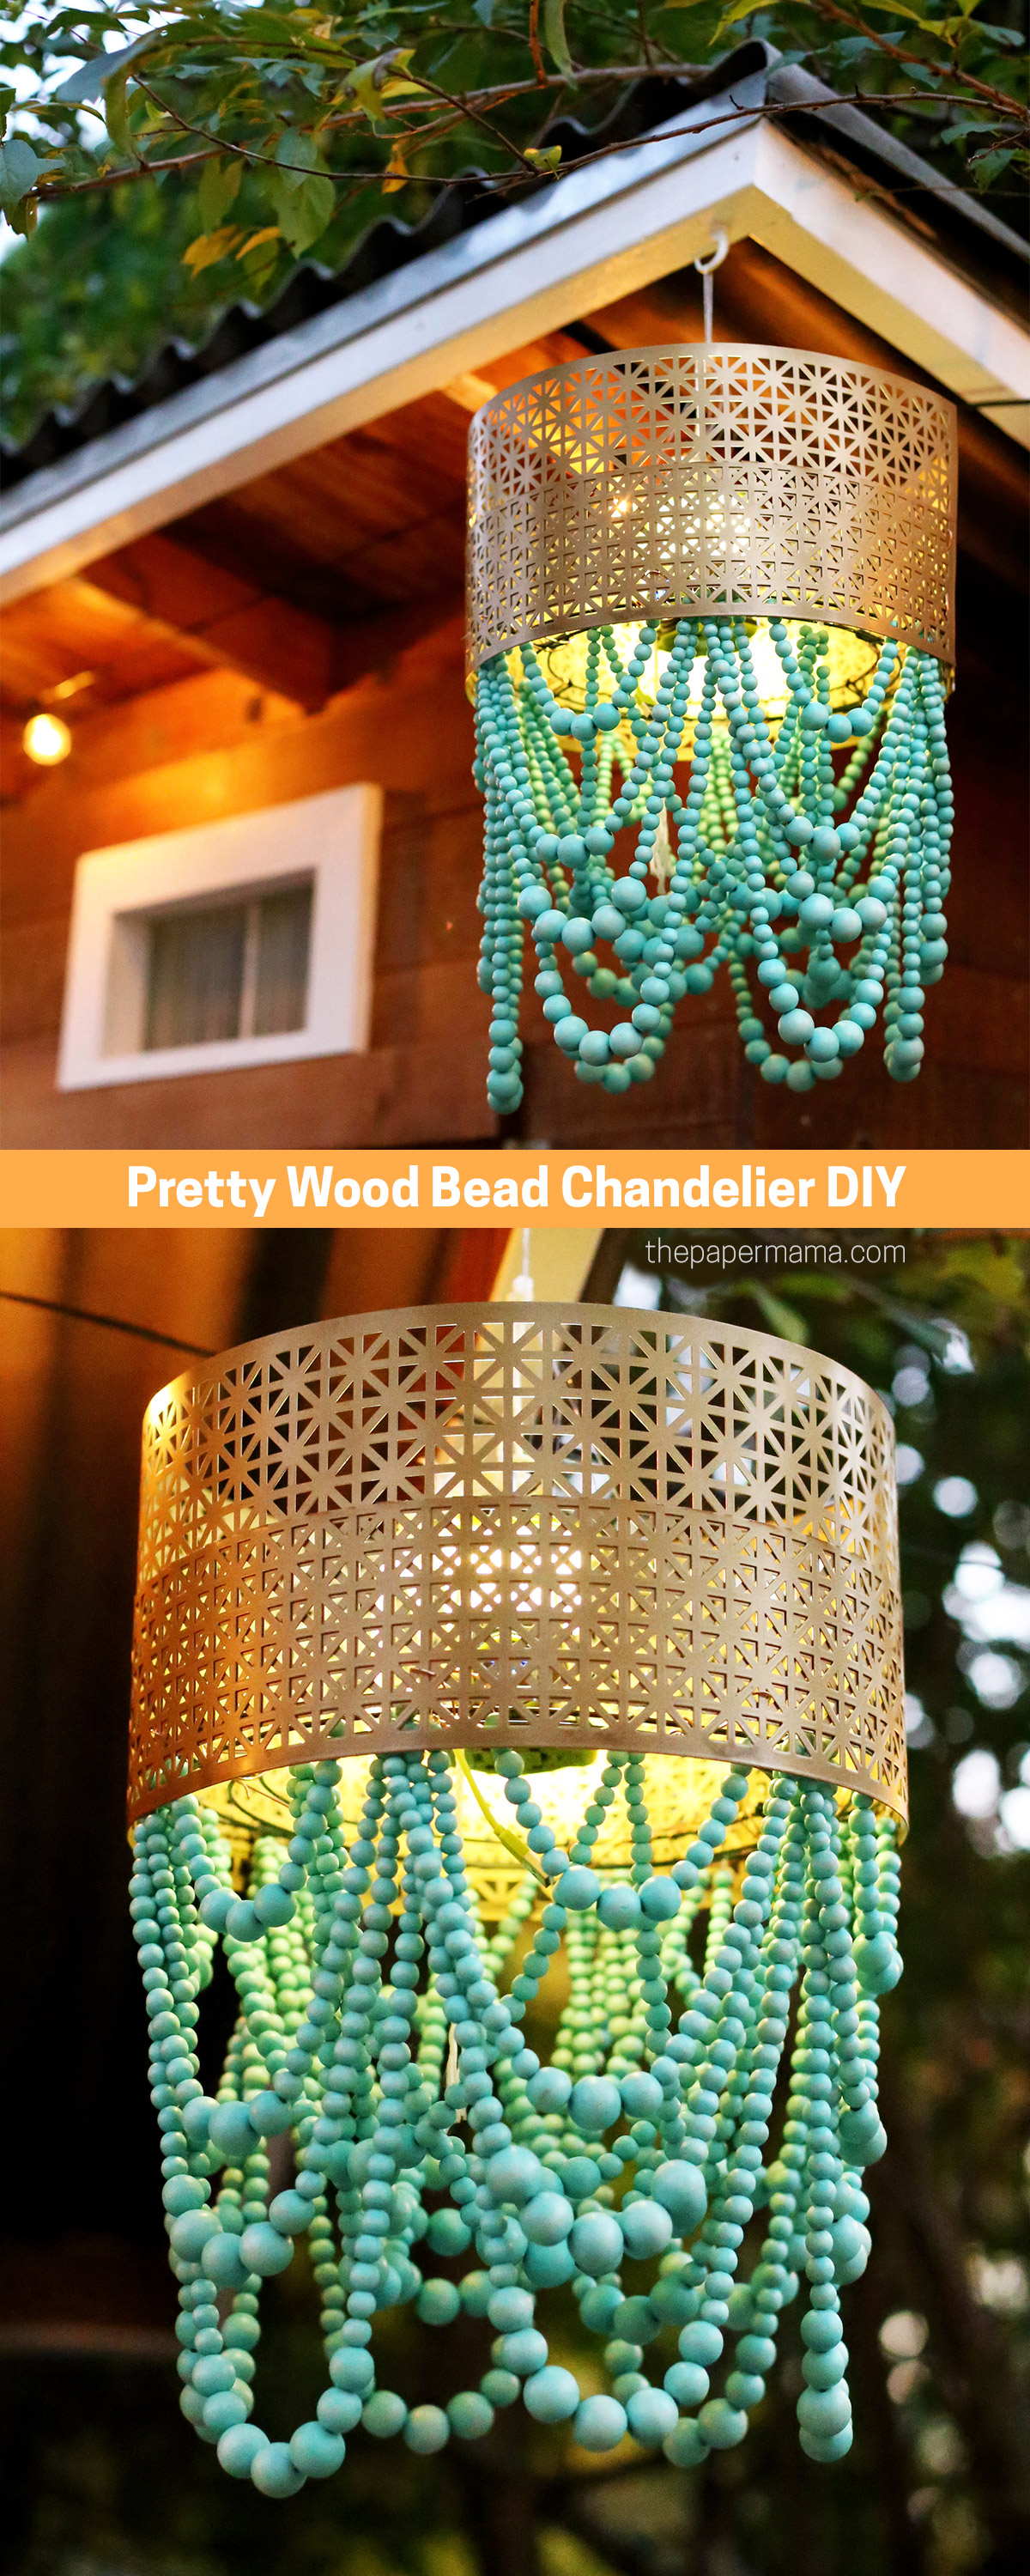
Making a beaded chandelier has been on my to-do list for a couple of years now and I’m happy to report: I’ve finally made one! My original plan was to make a chandelier to hang in our dining room, but when we began planning our backyard makeover I knew I wanted to make this to hang outside. With the help of supplies, from The Bead Chest,I transformed over 1,200 beads into this pretty wood bead chandelier DIY!
This project is VERY time consuming, but simple to make. I promise. Maybe sitting down to binge watch some shows while you string beads will make the time fly by? Please explore the directions below to see how I made my chandelier. Feel free to come up with your own bead pattern if you prefer.
Supplies:
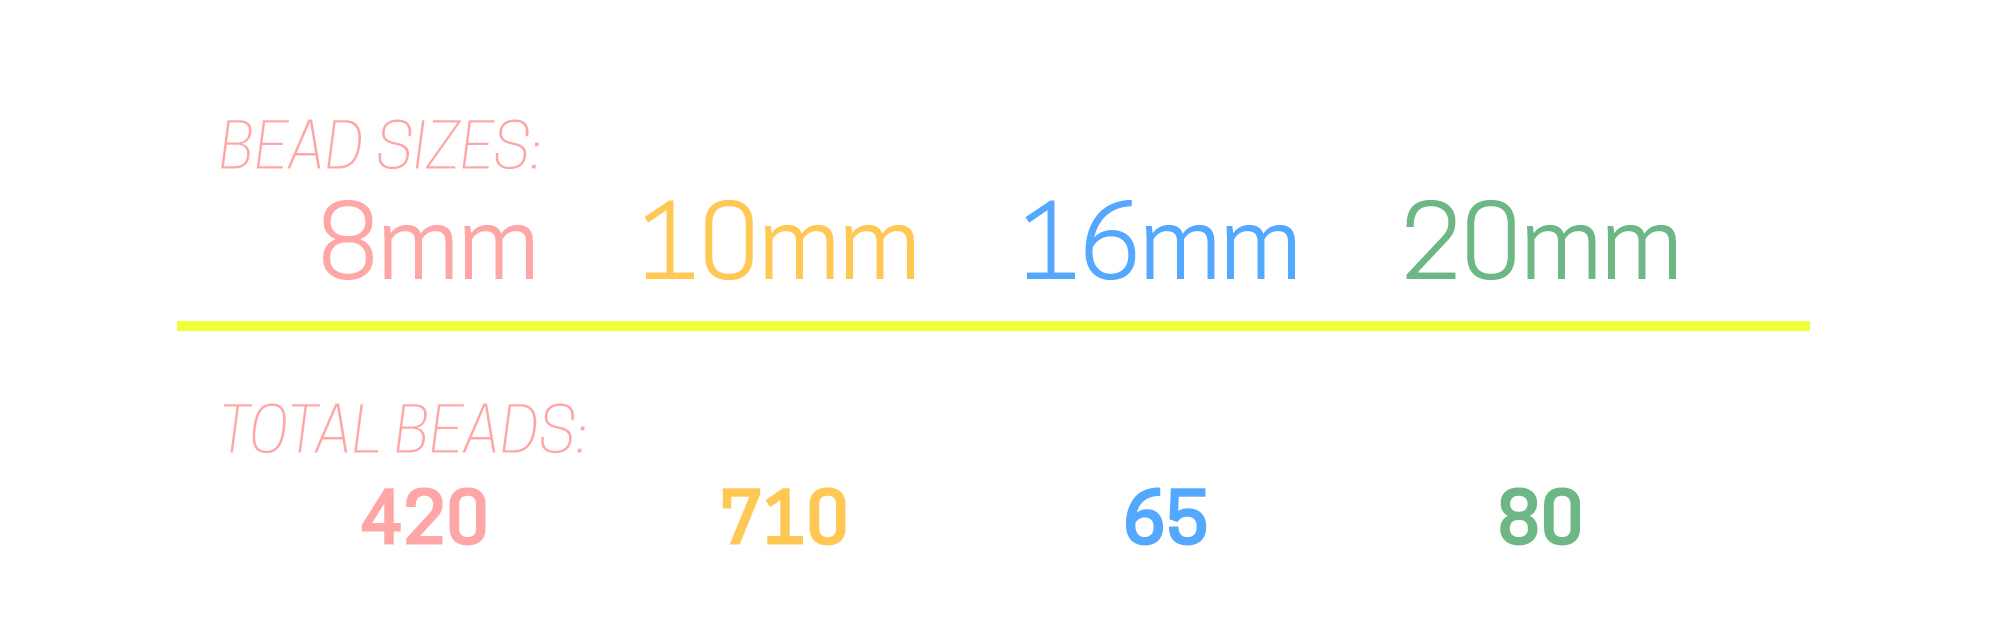
- fishing line
- 528 – 8mm beads (8 strands at The Bead Chest)
- 876 – 10mm beads (18 strands at The Bead Chest)
- 78 – 16mm beads (3 strands at The Bead Chest)
- 96 – 20mm beads (4 strand at The Bead Chest)
- tape
- 10″ diameter wire wreath frame
- aluminum perforated sheet metal (needs to be at least 3′ long for the 10″ wreath frame)
- galvanized steel wire
- outdoor rope
- metal cutter snips
Directions:
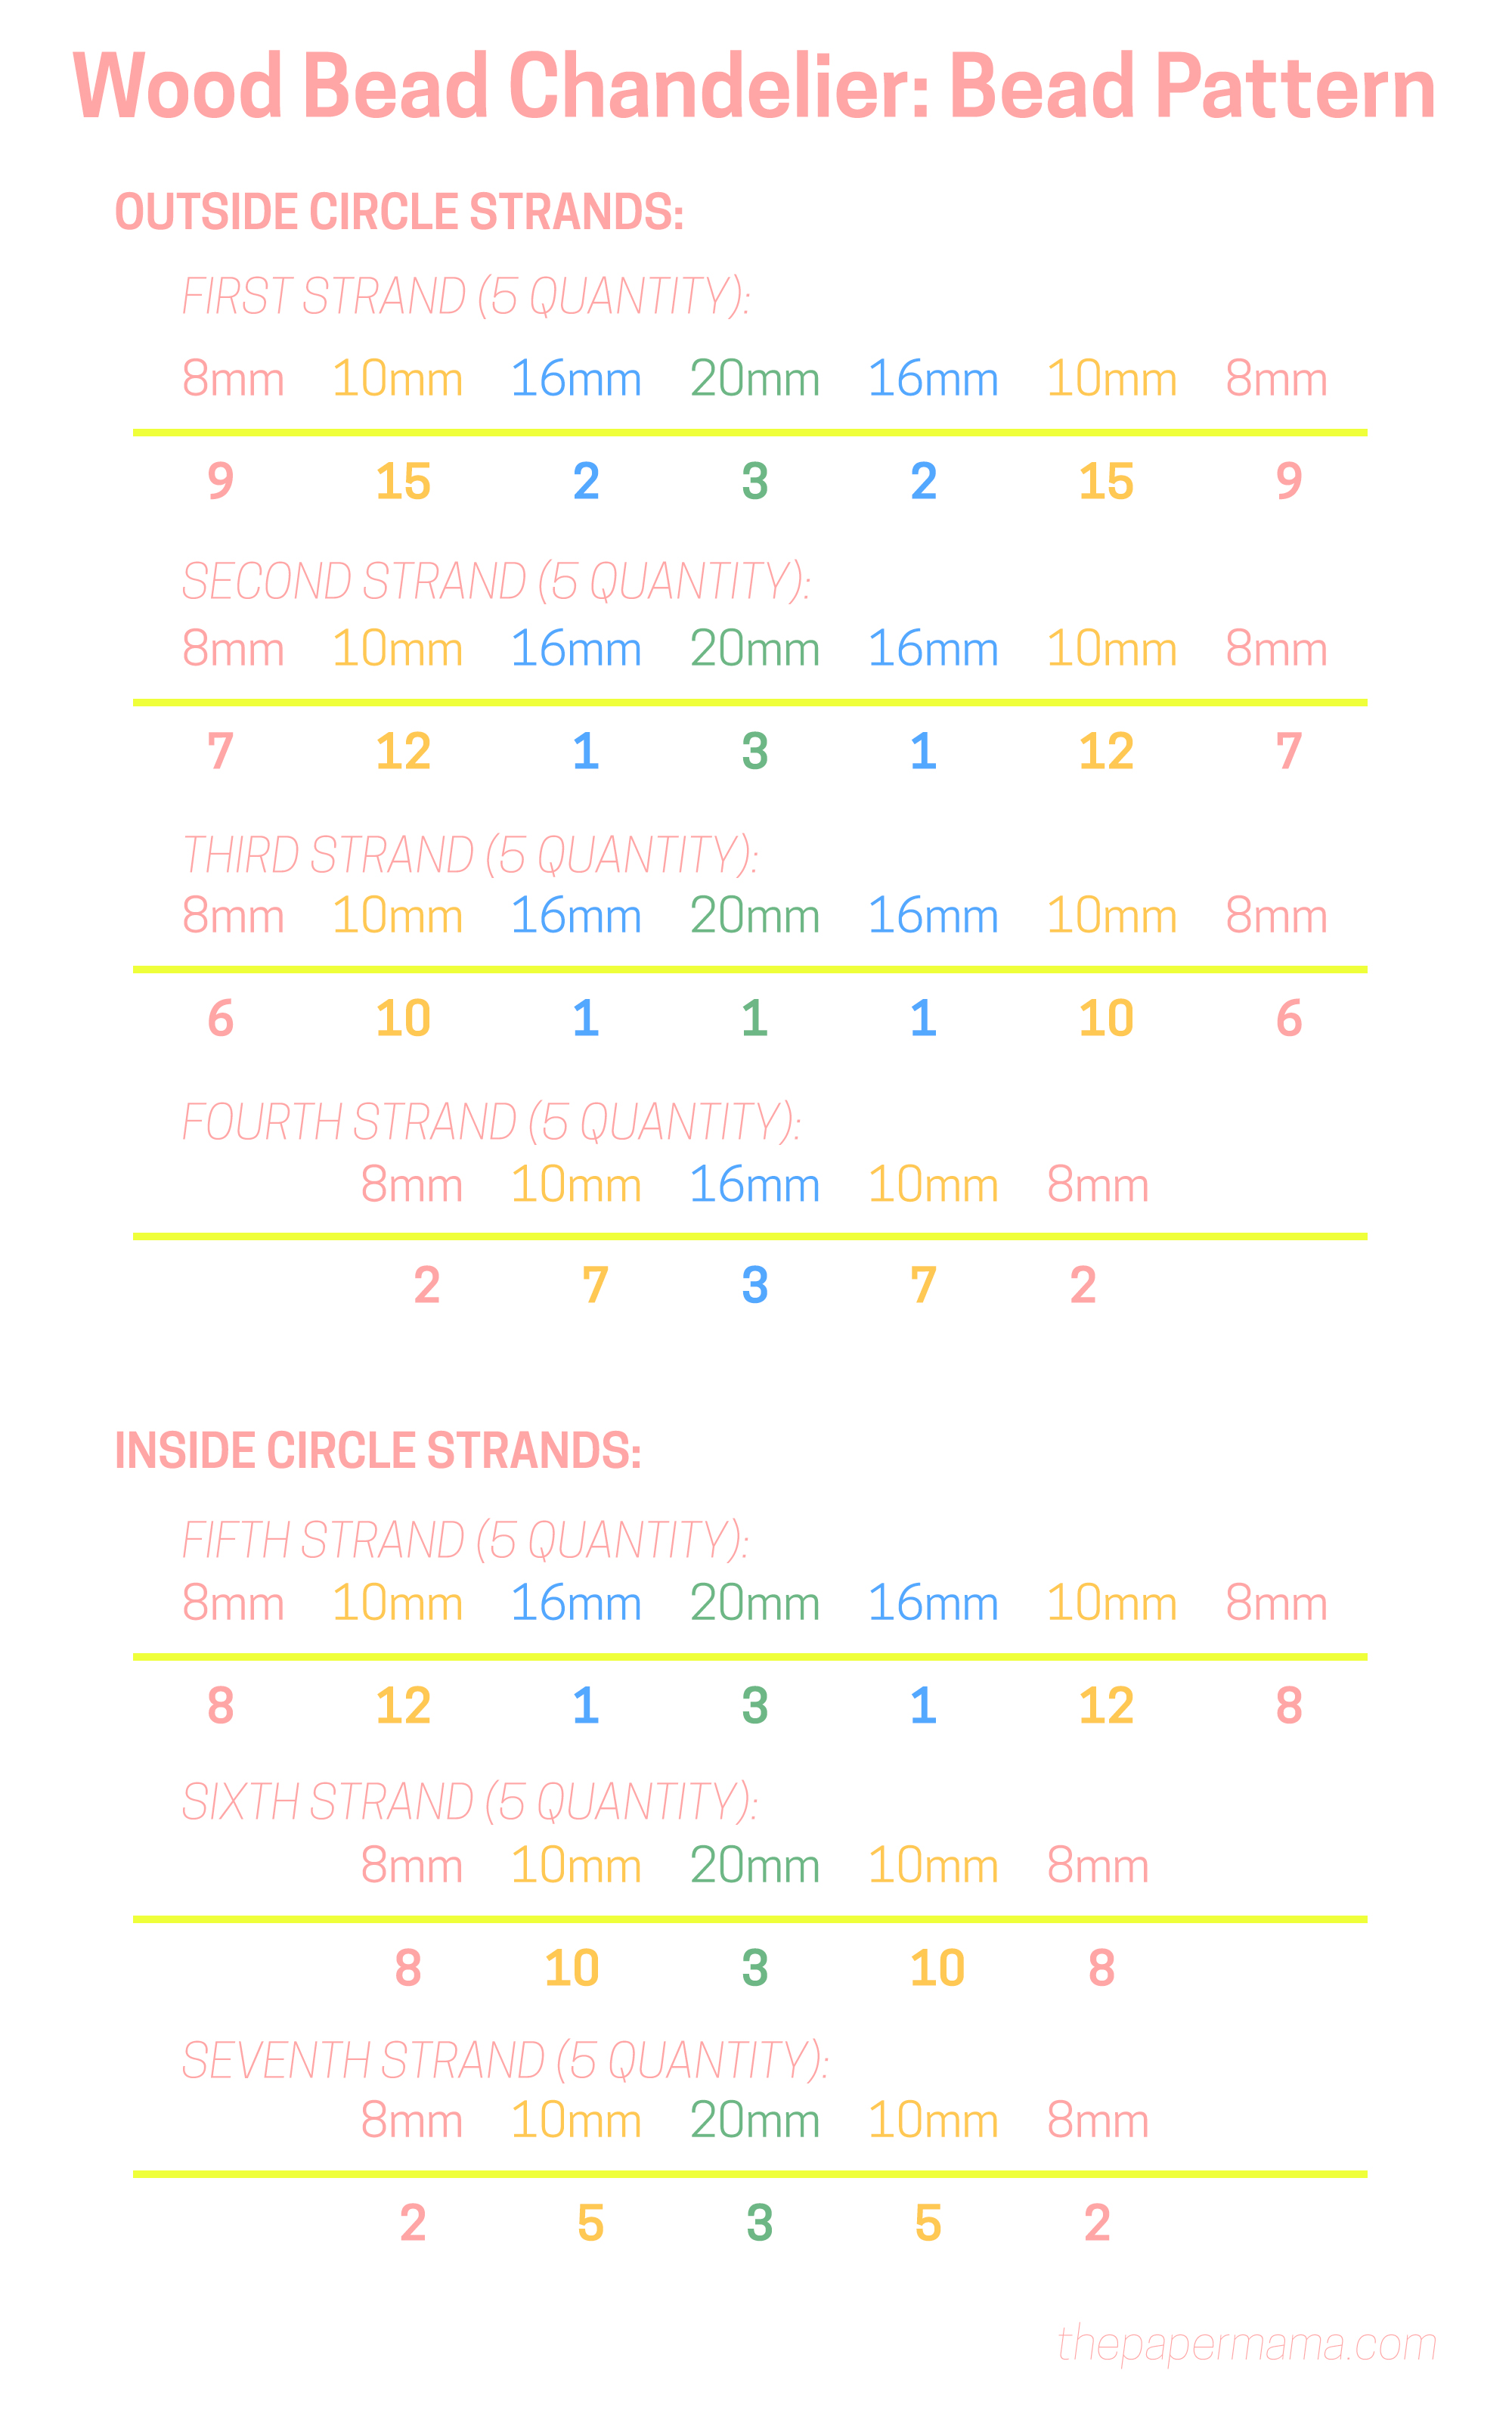
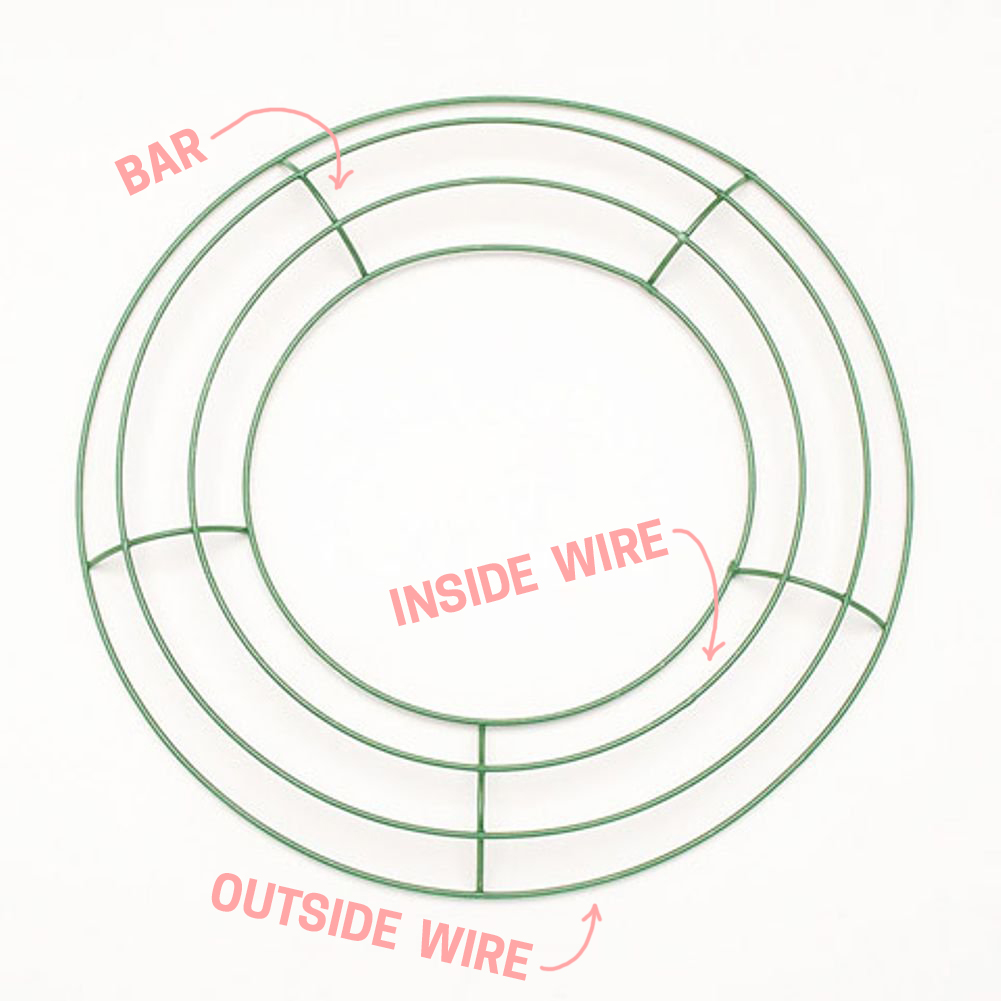
Before you get started: For this project I am calling each finished string of beads ‘strands’. To help with the beading process I made a bead strand pattern list (see image below). There are 5 quantity of seven different strand patterns for a total of 42 strands! I know it sounds like a lot, but it’s worth it when the chandelier is finished. I’ve separated the pattern list into “outside circle strands” and “inside circle strands”. The strand patterns list the bead size right above the amount needed for each size in that strand.
Step 1:
Let’s prep the wreath frame for the project. Connect 3 lengths of rope, evenly spaced, onto the inside circle of the frame. Tie the other ends of the rope into a loop (for hanging).
Find somewhere to hang up the wreath. This makes it easier to attach the strands.
Step 2:
Let’s start stringing the beads! Below I’ve shared an image of the bead patterns I created for each strand. These patterns were made based on the beads I had on hand. You can adjust these patterns to work with whatever beads you have.
Getting started with the first strand: cut a 36″ long piece of fishing wire. To prevent beads from sliding off the wire put tape on one end. Follow the pattern I made (on the image below, listed as “first strand”). Tape the other end of the fishing wire when all the beads are on, set aside. Repeat this 4 more times to have a total of 5 for the first strands.
Important note: When setting your strands aside be sure to keep them separate so they don’t turn into a tangled mess.
Repeat the step above for each of the strand patterns. Just below you’ll find a list of fishing wire lengths I cut for each strand.
- first strand (5 quantity): 36″
- second strand (5 quantity): 30″
- third strand (5 quantity): 24″
- fourth strand (5 quantity): 16″
- fifth strand (5 quantity): 30″
- sixth strand (5 quantity): 24″
- seventh strand (5 quantity): 16″
Step 3:
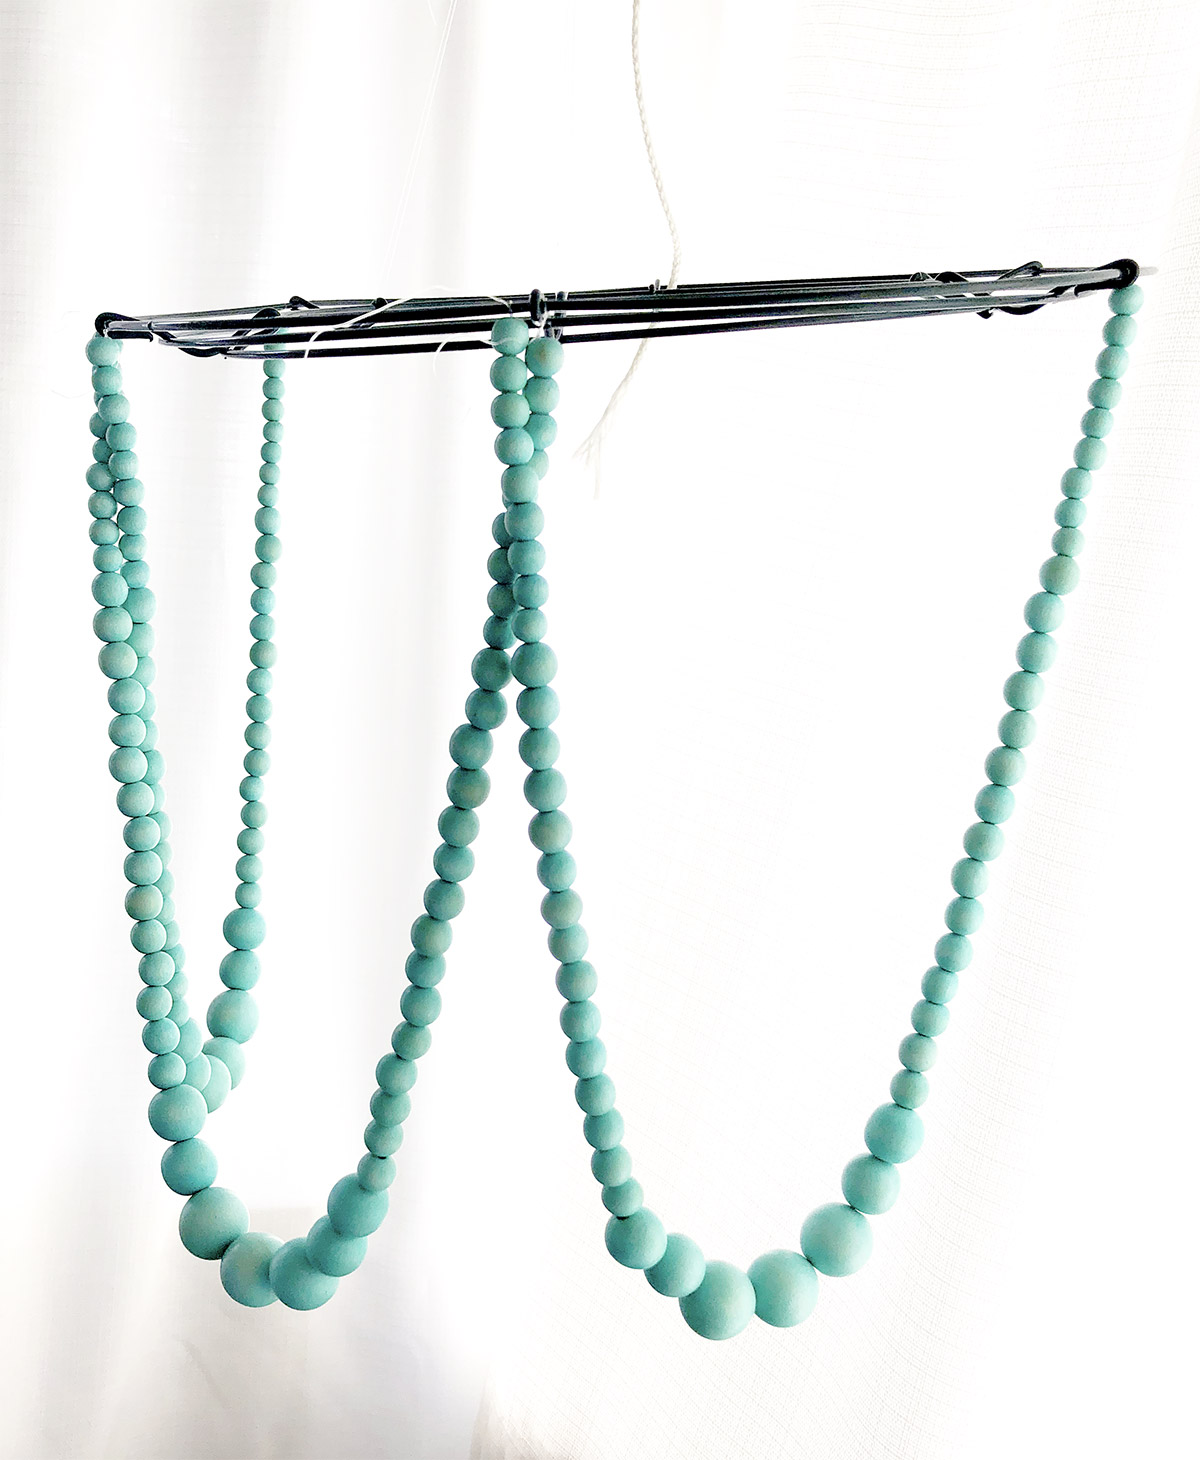
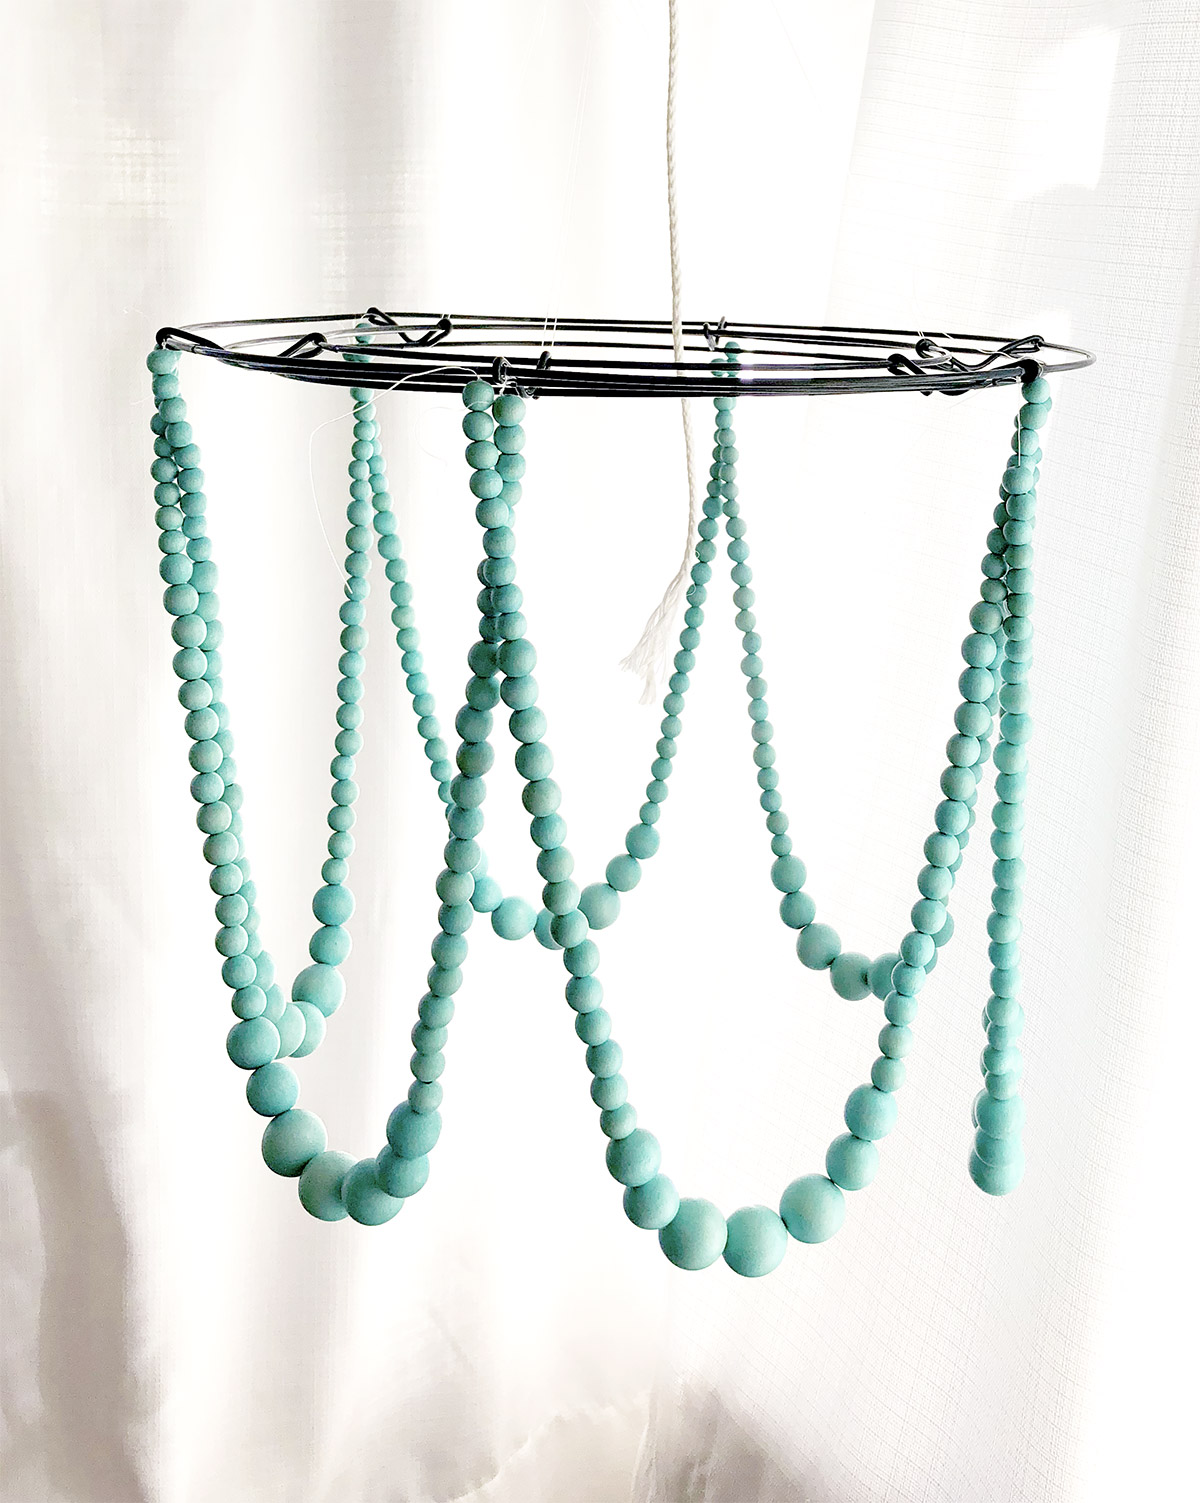
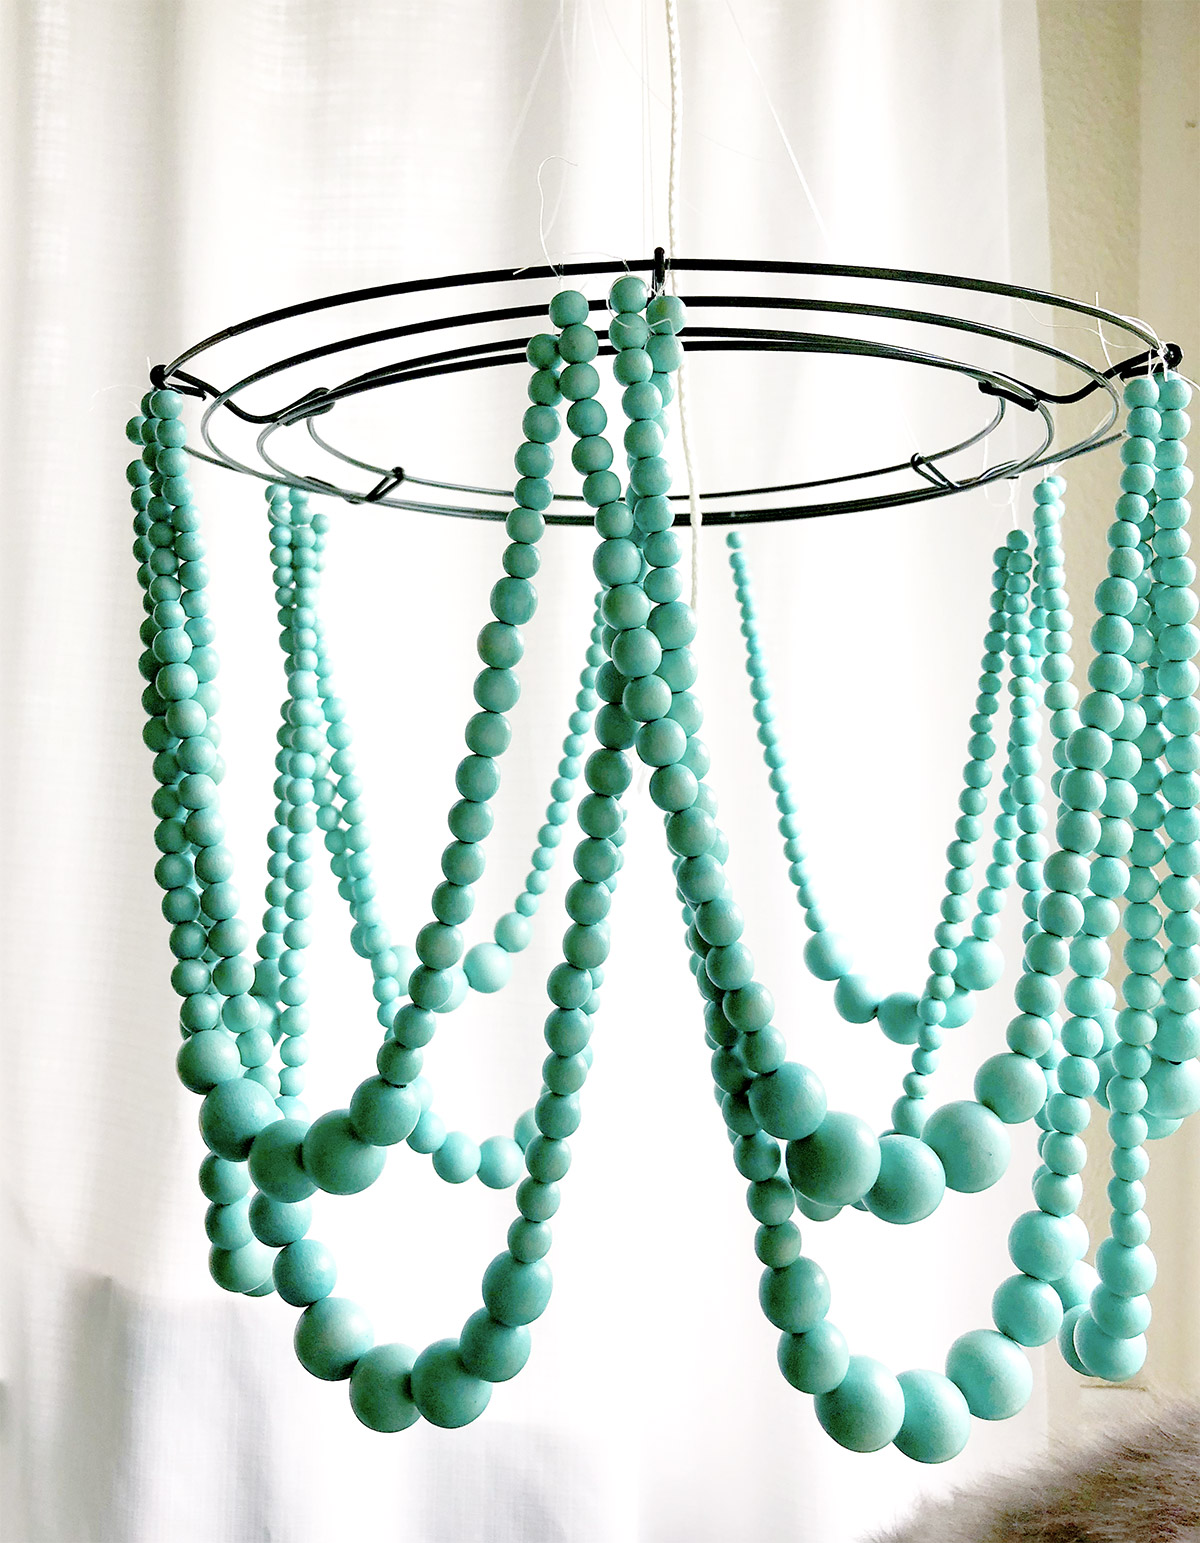
When you have 5 strands of the same pattern ready, you can start attaching them to the wreath frame. On your frame you’ll notice 5 bars connecting the circles for the wreath. I used these bars as a guide to space out my strands. Strands one, two, three, four, and seven will be connecting to the outside wire. Strands five and six will be connecting to the inside wire (see first image below for wreath info).
To attach strand patterns one through four: On the outside wire start by tying one end of a strand on the left side of one bar. Knot the opposite end, of that same strand, onto the right side of the next bar. Grab a second strand and repeat this step until you have all 5 strands, from the same pattern, attached to the frame.
Repeat the step above for bead patterns two, three and four.
To attach strand patterns 5 and 6: On the inside wire start by tying one end of a strand on the CENTER of the wire (in between two bars). Knot the opposite end, of that same strand, onto the center of the wire after the next bar. Grab a second strand and repeat this step until you have all 5 strands, from the same pattern, attached to the frame.
Repeat the step above for bead pattern six.
To attach strand pattern 7: I added this strand at the end of my project because I felt like my chandelier needed just a little something more. On the outside wire attach both ends in between the first set of strands you attached (this strand will sit centered just above the other beads on the outside wire). Grab a second strand and repeat this step until you have all 5 strands, from the same pattern, attached to the frame.
Step 4:
Now that all of your beads are attached to the wreath let’s add the metal shade! Grab the aluminum perforated metal sheet and cut out the following sizes with your metal cutter snips:
- 3′ x 8″
- 3′ x 6″
Why did I cut two sizes for one shade? I liked the finished edge of the perforated metal sheet, so I wanted it on the top and bottom of the shade. Wrap the sheet around the shade and use the galvanized wire to attach it to the wreath in 3-5 spots.
You are officially done!
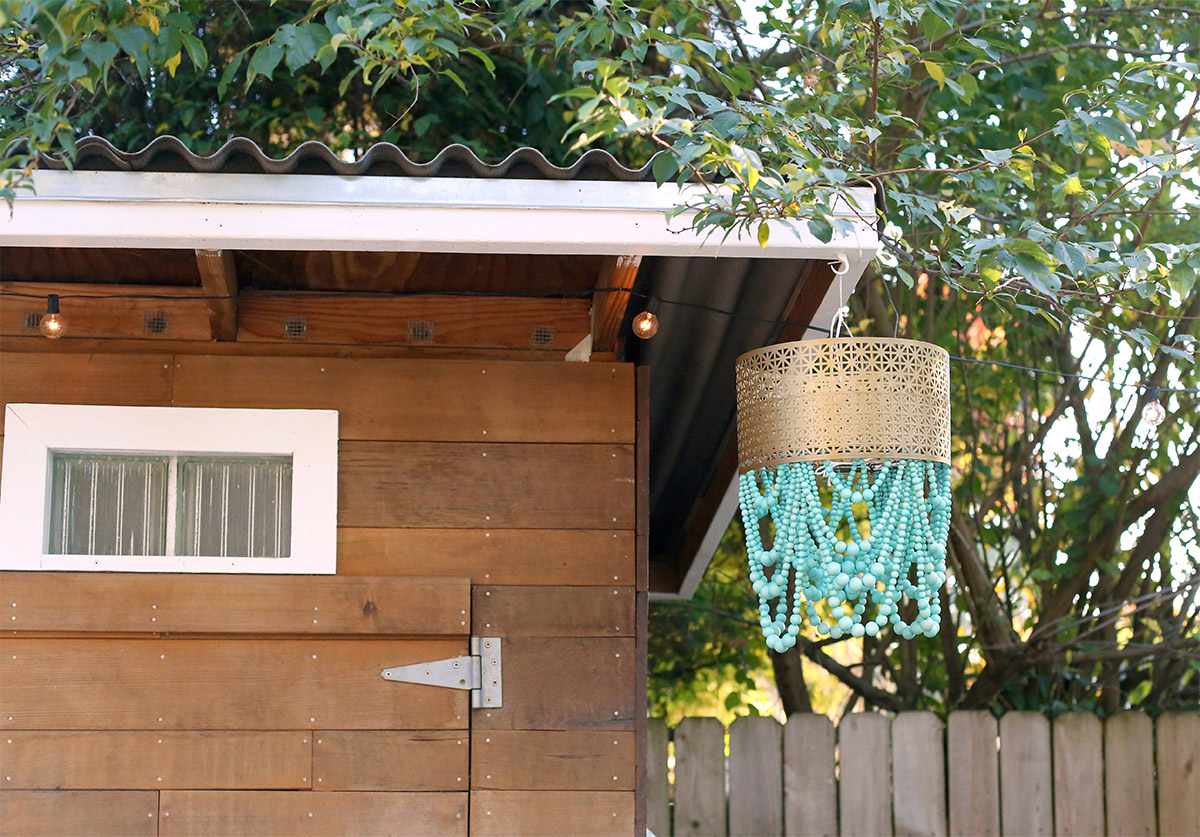
Hang this pretty wood bead chandelier in your home or somewhere in your yard. If you do hang this outside be sure to store it during winter weather so it stays nice! I made this chandelier to hang in my newly made-over backyard. You can check out the before and after photos here.
To help you start this project, or any other beaded project, The Bead Chest is providing a 15% discount code for my readers. Just use the code ‘CAPM15’ during checkout.
– Chelsey
Disclosure: The Bead Chest provided product for me to create this sponsored DIY. I may earn a small commission for my endorsement, recommendation, testimonial, and/or link to any products or services from this website. Thank you for your support.


So did you use a light fixture or flameless candle for the light? It’s beautiful and I’m thinking I need this in my bedroom.
Hi Debi,
I just hung it over a light on our string lights. You can definitely use a battery powered light, or one of those solar power outdoor lights.