Tag: tutorial
-
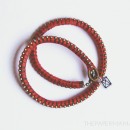
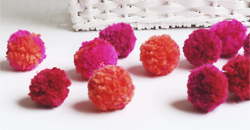
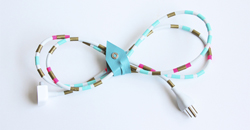
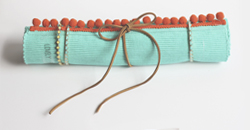
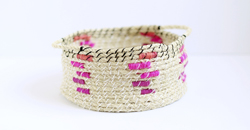
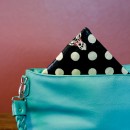
Wrapped Charm Bracelet Craft
Wrapped Charm Bracelet Craft
February 20, 2014
In January I finally gave in and made my own wrap bracelet for HP Create. I’ve been seeing these things all over the internets and I gotta say: This was a fun craft! It [...] Continue →
-

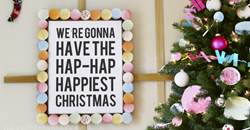
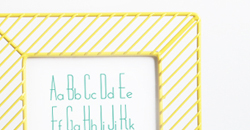
Light-up Glitter Marquee Letters on BHG
Light-up Glitter Marquee Letters on BHG
January 23, 2014
I hope you’re all having a FABulous week! I’m in Salt Lake City for Alt Summit… so crazy busy! We’re hosting a Carnival themed party here, and we shared a little party diy with [...] Continue →
-

Day 17: Christmas Card Photoshop Tutorial
Day 17: Christmas Card Photoshop Tutorial
November 19, 2013
Day 15 of my 50 DIY Days of Christmas: Christmas Card Photoshop Tutorial with Crystalyn of Flavor Pink! The Clone Stamp Tool in Photoshop is probably my FAVORITE out of ALL the tools. Did you take [...] Continue →
-
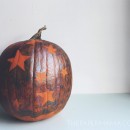
Painted Star Pumpkin for the Kid
Painted Star Pumpkin for the Kid
October 15, 2013
We love carving pumpkins, I swear, but it’s much more fun to paint a pumpkin when your kiddo is 3-years-old. I don’t quite trust her with a knife just yet. Ha! I know she [...] Continue →
-
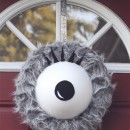
Monster Eye Wreath DIY
Monster Eye Wreath DIY
October 4, 2013
Boo! Scare the bajeebies outta your trick or treaters with my Monster Eye Wreath DIY! Actually, it’s kinda cute and I’m happy to have it on my door! It’s a cheap and easy craft, check [...] Continue →
-

HP Create!
HP Create!
September 27, 2013
//I’m a contributor to this new site, HP Create// Hello friends! I’m so excited to finally share this with you: the launch of HP Create! I’ve been working with HP for a while now [...] Continue →
-
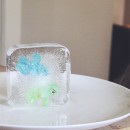
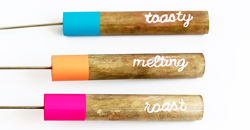
Ice Melt Project
Ice Melt Project
August 26, 2013
Need a few minutes of free time? Need to distract your kiddo? WELL, here you go: Ice Melt Project. You do need to plan this out ahead of time, but it’s worth it. This [...] Continue →
-
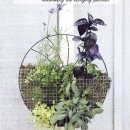
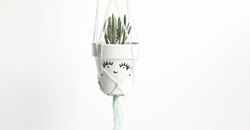
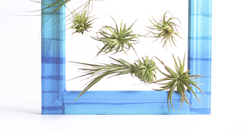
Rethinking the hanging planter
Rethinking the hanging planter
July 11, 2013
Today on the Better Homes and Gardens blog, I’m rethinking the hanging planter. I’ve made a sweet little garden for my herbs. You know what else this would be good for? Succulents. OR, ferns. [...] Continue →
-
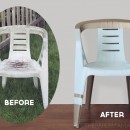
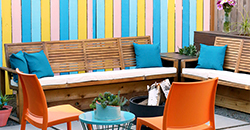
Revamped Outdoor Chair
Revamped Outdoor Chair
July 8, 2013
Well, it’s that time of year again. Time to pretend like my backyard is always clean. Ha! The truth: I live in Oregon and we have moss and all the goodness that likes to [...] Continue →
-

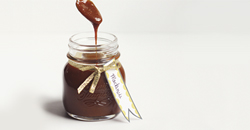
Concrete Honey Bear
Concrete Honey Bear
June 13, 2013
Uh oh. I got my hands on some concrete and sorta maybe went crazy and am making ALL the things concrete. CAN. NOT. STOP. Not all of my projects have been successful, but I’m [...] Continue →
-

Cardboard Playhouse!
Cardboard Playhouse!
April 23, 2013
This past week I took on something new… A full on DIY with my kiddo. With her help. It was hard, but we did it. I’ll chat more about working with my kiddo at [...] Continue →
-
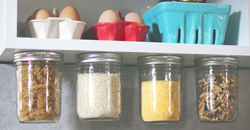
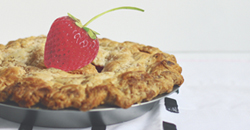
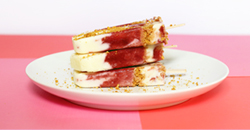
Water bath canning method… for high acid foods
Water bath canning method… for high acid foods
April 9, 2013
I realized, AFTER I shared my Apple Pie Butter recipe, that I never shared how to actually do the Water Bath Canning Method. I am, by no means, an expert… but I’ve researched a [...] Continue →
-
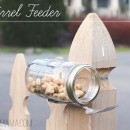
We feed the squirrels.
We feed the squirrels.
March 18, 2013
Do not feed the squirrels. Yeah, we feed those little rodents. I KNOW we probably shouldn’t… but it’s pretty cute to watch. They pretty much rule our neighborhood and I’m 90% sure they are [...] Continue →
-

“I Love You” Bunting
“I Love You” Bunting
February 7, 2013
I Love You. Something I tell my husband and daughter everyday. Why not write it out for all to see? I love glitter. A lot. Glitter sorta makes most things better. Feeling bored? Glitter. [...] Continue →
-
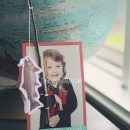
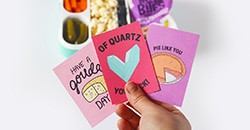
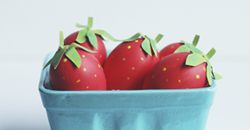
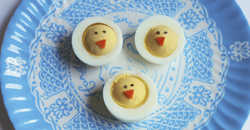
Valentine’s Card: You’re a reel catch!
Valentine’s Card: You’re a reel catch!
January 31, 2013
My kiddo is in preschool…. SO that means Valentines cards! I know I’m more excited about these cards and this whole “holiday” than Miss R, but I know she’ll get more excited on the [...] Continue →
-

Day 50? The failed DIY.
Day 50? The failed DIY.
January 11, 2013
Day 50: You may have noticed (or not) that I never reached Day 50 of my 50 DIY Days of Christmas. Well, I had a project for Day 50. All finished and ready. But, [...] Continue →
-
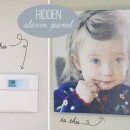
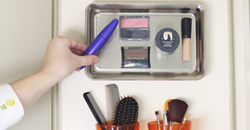
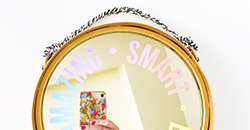
::Hidden Alarm Panel DIY:: on Better Homes and Gardens
::Hidden Alarm Panel DIY:: on Better Homes and Gardens
January 10, 2013
New year, new DIY. This is officially my FIRST DIY of the year. Yay! It was quick and easy to do, and now my alarm panel is no longer in sight. I originally found [...] Continue →
-
Day 41: Laminated Tablet Sleeve
Day 41: Laminated Tablet Sleeve
December 12, 2012
DAY 41 is brought to you by, the lovely Jill of Baby Rabies: Okay, so maybe you can’t afford to give all your friends and family new tablets for the holidays, but you can [...] Continue →
-

Day 40: Christmas Yarn Wreath
Day 40: Christmas Yarn Wreath
December 11, 2012
DAY 40 is brought to you by, the lovely Violet of Blythe Ponytail Parades: Hi! I’m Violet from Blythe Ponytail Parades and I’m here to share a fun Christmas wreath DIY! So let me start by saying [...] Continue →
-

Day 36: Happy Christmas Tree Skirt!
Day 36: Happy Christmas Tree Skirt!
December 6, 2012
Day 36: Happy Christmas! Add a little handmade skirt to your Christmas tree. I’m absolutely in love with this skirt. It makes me happy to see it under my tree. I do think it’s [...] Continue →
-

Day 31: Rudy the Red Nosed Wreath
Day 31: Rudy the Red Nosed Wreath
November 30, 2012
Day 31: Wow, I’ve past the 30-day mark for my 50 DIY Days! I can’t believe it…. Just 24 more DIY’s after this! Hee!!! Well, today I’m sharing a cute wreath for you Christmas [...] Continue →
-
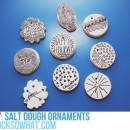
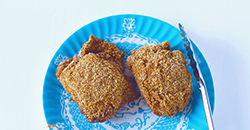
Day 27: Salt Dough Ornaments
Day 27: Salt Dough Ornaments
November 26, 2012
DAY 27 is brought to you by, the lovely Jess of IROCKSOWHAT: I have been a salt dough makin’ fool! There is nothing more festive for me than baking these special ornaments, knowing that it’ll add [...] Continue →
-

Day 26: Festival of Lights Hannukah Wreath!
Day 26: Festival of Lights Hannukah Wreath!
November 24, 2012
DAY 26 is brought to you by, the lovely Jessica of Curlyhair Curlyperson. Jessica offered to share a fantastic Hanukkah DIY with you. Enjoy: Hi everyone, jessica from Curlyhair Curlyperson here! If you don’t already know, [...] Continue →
-
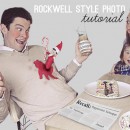
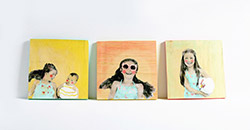
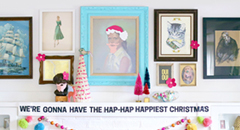
Day 24: Rockwell style Christmas photo!
Day 24: Rockwell style Christmas photo!
November 20, 2012
Day 24: Today I’m sharing how I created my Rockwell style Christmas card. It’s a bit complicated… and, WILL take some time. BUT, so worth it. Really. I absolutely love wandering back and looking [...] Continue →
-

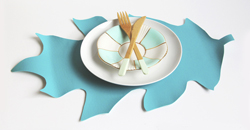
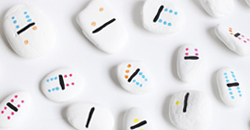
Day 18: Leaf Place Markers
Day 18: Leaf Place Markers
November 13, 2012
Day 18: Today…. leaf place markers! This will be perfect for your upcoming Thanksgiving dinner. It’s a very simple table marker DIY. What you need: leaves, a permanent marker, and a bit of string. [...] Continue →
-
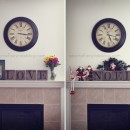
Day 17: DIY Love and Noel Blocks
Day 17: DIY Love and Noel Blocks
November 12, 2012
DAY 17 is brought to you by, the lovely Mandy of A Sorta Fairytale: Hi! My name is Mandy from A Sorta Fairytale blog! I’m here to share a fun DIY project with you all! Thanks [...] Continue →
-

Roll Up Bun
Roll Up Bun
November 8, 2012
The roll up bun. Recently: I’ve been wearing my hair like this NON stop. It’s simple. I love it. ::side note: ummm, it’s also great when you just don’t have time to wash that [...] Continue →
-
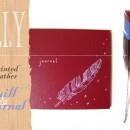
Day 12: Painted feather quill and journal
Day 12: Painted feather quill and journal
November 6, 2012
DAY 12 is brought to you by, the lovely Mel of Needle and Nest Design: Hello all you lovely readers of The Paper Mama! My name is Mel, and I perch over at the Needle and Nest [...] Continue →
-

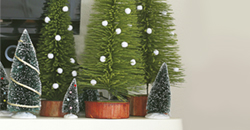
Day 11: DIY Winter Snowglobes
Day 11: DIY Winter Snowglobes
November 5, 2012
DAY 11 is brought to you by, the lovely Suzanne of Bebehblog: Hello friends! I’m currently planning my daughter’s second birthday party with a North Pole Winter Sparkle Candy Cane Fairy theme (it makes sense in [...] Continue →
-
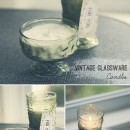
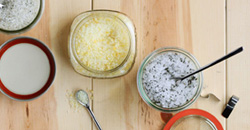
Day 6: Thrifted Glassware Candles
Day 6: Thrifted Glassware Candles
October 30, 2012
I don’t know why, but I’ve never tried making my own candles. I guess I’ve always thought, “Why make, when you can buy?” BUT, most candles don’t come in cool containers that would look [...] Continue →
-

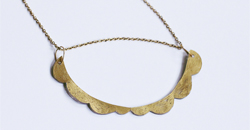
Day 1: Magical Unicorn/Narwhal Necklace!
Day 1: Magical Unicorn/Narwhal Necklace!
October 24, 2012
Hello all, Welcome to Day 1 of the 50 DIY Days of Christmas. Whew! I’m excited. I’m going to kick this series off with a little DIY gift: the Magical Unicorn/Narwhal necklace! When asked, [...] Continue →
-

Flat Iron Curls
Flat Iron Curls
September 18, 2012
I’ve seen these flat iron curls all over the internets…. and I’ve really wanted to try them out on myself, but I could not figure them out. I don’t know why, I just couldn’t. [...] Continue →
-
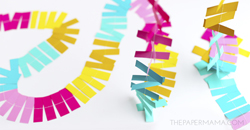
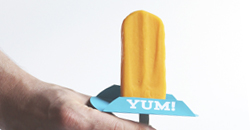
Leftover Paper: Paper Strip Garland + Treat Toppers
Leftover Paper: Paper Strip Garland + Treat Toppers
August 27, 2012
Ever wonder what to do with your leftover party invites? Hmmmm? Well, wonder no more. I have an answer. Don’t just toss them… make a paper strip garland and treat toppers! It takes barely [...] Continue →
-

Natural Dye Experiment: Turmeric
Natural Dye Experiment: Turmeric
August 23, 2012
This past week I did a little bit ‘o experimenting! I really wanted to try and dye my own fabric…. But, I didn’t want to buy the dye from the store. Soooo, I used [...] Continue →
-
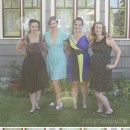
Wordless(ish) Wednesday: My Bachelorette Sister + tutorial
Wordless(ish) Wednesday: My Bachelorette Sister + tutorial
August 8, 2012
My sister will be a married lady in just a few more days! A week ago (before I went to NY) we celebrated her, got all dolled up, and hit the town. It was [...] Continue →
-

Better Homes and Gardens post: DIY Fabric Panel
Better Homes and Gardens post: DIY Fabric Panel
July 26, 2012
I have another DIY up and running over at the Better Homes and Gardens blog! Inspired by the two photos below, plus a couple of friends that live in apartments, I’m showing you how [...] Continue →
-

Dress Redo
Dress Redo
July 9, 2012
Last week I found this dress on the clearance rack for $10. I REALLY didn’t like the top portion of it (so unflattering/uncomfortable), but the bottom flowy skirt part was lovely + I loved [...] Continue →
-

Made it: Camera Straps DIY
Made it: Camera Straps DIY
July 5, 2012
AAaaaand, then there was that day I went crazy and made 2 camera straps for myself. Oh yes. One day I just decided that I could make my own camera strap! I’m slowly learning [...] Continue →
-
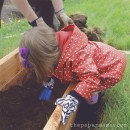
DIY: Raised garden bed for the kiddo
DIY: Raised garden bed for the kiddo
June 14, 2012
I have a new DIY up on Better Homes and Gardens! I hope you can check it out and say hello! We recently made a little garden box JUST for Ruari. She absolutely loves [...] Continue →
-

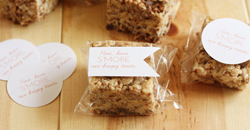
Cute little party favors!
Cute little party favors!
May 29, 2012
I mentioned last week that we had my friends wedding, bachelorette party, and shower all in one weekend… Well, the shower was at my home and I needed some quick and inexpensive favors. I [...] Continue →
-

Wordless{ish} Wednesday: How I make a GIF
Wordless{ish} Wednesday: How I make a GIF
May 23, 2012
I’ve been asked by a few lovelies to share how I create a GIF with photoshop. It’s pretty darn simple. I first learned how from my friend, Jess. With practice… an idea… and a [...] Continue →
-

Better Homes and Garden contributor!
Better Homes and Garden contributor!
May 17, 2012
Hello! I am so happy and excited to share with all you lovelies: I am officially a contributor to Better Homes and Gardens online! What? Yes. I am still in shock… I’ve been in [...] Continue →
-
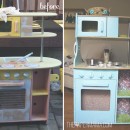
Revamped play kitchen
Revamped play kitchen
May 14, 2012
My little girl’s “new” play kitchen! I bought this goody at a local consignment shop for $25 last October/November. My intentions were to have it finished before her birthday and christmas in December. Of [...] Continue →
-
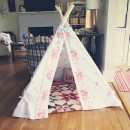
The new teepee.
The new teepee.
March 29, 2012
After about one million years I’ve finally finished Miss R’s teepee! Back in November I planned this whole teepee deal. And, because I procrastinated like to plan…. it took me 4 months to do. [...] Continue →
-

Pin-It Back hair tutorial
Pin-It Back hair tutorial
March 12, 2012
My pin-it back hair. I’ve been crafting this hair forEVER. It’s sort of always been my go-to hair-do. Basically: I pin back my bangs…. the side of my hair… a little bump in the [...] Continue →
-

Braided Volume Hair DIY
Braided Volume Hair DIY
February 23, 2012
Hello sweet friends! It’s been a couple months since I’ve added a hair experiment to the blog. I got my new camera in the mail the other day (heck yeah)… so, I thought it [...] Continue →
-
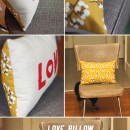
My Love Pillow
My Love Pillow
February 9, 2012
The other day I was wandering the Better Homes and Garden’s website and found this. I wanted to go for it. And, I’m so glad I did. It turned out so sweet! It’s perfect [...] Continue →
-

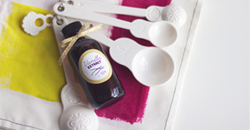
50 DIY Days with the Incomplete Works of Anselm: Homemade Vanilla Extract
50 DIY Days with the Incomplete Works of Anselm: Homemade Vanilla Extract
November 4, 2011
Day 10: Hi beautiful people! My name’s Naomi, and I blog over at the Incomplete Works of Anselm. I’m really excited to share an easy but impressive gift you can make in big batches [...] Continue →
-
50 DIY days of Christmas!!!
50 DIY days of Christmas!!!
October 21, 2011
I hope you all enjoyed my 50 DIY Days of Christmas! I certainly enjoyed sharing everything! Even though I’m terrible with math and miscalculated the time between my start date and Christmas… BUT, 45 [...] Continue →