Tag: recipe
-
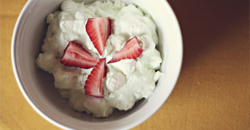
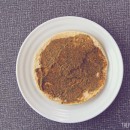
Banana Ice Cream Recipe: 3 Ways
Banana Ice Cream Recipe: 3 Ways
June 3, 2014
I have heard about people making banana ice cream, but I’ve never actually tried it until now. I mean… I will admit that I do not like the taste of bananas… at all, but [...] Continue →
-

Plastic Egg Popsicle Mold with a No Refined Sugar Popsicle Recipe
Plastic Egg Popsicle Mold with a No Refined Sugar Popsicle Recipe
April 23, 2014
Ok. Yes, Easter is over… Now what to do with all those extra plastic eggs? I saw this blogger make these, so I had to try it: Plastic Egg Popsicle. My kiddo is sort [...] Continue →
-
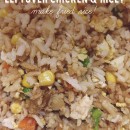
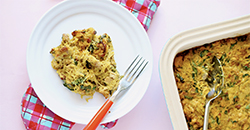
Making fried rice from leftovers! A wonderful recipe.
Making fried rice from leftovers! A wonderful recipe.
January 29, 2014
Bah! Ok, I’m not much of a cook…. I actually would rather do most anything else before I cook. It’s just not for me. I will bake and can food, but if if comes [...] Continue →
-

It’s just about that time for Bacon Hearts.
It’s just about that time for Bacon Hearts.
January 7, 2014
Way back in 2011 I made some bacon hearts. It was my budget/super romantic Valentine’s gift to the husband. I shared it on my blog and everyone loved it. They love it so much [...] Continue →
-
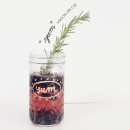
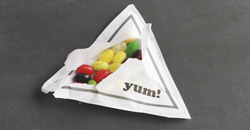
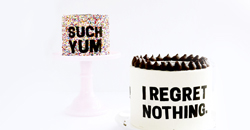
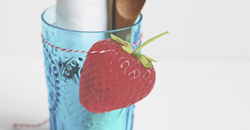
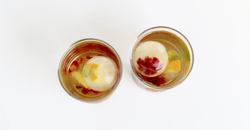
“Yum” Cup DIY with Peach Melba Bellini Cocktail!
“Yum” Cup DIY with Peach Melba Bellini Cocktail!
July 30, 2013
……………………………………………………………………………………………………………………. I love bubbly, but not the stemware you serve it in. I am super clumsy and tend to break most champagne/wine glasses. 90% of our stemware has left our home in pieces, or [...] Continue →
-

Happy Father’s Day Gift: Bacon Infused Vodka!
Happy Father’s Day Gift: Bacon Infused Vodka!
June 14, 2013
Father’s Day is this weekend, and I thought you all may need a last minute gift idea for the dad in your life. Here you go: Bacon Infused Vodka. You’re welcome. Maybe. Bacon Infused [...] Continue →
-
Cleaning without the chemicals.
Cleaning without the chemicals.
June 7, 2013
There’s something you should know about me…. I do not like to clean my house. I do it, but I don’t like it. Ooooooh… the scrubbing. I cannot stand scrubbing. Gah. How many hours [...] Continue →
-

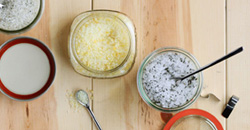
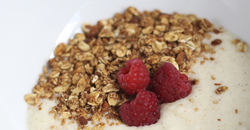
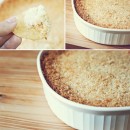
Homemade Granola (no refined sugars)
Homemade Granola (no refined sugars)
January 29, 2013
I love quick and easy foods. I’d MUCH rather just head to the store and buy something… instead of making it. I’m just not into cooking. Since I’ve had my kiddo I’ve been looking [...] Continue →
-

Day 33: Chocolate Covered Mini Oreos (with a $50 Pear Tree Greetings giveaway!)
Day 33: Chocolate Covered Mini Oreos (with a $50 Pear Tree Greetings giveaway!)
December 3, 2012
Day 33: So… these are so good. Really good. I mean, Oreo’s are good just the way they are… but add some chocolate: OMG. It makes these mini Oreo’s addictive! Plus, since they’re bite-size, [...] Continue →
-
Day 25: Jalapeño Popper Dip!
Day 25: Jalapeño Popper Dip!
November 21, 2012
Day 25: This is a recipe I shared a year and a half ago, and with Thanksgiving tomorrow…. I really think this needed to be shared AHgain. The last couple of years my hubs [...] Continue →
-

Day 22: Chocolate Covered Bacon Bites!
Day 22: Chocolate Covered Bacon Bites!
November 17, 2012
Day 22: This DIY is a favorite of mine because, well yeah… bacon covered in chocolate. I bet some of you are thinking, “What the? Nope.” Let me tell you, it’s fantastic. Things you [...] Continue →
-
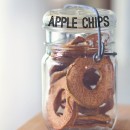
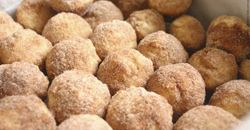
Day 9: Homemade Apple Chips
Day 9: Homemade Apple Chips
November 2, 2012
Day 9: Today I’m sharing a simple homemade apple chips recipe! Only two ingredients. These little treats are delicious! My kiddo calls them “Dessert”. They would also be perfect to give as a hostess [...] Continue →
-
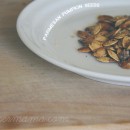
Baked Parmesan Pumpkin Seeds!
Baked Parmesan Pumpkin Seeds!
October 25, 2012
As a kid, my favorite part of carving pumpkins: eating the baked pumpkin seeds! Just add a bit of salt, bake for a bit, and you’re done! Always. But, I don’t know why we [...] Continue →
-
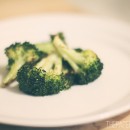
My favorite way to cook broccoli…
My favorite way to cook broccoli…
October 16, 2012
First, you’re welcome. Ha! The following is most simple way you can cook broccoli (well, maybe microwaving would be easier… boring). Anywho, it’s delicious! I’m not really a fan of cooking and this is [...] Continue →
-
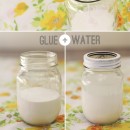
Tried it: Homemade mod podge
Tried it: Homemade mod podge
September 11, 2012
Hello sweet friends! Another Tried It post. In case you missed it before, my Tried It series is all about what actually works from Pinterest. And, hopefully I can add tips to make it [...] Continue →
-

Weed Killer Recipe – Kill Weeds Without Pesticides
Weed Killer Recipe – Kill Weeds Without Pesticides
June 7, 2012
WEED KILLER RECIPE: The other weekend my husband mentioned something weird: he was going to spray our 1 million dandelions with vinegar. Umm. Ok. I thought he was insane (well, after almost 10 years [...] Continue →
-
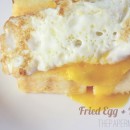
Recipe: Fried Egg + Polenta
Recipe: Fried Egg + Polenta
May 24, 2012
So, this is a recipe my husband found on the blog, The Italian Dish. She shares how to make this yummy pan fried polenta from Bill Buford’s book, Heat…. we added the fried egg. [...] Continue →
-
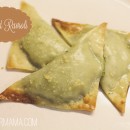
Baked Ravioli Recipe
Baked Ravioli Recipe
April 30, 2012
Oh Baked Ravioli. You really are amazing, aren’t you? Yes, you are. I was wandering an Everyday Food magazine when I found a little ravioli recipe. It was a boiled recipe… not baked and [...] Continue →
-
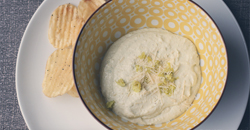
Chickpea Spread
Chickpea Spread
April 24, 2012
Since January…. my husband and I have been exploring the world of meat-free living. Just exploring. If you know me…. I am like the last person on the planet to ever give up meat. [...] Continue →
-
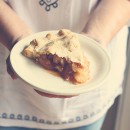
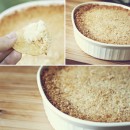
Delicious Apple Pie
Delicious Apple Pie
April 3, 2012
{My Style://Sweater: f21//necklace: f21//pants: f21//halloween socks: Target//Boots: f21} We celebrated my sweet grammy’s birthday this last Sunday. I made a pie for her birthday treat. I must say… it was delicious. Oh goodness. So [...] Continue →
-
Baked Penne with Beef Recipe
Baked Penne with Beef Recipe
February 14, 2012
Thank you to Kraft Foods for offering me the opportunity to recreate a recipe with PHILADELPHIA Cooking Creme. Please click here to learn more about all the PHILADELPHIA Cooking Creme flavors and recipes. …………………………………………………………………………………………………………………………………………………………… [...] Continue →
-

The Original Bacon Hearts Recipe
The Original Bacon Hearts Recipe
February 4, 2012
Update July 2019: Back in 2011, I shared this Bacon Hearts Recipe with my readers for a budget Valentine’s Day idea, and everyone loved it. It’s been all over the internet and even featured [...] Continue →
-

50 DIY Days with the Incomplete Works of Anselm: Homemade Vanilla Extract
50 DIY Days with the Incomplete Works of Anselm: Homemade Vanilla Extract
November 4, 2011
Day 10: Hi beautiful people! My name’s Naomi, and I blog over at the Incomplete Works of Anselm. I’m really excited to share an easy but impressive gift you can make in big batches [...] Continue →
-
Sneaky Veggies Spaghetti Recipe for Picky Eaters
Sneaky Veggies Spaghetti Recipe for Picky Eaters
October 27, 2011
Thanks to Plum Organics for sponsoring my post about tips for baby feeding magic. What if you let baby choose what’s for dinner? Check out their cute “Quest for Yum!” video and see what [...] Continue →
-
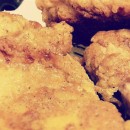
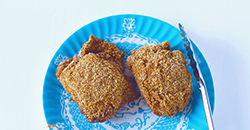
Delicious Fried Chicken Recipe
Delicious Fried Chicken Recipe
October 20, 2011
Look! It’s proof I cooked something once! See, there’s tongs in my hand… I’m standing by a stove! Proof! ;D In my little family I am not the cook (yes! ::karate chop::). I don’t [...] Continue →
-

The Best Chocolate Chip Cookie Recipe Ever (with an Oreo center)
The Best Chocolate Chip Cookie Recipe Ever (with an Oreo center)
September 29, 2011
I’ve mentioned the hubby’s chocolate chip cookie recipe on my blog a few times before… and, I keep threatening to share it with you all! AND, I FINALLY did it! I’m sharing it with [...] Continue →
-
Jalapeño Popper Dip Recipe
Jalapeño Popper Dip Recipe
July 14, 2011
Another recipe brought to you by my handsome husband. I know you can probably find about a million recipes of this dip around the internet, but I didn’t even know this Jalapeño Poppers came in dip [...] Continue →
-
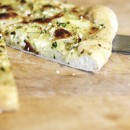
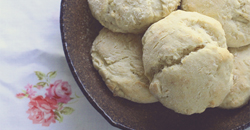
Homemade Pizza Dough and Potato Pizza Recipe
Homemade Pizza Dough and Potato Pizza Recipe
July 5, 2011
Mike’s been making this homemade bread and it’s so simple and delicious. This homemade bread can also be used for this Homemade Pizza Dough and Potato Pizza Recipe. It really makes delicious pizza. We did a [...] Continue →
-

An Experiment: Butter-Free Chocolate Chip Cookies
An Experiment: Butter-Free Chocolate Chip Cookies
May 18, 2011
These cookies are a recipe that my husband originally adapted from one of his favorite cookbooks, The Ultimate Cookbook. They are normally FULL of butter and a ton of sugar, but I didn’t really want that [...] Continue →
-

The Original Bacon Hearts Recipe
The Original Bacon Hearts Recipe
February 16, 2011
Update July 2019: Back in 2011, I shared this Bacon Hearts Recipe with my readers for a budget Valentine’s Day idea, and everyone loved it. It’s been all over the internet and even featured [...] Continue →