Tag: gift
-
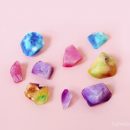
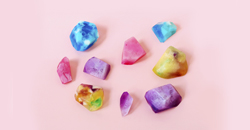
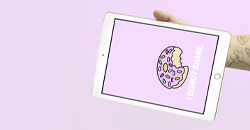
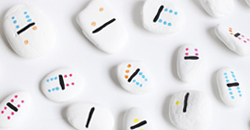
Pretty Gemstone Soap DIY!
Pretty Gemstone Soap DIY!
July 1, 2016
DIY Gemstone Soap! One of my favorite trends right now: gemstone everything! People are crafting anything they can find into these sparkly creations. So, a couple weeks ago I picked up a gem soap [...] Continue →
-
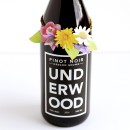
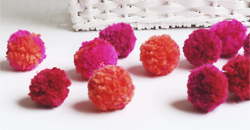
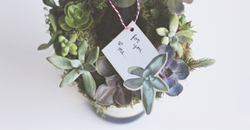
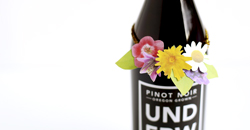
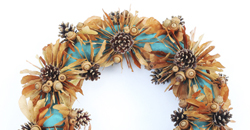
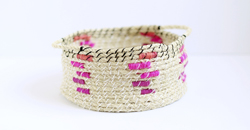
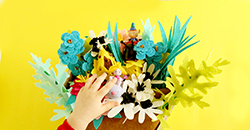
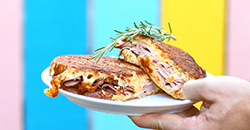
Mini Wreath Gift Decoration DIY
Mini Wreath Gift Decoration DIY
February 9, 2016
I know it’s still Winter, but I thought some of us could use a bit of Spring color in our lives. I have some flowers that I photographed during warmer weather and I used [...] Continue →
-
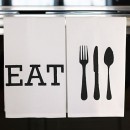
Day 42: Stenciled Kitchen Towels DIY
Day 42: Stenciled Kitchen Towels DIY
December 9, 2014
Day 42: Stenciled Kitchen Towels I love the holiday season for lots of reasons. One of them is that it gives me the chance to make all kinds of things: decorations, treats, and, of course, [...] Continue →
-
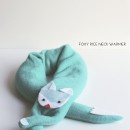
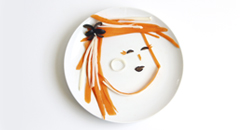
Day 34: Foxy Rice Neck Warmer
Day 34: Foxy Rice Neck Warmer
November 20, 2014
Day 34: Foxy Rice Neck Warmer Have you noticed how chilly it is outside? I have too. We’ve turned on the heat in out home, but sometimes I’d like a bit more warmth. This [...] Continue →
-
Day 32: Cute Free Printable Christmas Gift Tags!
Day 32: Cute Free Printable Christmas Gift Tags!
November 18, 2014
Day 32: Cute Free Printable Christmas Gift Tags! Way back when I started this ‘ol 50 DIY Days of Crafts, my friend Jess, from IROCKSOWHAT, made these super cute gift tags for you to [...] Continue →
-
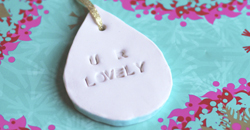
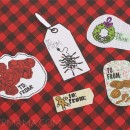
Day 31: Polymer Clay Gift Tags (with printable patterns)
Day 31: Polymer Clay Gift Tags (with printable patterns)
November 17, 2014
Day 31: Polymer Clay Gift Tags (with printable patterns) Today I wanted to share some lovely polymer clay gift tags with you! This little cuties double as gift tags and ornaments. Attach this fun [...] Continue →
-
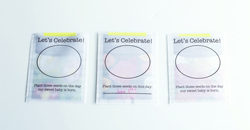
Day 27: Fruit and Berry Gift Tags (free printable)
Day 27: Fruit and Berry Gift Tags (free printable)
November 11, 2014
Day 27: Fruit and Berry Gift Tags (free printable) I think we’ve already established that I love paper and making printables, but I just need to say it again: I love paper and making [...] Continue →
-
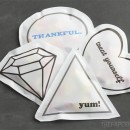
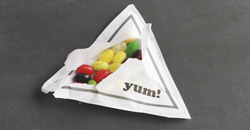
Day 26: Treat Yourself Sewn Paper Treat Bags
Day 26: Treat Yourself Sewn Paper Treat Bags
November 10, 2014
Day 26: Treat Yourself Sewn Paper Treat Bags You guys. Thanksgiving is less than 20 days away. I love this holiday because you get a four-day vacation with the family and ALL of the [...] Continue →
-
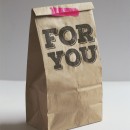
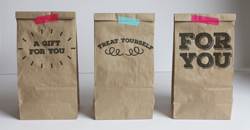
Day 8: Printable Paper Sack Gift Bags
Day 8: Printable Paper Sack Gift Bags
October 15, 2014
Day 8: Printable Paper Sack Gift Bags I really love this creation. Printing on things that aren’t normally a printable item: awesome. I love it. These bags are the perfect lazy-person gift wrap. I [...] Continue →
-
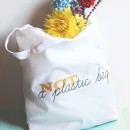
“Not A Plastic Bag” Cloth Bag DIY and Free Printable
“Not A Plastic Bag” Cloth Bag DIY and Free Printable
August 5, 2014
No plastic bags here in this home. Just kidding, it’s hard to avoid plastic bags when you shop. We do try our best to remember to bring cloth bags when we go to stores, [...] Continue →
-
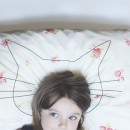
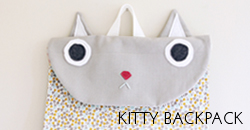
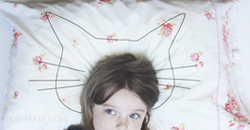
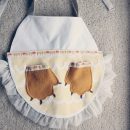
Cat Head Pillowcase DIY
Cat Head Pillowcase DIY
July 16, 2014
Do you ever get a great idea, then completely forget about it until you stumble upon some notes from over a year ago? Yeah, me too. Ha! I had this idea to make a cat head [...] Continue →
-
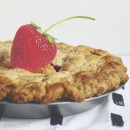
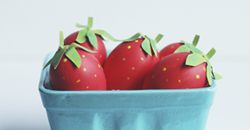
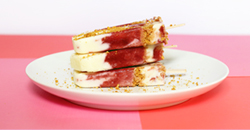
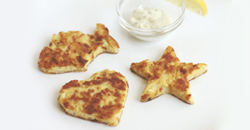
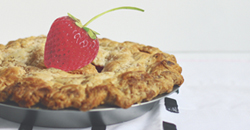
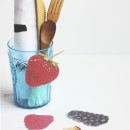
Paper Berry Pie Decorations (with free printables)
Paper Berry Pie Decorations (with free printables)
July 9, 2014
It’s summertime, a.k.a. fruit pie time! I love pie. I love the slightly salty crust with the sweet and tart fruit. Mmmmm, seriously so good. The thing with pies, it’s hard to tell what [...] Continue →
-
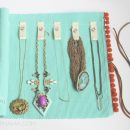
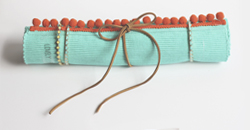
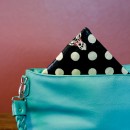
DIY Jewelry Roll
DIY Jewelry Roll
June 18, 2014
I travel quite a but, so that’s why I really wanted to make this DIY Jewelry Roll. I typically put all my jewelry in a little pouch, then spend about 15 minutes detangling the [...] Continue →
-

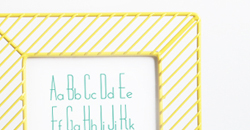
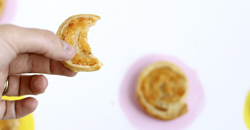
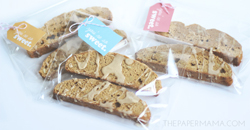
Alphabet Cookies Gift
Alphabet Cookies Gift
May 19, 2014
A couple weeks ago I made some really cute alphabet cookies for the HP Create blog. I don’t own any alphabet cookie cutters, I just printed out a really lovely alphabet and used a [...] Continue →
-
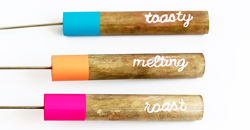
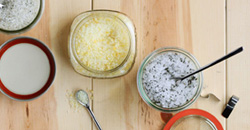
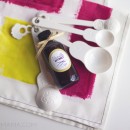
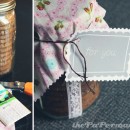
DIY Flavored Sea Salts
DIY Flavored Sea Salts
April 7, 2014
It’s always fun to give homemade gifts, especially when they’re food related, even more especially when they’re very fancy and very gourmet. Flavored sea salts are one of those great little gifts that don’t [...] Continue →
-
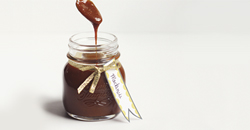
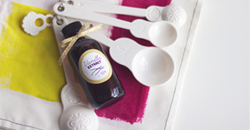
Vanilla Extract Recipe + Free Label Printable
Vanilla Extract Recipe + Free Label Printable
March 18, 2014
Can you really call something a recipe if it’s only 2 ingredients? Well, Vanilla Extract is surprisingly easy to make. Just two things you need: alcohol and vanilla beans. Yup. You wouldn’t know that [...] Continue →
-

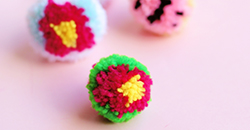
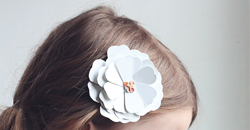
Paper Cosmo Flower Hair Clip or Gift Bow! Comes with a free printable!
Paper Cosmo Flower Hair Clip or Gift Bow! Comes with a free printable!
March 14, 2014
Way back when… before I was married and before the kid… I made a lot of paper goodies. I made paper crowns to sell to brides for their bridal showers, and I also made [...] Continue →
-
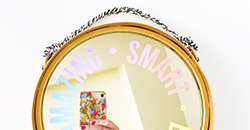
No One Belongs Here More Than You Do. Meet Make Do goodies.
No One Belongs Here More Than You Do. Meet Make Do goodies.
March 12, 2014
“No one belongs here more than you.” It’s officially been 2 weeks since I wandered down to Palm Springs for the fabulous Meet Make Do retreat. I’ve thought about that trip each and every [...] Continue →
-
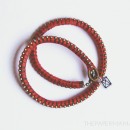
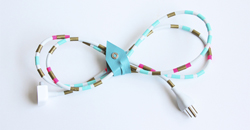
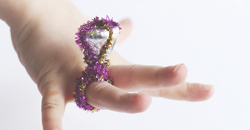
Wrapped Charm Bracelet Craft
Wrapped Charm Bracelet Craft
February 20, 2014
In January I finally gave in and made my own wrap bracelet for HP Create. I’ve been seeing these things all over the internets and I gotta say: This was a fun craft! It [...] Continue →
-
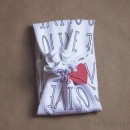
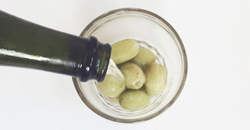
Olive Juice Tea Towel Gift Wrap
Olive Juice Tea Towel Gift Wrap
January 30, 2014
I love you, or “Olive Juice” (as my 9-year-old self used to say). Add a cute little touch to your Valentine’s gift this year with an Olive Juice tea towel. Just wrap it around [...] Continue →
-
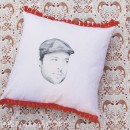
Silly Valentine Pillow DIY
Silly Valentine Pillow DIY
January 17, 2014
If you’re in my family… chances are you’ll eventually receive a weird gift from me. It just so happens that my brother’s girlfriend just celebrated a birthday, so I thought I’d make a little [...] Continue →
-
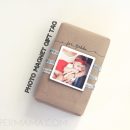
Day 31: Photo Magnet Gift Tags
Day 31: Photo Magnet Gift Tags
December 6, 2013
Day 31 of my 50 DIY Days of Christmas: Photo Magnet Gift Tags! Instead of the typical gift tag, add an extra goody to your gifts. These Photo Magnets are perfect for gifts from [...] Continue →
-
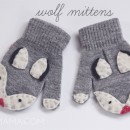
Day 10: Wolf Mittens
Day 10: Wolf Mittens
November 8, 2013
Day 10 of my 50 DIY Days of Christmas: Wolf Mittens. Woof! I made these for my kiddo. It’s getting colder and we gotta keep those little hands warm. Instead of boring little grey gloves, [...] Continue →
-
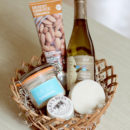
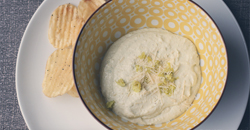
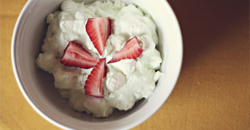
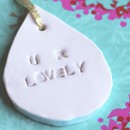
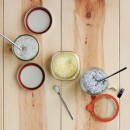
Homemade Bath Soak
Homemade Bath Soak
November 4, 2013
This post is sponsored by HP. I never realized how simple it is to make a homemade bath soak until recently. With Mother’s Day coming up I thought this would be a wonderful gift [...] Continue →
-
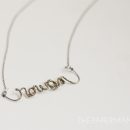
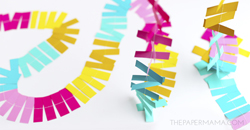
Day 2: Glitter Wire Name
Day 2: Glitter Wire Name
October 29, 2013
Day 2 of 50 DIY Days of Christmas: Glitter Wire Name! My kiddo has been showing an interest in how the mail system works, so I thought I’d set up some pen pals with her! [...] Continue →
-
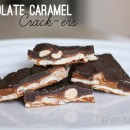
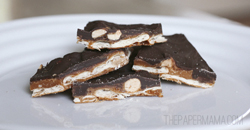
Chocolate Caramel Crack-ers
Chocolate Caramel Crack-ers
May 3, 2013
I love sweet awesome candy goodness, but I like to pretend that I don’t want to eat it ALL the time (especially when my kiddo is looking). Admit it… you’ve snuck the candy you JUST told [...] Continue →
-
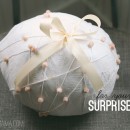
Surprise Ball: For Your Dude
Surprise Ball: For Your Dude
February 25, 2013
I have been struggling with what to name this thing… I mean. How do I even name this without it sounding dirty? It was hard, but I think I did it. Say hello to [...] Continue →
-

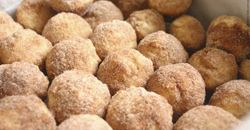
A lovely Valentine’s Day!
A lovely Valentine’s Day!
February 15, 2013
We started the day with preschool, followed by a trip to the bakery (see above), and headed home. We found a wonderful bunch of goodies when we came home (turns out my man came [...] Continue →
-
Day 41: Laminated Tablet Sleeve
Day 41: Laminated Tablet Sleeve
December 12, 2012
DAY 41 is brought to you by, the lovely Jill of Baby Rabies: Okay, so maybe you can’t afford to give all your friends and family new tablets for the holidays, but you can [...] Continue →
-

Day 33: Chocolate Covered Mini Oreos (with a $50 Pear Tree Greetings giveaway!)
Day 33: Chocolate Covered Mini Oreos (with a $50 Pear Tree Greetings giveaway!)
December 3, 2012
Day 33: So… these are so good. Really good. I mean, Oreo’s are good just the way they are… but add some chocolate: OMG. It makes these mini Oreo’s addictive! Plus, since they’re bite-size, [...] Continue →
-
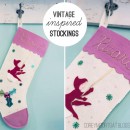
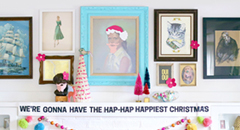
Day 29: Vintage Inspired Stockings!
Day 29: Vintage Inspired Stockings!
November 28, 2012
DAY 29 is brought to you by, the lovely Corey of the Corey Moortgat blog: Hello, Paper Mama readers! I’m Corey, and I’m here to show you how to make a vintage-inspired felt Christmas stocking. I’m obsessed [...] Continue →
-

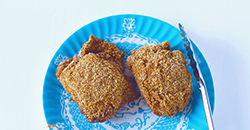
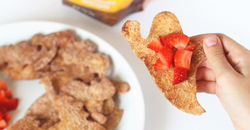
Day 22: Chocolate Covered Bacon Bites!
Day 22: Chocolate Covered Bacon Bites!
November 17, 2012
Day 22: This DIY is a favorite of mine because, well yeah… bacon covered in chocolate. I bet some of you are thinking, “What the? Nope.” Let me tell you, it’s fantastic. Things you [...] Continue →
-
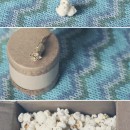
Day 20: Popcorn Packaging!
Day 20: Popcorn Packaging!
November 15, 2012
Day 20: Popcorn packaging! WHA? That’s right. It’s almost time. Almost time to send your packages out for the holidays! All you need: a box, a jar of popcorn kernels, and something to send. [...] Continue →
-
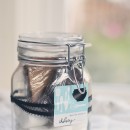
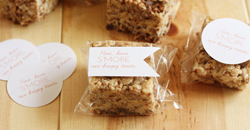
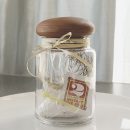
Day 16: S’mores in a Jar
Day 16: S’mores in a Jar
November 10, 2012
Day 16: Yup. Simple as that. S’mores in a jar! The perfect hostess gift. Pop some marshmallows, chocolate, and graham crackers into a jar. Add a customizable sticker, from pear tree greetings. Bam! There [...] Continue →
-
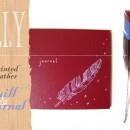
Day 12: Painted feather quill and journal
Day 12: Painted feather quill and journal
November 6, 2012
DAY 12 is brought to you by, the lovely Mel of Needle and Nest Design: Hello all you lovely readers of The Paper Mama! My name is Mel, and I perch over at the Needle and Nest [...] Continue →
-
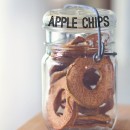
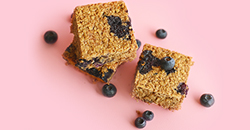
Day 9: Homemade Apple Chips
Day 9: Homemade Apple Chips
November 2, 2012
Day 9: Today I’m sharing a simple homemade apple chips recipe! Only two ingredients. These little treats are delicious! My kiddo calls them “Dessert”. They would also be perfect to give as a hostess [...] Continue →
-
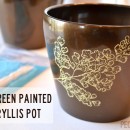
Day 8: Silkscreen Painted Amaryllis Pot
Day 8: Silkscreen Painted Amaryllis Pot
November 1, 2012
DAY 8 is brought to you by, the lovely Emily of Peck Life: The fabulous Martha Stewart recently came out with a line of glass painting supplies, and after seeing some of the possibilities, I [...] Continue →
-
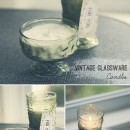
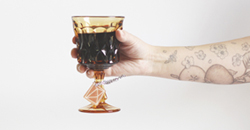
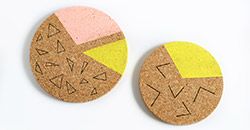
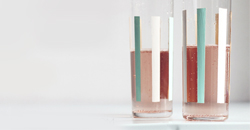
Day 6: Thrifted Glassware Candles
Day 6: Thrifted Glassware Candles
October 30, 2012
I don’t know why, but I’ve never tried making my own candles. I guess I’ve always thought, “Why make, when you can buy?” BUT, most candles don’t come in cool containers that would look [...] Continue →
-
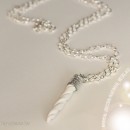
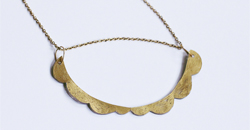
Day 1: Magical Unicorn/Narwhal Necklace!
Day 1: Magical Unicorn/Narwhal Necklace!
October 24, 2012
Hello all, Welcome to Day 1 of the 50 DIY Days of Christmas. Whew! I’m excited. I’m going to kick this series off with a little DIY gift: the Magical Unicorn/Narwhal necklace! When asked, [...] Continue →
-

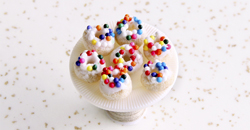
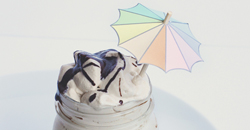
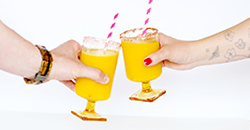
Cute little party favors!
Cute little party favors!
May 29, 2012
I mentioned last week that we had my friends wedding, bachelorette party, and shower all in one weekend… Well, the shower was at my home and I needed some quick and inexpensive favors. I [...] Continue →
-
DIY Sea Monkey Kit
DIY Sea Monkey Kit
May 7, 2012
DIY Sea Monkey Kit: I was always fascinated with these little creatures when I was little. I loved them. But, I didn’t like the little plastic containers they came in. For some reason I [...] Continue →
-
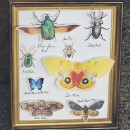
Paper Insect Collection tutorial
Paper Insect Collection tutorial
April 23, 2012
WARNING… don’t scroll down if you don’t like bugs. Hee! Say hello to my bug collection! My Paper Insect Collection! I love this thing… when I first described this idea to my mom… she [...] Continue →
-
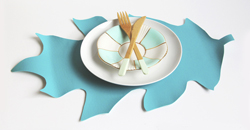
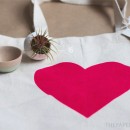
Kid’s Placemat Apron Tutorial
Kid’s Placemat Apron Tutorial
March 6, 2012
Last Friday I was wandering the town with Miss R…. when, I realized that Coral’s birthday party was coming up and I hadn’t purchased a present for her yet. SO…. since one of my [...] Continue →
-
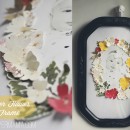
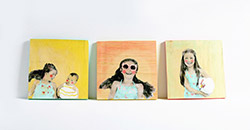
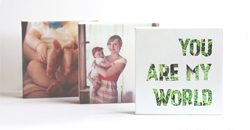
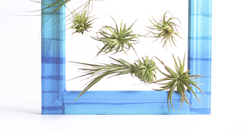
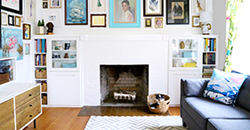
Paper Flower Frame: with free printables to make your own
Paper Flower Frame: with free printables to make your own
March 1, 2012
I was wandering a local antique shop the other day…. and, I saw a sweet little image of a child framed by some pressed flowers. It looked like it was very very old. The [...] Continue →
-
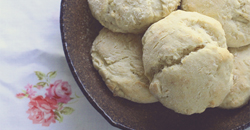
50 DIY days: The gift… of store bought cookies.
50 DIY days: The gift… of store bought cookies.
November 24, 2011
Day 24: Store bought cookies in a jar! Yup! I’m not beneath it…. I will gladly purchase a premade item… and package it up all pretty like to give to my friends and family! [...] Continue →