Tag: diy
-

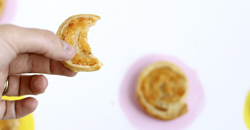
Ice Cream Cone Elbow Patches
Ice Cream Cone Elbow Patches
July 21, 2014
I am in love with these cute elbow patches from the lovely Studio DIY. I had to share them with all of you. Head on over to her blog to find the full tutorial! I feel [...] Continue →
-
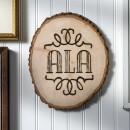
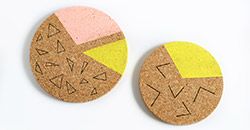
Lovely project idea: Wood Burning Décor DIY Monogram Plaque
Lovely project idea: Wood Burning Décor DIY Monogram Plaque
July 17, 2014
Have you ever tried wood burning? My friend, Amy from Mod Podge Rocks, tried it out and made a lovely Wood Burning Décor DIY project on a cut of wood for the HP Create blog. [...] Continue →
-

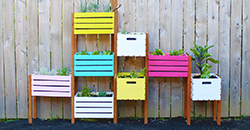
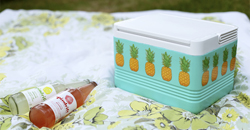
Colorful Patio DIY’s!
Colorful Patio DIY’s!
April 17, 2014
Today I want to share a few colorful patio DIY’s with you! Our backyard patio is so bleh. and I’m hoping these colorful creations will inspire me to finally fix up our backyard space. [...] Continue →
-

Favorites: Fun Kid Easter DIY’s!
Favorites: Fun Kid Easter DIY’s!
April 11, 2014
I don’t know about you, but this was a busy week for me. So much going on and I gotta say: thank goodness it’s Friday. I get to sleep in tomorrow morning! Yay! Ha. [...] Continue →
-
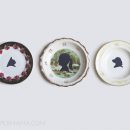
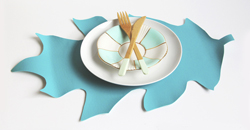
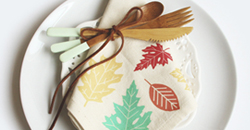
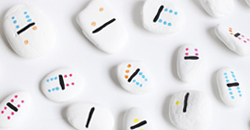
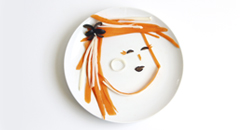
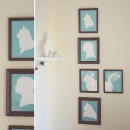
Pretty Silhouette Plates DIY
Pretty Silhouette Plates DIY
April 2, 2014
A lovely new DIY for you guys! I originally saw this idea on Pretty Prudent and I really wanted to try this out for myself. I used the silhouette from my kiddo, mom’s dog [...] Continue →
-

16 Easter Egg DIY’s
16 Easter Egg DIY’s
March 28, 2014
If you been following on the ‘ol blog this week, you’ll notice I went a wee bit crazy in the Easter Egg zone. Today I’m taking a break from making all the egg stuff [...] Continue →
-

10 Favorite St. Patty’s Day DIY’s!
10 Favorite St. Patty’s Day DIY’s!
March 10, 2014
We’re just a week away from St. Patrick’s Day, so I’ve gathered 10 of my favorite St. Patty’s Day DIY’s to inspire you! When I was younger… around college age… St. Patty’s Day was [...] Continue →
-
Up next: St. Patty’s Day!
Up next: St. Patty’s Day!
March 5, 2014
What’s up next on the Holiday Train? It’s Saint Patty’s Day! I gathered some of the Saint Patrick’s Day themed DIY’s I’ve made to share with you. I think I’m catching ANOTHer cold, so [...] Continue →
-

A good idea: Hot glue gun tip
A good idea: Hot glue gun tip
March 4, 2014
So, I have a thing for hot glue. I have to say the hot glue gun is my #1 favorite tool. I seem to use it for 75% of my projects and it can [...] Continue →
-

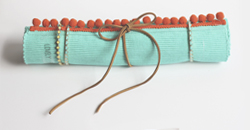
Wrapped Charm Bracelet Craft
Wrapped Charm Bracelet Craft
February 20, 2014
In January I finally gave in and made my own wrap bracelet for HP Create. I’ve been seeing these things all over the internets and I gotta say: This was a fun craft! It [...] Continue →
-

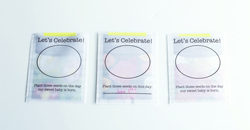
12 last minute super awesome Valentine gift DIY ideas!
12 last minute super awesome Valentine gift DIY ideas!
February 12, 2014
Valentine Arrow Cookies: Sugar and Cloth. Giant Valentine Posters (free for download): Oh Happy Day. Geometric Hearts Garland: How About Orange. DIY Cement Valentines: Lovely Indeed. XO DIY Wrap: Sugar and Cloth. Printable 6-pack [...] Continue →
-
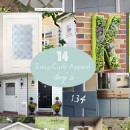
14 Easy Curb Appeal DIY’s!
14 Easy Curb Appeal DIY’s!
February 6, 2014
Head on over to Better Homes and Gardens to enjoy the full list of very easy curb appeal DIY’s! It’s a fantastic collection that I think would be easy to make for your home! [...] Continue →
-

Light-up Glitter Marquee Letters on BHG
Light-up Glitter Marquee Letters on BHG
January 23, 2014
I hope you’re all having a FABulous week! I’m in Salt Lake City for Alt Summit… so crazy busy! We’re hosting a Carnival themed party here, and we shared a little party diy with [...] Continue →
-

17 of The Cutest Homemade Valentine’s Cards!
17 of The Cutest Homemade Valentine’s Cards!
January 9, 2014
I know. It’s only the beginning of January and here I am talking about Valentine’s stuff. I’m crazy. Yup. Valentine’s always sneaks up on me. I just don’t think of it until a couple [...] Continue →
-

Some time off.
Some time off.
December 30, 2013
I just enjoyed the most amazing time off. It was glorious. There’s only been one other time I’ve taken a full week off of blogging. It was much needed. I even kept my instagram/other [...] Continue →
-

Day 22: Personalized Casserole Dish
Day 22: Personalized Casserole Dish
November 24, 2013
Day 12 of my 50 DIY Days of Christmas: Personalized Casserole dish, made by Skip to my Lou, for HP Create. I just love this DIY! How neat would it be to bring a Personalized [...] Continue →
-
Love for Make Your Day
Love for Make Your Day
November 18, 2013
TWO whole weeks. Yes, two whole weeks since Chelsea and I launched our ebook. I still can’t get over the fact that it’s out there, free in the wild of the internets. I need [...] Continue →
-

Day 9: Painted Feather Ornament
Day 9: Painted Feather Ornament
November 7, 2013
Day 9 of my 50 DIY Days of Christmas: Painted Feather Ornaments. I’ve got feathers everywhere. My chickens drop them like crazy. It’s slowed down a bit since the weather got colder, but from the [...] Continue →
-

Day 5: Painted Party Tights DIY!
Day 5: Painted Party Tights DIY!
November 1, 2013
Day 5 of the 50 DIY Days of Christmas: It’s party season! Time to wear all those fancy things you hide away during the Summer. Sparkle jacket? yes. Painted Party Tights DIY? Ummm, yeah! Beautiful [...] Continue →
-

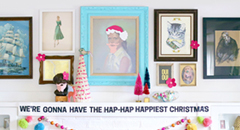
Day 1: Pacific Northwest Photo Booth Props
Day 1: Pacific Northwest Photo Booth Props
October 28, 2013
Day 1 of 50 DIY Days of Christmas: Pacific Northwest Photo Booth Props! I’m prepping the final details for my PNW Blogger Holiday Party and I needed some perfect props for our photo booth. [...] Continue →
-

Last Minute Halloween Window Decor Idea!
Last Minute Halloween Window Decor Idea!
October 25, 2013
Halloween is next week! OMG. So, if you feel like you need to step up your Halloween decoration game a bit, but don’t have much time to prep, look no further! Check out my [...] Continue →
-
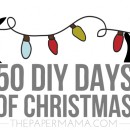
50 DIY Days of Christmas 2013!
50 DIY Days of Christmas 2013!
Every year I do this, I wonder if I’m nuts. Ha, but I really enjoy this series. I look forward to it each year and plan out what I’m up to starting in about [...] Continue →
-
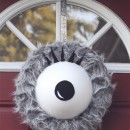
Monster Eye Wreath DIY
Monster Eye Wreath DIY
October 4, 2013
Boo! Scare the bajeebies outta your trick or treaters with my Monster Eye Wreath DIY! Actually, it’s kinda cute and I’m happy to have it on my door! It’s a cheap and easy craft, check [...] Continue →
-

HP Create!
HP Create!
September 27, 2013
//I’m a contributor to this new site, HP Create// Hello friends! I’m so excited to finally share this with you: the launch of HP Create! I’ve been working with HP for a while now [...] Continue →
-

Links to love: Handmade Purse DIY’s.
Links to love: Handmade Purse DIY’s.
September 10, 2013
I’m in the market for a purse, a handmade purse. I really have no idea what I want to make, but I found a ton of inspiration from around the interwebz and I thought [...] Continue →
-
Back to School Party!
Back to School Party!
September 2, 2013
Hello all! I hope you guys are enjoying the holiday weekend! We certainly are. My kiddo will be starting preschool soon and I’ve noticed a bunch of fun Back to School Party inspirations wandering [...] Continue →
-
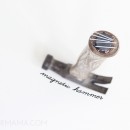
Tried it: Magnetic Hammer
Tried it: Magnetic Hammer
August 29, 2013
Tried it: I found this idea, last fall, over on the Dream A Little Bigger blog. The Magnetic Hammer… and I think it’s fantastic! You’re up on a ladder, you are just about ready to [...] Continue →
-
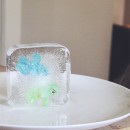
Ice Melt Project
Ice Melt Project
August 26, 2013
Need a few minutes of free time? Need to distract your kiddo? WELL, here you go: Ice Melt Project. You do need to plan this out ahead of time, but it’s worth it. This [...] Continue →
-
Over a year with Better Homes and Gardens
Over a year with Better Homes and Gardens
July 15, 2013
I didn’t even notice until this moment, but I’ve been contributing to the Better Homes and Gardens blog for over a year now, since May 2012. It’s been a fantastic journey and wonderful experience. [...] Continue →
-
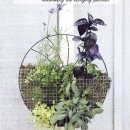
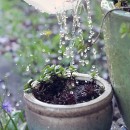
Rethinking the hanging planter
Rethinking the hanging planter
July 11, 2013
Today on the Better Homes and Gardens blog, I’m rethinking the hanging planter. I’ve made a sweet little garden for my herbs. You know what else this would be good for? Succulents. OR, ferns. [...] Continue →
-

Wednesday Goodies: So awesome.
Wednesday Goodies: So awesome.
July 10, 2013
One moment I’m a mom… just doing my normal thing. The next, I’m a babbling mess over the most simple and beautiful piece of kid artwork. I mean… my kiddo has given me so [...] Continue →
-
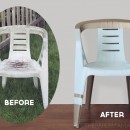
Revamped Outdoor Chair
Revamped Outdoor Chair
July 8, 2013
Well, it’s that time of year again. Time to pretend like my backyard is always clean. Ha! The truth: I live in Oregon and we have moss and all the goodness that likes to [...] Continue →
-
Favorite DIY’s from the ‘ol blog
Favorite DIY’s from the ‘ol blog
July 4, 2013
I’m taking the day off to have fun with my family and eat all the BBQ. I’m sharing a few of my favorite DIY’s from the blog for you to check out. Enjoy! I [...] Continue →
-

4th of July DIY
4th of July DIY
July 2, 2013
Am I the only person that just realized that Thursday is the 4th of July? For some reason I was thinking it was next week. Ha! Well, if you’re like me and you thought [...] Continue →
-

Concrete DIY Trends
Concrete DIY Trends
June 27, 2013
I’m sharing a list of my favorite concrete DIY’s on the Better Homes and Gardens blog today. I’m LOVING all the concrete. Have you tried it yet? Here’s a couple of my favorites, and [...] Continue →
-
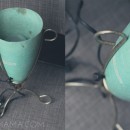
Revamped: Fiberglass Lamp
Revamped: Fiberglass Lamp
June 18, 2013
My sweet little vintage fiberglass lamp. I bought this guy last year, from Remnant, for $15. It needed a little bit of love and an electrical change. I used a 220 grit sand paper [...] Continue →
-

Concrete Honey Bear
Concrete Honey Bear
June 13, 2013
Uh oh. I got my hands on some concrete and sorta maybe went crazy and am making ALL the things concrete. CAN. NOT. STOP. Not all of my projects have been successful, but I’m [...] Continue →
-
Cleaning without the chemicals.
Cleaning without the chemicals.
June 7, 2013
There’s something you should know about me…. I do not like to clean my house. I do it, but I don’t like it. Ooooooh… the scrubbing. I cannot stand scrubbing. Gah. How many hours [...] Continue →
-

DIY Father’s Day Gifts!
DIY Father’s Day Gifts!
June 3, 2013
It’s almost here! Father’s day is coming up on June 16th! Are you ready? Well, I’ve been gathering some fun Dad themed DIY’s and I want to share them with you! Shrinky Dink Father’s [...] Continue →
-
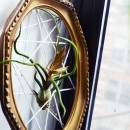
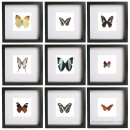
Air Plant Display Trends!
Air Plant Display Trends!
May 30, 2013
{Framed Air Plant Display from All The Good Girls Go To Heaven} Today on Better Homes and Gardens I’m sharing my favorite Air Plant Displays from around the interwebs. There are 8 different ideas to inspire [...] Continue →
-
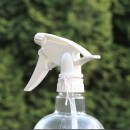
Milk Jug Watering Can for the kiddo!
Milk Jug Watering Can for the kiddo!
April 24, 2013
The milk jug watering can. It’s free and easy to make! Wait…. why make it? Well, if your kiddo is like mine and wants to help you water the plants every time, and always [...] Continue →
-

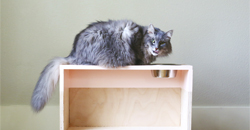
Cardboard Playhouse!
Cardboard Playhouse!
April 23, 2013
This past week I took on something new… A full on DIY with my kiddo. With her help. It was hard, but we did it. I’ll chat more about working with my kiddo at [...] Continue →
-

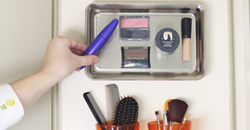
Button Earring Holder on the Better Homes and Gardens blog!
Button Earring Holder on the Better Homes and Gardens blog!
April 18, 2013
TODAY on the Better Homes and Gardens Blog: A couple of months ago I happened to catch an episode of the Rachel Ray show. I’ve only seen it a couple of times and never [...] Continue →
-
Water bath canning method… for high acid foods
Water bath canning method… for high acid foods
April 9, 2013
I realized, AFTER I shared my Apple Pie Butter recipe, that I never shared how to actually do the Water Bath Canning Method. I am, by no means, an expert… but I’ve researched a [...] Continue →
-

Kitchen nook set up with DIY banquette seating (on BHG)
Kitchen nook set up with DIY banquette seating (on BHG)
April 4, 2013
Today, on BHG, I’ve shared how you can create your own sweet nook space with DIY banquette seating and storage. I really believe that every inch of a home is precious. ESPEcially if you [...] Continue →
-
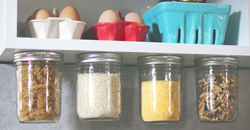
Wednesday Goodies: Revamped cabinet!
Wednesday Goodies: Revamped cabinet!
April 3, 2013
We are in the process of organizing our messed up/crazy crammed laundry slash mud room. Actually, we are in the process of organizing our WHOLE home… but the laundry room is getting the most [...] Continue →
-

Favorites for Thursday: Easter Edition
Favorites for Thursday: Easter Edition
March 28, 2013
The kiddo and I are getting ready to decorate Easter eggs… I was looking for projects that may be easier for the kiddo and fun for me! I’m always looking for something new and [...] Continue →
-
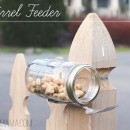
We feed the squirrels.
We feed the squirrels.
March 18, 2013
Do not feed the squirrels. Yeah, we feed those little rodents. I KNOW we probably shouldn’t… but it’s pretty cute to watch. They pretty much rule our neighborhood and I’m 90% sure they are [...] Continue →
-

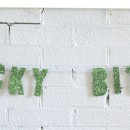
“I Love You” Bunting
“I Love You” Bunting
February 7, 2013
I Love You. Something I tell my husband and daughter everyday. Why not write it out for all to see? I love glitter. A lot. Glitter sorta makes most things better. Feeling bored? Glitter. [...] Continue →
-
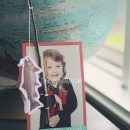
Valentine’s Card: You’re a reel catch!
Valentine’s Card: You’re a reel catch!
January 31, 2013
My kiddo is in preschool…. SO that means Valentines cards! I know I’m more excited about these cards and this whole “holiday” than Miss R, but I know she’ll get more excited on the [...] Continue →
-

Day 50? The failed DIY.
Day 50? The failed DIY.
January 11, 2013
Day 50: You may have noticed (or not) that I never reached Day 50 of my 50 DIY Days of Christmas. Well, I had a project for Day 50. All finished and ready. But, [...] Continue →
-
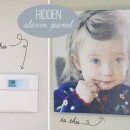
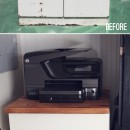
::Hidden Alarm Panel DIY:: on Better Homes and Gardens
::Hidden Alarm Panel DIY:: on Better Homes and Gardens
January 10, 2013
New year, new DIY. This is officially my FIRST DIY of the year. Yay! It was quick and easy to do, and now my alarm panel is no longer in sight. I originally found [...] Continue →
-
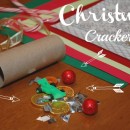
Day 46: Make your own Christmas Crackers!
Day 46: Make your own Christmas Crackers!
December 19, 2012
DAY 46 is brought to you by, the lovely Liz of Yellow Finch: Hi everyone! I’m Liz from Yellow Finch and I’m so excited to be here to share this DIY with you. When I was younger [...] Continue →
-

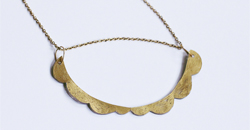
Day 43: Silver Glitter Chain
Day 43: Silver Glitter Chain
December 14, 2012
Day 43: This silver glitter chain is the perfect christmas garland! You can’t go wrong with sparkles! I found a chain, at one of my favorite stores, VERY similar to this… but, it was [...] Continue →
-

Day 42: Patterned Aztec Leggings
Day 42: Patterned Aztec Leggings
December 13, 2012
DAY 42 is brought to you by, the lovely Jess of IROCKSOWHAT: It’s just not fair. It’s not fair that boys get jipped in the clothing department. To find awesome clothes for your boy means you’re gonna [...] Continue →
-

Day 41: Laminated Tablet Sleeve
Day 41: Laminated Tablet Sleeve
December 12, 2012
DAY 41 is brought to you by, the lovely Jill of Baby Rabies: Okay, so maybe you can’t afford to give all your friends and family new tablets for the holidays, but you can [...] Continue →
-

Day 40: Christmas Yarn Wreath
Day 40: Christmas Yarn Wreath
December 11, 2012
DAY 40 is brought to you by, the lovely Violet of Blythe Ponytail Parades: Hi! I’m Violet from Blythe Ponytail Parades and I’m here to share a fun Christmas wreath DIY! So let me start by saying [...] Continue →
-

Day 36: Happy Christmas Tree Skirt!
Day 36: Happy Christmas Tree Skirt!
December 6, 2012
Day 36: Happy Christmas! Add a little handmade skirt to your Christmas tree. I’m absolutely in love with this skirt. It makes me happy to see it under my tree. I do think it’s [...] Continue →
-

Day 31: Rudy the Red Nosed Wreath
Day 31: Rudy the Red Nosed Wreath
November 30, 2012
Day 31: Wow, I’ve past the 30-day mark for my 50 DIY Days! I can’t believe it…. Just 24 more DIY’s after this! Hee!!! Well, today I’m sharing a cute wreath for you Christmas [...] Continue →
-
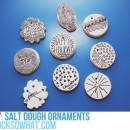
Day 27: Salt Dough Ornaments
Day 27: Salt Dough Ornaments
November 26, 2012
DAY 27 is brought to you by, the lovely Jess of IROCKSOWHAT: I have been a salt dough makin’ fool! There is nothing more festive for me than baking these special ornaments, knowing that it’ll add [...] Continue →