Category: Photoshop
-
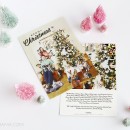
Day 39: Our Silly Christmas Photo + a $125 Minted Giveaway!
Day 39: Our Silly Christmas Photo + a $125 Minted Giveaway!
November 23, 2015
Day 39 of my 50 DIY Days: Our Silly Christmas Photo Well, it’s another year and time for another weird Christmas card. Each year we do something crazy with our holiday cards, because we [...] Continue →
-

Day 17: Christmas Card Photoshop Tutorial
Day 17: Christmas Card Photoshop Tutorial
November 19, 2013
Day 15 of my 50 DIY Days of Christmas: Christmas Card Photoshop Tutorial with Crystalyn of Flavor Pink! The Clone Stamp Tool in Photoshop is probably my FAVORITE out of ALL the tools. Did you take [...] Continue →
-

Day 16: Christmas Photo Inspiration
Day 16: Christmas Photo Inspiration
November 18, 2013
Day 16 of my 50 DIY Days of Christmas: Christmas Photo Inspiration! It’s just about that time! Time to get your family/pets/whatever dressed up and ready for the annual Christmas photo! This also means we [...] Continue →
-
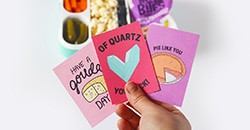
Valentine’s Card: You’re a reel catch!
Valentine’s Card: You’re a reel catch!
January 31, 2013
My kiddo is in preschool…. SO that means Valentines cards! I know I’m more excited about these cards and this whole “holiday” than Miss R, but I know she’ll get more excited on the [...] Continue →
-

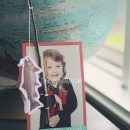
Day 24: Rockwell style Christmas photo!
Day 24: Rockwell style Christmas photo!
November 20, 2012
Day 24: Today I’m sharing how I created my Rockwell style Christmas card. It’s a bit complicated… and, WILL take some time. BUT, so worth it. Really. I absolutely love wandering back and looking [...] Continue →
-

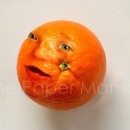
Happy Halloweeeeeeen
Happy Halloweeeeeeen
October 31, 2012
Zombie Chelsey says, “Blarhgle, Happy Hallllowspleen! Brains!!!!” – Zombie Chelsey ………………………………………………………………………………………………………………………………………………………….. {If you have a Wordless{ish} Wednesday, please feel free to link it up below. And, feel free to link up to these blogs [...] Continue →
-
Slowing down in New York
Slowing down in New York
August 10, 2012
I hope my GIF’s don’t give you all massive headaches… but, I sort of love making them. Aaaaand, I had quite a few photo sets to work with from New York.
-

Wordless{ish} Wednesday: How I make a GIF
Wordless{ish} Wednesday: How I make a GIF
May 23, 2012
I’ve been asked by a few lovelies to share how I create a GIF with photoshop. It’s pretty darn simple. I first learned how from my friend, Jess. With practice… an idea… and a [...] Continue →
-

Better Homes and Garden contributor!
Better Homes and Garden contributor!
May 17, 2012
Hello! I am so happy and excited to share with all you lovelies: I am officially a contributor to Better Homes and Gardens online! What? Yes. I am still in shock… I’ve been in [...] Continue →
-

Happy happy Christmas to you!
Happy happy Christmas to you!
December 25, 2011
Hello sweet readers! I wanted to send out a lovely Happy Christmas to all of you today! Whether you celebrate Christmas or not: Have a beautiful day and I’ll talk to you later! <3
-

50 DIY Days with Adeline’s Daddy: Vintage Style Silhouette
50 DIY Days with Adeline’s Daddy: Vintage Style Silhouette
November 28, 2011
Day 26: Don AKA Adeline’s Daddy here, and today we are going to make some vintage style silhouettes… with a holiday twist. I’m going to lay out how this can be made by hand [...] Continue →
-

Shop update: more drawings and banners!
Shop update: more drawings and banners!
June 10, 2011
I’ve been drawing and creating banners like crazy! I’m a busy girl… It’s hard to find to do anything while being a stay-at-home mom…. BUT, I can do it. And, am doing it… slowly… [...] Continue →
-
What I’ve been up to…
What I’ve been up to…
March 15, 2011
Happy Tuesday everyone! I have been so crazy/awesome busy with my shops and I just wanted to share with all of you what I’ve been up to… LOTS of blog banners…. tattooing babies… paper [...] Continue →
-

Photo Challenges
Photo Challenges
January 20, 2011
My 365: Days 18 through 20 Day 18{365}: 13 Months Old. Day 19{365}: Mr. Pistachio. Day 20{365}: Chubby Feet. Shoot and Edit: SOOC: 1st Edit: 2nd Edit: Simplicity Photo Challenge: Happiness Happiness is making [...] Continue →
-
Some photo challenges…
Some photo challenges…
January 13, 2011
Simplicity Photo Challenge: FoodANDPixel Perfect Before and After: After: Before: Before: 365 Challenge: Day 10{365}: Orange you glad I didn’t say apple? Day 11{365}: Tea time. Day 11{365}: Water study. So, I’m linking this [...] Continue →
-
What I’ve been up to…
What I’ve been up to…
November 23, 2010
So, I’ve been SO busy! I had quite a few orders in my paper mama shop the other week. Busy! But, fun! I just wanted to share what I’ve been doing: The winner of [...] Continue →
-

The Paper Mama Challenge winners: A hint of color.
The Paper Mama Challenge winners: A hint of color.
October 2, 2010
This weeks guest judge: Mandy from: A Sorta Fairytale. This weeks challenge: A hint of color.The challenge: Take or find a photo of your baby (or kid… or puppy… or kitty) with just a hint [...] Continue →
-

The Paper Mama Photo Challenge: A hint of color.
The Paper Mama Photo Challenge: A hint of color.
September 25, 2010
This weeks guest judge: Mandy from: A Sorta Fairytale. This weeks challenge: A hint of color.The challenge: Take or find a photo of your baby (or kid… or puppy… or kitty) with just a hint [...] Continue →
-

Fix it Friday
Fix it Friday
September 24, 2010
Before: Edit 1: For this edit I ran my new action, Brighten Me, and turned off the exposure and turned on the levels 2. Edit 2: from there I added a solid color layer, [...] Continue →
-
I’m changing the world!
I’m changing the world!
September 17, 2010
Well, not really. 😀 Just doing a couple photo edit challenges! I am SO tired today… I’m dragging… we didn’t sleep very well last night. More caffeine. I wanted to post these earlier, but [...] Continue →
-
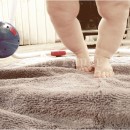
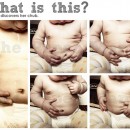
Before and after: baby feet
Before and after: baby feet
August 26, 2010
AFTER: I love my baby’s feet. BEFORE: A couple of little reminders: ❤ Current photo challenge: Flower…LAST DAY TODAY! ❤ Vote off: Vote for your fave photo: LAST DAY TOMORROW! ❤ Giveaway: Simplicity SLR [...] Continue →
-
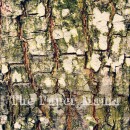
Tuesday Challenges…
Tuesday Challenges…
August 24, 2010
In a Yellow House: Trees Touch Up Tuesday: Before: After: After take 2: After take 3 (Can be customized in my Etsy shop): After take 4 (Can be customized in my Etsy shop): I [...] Continue →
-
Simplicity Button Challenge
Simplicity Button Challenge
Faith is doing a take two for her button challenge. Here’s my button (made using one of her beautiful floral photos!): Here’s my original button: Just about one day left for you to enter [...] Continue →
-

Fix-it Friday
Fix-it Friday
August 20, 2010
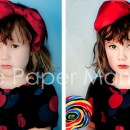
I LOVE this weeks photo! What a cute little Girl. My first edit: My second edit: For this one I added a little black and white overlay to make things just a little more [...] Continue →
-

Two Mom’s Photo Challenge: Selfie
Two Mom’s Photo Challenge: Selfie
August 15, 2010
{Ruari (almost 8 months) and I} This was a self portrait challenge. This is me. Me, my baby, and my house. The numbers have been reset! Help me get in the top 10! I [...] Continue →
-
Before and After
Before and After
August 13, 2010
So, I originally took this photo for Simplicity’s photo challenge this week. I thought I’d share how it started out. (Get your own personalized doodle at my shop!). After: {Get your own personalized doodle [...] Continue →
-

Wordless{ish} Wednesday: Purple tutu
Wordless{ish} Wednesday: Purple tutu
July 28, 2010
{I took so many photos for this weeks I heart Faces challenge (purple). I really loved a ton of them. She makes so many silly faces. I had to post a as many as [...] Continue →
-

Touch-up Tuesday
Touch-up Tuesday
July 27, 2010
Little reminder:– Don’t forget to vote for your fave photo! Ends Friday!– Enter this weeks photo challenge: Absolute Favorite! Last day: Friday!– AND: win some personalized cards. Ends Friday!– Ask Alabaster Cow a question! [...] Continue →
-

I Heart Faces: Purple
I Heart Faces: Purple
July 26, 2010
{Ruari at 7 months} Link your purple shots: The numbers have been reset! Help me get in the top 10! I ♥ you!
-

You Capture: Black and White
You Capture: Black and White
July 22, 2010
This week’s shot is black and white. So, I know I’ve posted this photo about a million times, but I just wanted to see it in black and white. 🙂 {Photo manipulation: Paper Mama [...] Continue →
-

Fix-it Friday #62
Fix-it Friday #62
July 16, 2010
Such a SWEET photo to fix for this weeks Fix-it Friday at I Heart Faces. Here you go: {My fix} {Before} Would you like to fix this? Head on over… {Just a quick reminder…. [...] Continue →
-

Before and After: Ha ha! I think I’m funny!
Before and After: Ha ha! I think I’m funny!
July 15, 2010
{Tattoo photo-manipulation: The Paper Mama Shop} {Tattoo photo-manipulation: The Paper Mama Shop} HA HA! Look what I did during Ruari’s nap time!!! We went and got some tattoos! Hee. I do get a TON [...] Continue →
-

Before and After: Kissy
Before and After: Kissy
June 25, 2010
Here’s baby and I before: {Before} AND, after. {After} I have a cheap old digital camera And, I use Photoshop CS3 Join: The numbers have been reset! Help me get in the top 10! [...] Continue →
-
Fix-it Friday: #60
Fix-it Friday: #60
{Before} {After} Worked with: Photoshop CS3 Just a little reminder…Today is the last day: Current photo challenge: Talented!Don’t forget to enter my giveaway: 5 winners! The numbers have been reset! Help me get in [...] Continue →
-
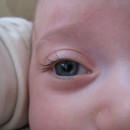
Before and After: Baby eye
Before and After: Baby eye
June 17, 2010
Another Before and After over at Pixel Perfect. I hope you all enjoy! I know I LOVE doing this! 🙂 Here is the Before…. Man, this angle makes her nose look big. 🙂 {Before} [...] Continue →