Learning How To Tie a Bowline Knot is one of the most handy tricks I’ve picked up along this DIY journey. I craft a lot of everything (that’s pretty obvious) and I’m often tying knots for these projects. It’s important to know how to properly tie a knot and there are many knots with hundreds of uses. The bowline knot (pronounced “boh-lin”) is one of the most versatile and easy to tie. Even though there are quite of few different bowline knots out there this version I’m sharing is popular because of it’s strength and it’s simple to tie.
Are you ready to learn how to tie a bowline knot?
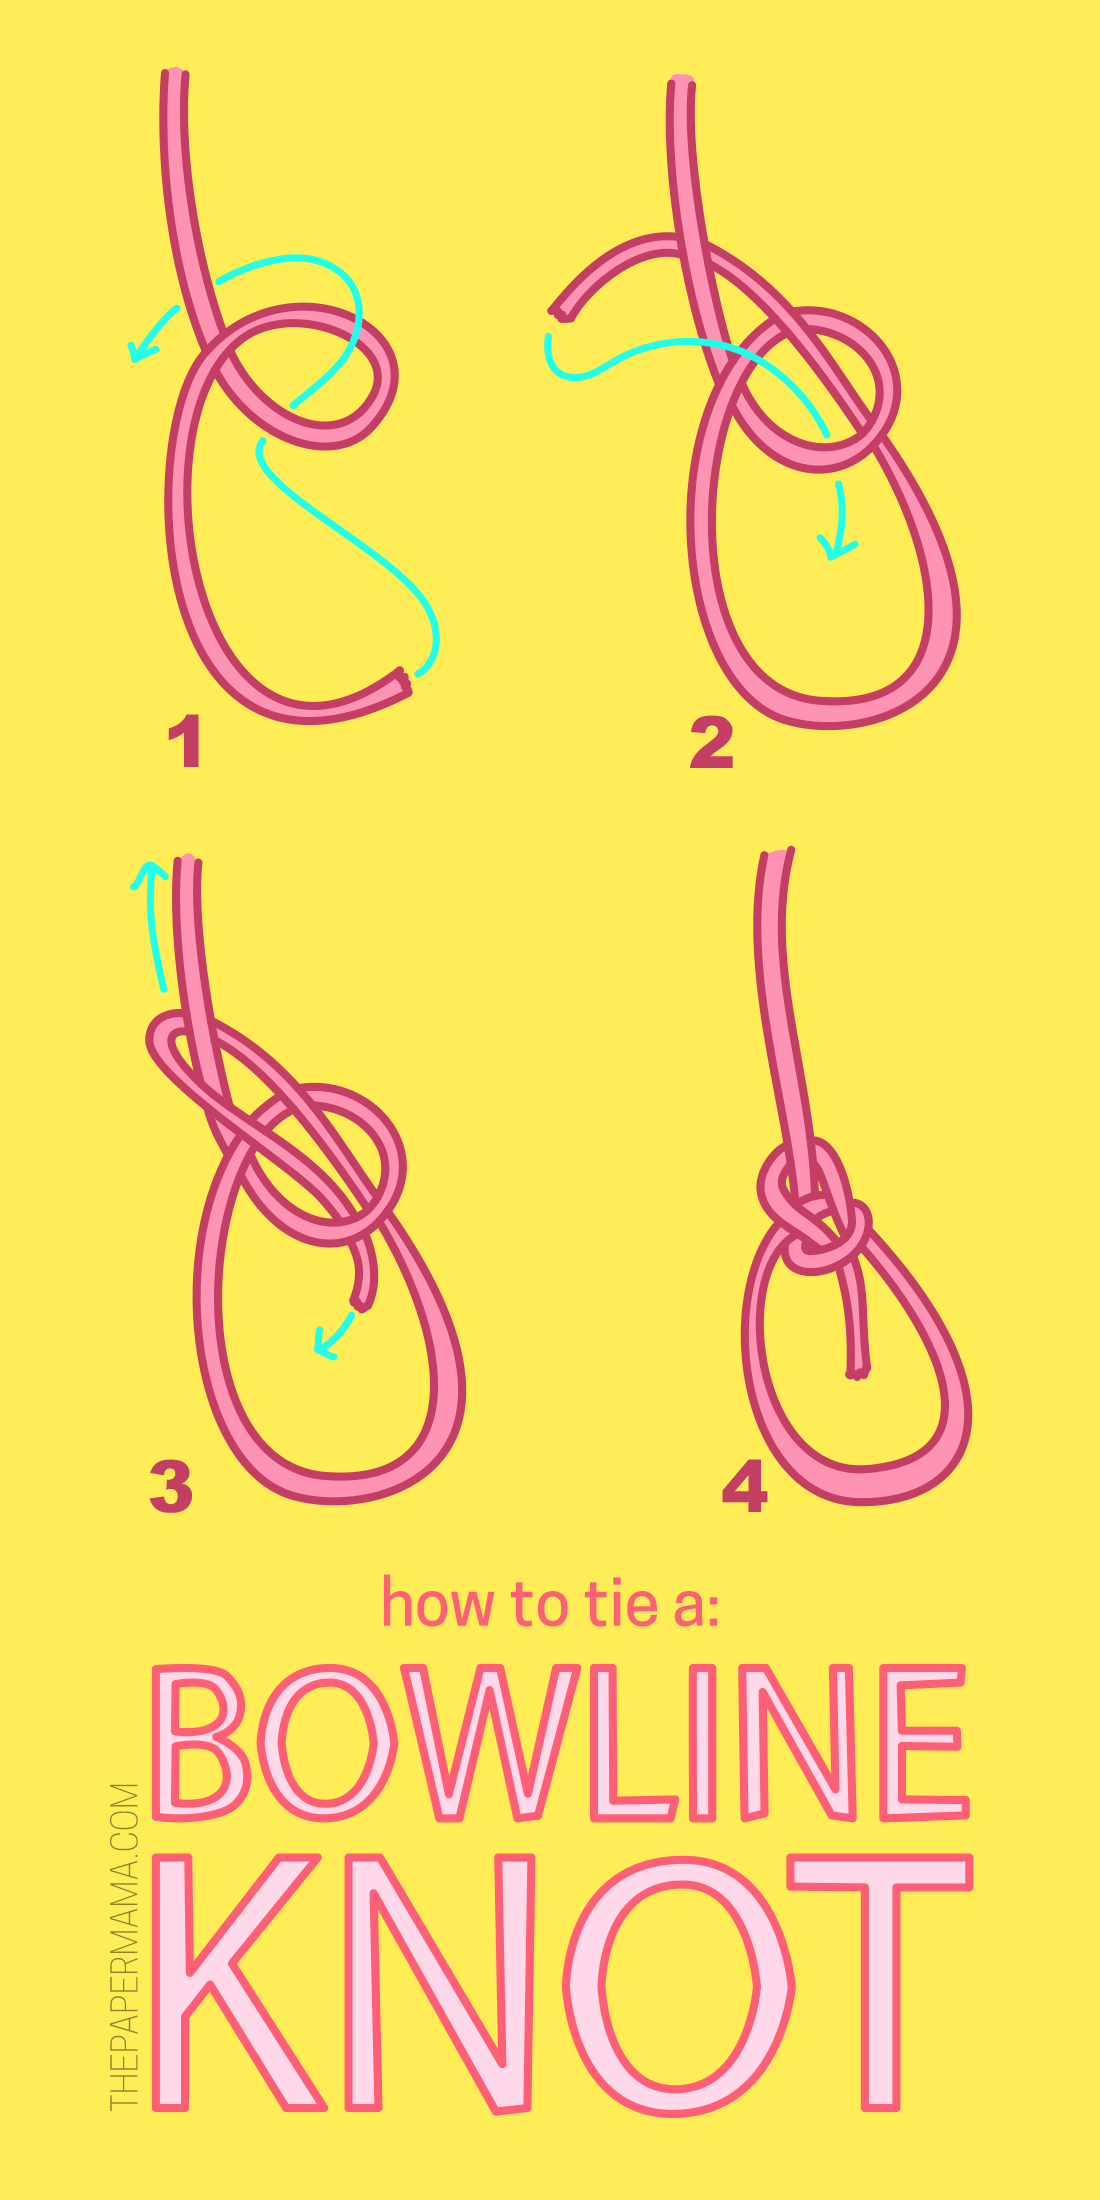
Step 1:
Make a small loop in the rope. Leaving a long enough “tail” at the end to tie the bowline knot. Pass the tail of the rope under and through the loop. Bring the tail around the “back” of the top portion of the rope.
Step 2:
Bring the tail around to the “front” and then pass the tail back through the small loop.
Step 3:
Tighten the knot by pulling the tail down and the top of the rope up.
Step 4:
Your knot is ready! If you need to undo the knot simply loosen the loop on the knot.
This may be one of my more nerdy posts, but I love a good knot. I mean: why knot share this DIY? See what I did there? It’s so fascinating that a properly tied knot can be so strong! I just finished a project and used this knot (it will be up on the blog soon).
Do you want to get news, shop discounts and freebies?
Sign up for my newsletter. There are special treats just for my email subscribers. Head over here to sign up! Just a note: I will not sell your info to anyone. This is just an email from me 1 – 3 times a week.
Click here if you want to check out my other Tips and Tricks!
– Chelsey
Disclosure: I may earn a small commission for my endorsement, recommendation, testimonial, and/or link to any products or services from this website.