
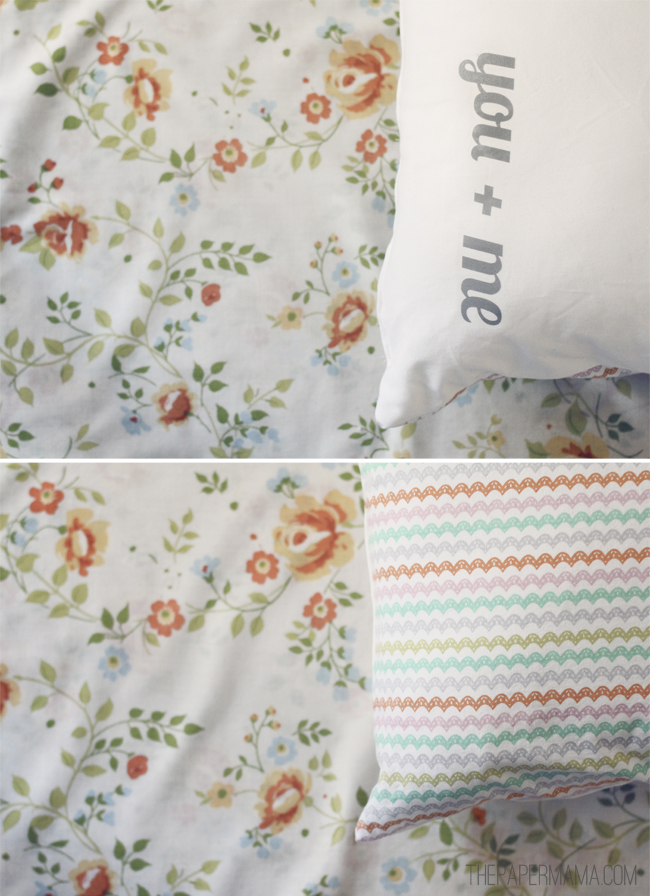
Day 3 of my 50 DIY Days of Christmas: This lovely You Plus Me Pillow DIY I made for HP Create!
Are you in love? Instead of carving your initials into the nearest tree or getting a name tattooed on your arm, let’s make a You + Me Pillow! I’ve created a lovely grouping of printouts for you to use to create your own custom pillow. There are all the letters of the alphabet, you + me =, Love, and heart symbols in both red and grey colors. Printed out on some HP fabric transfer paper, then ironed onto a pillow. What do you think, sound fun? Here’s how you can make your own:
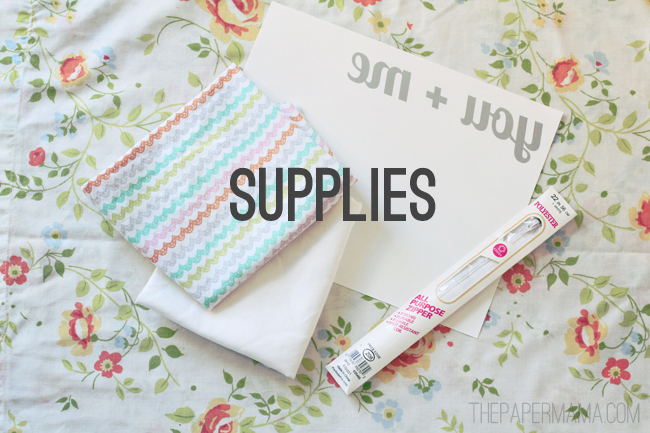
Supplies:
– 1/2 yard of white fabric (I used bottom weight cotton).
– 1/2 yard of pretty patterned fabric for the back of your pillow.
– HP iron-on transfer paper
– A 14 inch square pillow form or 1 bag of stuffing.
– You + Me Printouts: Hearts, “LOVE”, You + Me Red, You + Me Grey, Alphabet Red, and Alphabet Grey.
– Optional: zipper
Directions:
Step 1: Cut out a 15 by 15 inch square from your white fabric and patterned fabric. The goal is to make a 14 inch square pillow, with 1 inch seam allowance (I personally like a bit more seam allowance, just in case I make a mistake).
Step 2: Decide what you’d like to iron on to your pillow. You + Me? OR, would you like to get more personal… maybe C + M = Love? Or, even I Love You. Once you pick it out, do a test run print. Make sure the ink in your printer is printing right. ALSO: read the directions for your iron-on transfer paper, do you have the proper printer for this paper?
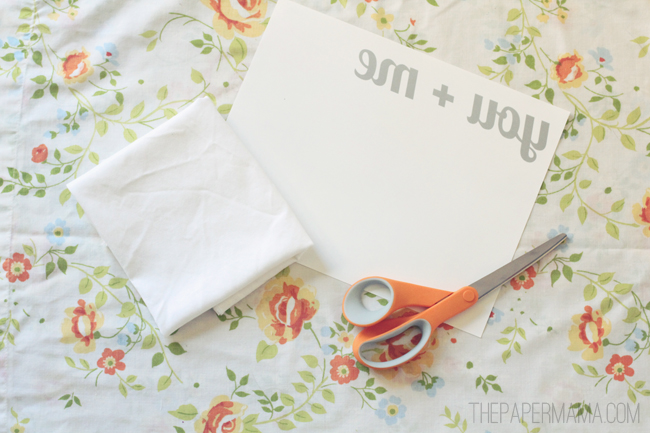
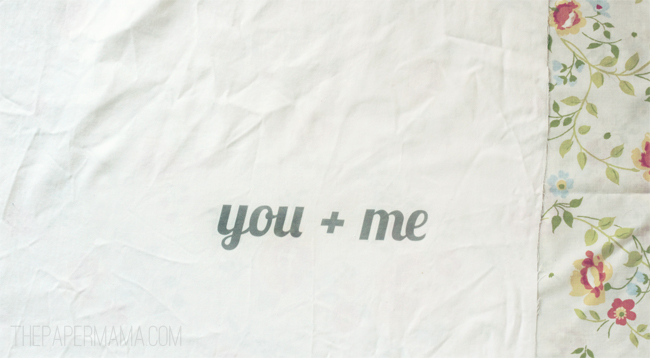
Step 3: After your test run, print out your chosen word/letters onto the fabric iron-on transfers. Let this dry for a few minutes, then cut it out. Leave about 1/4 inch of “white space” around your printed items while cutting.
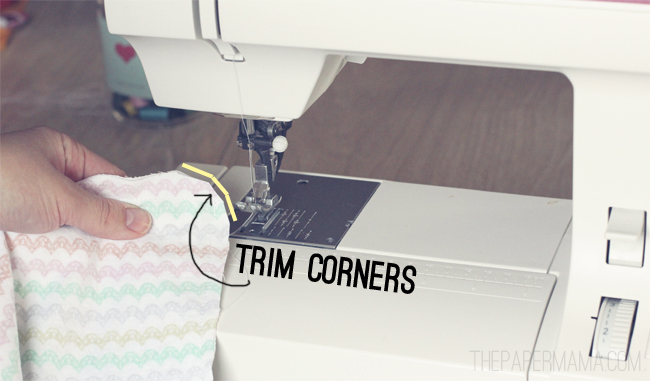
Step 4: Following the directions of your iron-on transfer paper, heat up your iron to the highest setting (steam turned off). Place a protective fabric barrier onto your floor or countertop (don’t use an ironing board, since it’s not sturdy enough).
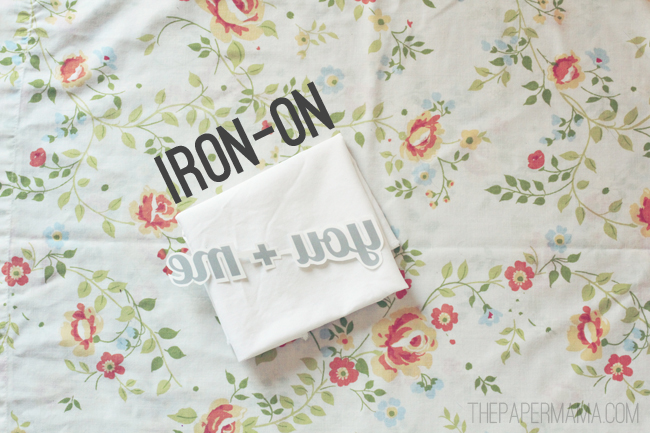
Step 5: Place the wording exactly where you’d like it to go on the white fabric. Iron-on the words. Let cool for a few minutes, then peel back the paper.
Optional: Sew a zipper onto the fabric. This is a good option if you’d like to easily wash your pillow cover (good if you have kids, right?). Follow the sewing directions on the back of your zipper package.
Step 6: With the fabric’s right sides facing each other, pin the fabric squares together. If you stitched in a zipper, don’t forget to unzip it before sewing the pieces together. If you DIDN’T install a zipper, leave an opening large enough for you to flip the fabric right side out and add the pillow form or stuffing. Stitch around the whole thing (leaving a 1 inch seam allowance).
Step 7: Flip the fabric square inside out. Add your pillow form or stuffing. If you installed a zipper… all you have to do is zip it closed.
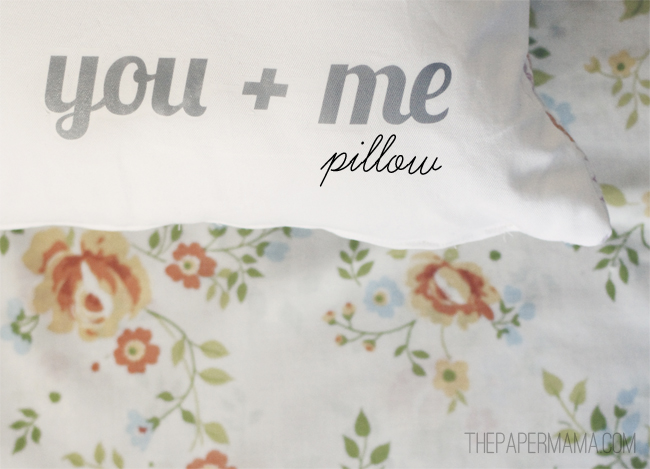
Yay! You now have a sweet customized pillow.
– Chelsey
I am a paid contributor for Hp Create. If you’d like to reminisce in the past 50 DIY Days of Christmas… here you are: 2011 & 2012.


Cute idea and I like the colors!
http://tinajoathome.com/