
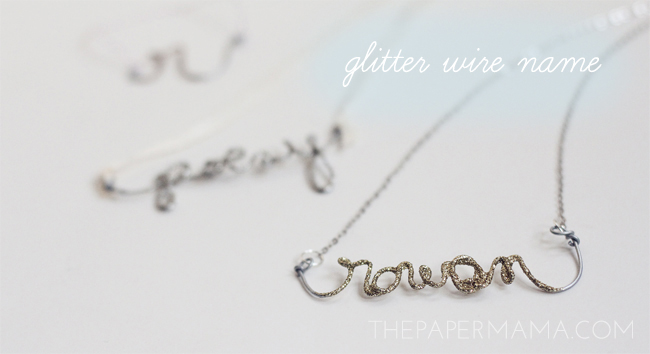
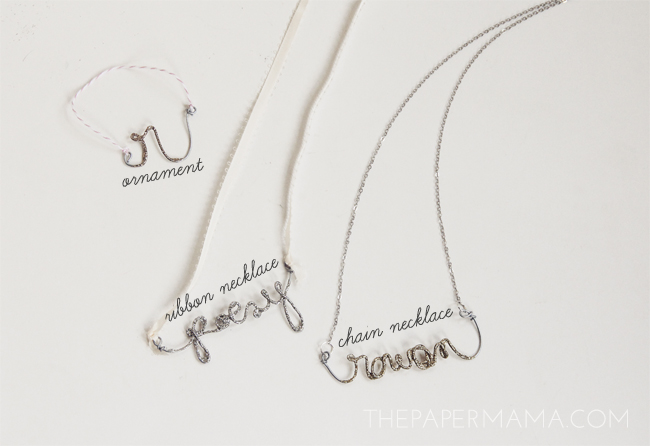
Day 2 of 50 DIY Days of Christmas: Glitter Wire Name! My kiddo has been showing an interest in how the mail system works, so I thought I’d set up some pen pals with her! It’s a totally new thing and we haven’t even started yet, but we will soon. She’s got about 3 of them (all girl’s about her age). I expect most of it will be colored pictures and stickers, but I thought it would be fun to send something special for the holiday season. That’s why I’ve created these Glitter Wire Name necklaces/ornaments!
There VERY inexpensive to create and cute. I can see them worn as a necklace or used as an ornament for the Christmas tree. If the kiddo receiving this gift is a bit on the young side (and/or seems to put everything in their mouth), I’d recommend this be an ornament. My girl will be wearing her name as a necklace. Hopefully her pen pal buddies will love their necklaces (or ornaments), too!
Supplies:
– wire
– Mod Podge
– fine glitter
– clear acrylic spray
– necklace chain or string
– needle nose pliers
– wire cutters
Directions:
– Draw the name of the person you’d like to gift this creation to on a piece of paper.
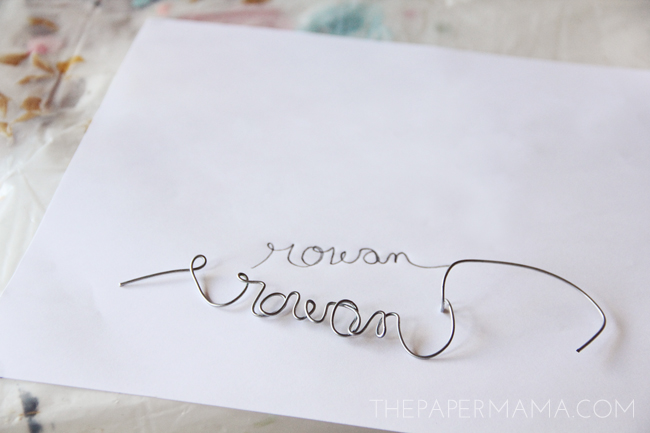
– Cut a section of wire. I’d recommend cutting an 18ish inch piece of wire. That should be a good length for most names (unless it’s a super long name). Note: make sure there’s about an extra couple inches at the end of the name, this will be useful for hanging the piece to dry.
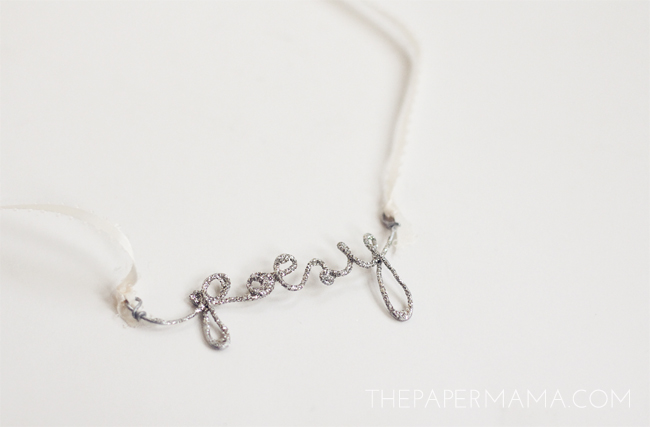
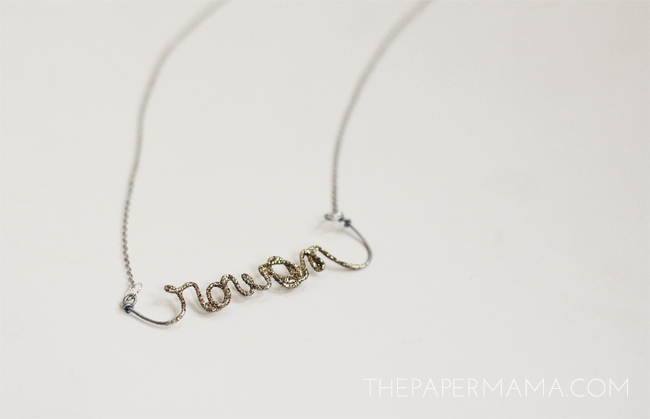
– Paint a layer of Mod Podge onto the name. Pour a bunch of glitter all over the Mod Podge. Hang the name to dry overnight.
– In a well ventilated area, spray a couple layers on each side of the name (waiting about 2 minutes in between each layer). Wait about 24 hours for the name to cure.
– At each end of the name, twist a loop. This will be to attach the chain or string.
– Decide if you’d like this to be a necklace or an ornament.
Give this pretty thing to a favorite person!
– Chelsey
To keep up with the series, click here or on the image below!
P.S. I do have a couple of spots open for the DIY Days, so if you think you have the perfect project to share send me an email. First, check out theDIY/Submission section in my FAQ’s for a bit of post submission info. If you’d like to reminisce in the past 50 DIY Days of Christmas… here you are:2011 & 2012.


This is super cute, but ours did not turn out nearly as legible as Chelsey's! It was a bit trickier than I anticipated.
Pingback: Friday Favorites « Jen Loves Kev
Great idea!
Was gauge wire did you use for this? I am thinking my daughter would love to make these for her girlies as well! Great job!!!
Sooo cute and fun! The glitter makes it even more special!