
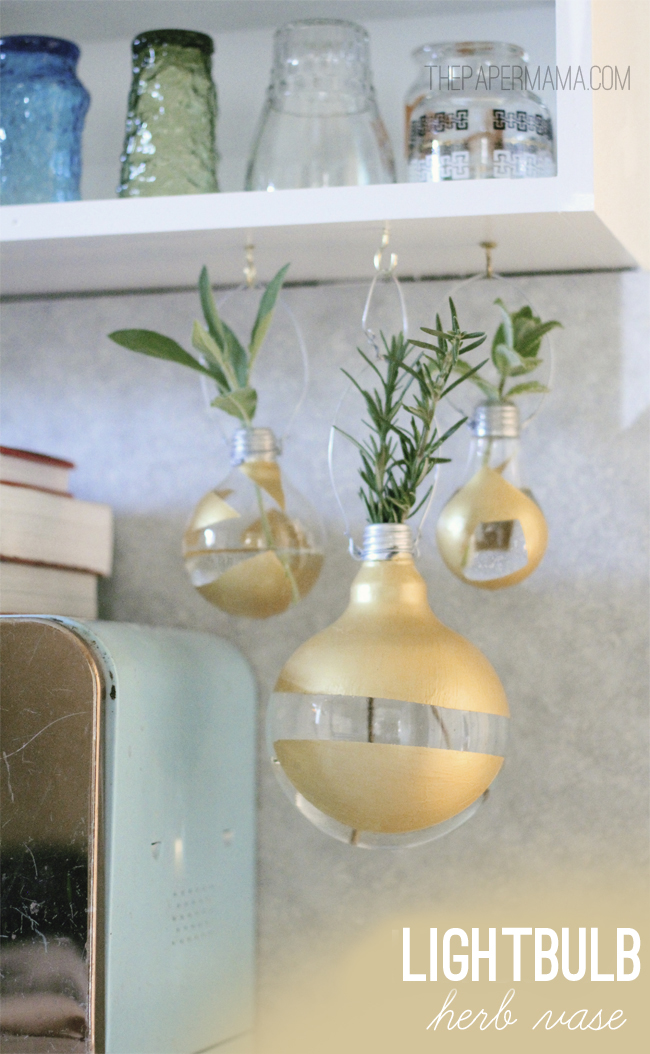
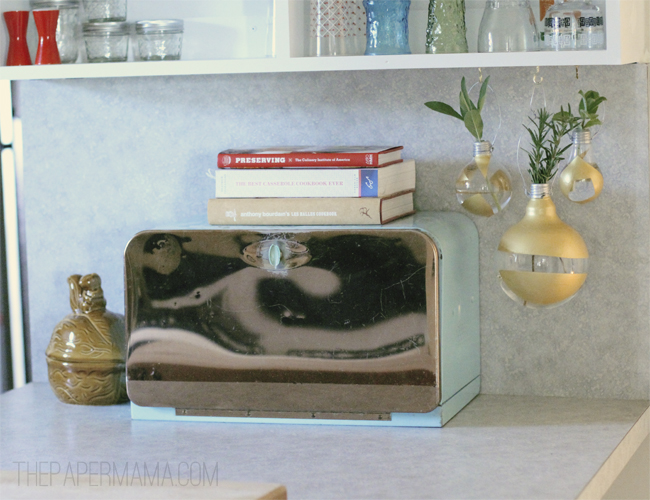
My hubby went through the house and changed all the lightbulbs, and before he could recycle them I said, “Wait, I can use those for this project!” He may have given me that “year, sure” look, but I really had an idea for these little bulbs. I’ve been wanting to create a hanging lightbulb herb vase FORever and now I’ve done it and I love them. I didn’t really want floral vases, I wanted little herb vases. When you pluck a bit of rosemary or sage, the smell is amazing! We have an amazing amount of herbs always available in our yard (our rosemary grows year round) and if we need a bit for cooking, it’s right there. Ready to make one for yourself? Let’s go!

Supplies:
– Old lightbulbs
– Martha Stewart’s Multi-Surface Paint
– Painter’s Tape
– Wire
Directions:
– First we need to prep the bulbs. Make sure you are wearing protective eyewear and gloves. Prepping the bulbs involves breaking glass, and it seems to fly everywhere! Do this project in a space you’re not worried to find little bits of glass later, cause you will find little bits of glass later. Be safe.
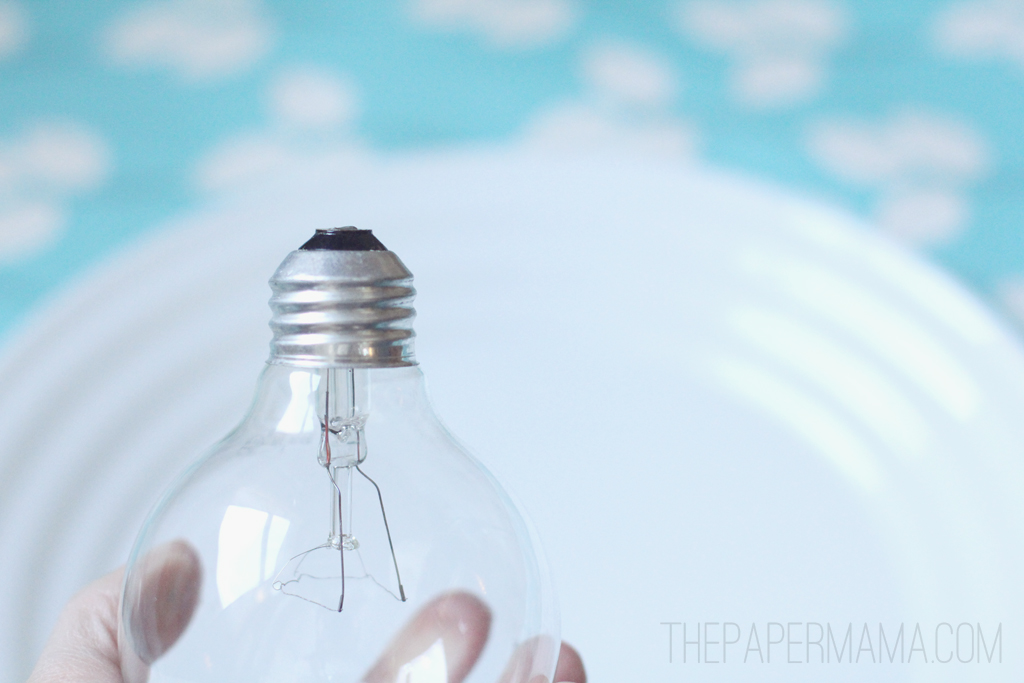
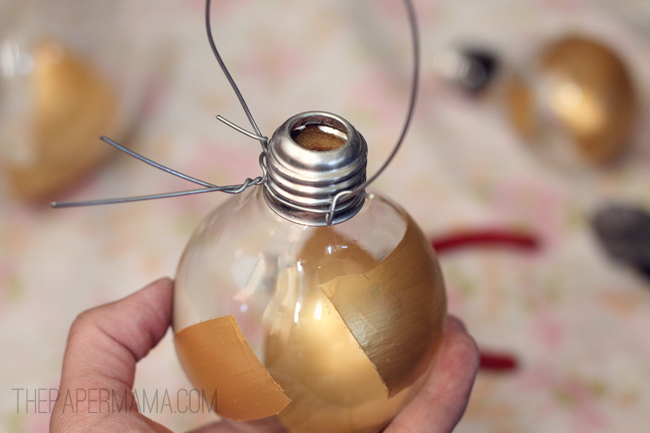
– Use a set of pliers to pry off the little metal disk on the base of the bulb.
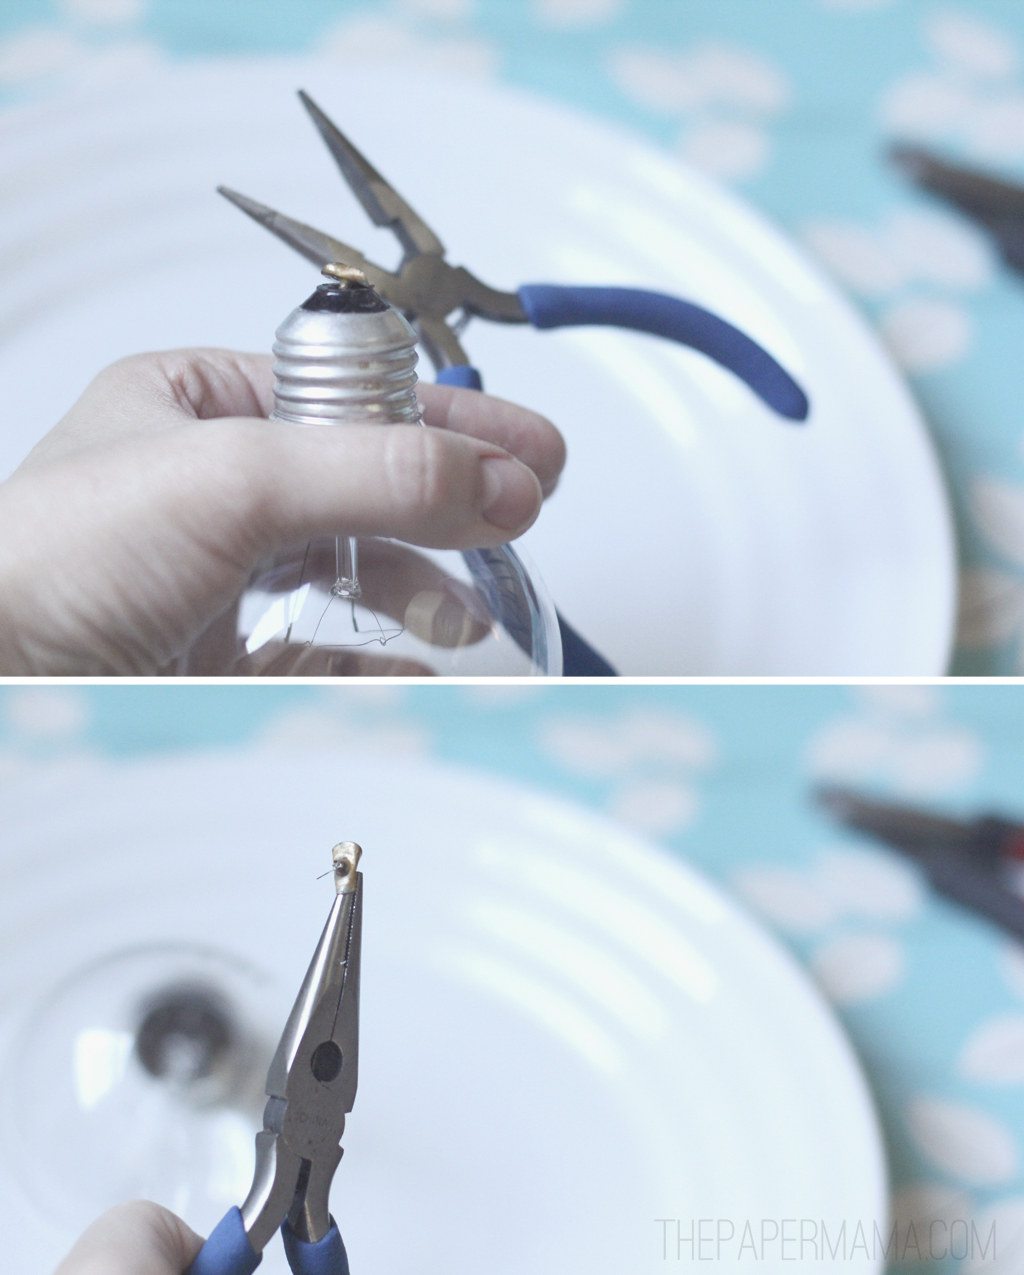
– Using pliers or some sort of point, crack apart the glass inside of the bulb. When it’s broken up, pore out the glass. If there are any stuck pieces, use needle nose pliers to pull them out. Break away any extra bits of glass inside the rim. Pour some water in the bulb to swish it around and get any last little teeny bits of glass.

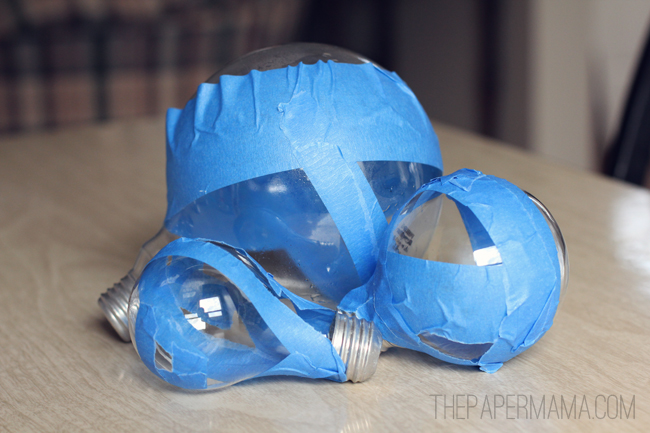
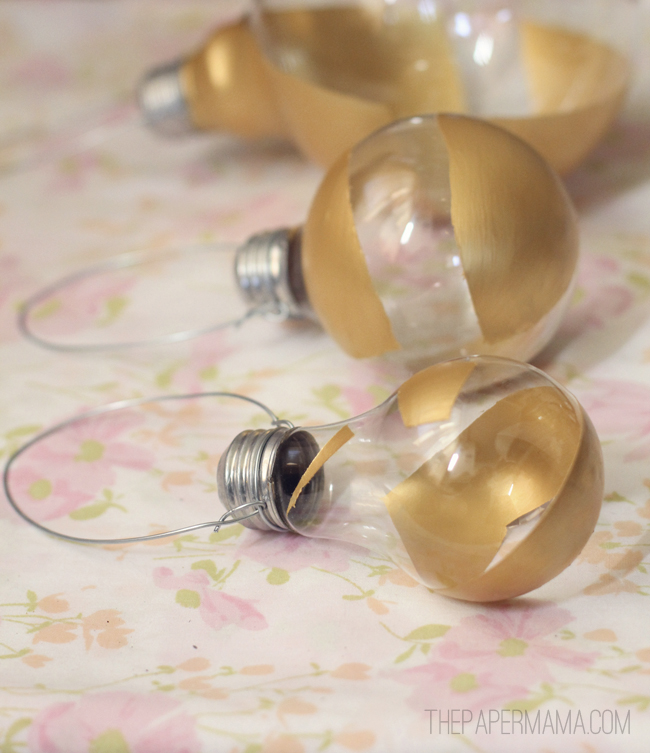
– Wash and completely dry the outside of each bulb. Use your painters tape to set up some fun shapes on the bulb. Tear and adjust the tape to your liking.
– Paint in the spaces you prepped for painting. Let dry completely before removing the tape. TIP: I put a chopstick inside each bulb and propped them up in glasses to dry.
– So, the Martha Stewart paint requires 21 days to cure completely, but I didn’t really wait for that. Since I’m not putting this in a dishwasher, I think it’s probably ok.
– Cut a couple 10 inch sections of wire. Make a “U” shape with one of the wires, and fold up the tips on each end (see photo below) and this will be your handle. Make a rough circle with the other wire piece, loop the tips onto the circle.
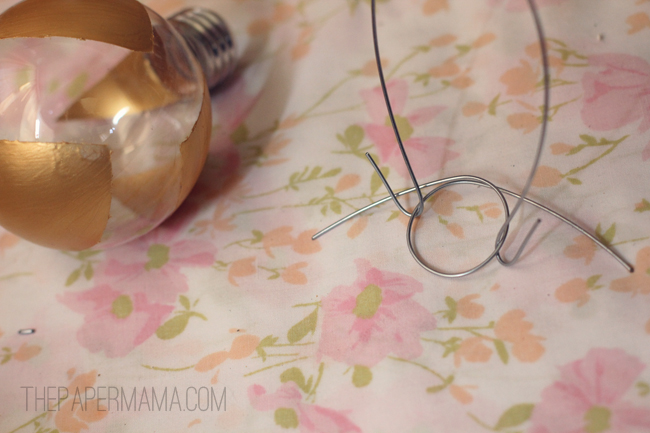
– Use some needle nose pliers to twist and tighten the wire on one of the lightbulb ridges and the tips of the “U” handle. Trim the extra bits of wire.
– You’re done! Just needs a bit of wire and some smelltastic herbs.
We hung these lovely vases in our kitchen. I love it.

– Chelsey


These are so pretty. They'd be perfect for Christmas, too. They look like ornaments.
What a neat idea!! Pretty and useful. 🙂
Thank you!
cool!
How cool! Sadly I don't know if I have any of these old school bulbs 🙂
I did get the big bulb from a recycled building materials center. They have all the old goodies. 🙂
These would be cool ornaments, too!
Agreed!
Interesting idea! They look great, I'm sure my kids would break them though.
Kids! They are trouble. 😉
Especially when they are 4 and 2 lol
These are so cool! You did a great job… I think I need some for my kitchen as well! 🙂