
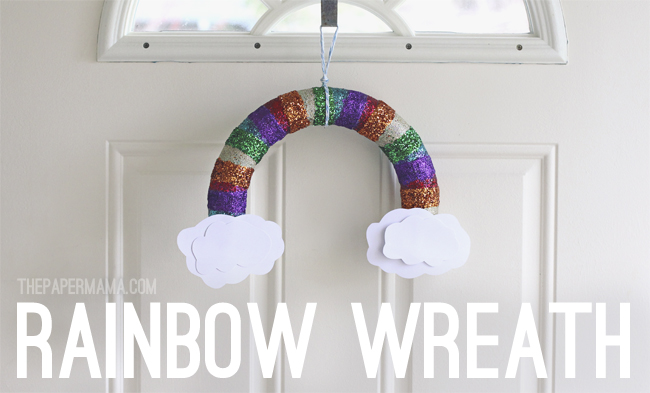
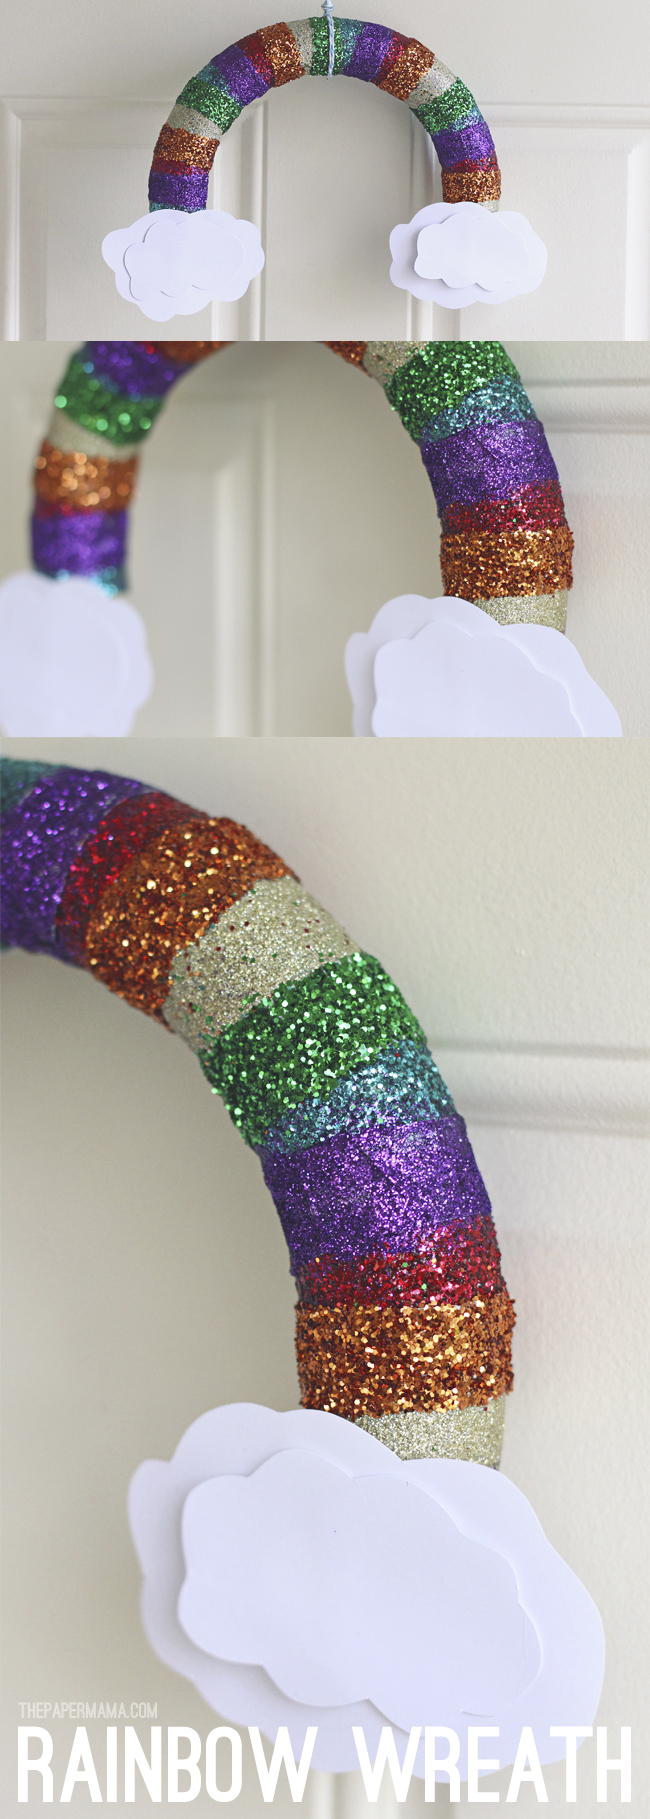
Hello Rainbow Wreath. You are quite lovely. This is one of my favorite wreaths to date. It’s fun and really reminds me of Rainbow Brite’s boots. Hee. This wreath is PERFECT for the upcoming St. Patrick’s Day holiday, but I plan on keeping it up for longer than this weekend. I think it’s a perfect wreath for Easter and even just for Spring (it’s almost Springtime, yay)!
Want to make this for yourself? Good. Here’s how I did it:
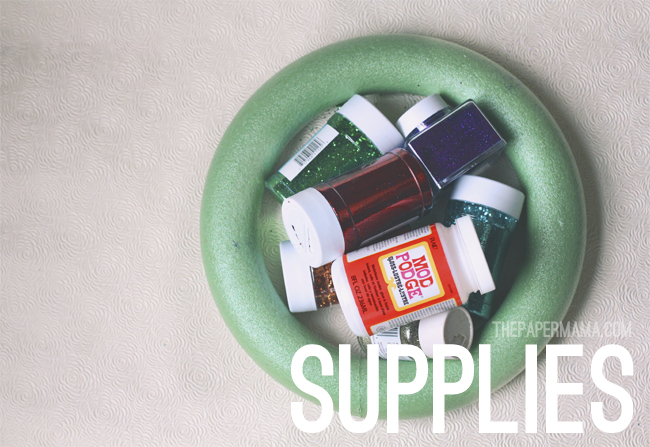
Supplies:
– Foam wreath
– Masking Tape (1 inch wide)
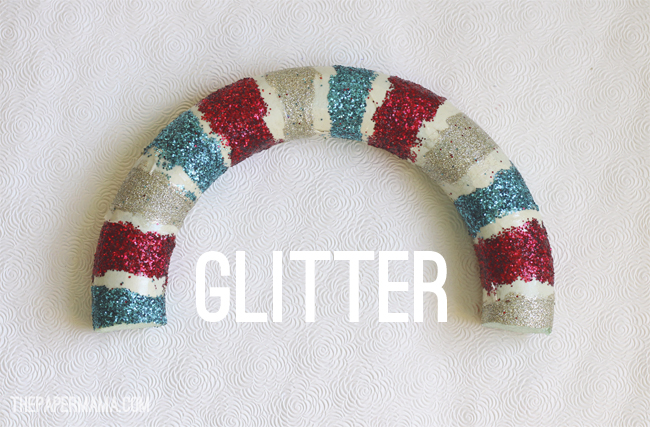
– Glitter: red, orange, yellow (or gold), green, blue, and purple
– Old brush (about 1/2 inch wide)
– 6 toothpicks
– Hot glue
Directions:
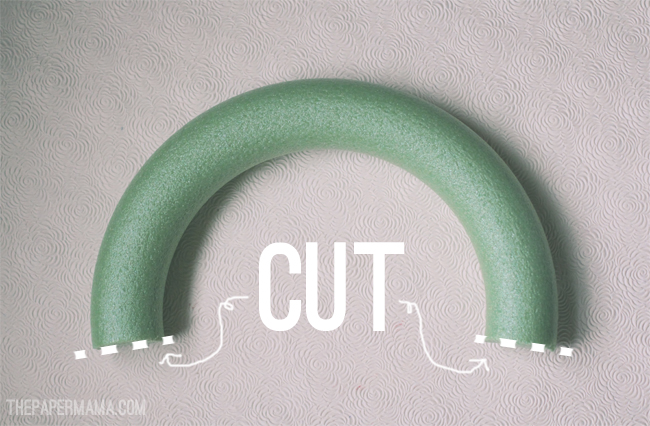
– Cut off half of your wreath, creating a rainbow shape. I used a small hand saw to do this.
– Use your painters tape to tape off sections of your wreath. I tried to tape off about 1/2 to 1 1/4 inch sections. This is just a map to help you paint the rainbow stripes.
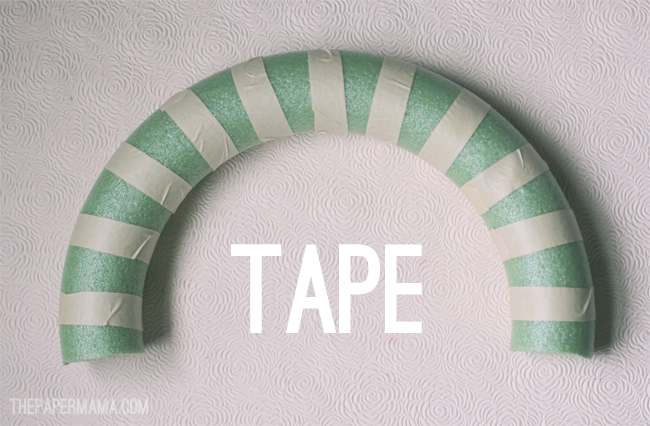
– Pick out the order you’d like your glitter in…. I chose the basic rainbow order: red, orange, yellow, green, blue, and purple. That means… every six sections (including the taped off spots) is the same color. Don’t worry about being too neat about this first round of colors, you’ll be covering any mess in the next set of colors.
Using your brush, put a layer of Mod Podge and glitter. Let dry and repeat a second coat of glue and glitter. Let the glitter dry COMPLETELY. I let it go a couple hours.
– When your first round of glitter is dry, add tape to cover the glitter runoff and old tape.
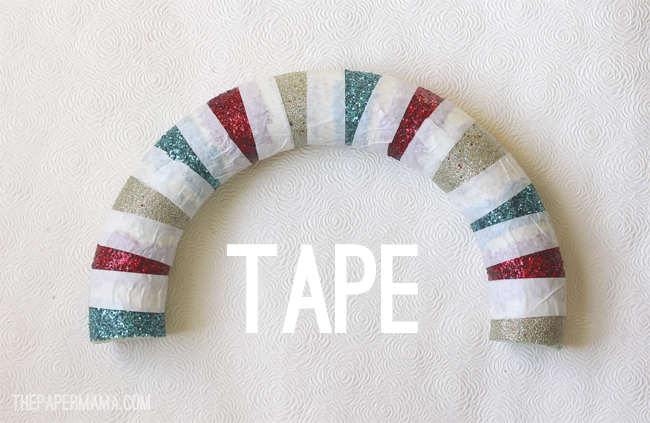
– Add the remaining colors of glitter OVER the tape. Yup. Put Mod Podge on the tape and glitter. This also requires a couple of layers (and maybe a couple of quick touch ups). Let completely dry.
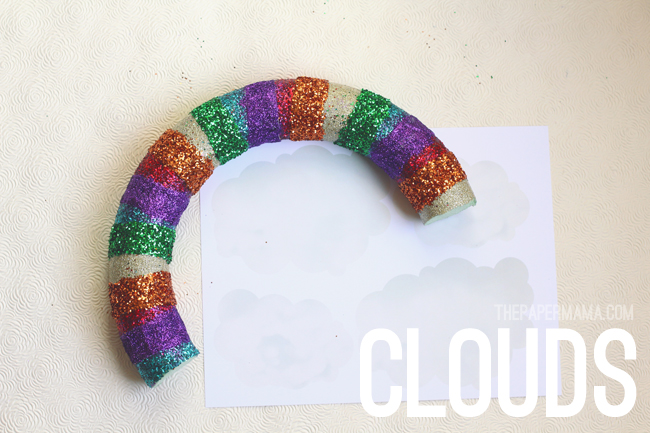
– Print and cut out the cloud printout. I chose to follow the cloud outline, but use the back of the page. I liked the pure white cloud instead of my cloud images. It was nice to have a pattern to follow while cutting.
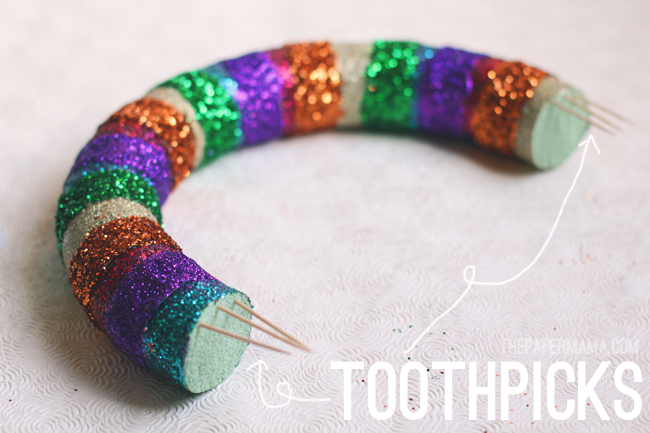
– To support the clouds you’ll be hot gluing on, stick 3 toothpicks into the bottom of each side of the rainbow. Hot glue the clouds down.
– Add a couple of coats of Clear Acrylic Spray to your Rainbow Wreath. Mod Podge is water based, and is NOT waterproof. I’d also suggest NOT putting this wreath in direct rain. My front door is safe from the rain, so I’m not too worried about a couple of splashes.
– Annnnd, you’re done! Hand your wreath where you can enjoy it everyday. I also suggest maybe tying the wreath with a bit of wire onto the wreath hangar. It’s a bit wobbly.
This project is a bit time consuming, but I love the end result. ALSO: messy. Glue and glitter… holy messy. Just take your time and let the glitter dry before adding more coats… that may help keep the frustration level down. Hee.
Also…. I photographed the wreath indoors… because I didn’t like the photos of it up against my red door. That’s it: time to paint the front door. I’m leaning towards a grey.

– Chelsey
P.S. Let me know if you create this!
……………………………………………………………………………………………………………………………………
If you have a Wednesday post, please feel free to link it up below. And, feel free to link up to these blogs too… Parenting by Dummies, Project Alicia, Jenni from the Blog, and Live and Love Outloud.
Tags: easter, glitter, st. patricks day, wreath
Categories: diy, Holiday - St. Patricks Day, 4th of July, and Other Parties!


That wreath is amazing!
Thanks!
That is beautiful!! My 5 year old daughter will seriously love me if I let her play with glitter. What FUN!
So messy! Ha! But, fun. 😉