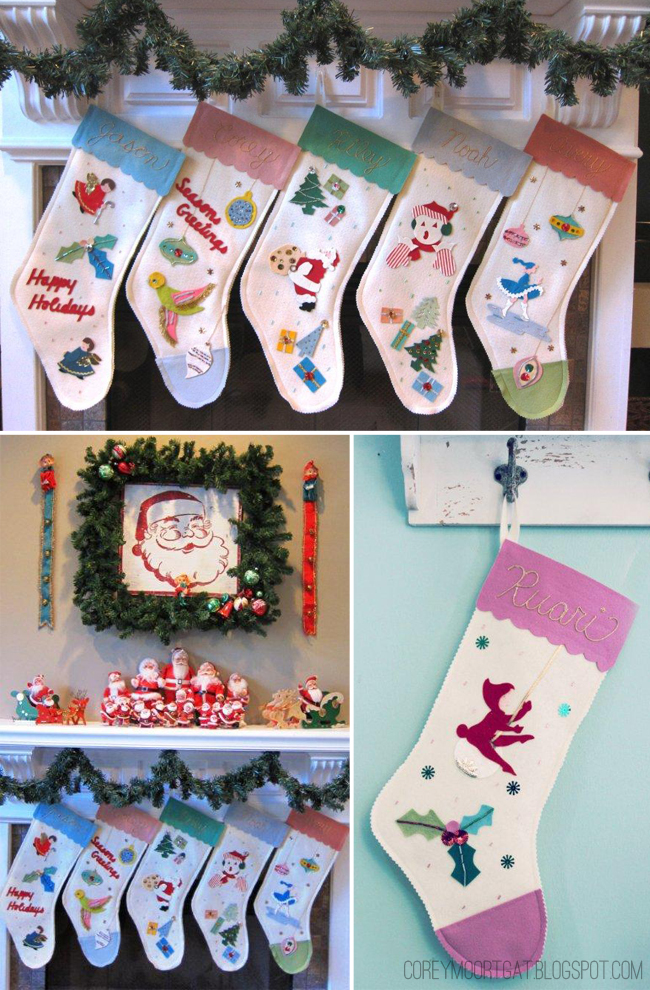
DAY 29 is brought to you by, the lovely Corey of the Corey Moortgat blog: Hello, Paper Mama readers! I’m Corey, and I’m here to show you how to make a vintage-inspired felt Christmas stocking. I’m obsessed with vintage and am constantly looking for ways to introduce vintage décor into my home. I collect old Christmas decorations, and a couple years ago, I decided to make some stockings that fit amongst my collection.

This is a really fun project, because you can use real vintage images, or you can just fake it and make your own “vintage” images! Each of the stockings I made has a mix of pieces I thrifted, pieces I purchased online, and pieces I made myself. This time of year is such a great time for junking, because you can find such cute vintage holiday items. Every time I see an old item made from felt, like a tree skirt, or Christmas stocking, or tree ornament, I pick it up with the idea of repurposing it. That way it has a little bit of its former life mingled in with a little bit of my own style.
And so, enough talking about it. Let’s begin, shall we?

Materials needed:
Offwhite felt- twice as big as you want your stocking to be (because you’ll need front and back)
Tacky glue
Scissors- regular and pinking shears
Assorted holiday trims- shiny string, silver and gold ric-rac, etc.
Assorted sequins and beads
Vintage-y colors of felt (I like wool felt better than craft store felt- the colors are much prettier- just search under “wool felt” on Etsy)
Vintage felt images from old Christmas items, the thrift store, or anywhere else you find them (look on Etsy or Ebay for “Walco” brand felt appliques- there are some really cute ones!)

Step 1:
Double up your offwhite felt, and cut a stocking shape. I took another stocking and used it as a template. You should end up with two stocking shapes.


Step 2:
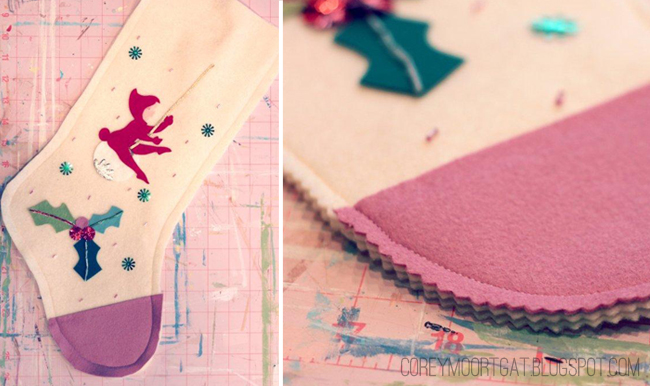
Lay out your stocking and begin placing your images down. In this case, I’m using one precut vintage fabric applique, and I’ll also cut some of my own images.
Step 3:
If you’re going to cut your own images , do that now. You can look at my stockings for ideas, or here are a couple more good places to look as well:
http://christmas.tipnut.com/
http://myfantastictoys.
http://www.flickr.com/photos/
Easy go-to images are Christmas trees, presents, and of course, holly!

Step 4:
Once you’ve got all your felt pieces out, begin adding the bling! Sparkly sequins, beads, trims… I lay them all out for placement first, to make sure I like it.
Step 5:
Now I’m going to let you in on a little secret here. Really, if you were being a very diligent crafter, you would hand-sew all the felt and beads into place. Ahem. Well, as you can see, I didn’t do that- tacky glue for me! My stockings have lasted two years so far, and nothing’s fallen off. I suppose if I run into problems down the road, I could go back and sew, but “if it ain’t broke, don’t fix it” is my motto for now!

Step 6:
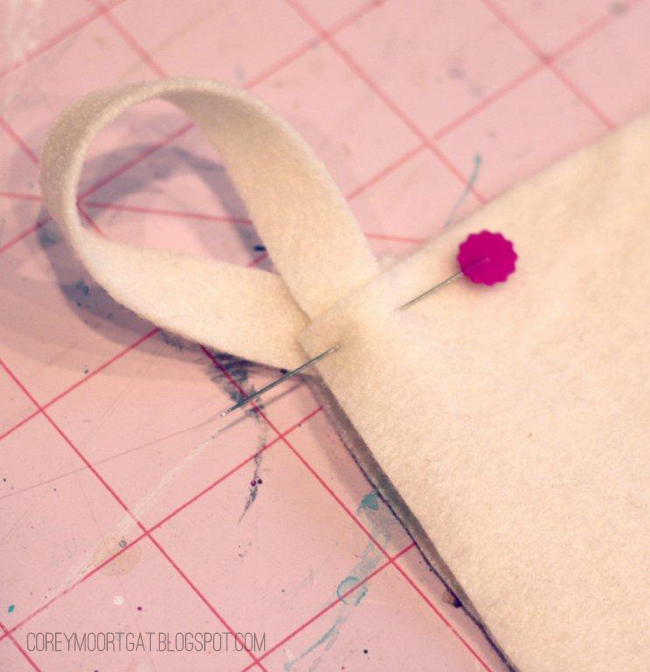
After everything’s been glued down and dried, it’s time to begin sewing the perimeter. (I suppose if you don’t want to do ANY sewing, you could even glue around the perimeter, too, but this part’s on the machine, so it’s quick.) Cut a narrow strip of felt (maybe ½” x 6”), loop it over, and pin it in place at the top corner in between the two layers, so the stocking has a way of hanging.
Step 7:
Sew around the perimeter of the pieces, making sure to catch the ends of your “loop” at the top. Leave the top open, obviously.

Step 8:
Using pinking shears, trim in about ½” away from your seam around all sides but the top.
Step 9:
Cut the piece that will go on the top of your stocking. I like to cut it slightly wider than the stocking, and leave the edges straight (not cut with pinking shears). “Write” the name using tacky glue.

Step 10:
Using gold string, follow the glue. Cut the string instead of doubling over (like in real handwriting), so that it looks smoother.

And there you have it! A vintage-inspired felt Christmas stocking, ready to fill with all kinds of goodies! I wonder what Santa’s going to leave in there for Ruari this year??
I’d love it if you’d come visit me on my blog for more vintage artsy-craftsy goodness!
– Corey
…………………………………………………………………………………………………………………………………………………
A very big THANK you to Corey for sharing this fantastic DIY. Please, be sure to give her blog home a visit.
P.S. Ruari and I LOVE the stocking. We will be making more, for the whole family!
To keep up with my 50 DIY Days, click here:
Tags: 50 DIY Days of Christmas, christmas, decorate, fireplace, gift, home decor, stocking, vintage
Categories: 50 DIY Days, diy


Beyond cute! Will definitely try tgis out! ❤
The first and third link are not longer working, any suggestions for other links? Thanks!
ooOooOoooOOOOoooo this is neat!
😀
Thanks so much for having me, Chelsey! I'm so glad you guys like the stocking- I had fun making it! 🙂
We LOVE it!
these are adorable! love them.
Me too!
So cute! Love the mistletoe felt, and the different color tops!
They turned out so cute!