Hello all,
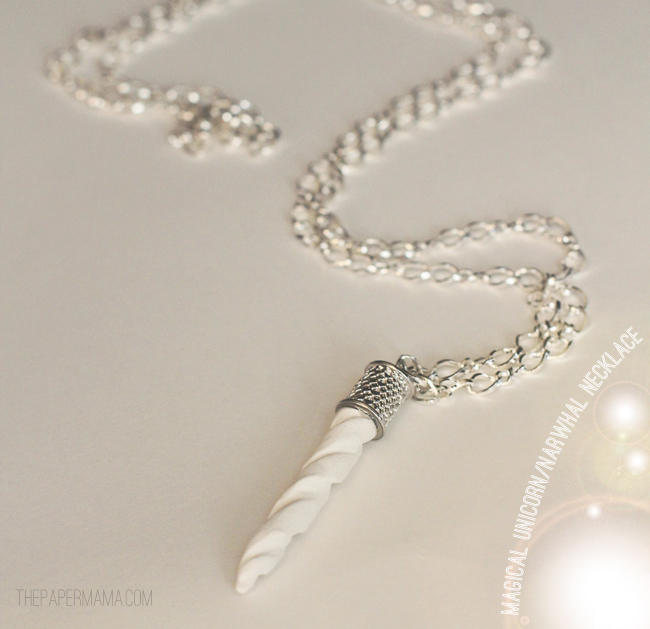
Welcome to Day 1 of the 50 DIY Days of Christmas. Whew! I’m excited. I’m going to kick this series off with a little DIY gift: the Magical Unicorn/Narwhal necklace! When asked, I tell people that my necklace is a Narwhal horn, but maybe you like Unicorns better? Well, then… it’s a unicorn horn. Hee!
Let’s get started with this easy gift…
Supplies needed:
- – Polymer Clay: I used Kato Clay (known to be stronger than most oven-baked clays), but you can also use other brands you may find at your local craft store. I found my Kato Clay at an art supply shop (or, it can be purchased here).
- – Toothpick
- – Super strong epoxy that can glue both metal and clay (I used the Loctite brand).
- – Bead cone/cap to cover the end of your horn.
- – Eyepin
- – Necklace
Directions:
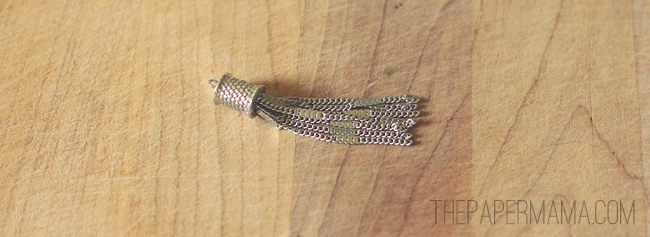
1. First, I wanted to note that I couldn’t find a bead cone/cap that I LOVED… so, I found an earring that had a cone that would be perfect. I just took out the extra chain that was attached (see the before below).
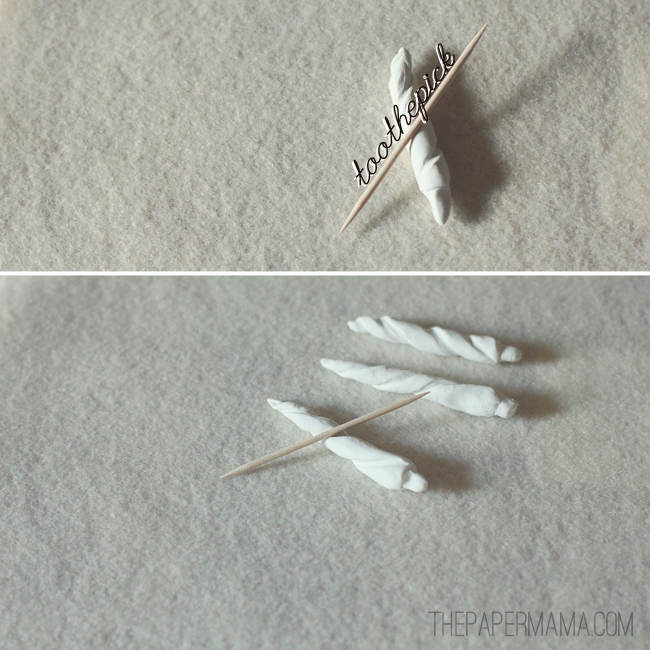
 2. Next up: the horn. Grab a small chunk of your polymer clay (I used about a 1/2 inch size ball) and roll out the clay to look like a stick. Test out the size with the bead cone (make sure it will fit).
3. Once your happy with the size, time to add some ridges to the horn. Set your toothpick on the horn (at an angle) and roll the toothpick along the horn to create some ridges (see photo below). Smooth out any rough spots with your finger. At the base of your horn, make a little nub that fits inside the bead cone. The glue will need something to hold onto (see photo below).

4. Time to bake. Follow the baking directions of your clay.
5. When the horn is done baking, let’s glue it to the bead cone. First, make sure you have an eye pin set up in the bead cone (so you can hook it onto the necklace). Follow your epoxy directions, and glue the horn nub into the cone.
6. Let the glue cure (usually about 24 hours) and… You’re Done!
7. Attach to a necklace chain and give this gift to your favorite magical creature aficionado.
– Chelsey
Today is the 1st day of my 50 DIY Days, but if you’d like to keep up with all the posts… they will be here:
Tags: 50 DIY Days of Christmas, craft tutorial, diy, gift, holiday, horn, narwhal, tutorial, unicorn
Categories: 50 DIY Days


Ok. I love this a ridiculous amount. Does that even make sense? This is awesome! I am going to make one for my sister for Christmas, and one for me!
Share pictures!
Oh your necklace turned out great! I am new to your blog. Love it!!
Welcome! AND, thank you. 🙂
awesome. Obsessed with narwhals… totally doing this 🙂
Yay! Share a photo when you're done. <3
LOVE it!
Wanted to give you a heads up, too – toothpick is spelled wrong in your picture. You spelled it toothEpick 🙂
Ha ha ha! Oh man. Dang it! I never even noticed. Thank you!
Whoa, 50 DIY's coming at us? That is ambitious, you go! I can scarcely do 1 DIY a year. Love the magical narwhal horn!
I'm crazy. 😉
I think the The 50 DIY days of Christmas is great! I've added you to my reader so I can keep up with all the cool ideas. Thanks for sharing.
Yay! I'm glad to have you. <3
Ha! Awesome! Did you know I used to think a Narwhale was a mythical creature… well, like a unicorn .. I was so excited to
discover they were/are real! Now .. to go hunt me a Jackalope.
Excited for this series!
mel ;o)
needle and nest design
I will find you that Jackalope! That would be so adorable if they were real.
This is great!
xoxo
Thank you!
Cute idea Chelsey! I am pretty excited about this series.
I'm glad you are! I am too. 😀
Aw this is cute. If I made this I think I would add some glitter or shimmery paint/ink 🙂
Yes! Glitter! Share a photo if you make one. 🙂